Workflow in the context of a ticket management system (Servicedesk) is a process that defines the sequence of steps and rules for processing a ticket from its creation to its closure. It is a type of workflow that ensures that all tickets are handled according to established organizational procedures. Each workflow can be configured individually for different types of tickets.
Read more about notifications: Go >
Elements and functions of the workflow
Here are the key elements and functions of the workflow:
|
1 |
Start conditions: These define what conditions must be met to start the workflow process. These conditions can be based on various criteria, such as the type of ticket, the source of the ticket, the priority, or other attributes defined in the system. |
|
2 |
Stage: Stages are the individual phases that a ticket goes through as part of the workflow. Each stage can have specific actions, tasks, approvals or forms assigned to it that must be completed or filled out before the ticket can move on. |
|
3 |
Stage action: Actions assigned to a stage are specific actions that must be taken when a ticket is at that stage. Actions can include assigning a ticket to a person or team, changing the status of a ticket, sending notifications, etc. More about actions: Go > |
|
4 |
Condition: Conditions are criteria that must be met to move from one stage to the next. They can be related to time, performing certain actions, obtaining relevant information, etc. |
|
5 |
Acceptance: This item allows you to define whether and at what point a ticket requires acceptance (e.g., from a manager or other authorized employee) before moving to the next stage. |
|
6 |
Form: Used to collect additional information from the user or to verify data. Forms may be required to be completed at various stages of the process. More about forms: Go > |
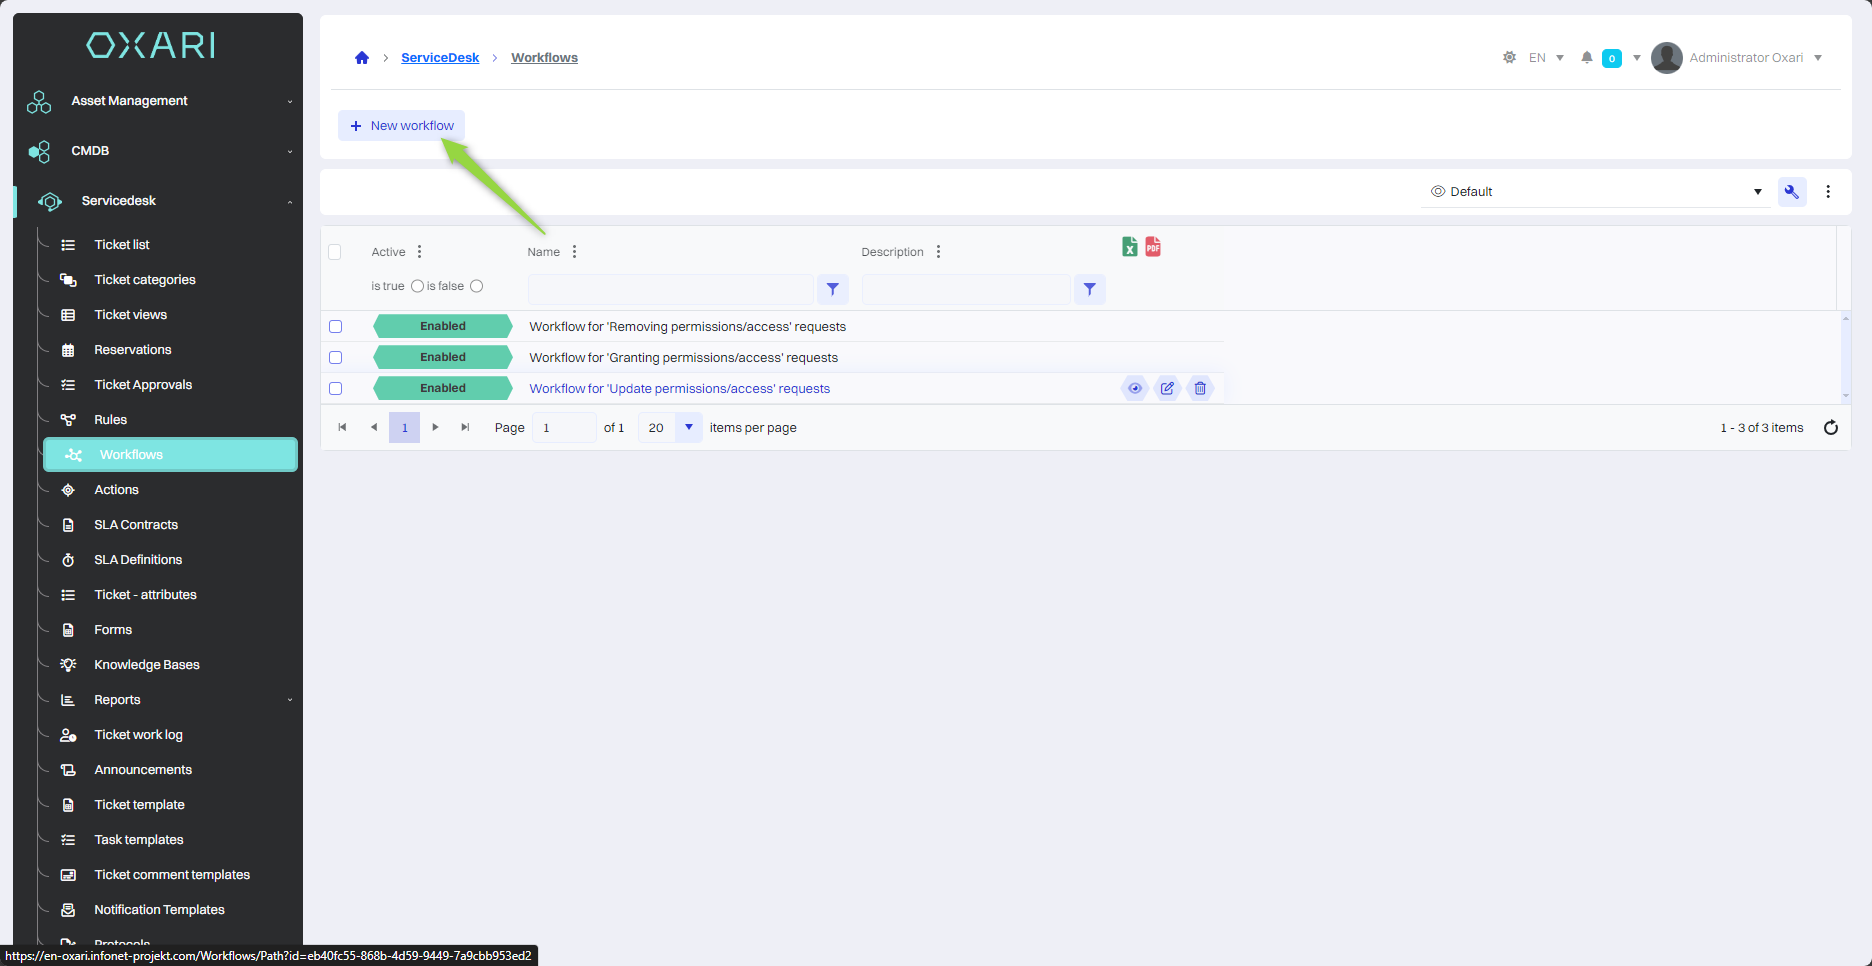
New workflow
To add a new workflow, go to Servicedesk > Workflows, then click the “New workflow” button.
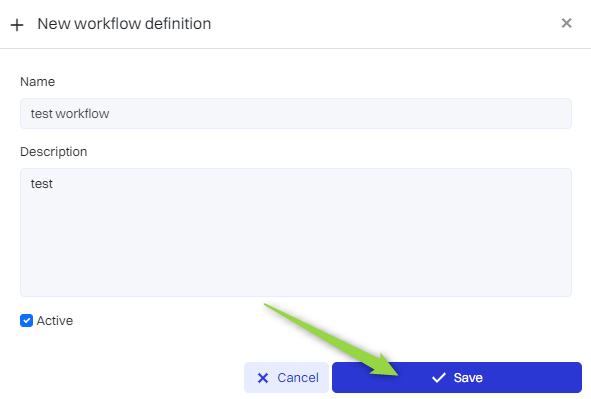
Next, the “New workflow definition” window contains the items:
|
1 |
Name - A text field for entering the name of the new workflow. The name should be unique and descriptive so that the purpose of the workflow in the system can be easily identified. |
|
2 |
Description - Text field for entering a more detailed description of the workflow. Here the user can enter the purpose, scope of operation, detailed instructions or other relevant information that will be helpful in identifying and understanding the process. |
|
3 |
Active - Checkbox which, when checked, indicates that the workflow is active. |
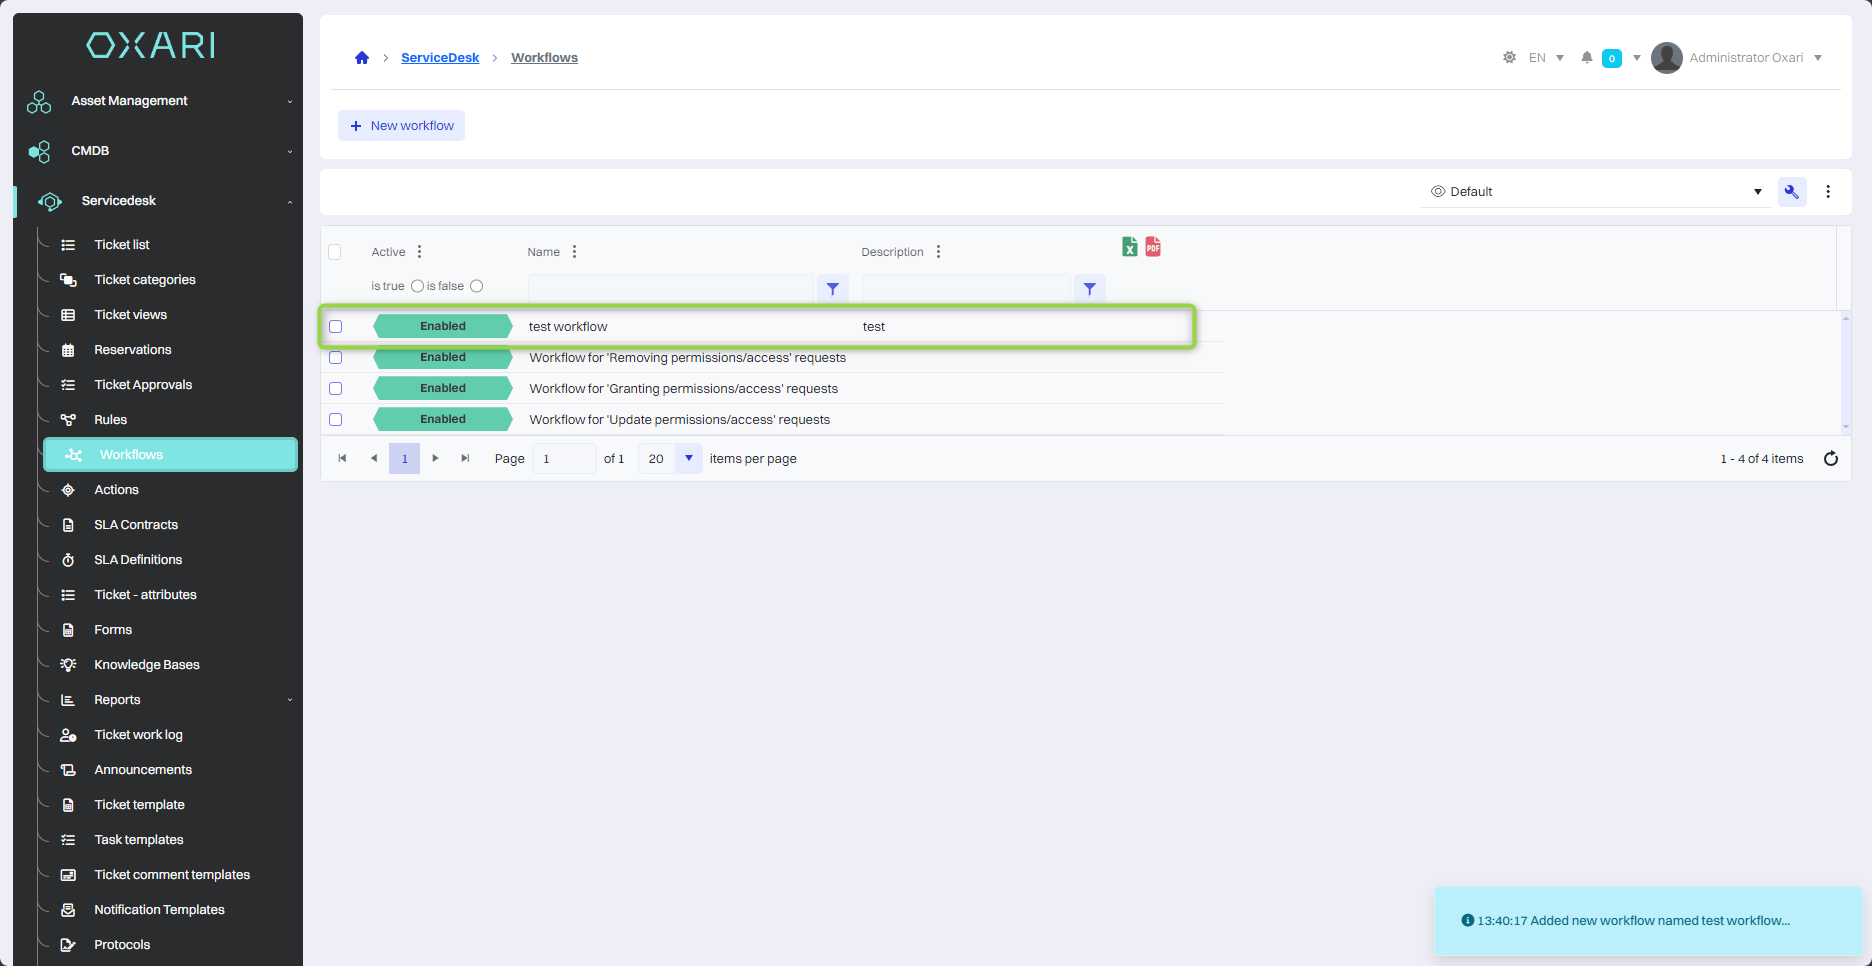
Fill in the desired fields and click the “Save” button.
The workflow has been added to the list.
Configuring a workflow
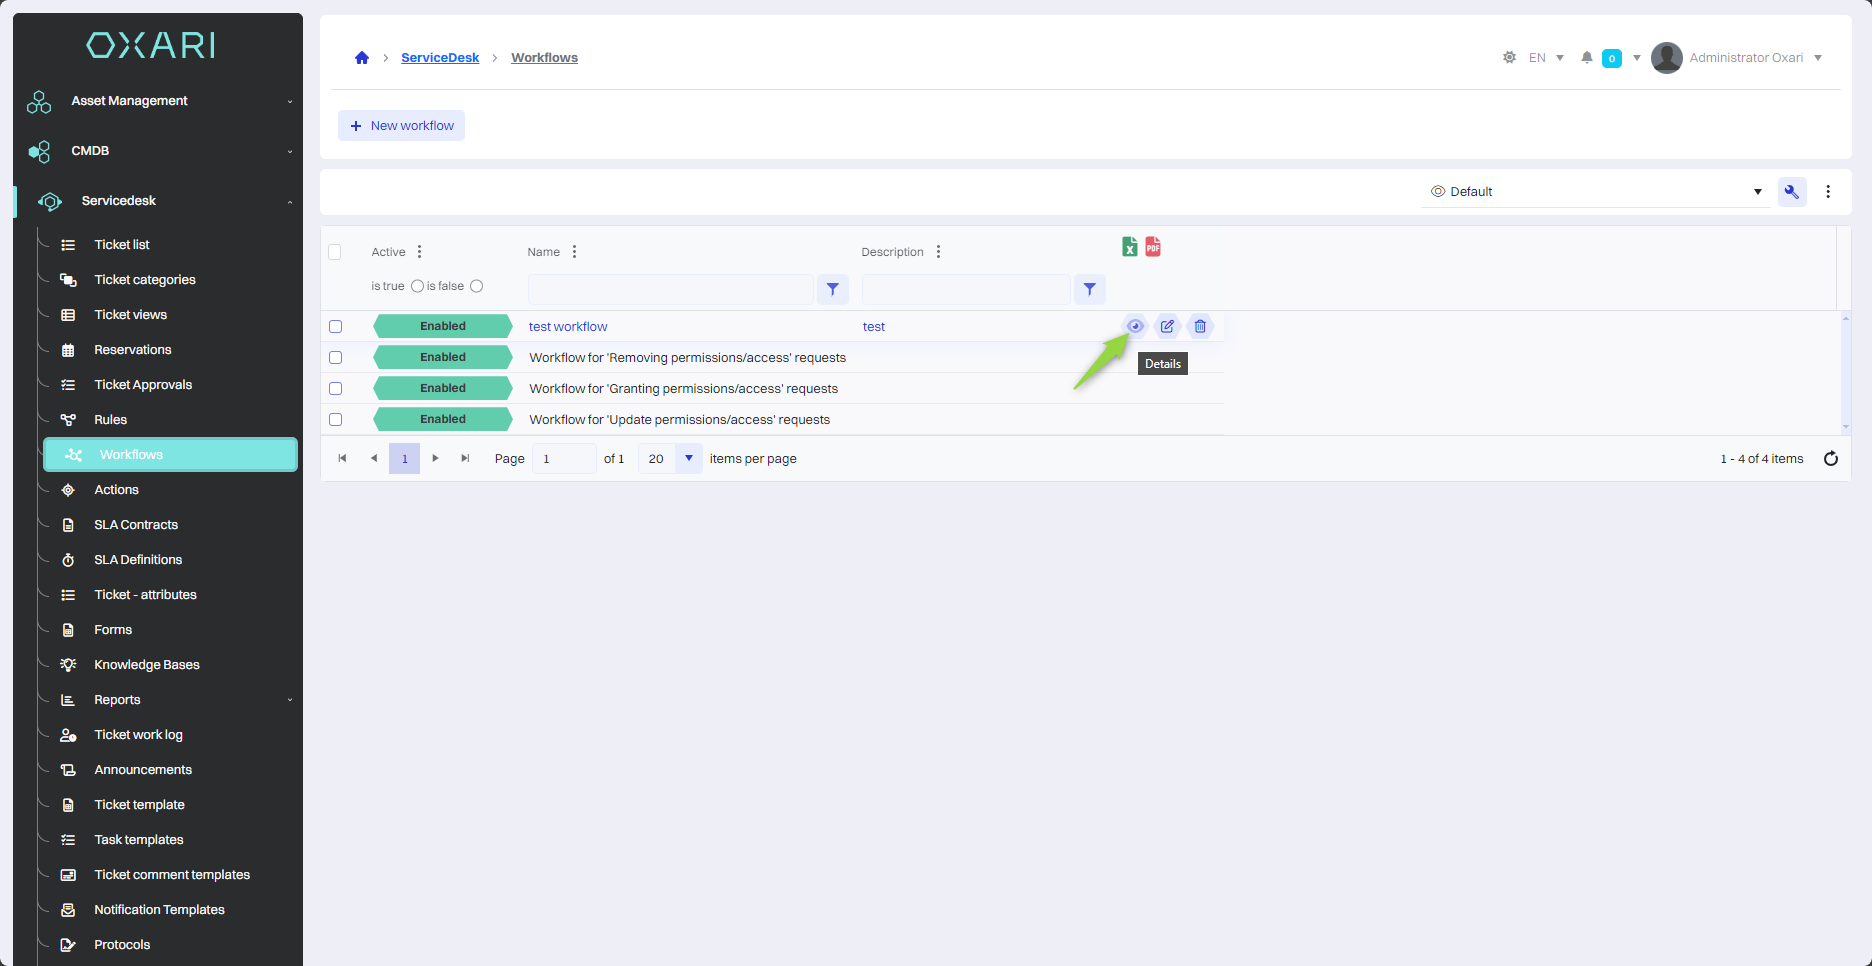
To add a new workflow, go to Servicedesk > Workflows, then click the “Details” button next to the desired workflow.

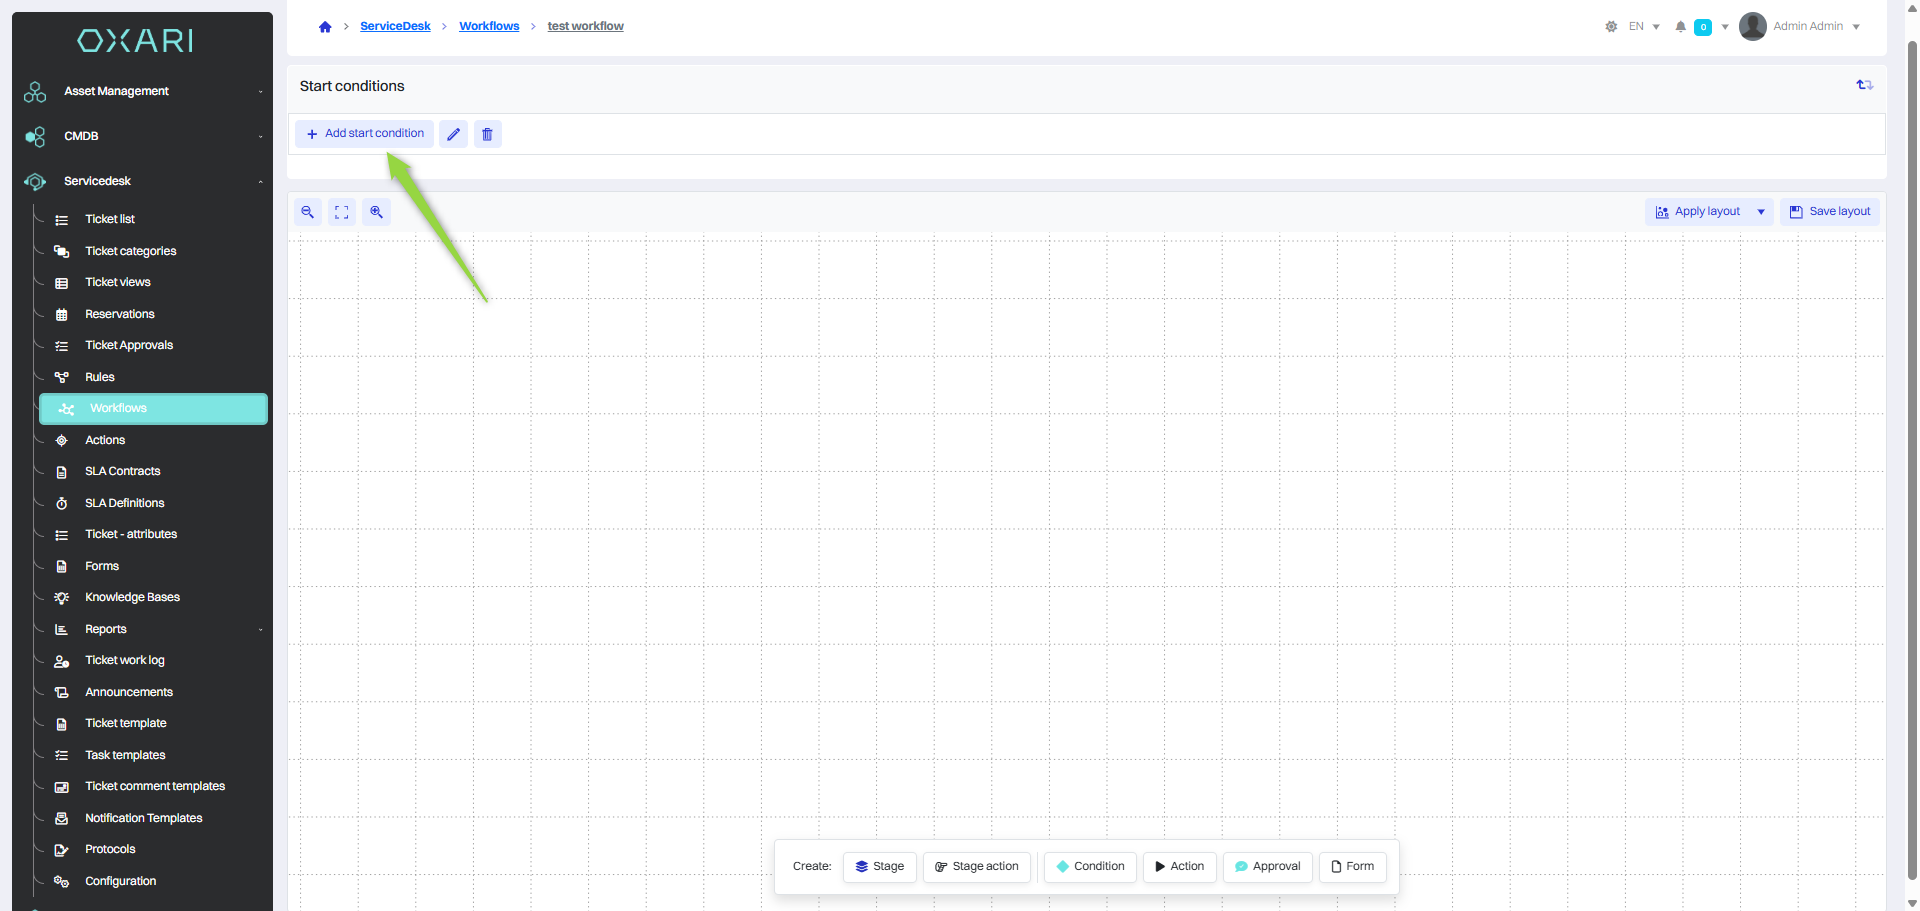
Adding a start condition
To add a start condition, click the “Add start condition” button in the detail view.
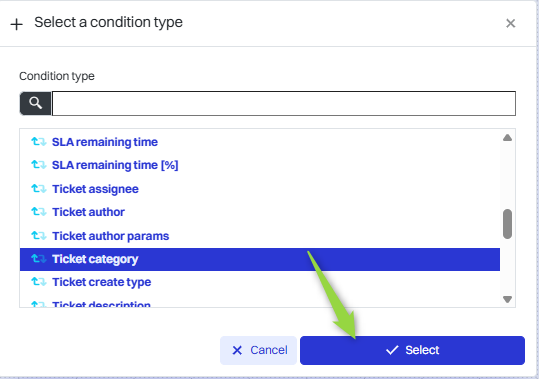
Next, in the “Select condition type” window, select the desired ticket category, and then click the “Select” button. In this case, it will be “Ticket category”.
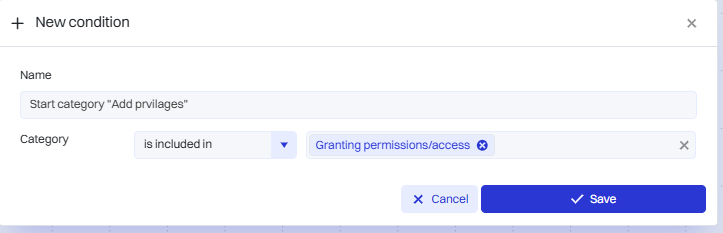
In this step, in the “New condition” window, name the condition and select the category of the ticket, in this case it will be “Granting permission/Access”, and then click the “Save” button.
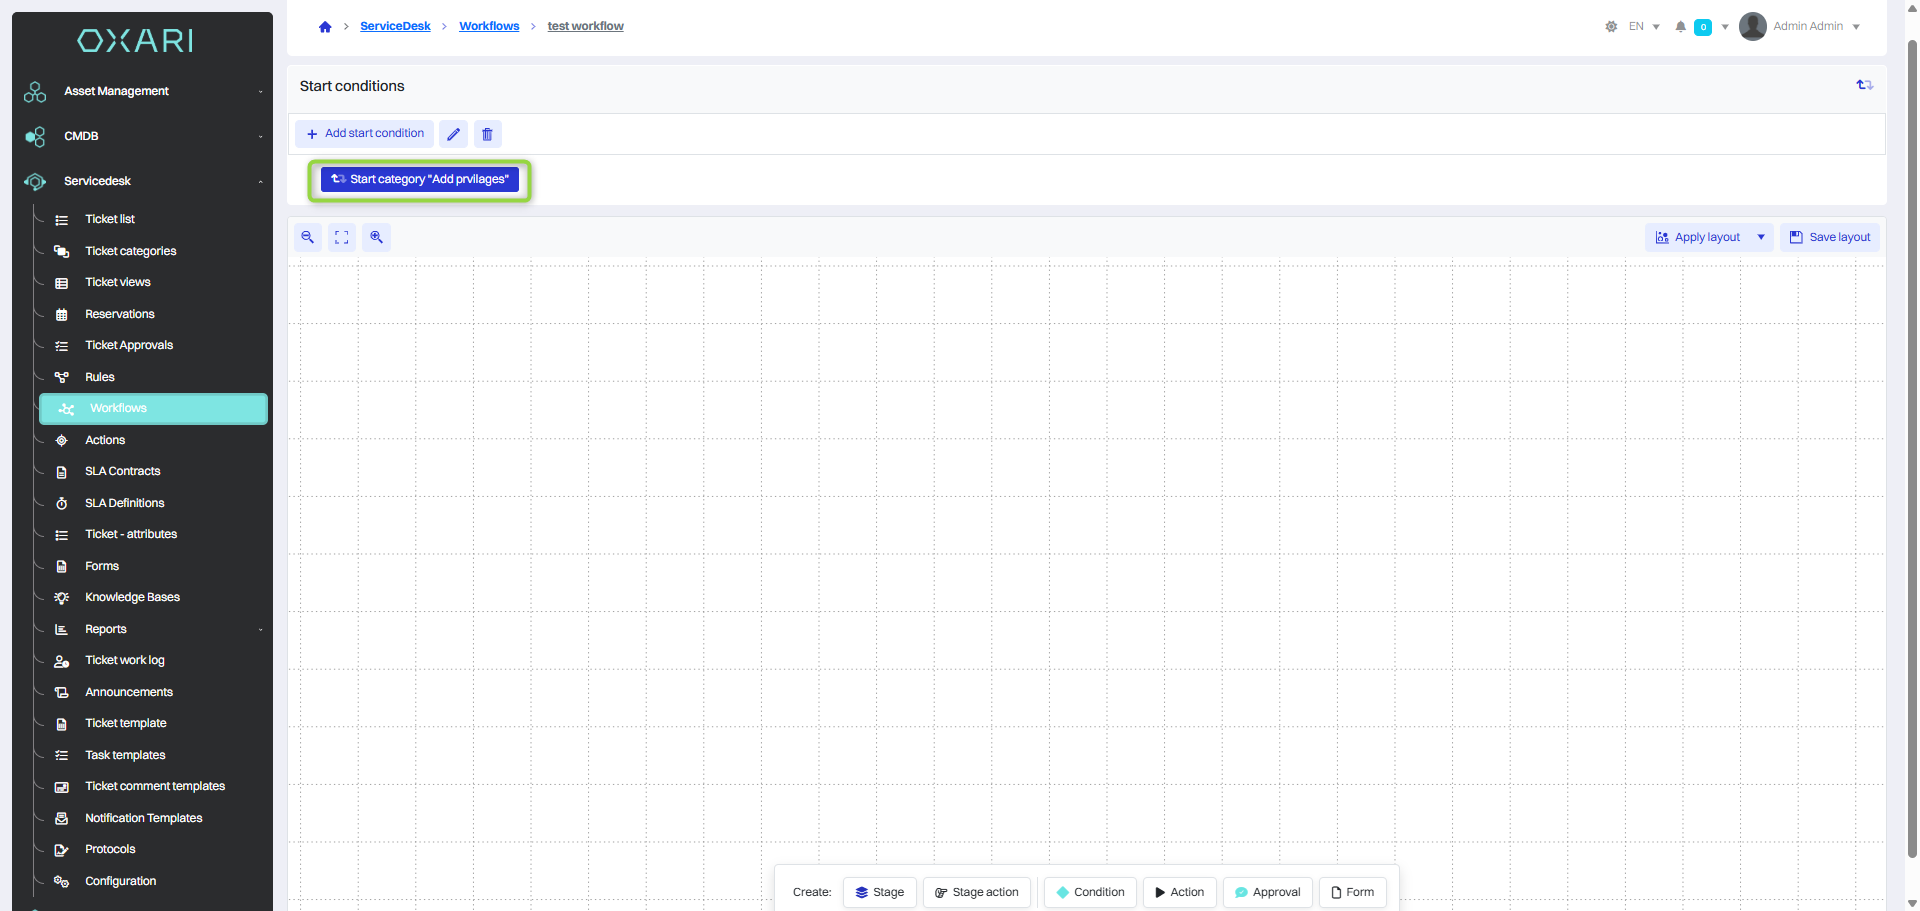
The start condition has been added.
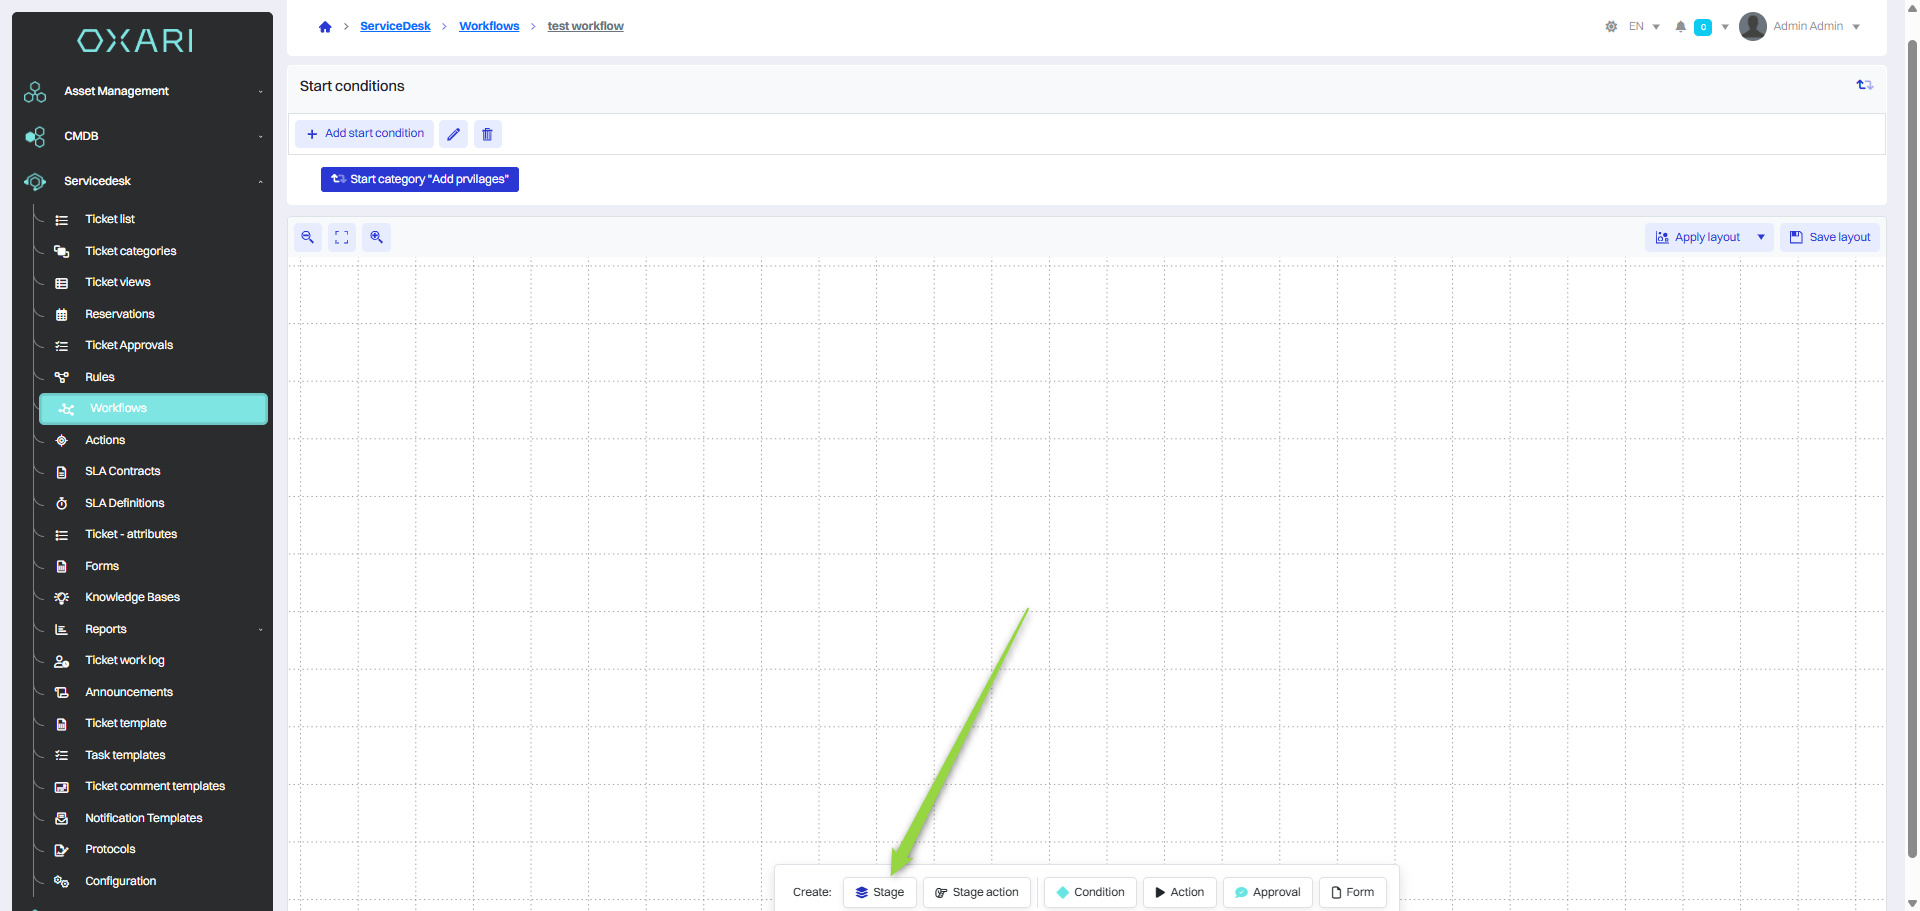
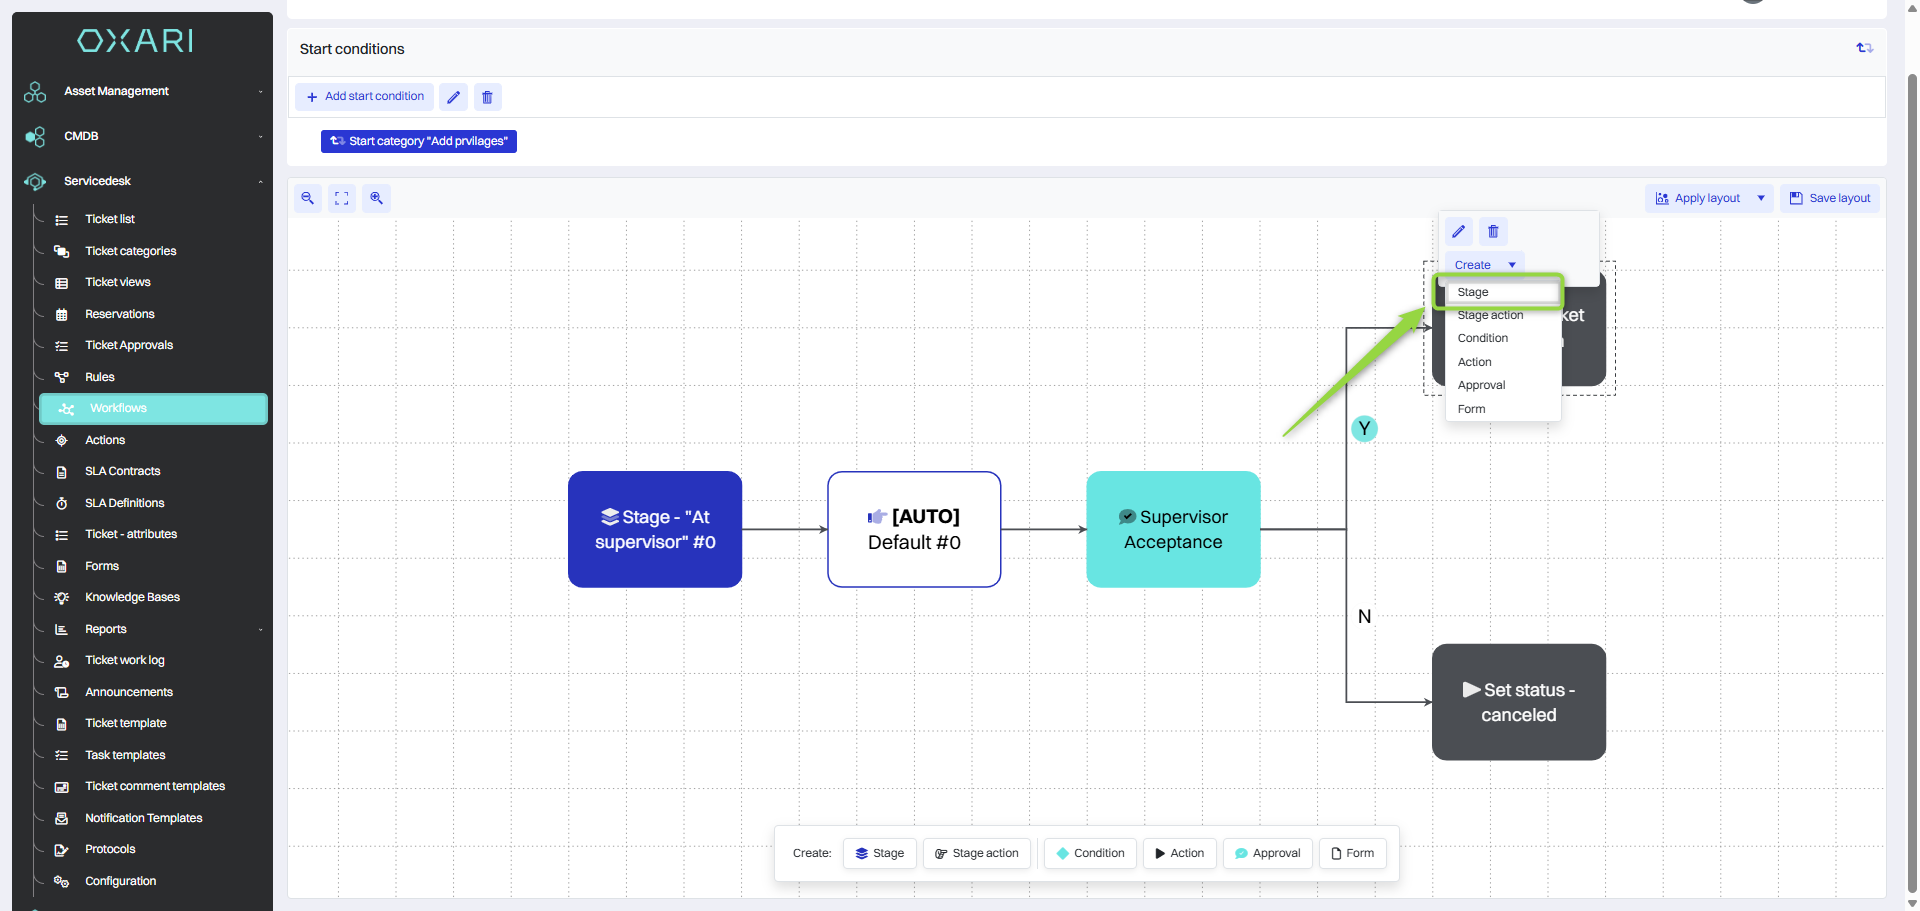
Creating a stage
Stages are the different phases that a ticket goes through within a workflow. To create a stage, click the “Create stage” button.
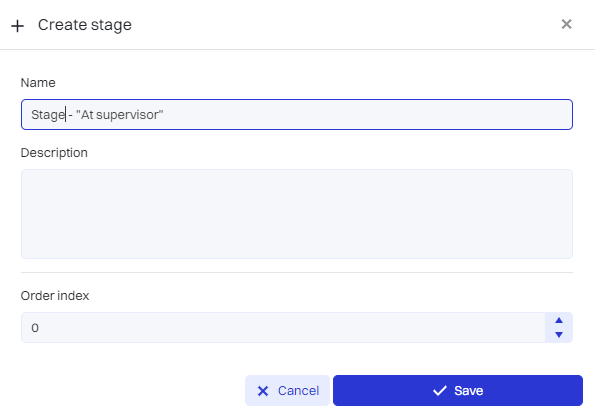
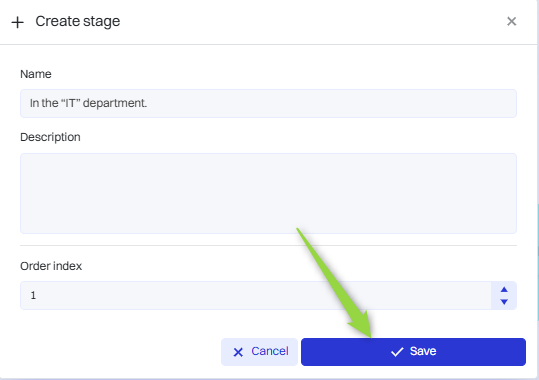
Then the “Create stage” window contains the items:
|
1 |
Name - A text field for entering the name of the new stage. The name should clearly indicate the nature of the stage in the process. |
|
2 |
Description - A larger text field intended for a detailed description of the stage. Here you can include information about what activities should be performed at this stage, what the purpose of the stage is, or other relevant information. |
|
3 |
Sequence number - A numbered field that allows you to specify the order in which a stage appears in the workflow. The sequence number is used to define the workflow sequence so that each stage is processed in the correct order. |
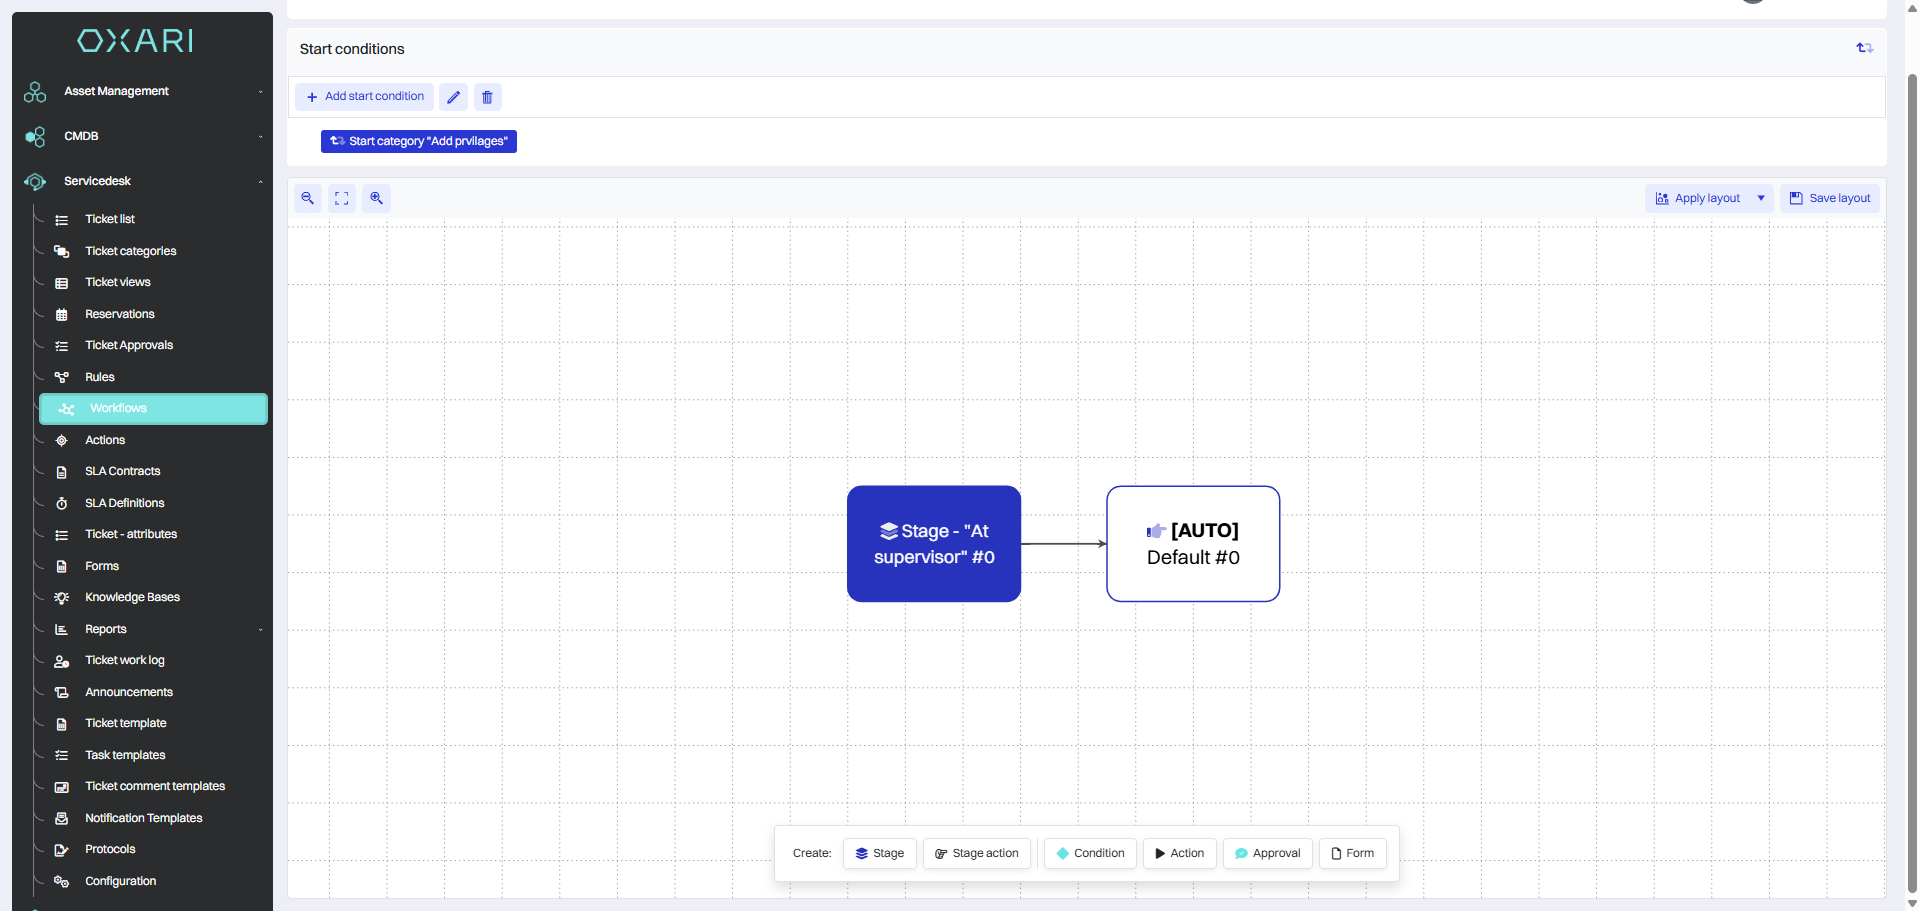
Fill in the desired fields and click the “Save” button.
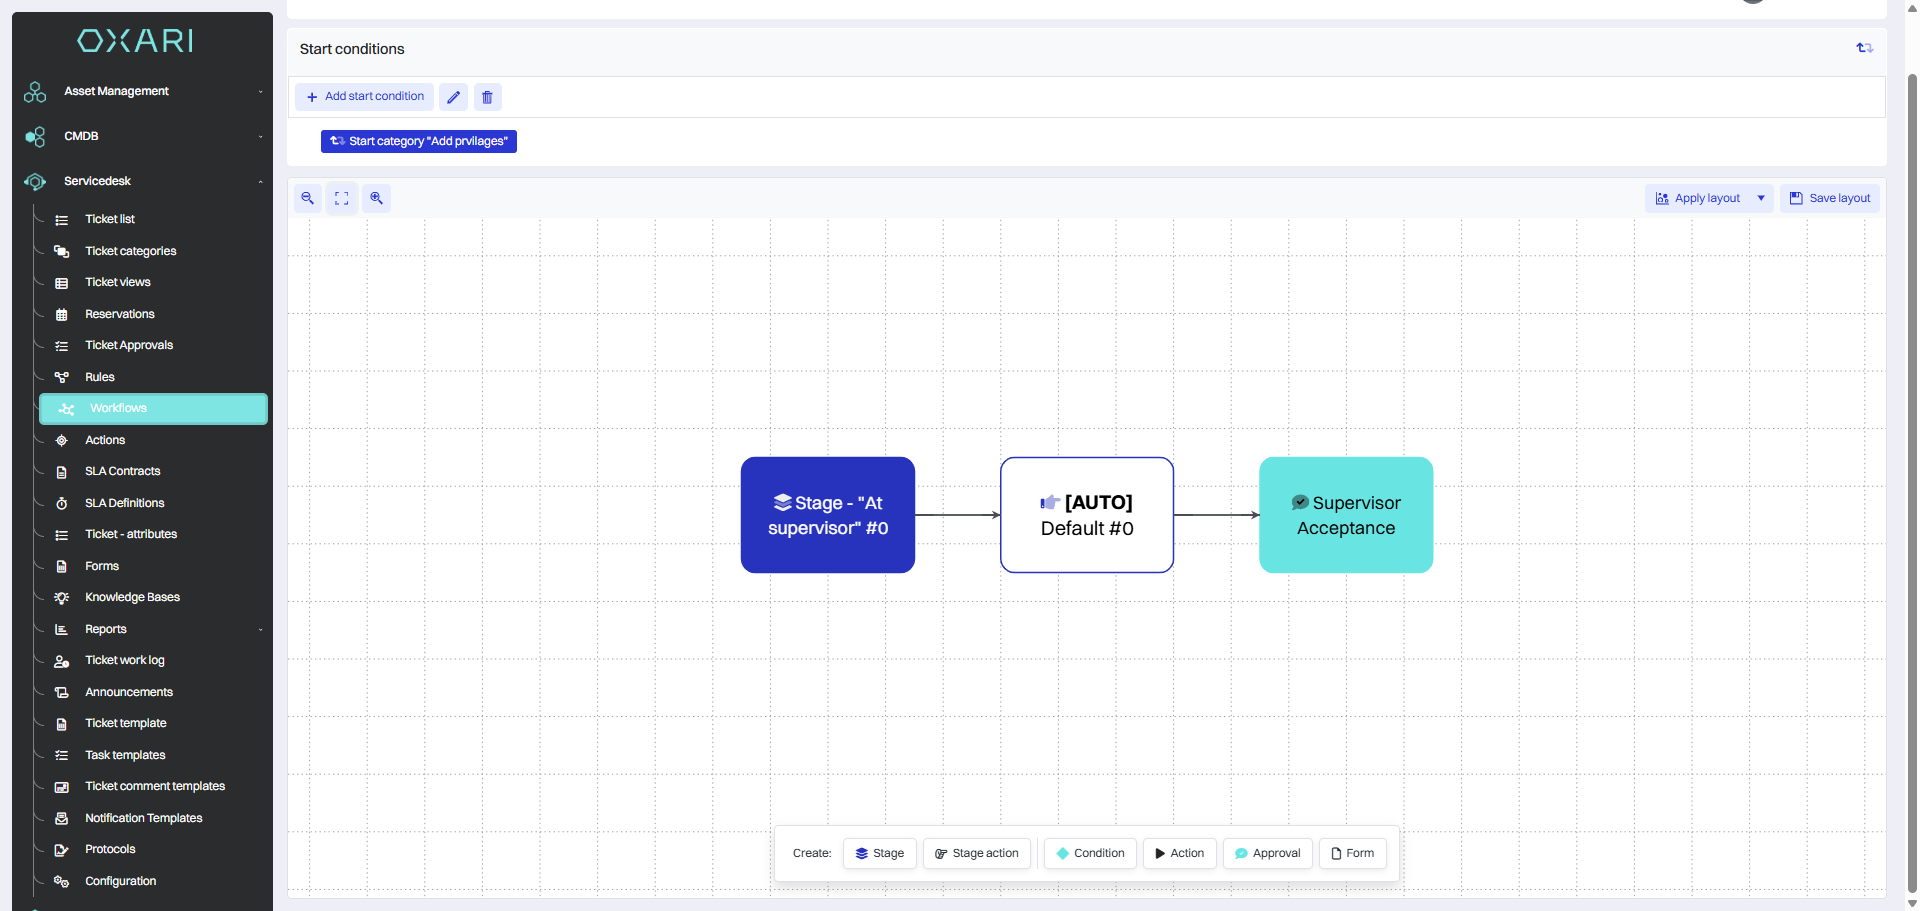
The stage has been added and the stage action is added by default and set as “Auto”.
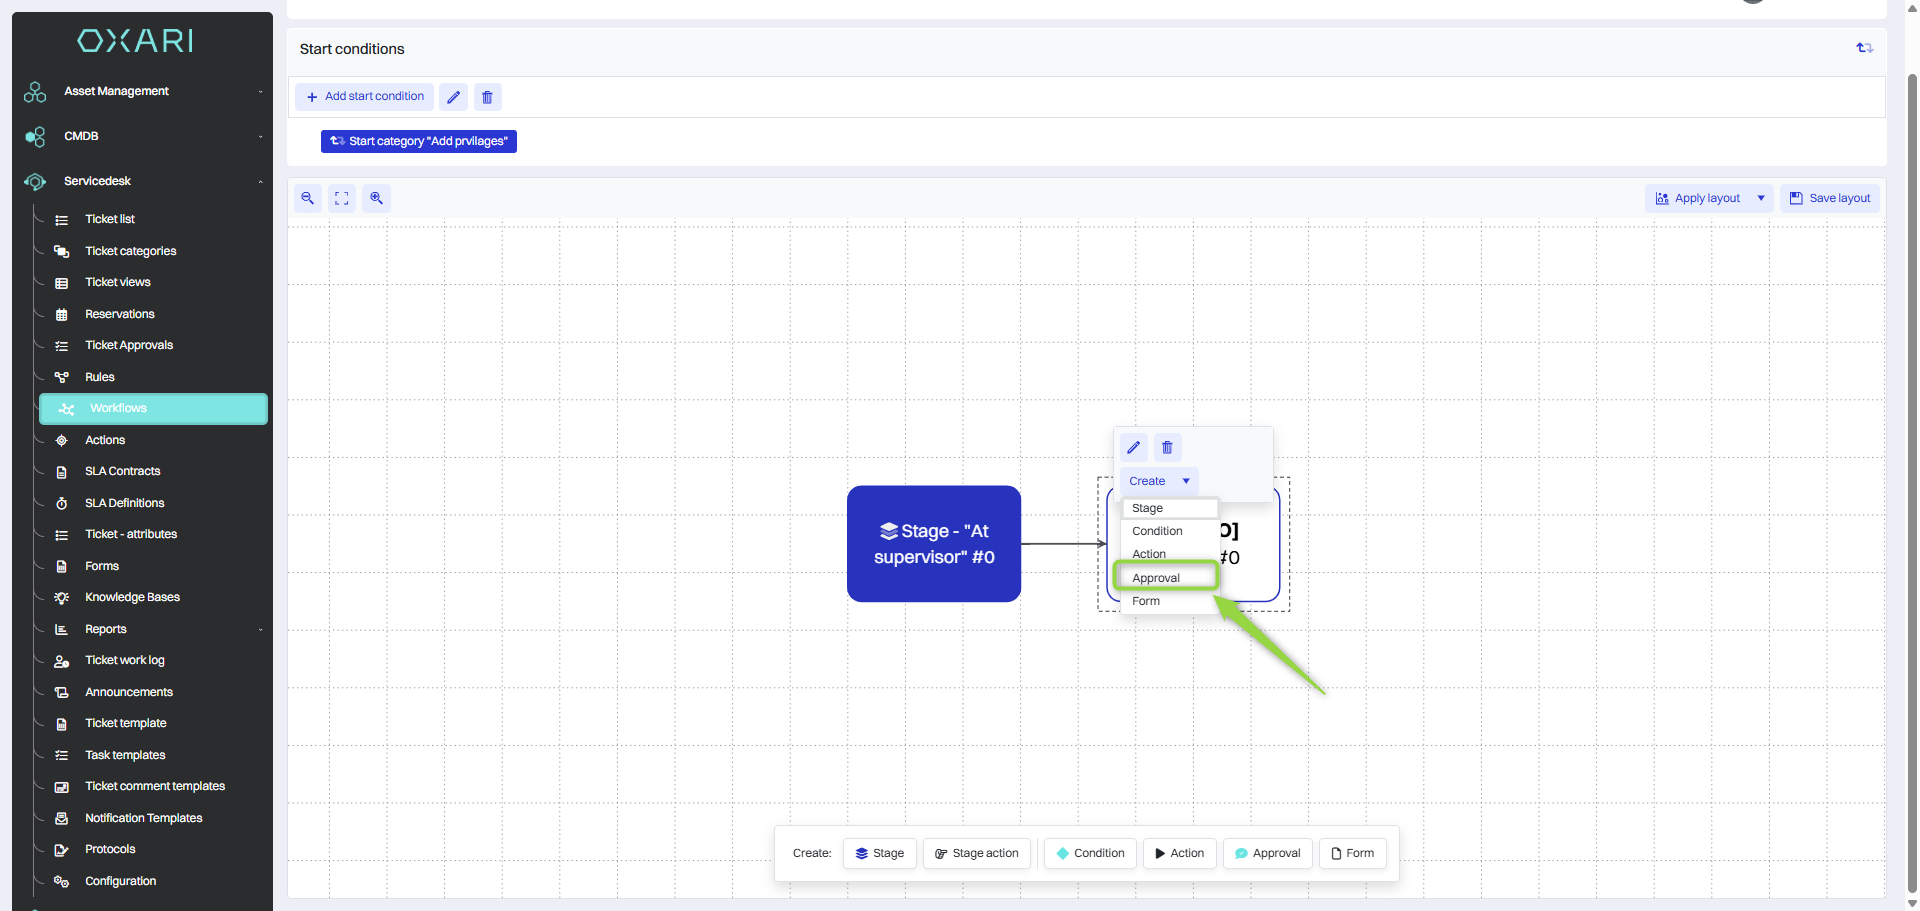
Adding acceptance
To add an acceptance, click on the “Auto” tile, and then click the “Add acceptance” button.
Next, the “Create acceptance” window contains the items:
|
1 |
Name - A field to enter the name of the approval, it should uniquely identify the type of approval, such as “Supervisor approval”. |
|
2 |
Description - A text field for a detailed description of the acceptance, where you can include information about what is being accepted, under what conditions or why the acceptance is required. |
|
3 |
Author of the ticket, Submitter, Author's supervisor ...: A list of checkboxes for selecting who has approval authority. Different roles can be selected depending on the company's organizational structure and processes, e.g. ticket author, immediate supervisor, etc. |
|
4 |
Supervisor roles - Ability to specify whether supervisors in specific roles have approval rights. More about roles: Go > |
|
5 |
Additional persons - A field to enter specific persons in the system to be included in the approval process beyond the standard roles. |
|
6 |
User groups: Here you can specify the user groups that have approval rights, such as IT team, management, etc. More about user groups: Go > |
|
7 |
Persons associated with CI relationship - Define persons associated with specific Configuration Items (CI) based on defined relationships. More about CI relationships: Go > |
|
8 |
Persons with position in the author's department - Ability to add persons with specific positions in the author's department to the approval process. |
|
9 |
Validation or rejection group for all CI - option for group acceptance or rejection for group for related configuration elements. |
|
10 |
Require only one approval or rejection - Checkbox, which allows you to determine whether the process requires only one acceptance or rejection. |
|
11 |
Require only one approval or rejection person in both - Checkbox, which allows you to specify, or process only one acceptance or rejection person in both. |
|
12 |
The form of acceptance/odd - List develops to choose a forms, which have to be used in the case of acceptance or rejection process. This allows standardization of messages and collection of additional information. More about forms: Go > |
After filling in the desired fields, click the “Save” button.
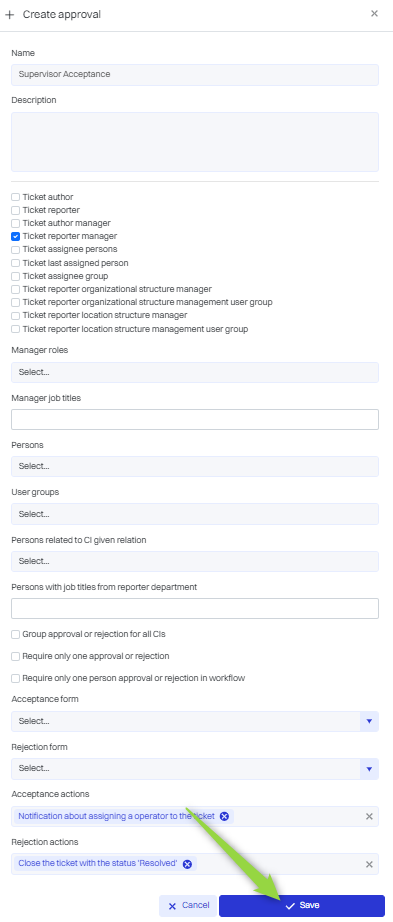
The acceptance is added to the workflow.
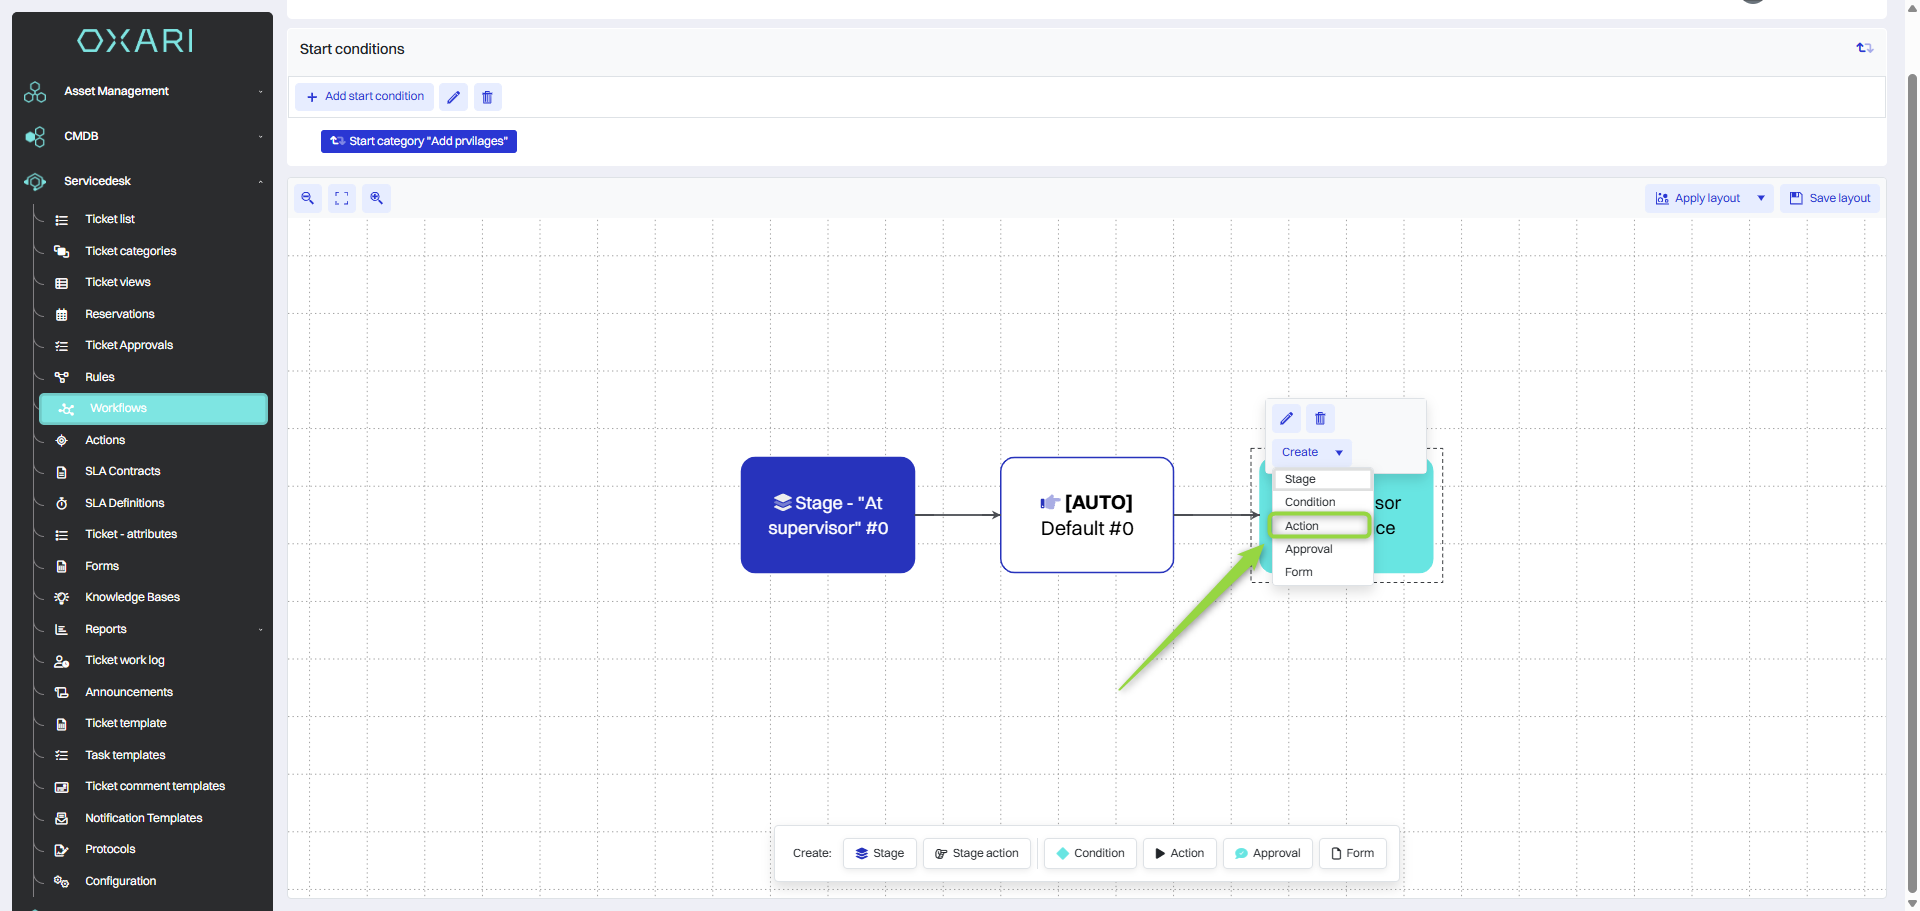
Adding an action
To add an action, select the “Supervisor acceptance” tile, and then click the “Add action” button.
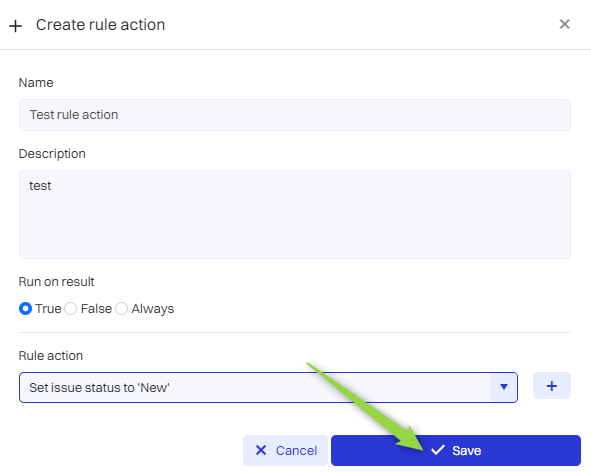
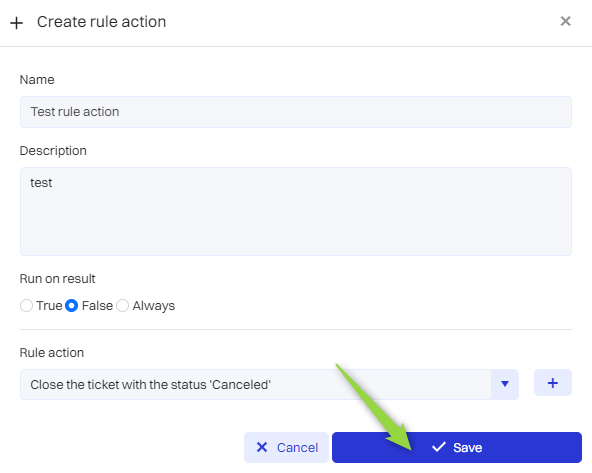
Next, the “Create action” window contains the items:
|
1 |
Name - A text field where you should enter the name of the action. The name should be descriptive and reflect the action that the action will perform. |
|
2 |
Description - A text field for a description of the action. Here you can include detailed information about what specifically the action will do, under what circumstances it should be performed or what effects it will have. |
|
3 |
Run for returned value - A group of options for selecting when the action should be executed. The options to choose from are:
|
|
4 |
Action: drop-down list with the ability to select a specific action from those available in the system. Next to it is a “+” button that allows you to add a new individual action. More about actions: Go > |
Fill in the desired fields and click the “Save” button.
For the correct operation of the workflow, an action for “False” will also be assigned.
Both actions have been added.
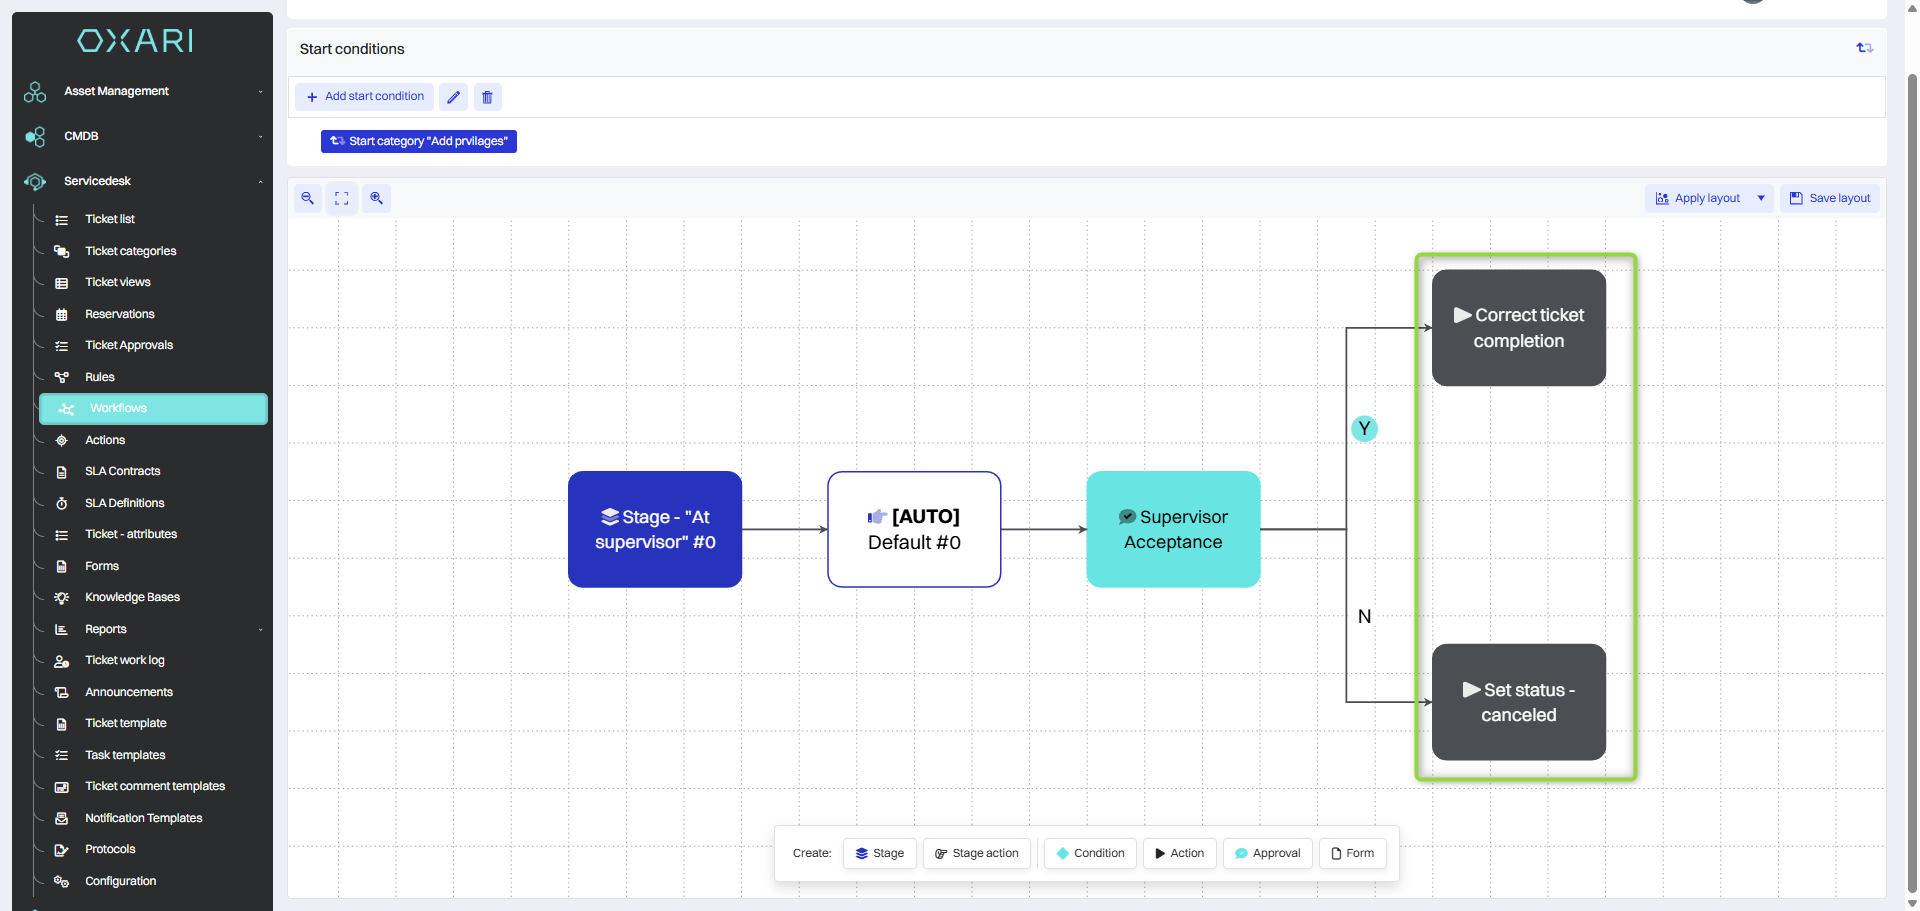
Completing the workflow
In order to complete the workflow, another stage will still be created, as well as an action to the stage that is not automatic. In order to add a stage, select the “Correct ticket completion” tile and then click the “Create stage” button.
Then name the stage and click the “Save” button.
In this step, disable the automatic launch of the stage action, select the stage action and click the edit button.
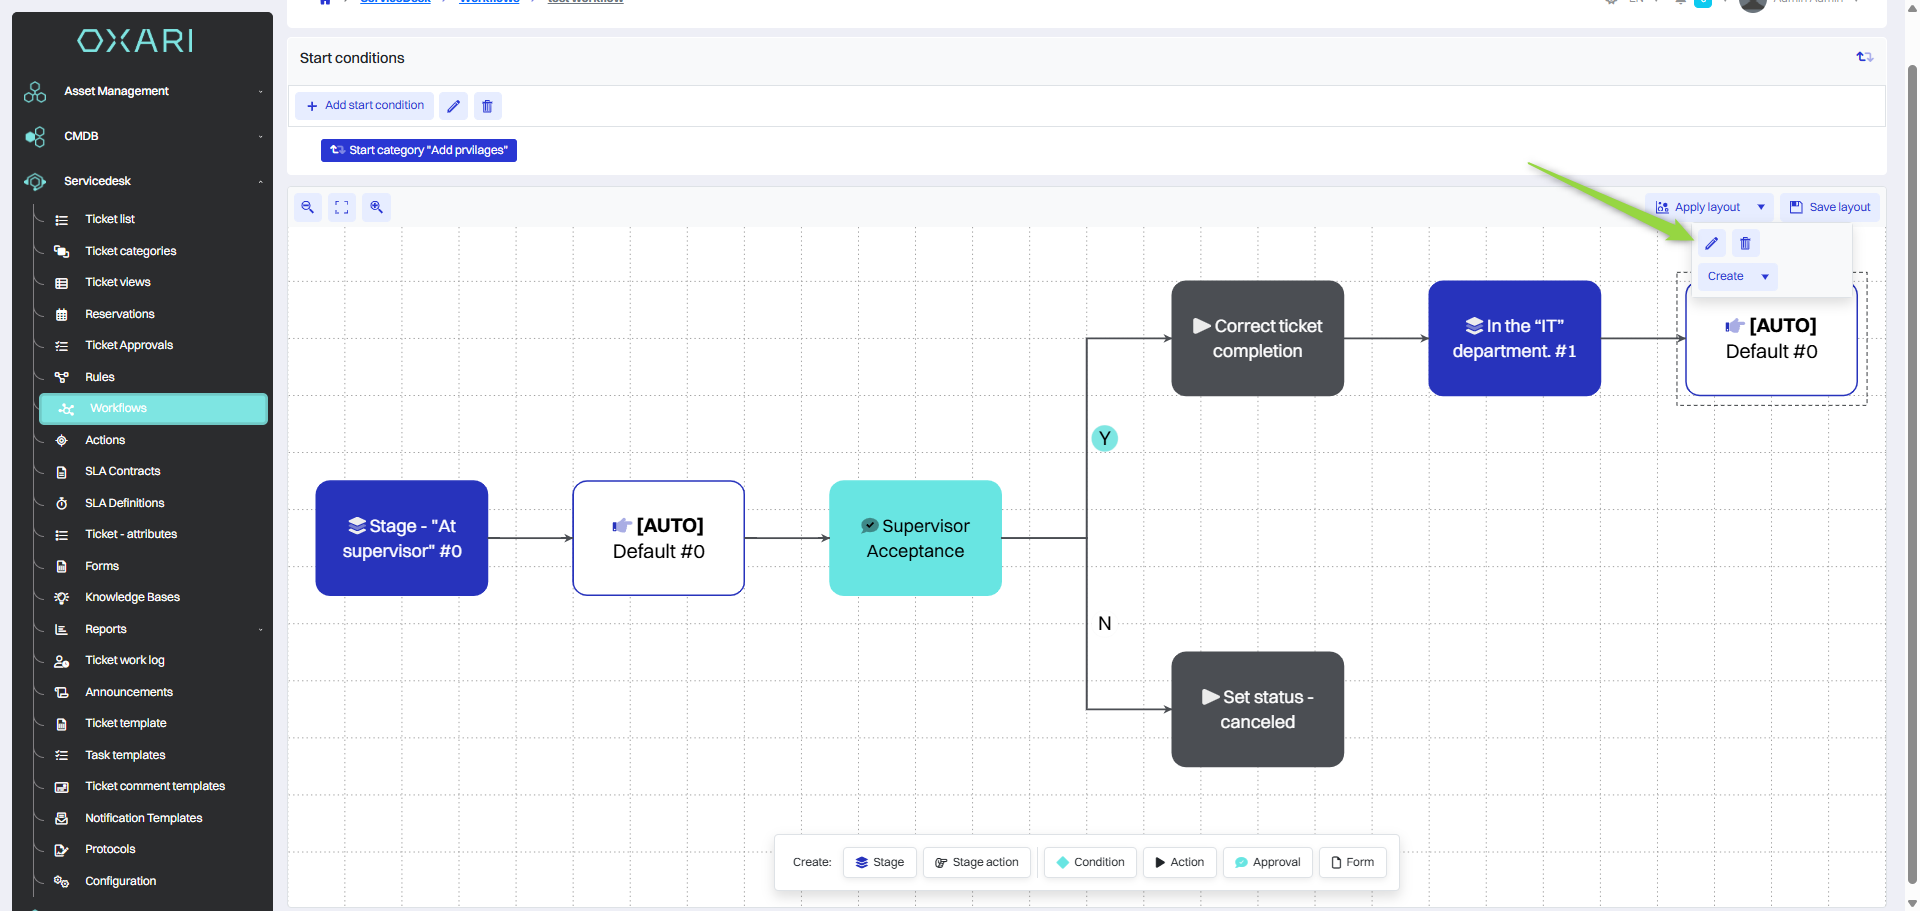
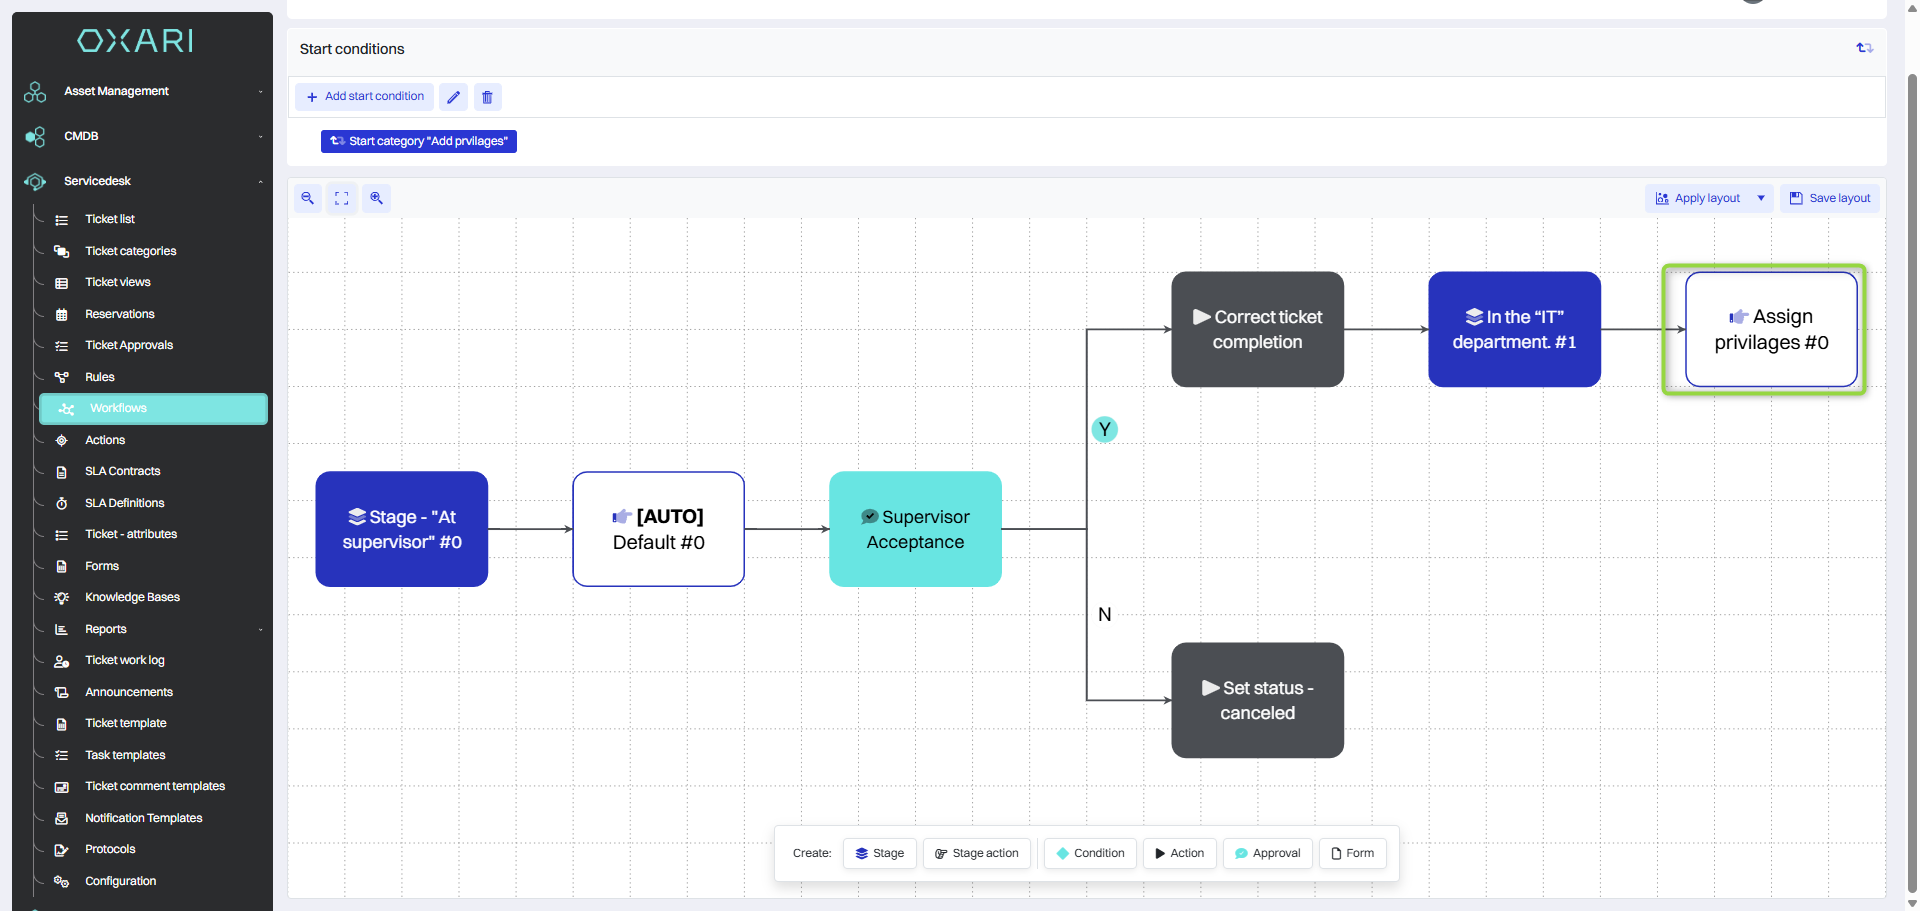
Then uncheck the “Run automatically” option, name the action and click the “Save” button.
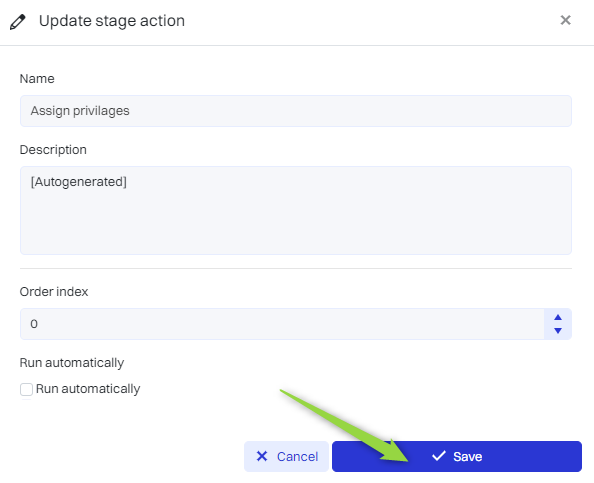
The action has been edited and the workflow has been completed.
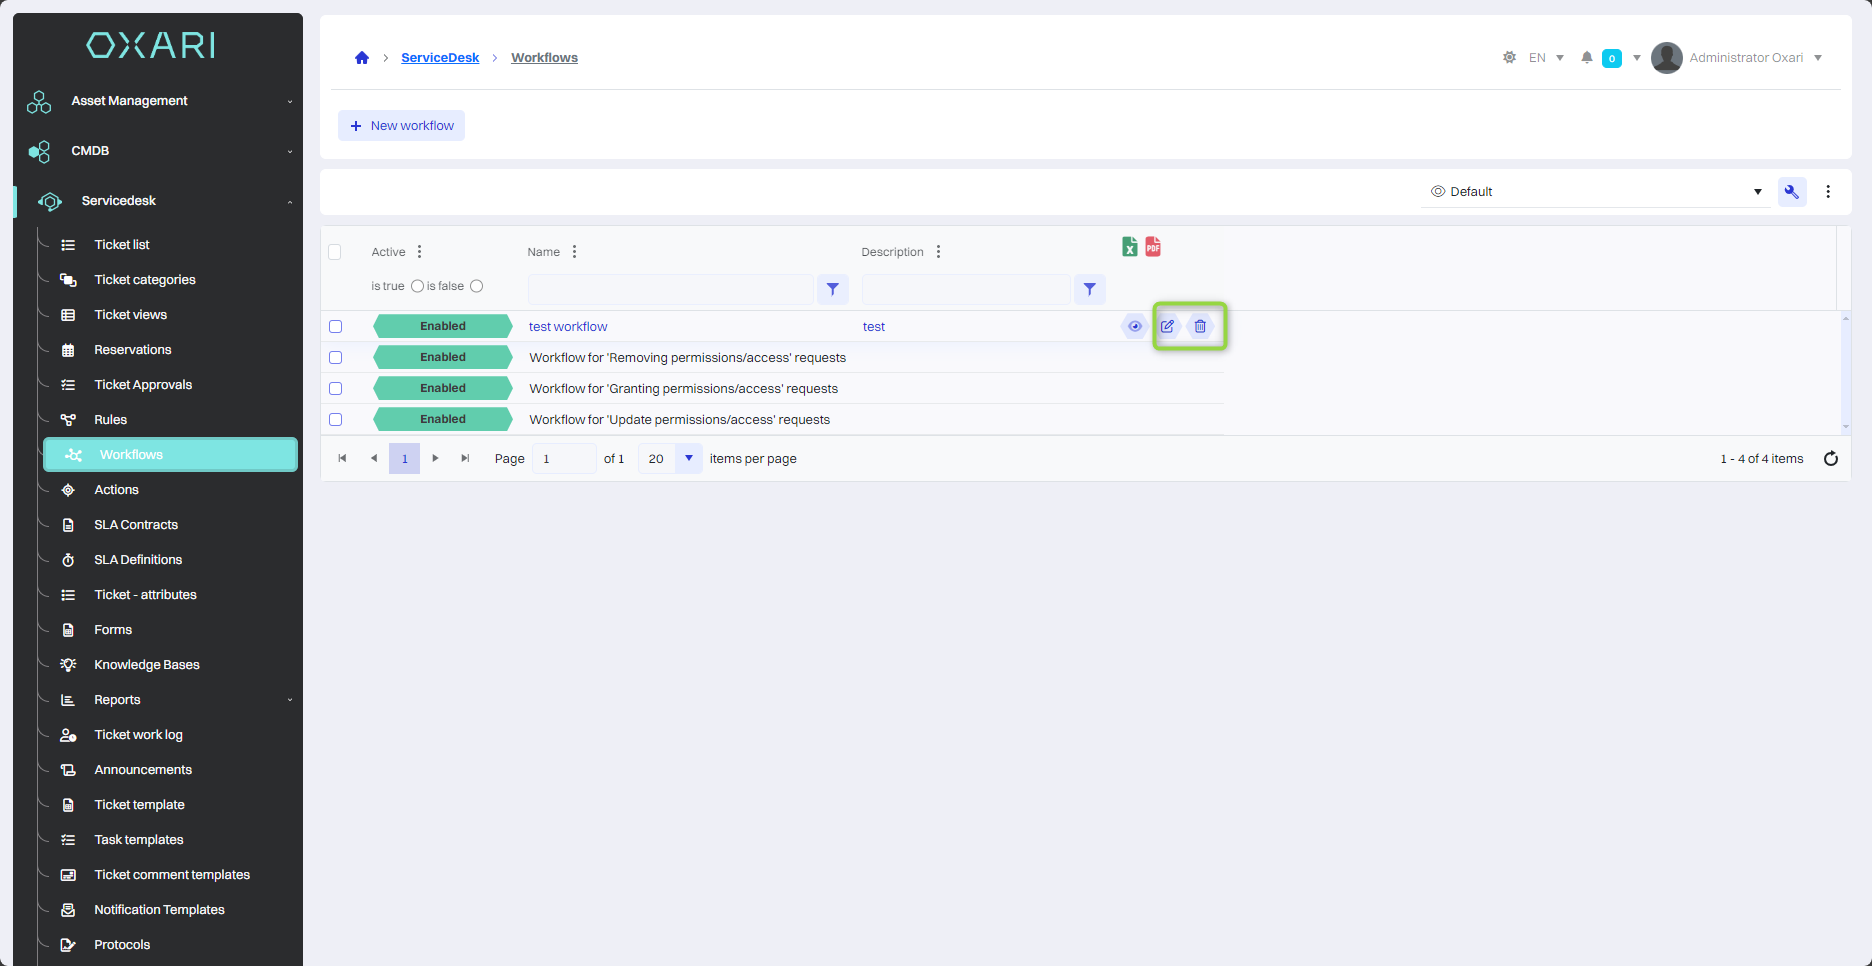
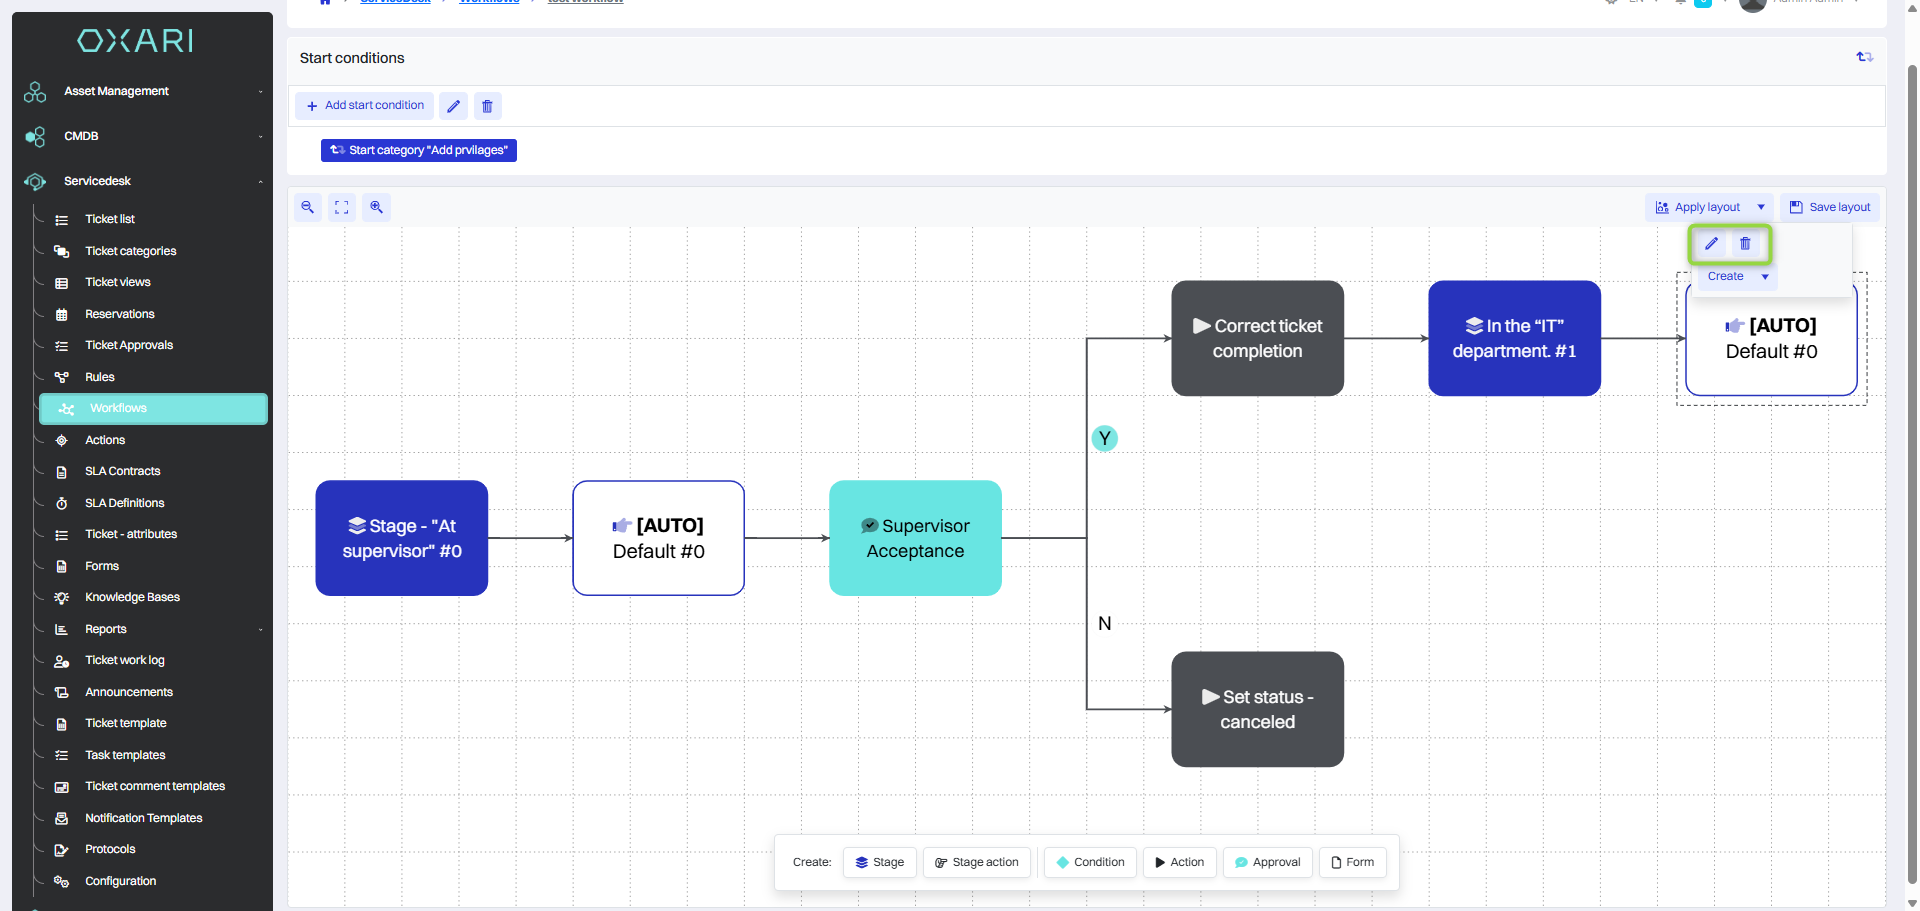
Editing/deleting the contents of the workflow
To edit the contents of a workflow, go to Servicedesk > Workflows, then click the “Details” button next to the desired workflow.
To edit or delete, select the desired tile, buttons to edit or delete will appear.
Editing/Deleting Workflow
To edit, delete a circuit, go to Servicedesk > Workflows, then hover over the desired circuit. The edit/delete buttons will be displayed.