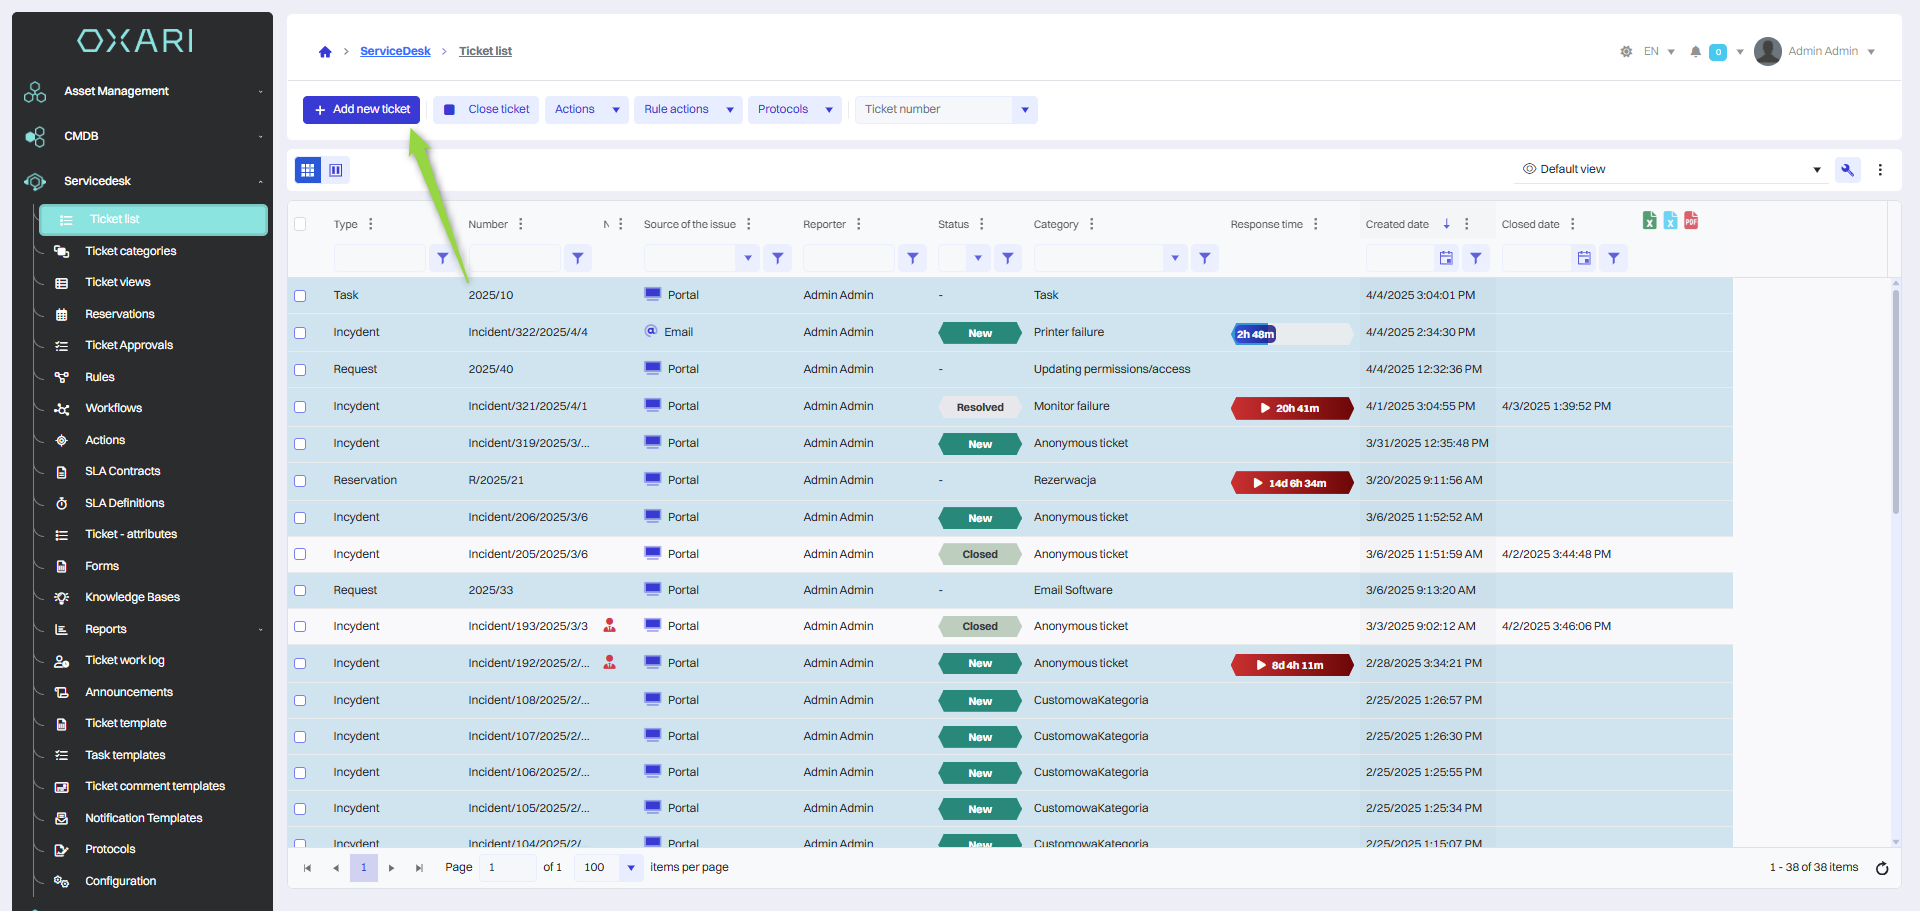
In the “Ticket list” section of the OXARI system, users have the option to add new tickets by categories such as incident, task, service, reservation, problem. There is also an option to perform various actions on tickets such as closing a ticket, assigning a document, deleting, assigning a custodian, and using a protocol for a ticket. In addition, the user can enter the details of each ticket to manage it on an individual level, which includes viewing details, editing information, communicating with other system users, and monitoring the progress of the ticket's resolution.
Read more about ticket categories: Go >
Adding a new ticket
To add a new request, go to Servicedesk > Ticket list and then click the “Add ticket” button.
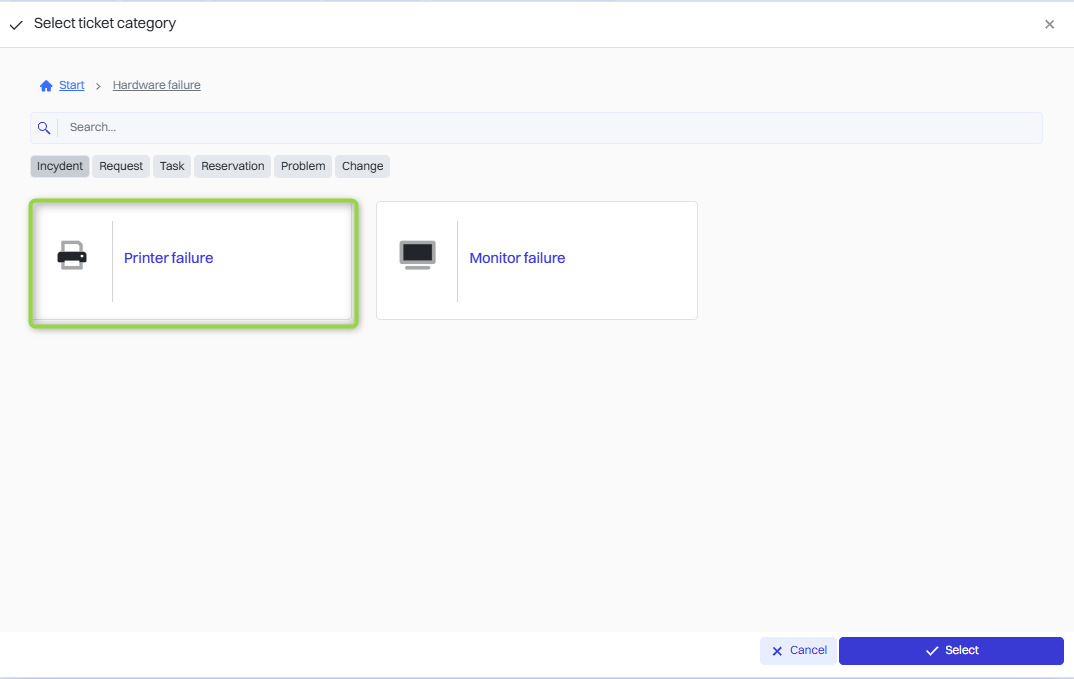
Selecting ticket category
Then there are selectable ticket types such as incident, task, service, reservation, problem, task. (Problem - allows you to merge multiple related requests, e.g. multiple incidents with the same cause into one, so it is possible to handle these incidents in one problem). Click on the desired type of ticket.
To configure ticket categories: Go >
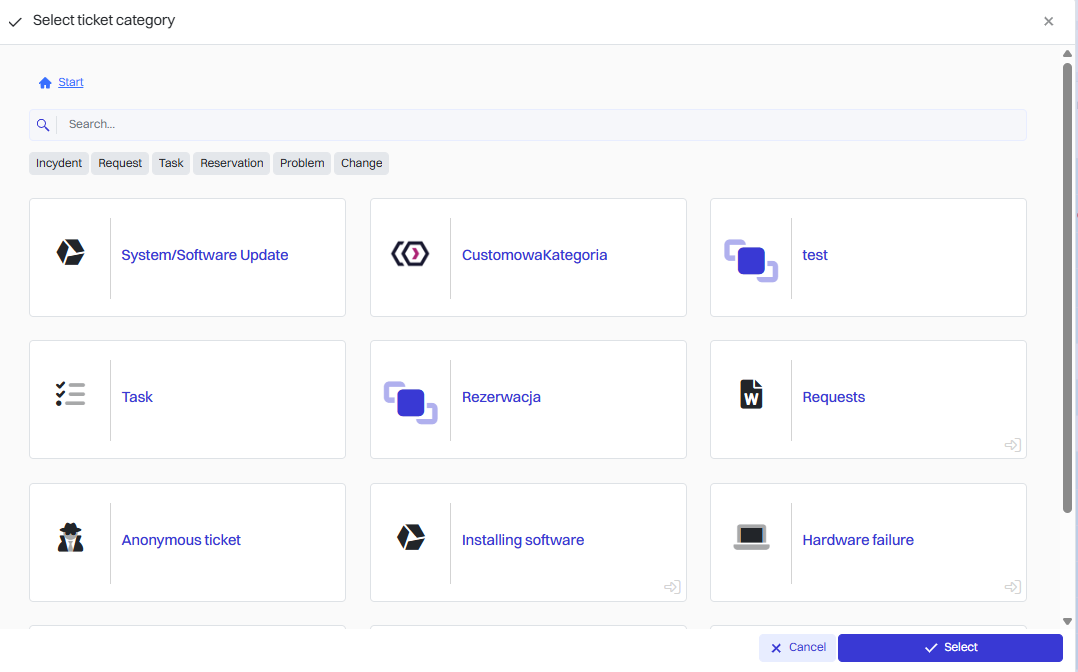
In the next step, we select the category of the ticket (here, in the example, Equipment failure)
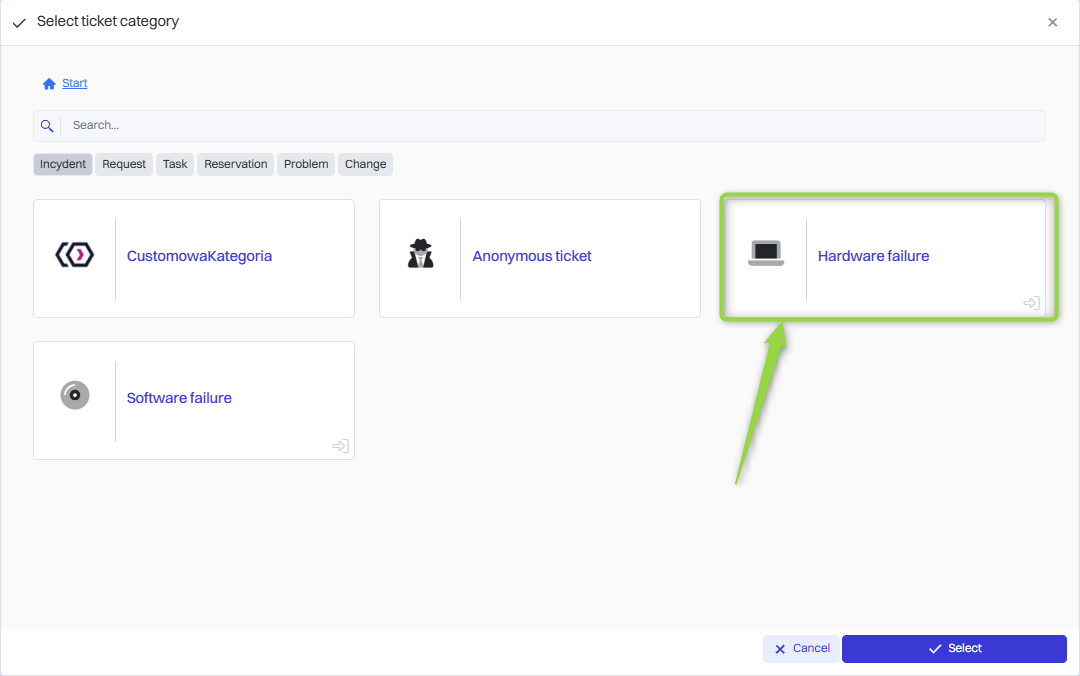
Some categories still have subcategories, so select the desired subcategory of the application in the next step.
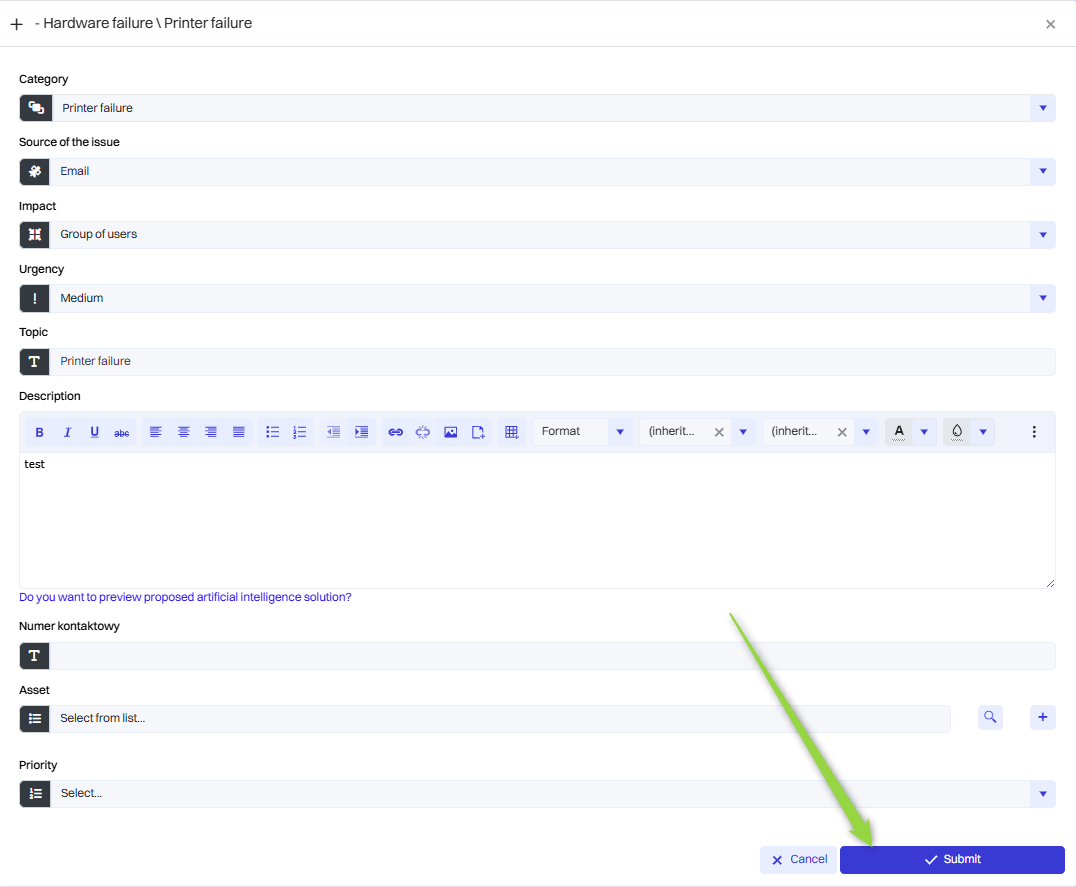
Filling out the ticket’s form
In this step, fill out the form for a particular ticket and click the “Submit” button. Each form may be different depending on the selected ticket category.
To configure the form and assign it to a ticket category: Go >
The ticket has been added to the list of tickets.
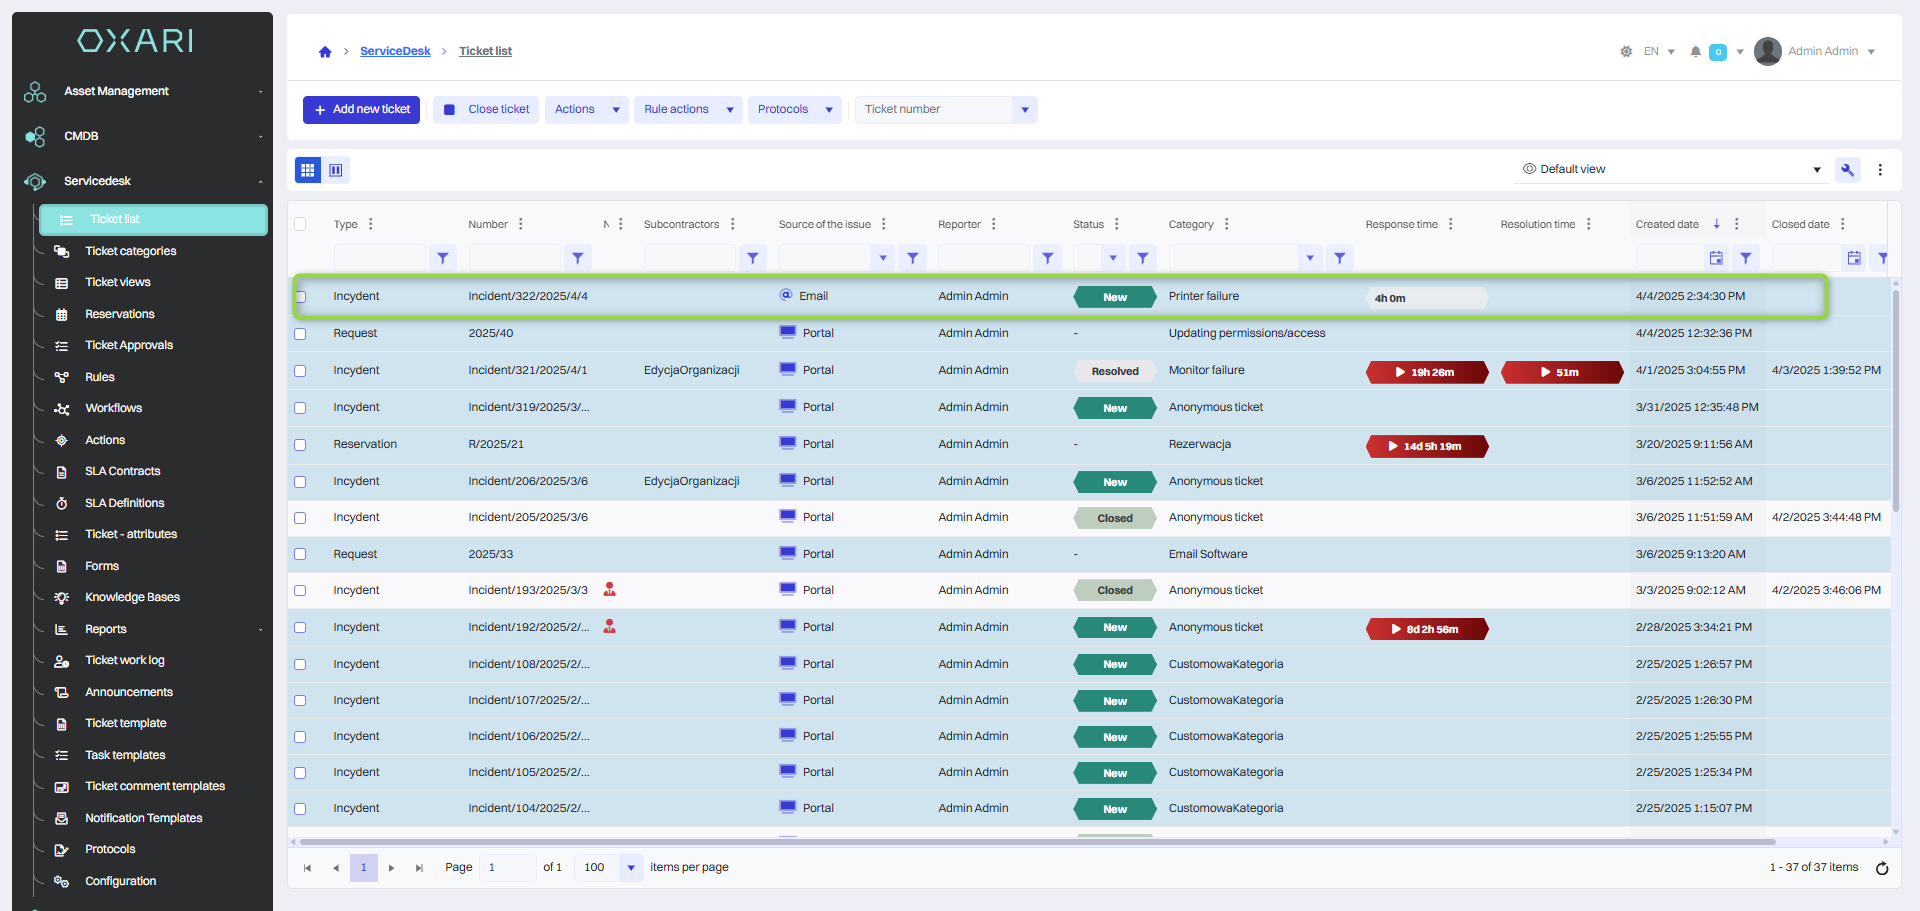
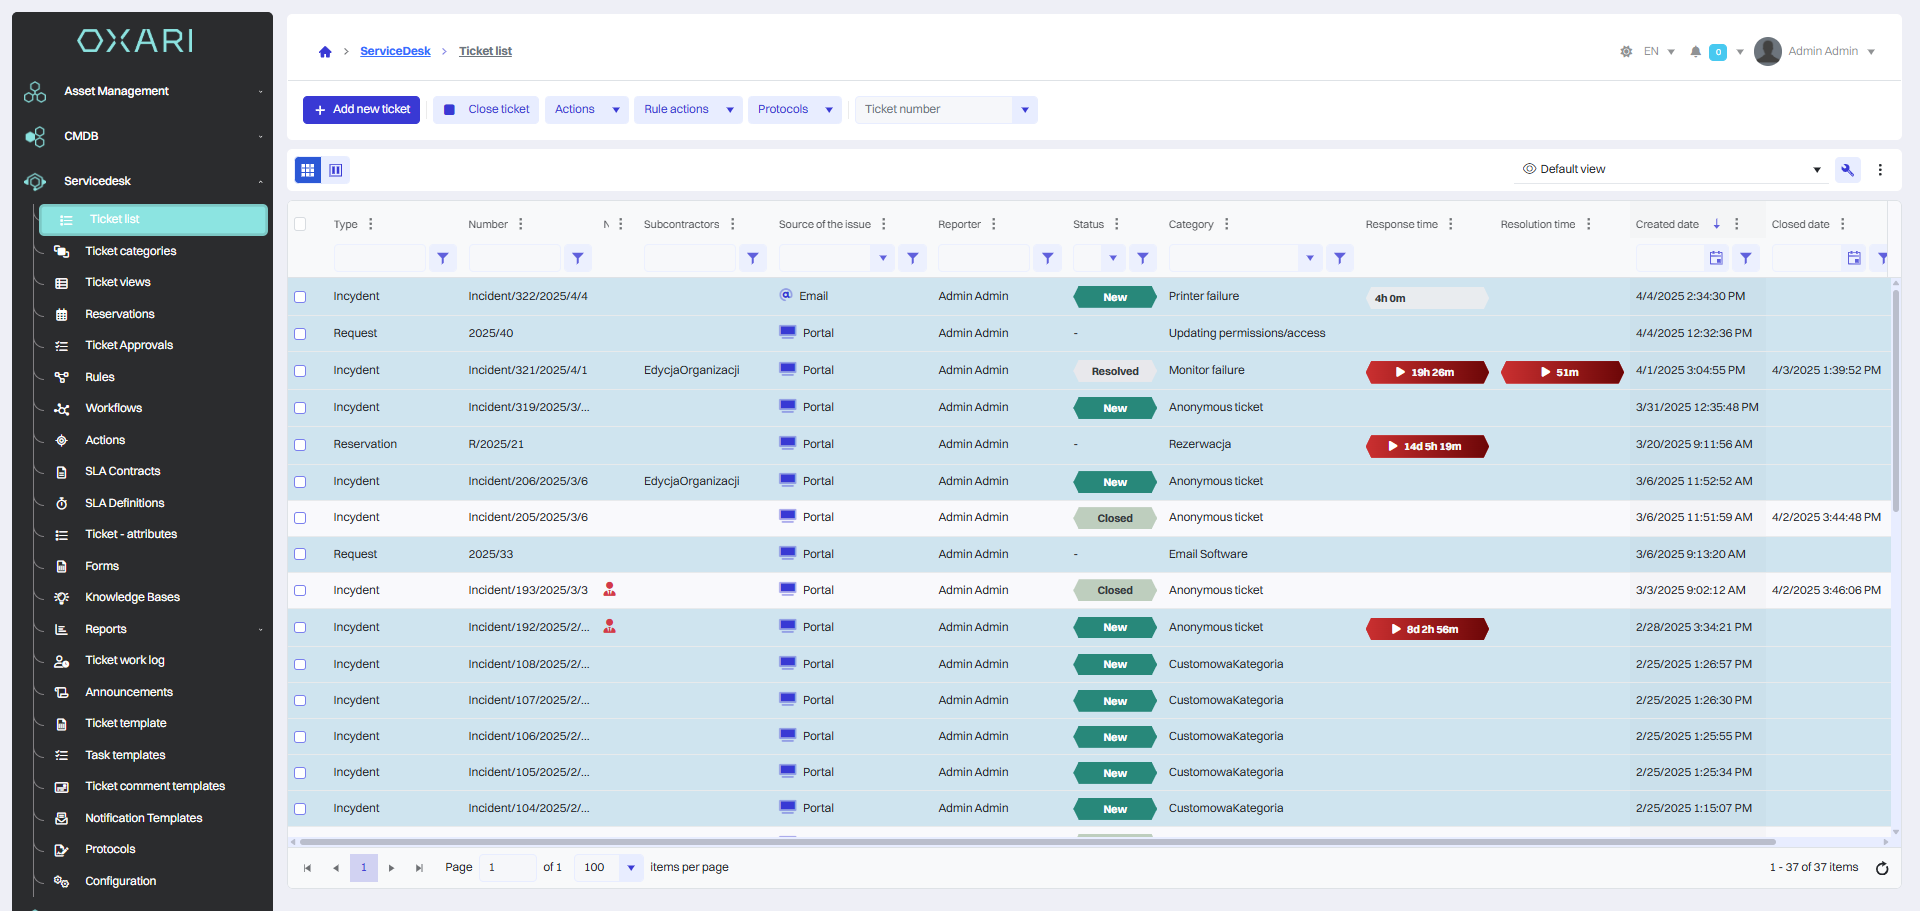
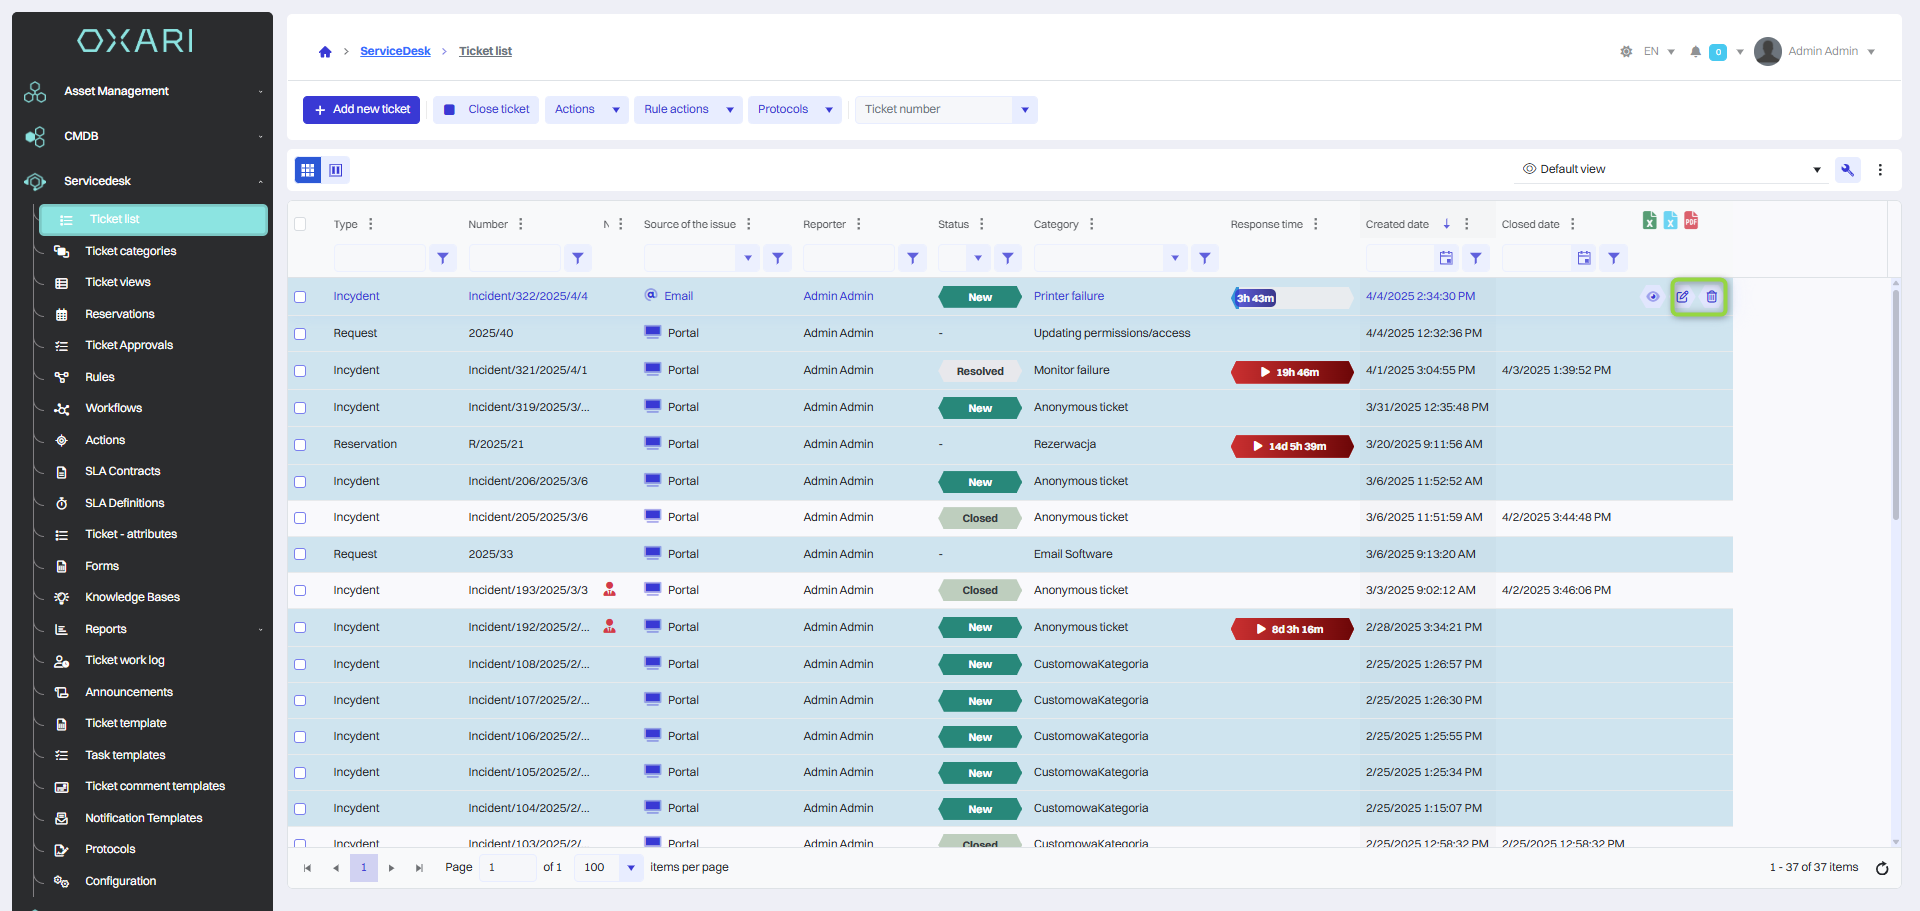
Ticket list view
This view contains various sections and options that allow you to manage your tickets.
Options in the ticket list view
The options that can be found in the detailed view are:
|
1 |
Add ticket - This menu allows you to create a new ticket in the system. Possible options are:
|
|
2 |
Close ticket - Closes the ticket, marking it as closed. |
|
3 |
Actions - A drop-down button that allows you to perform specific actions on a ticket, such as::
|
|
4 |
Protocols - Displays the ticket by protocol from the Servicedesk > Protocols section. More about protocols: Go > |
To perform an action on a ticket, highlight the desired ticket(s) and then select the desired action.

Editing/Deleting a ticket
A ticket can be edited or deleted using the following buttons.
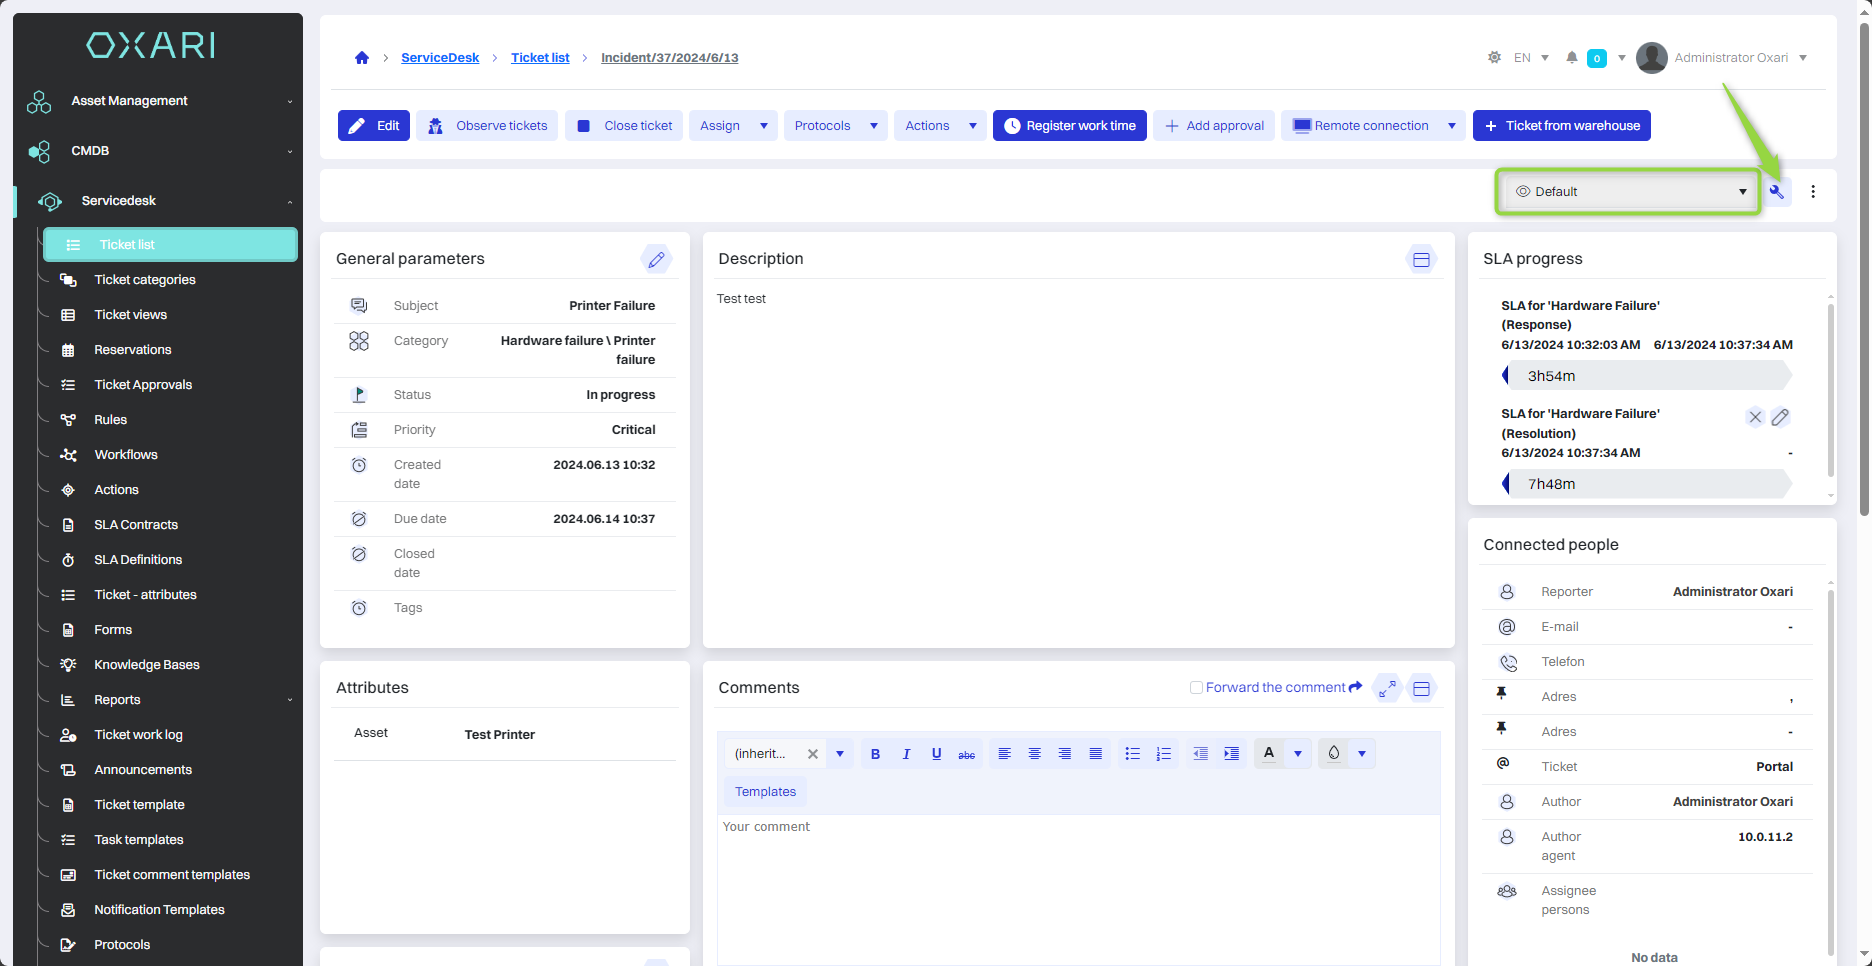
Ticket detail view
To open the detail view of a ticket, go to Servicedesk > Ticket list and then click the “Details” button next to the desired ticket.

In the detailed view, there are various sections and options that allow you to manage your ticket in detail.
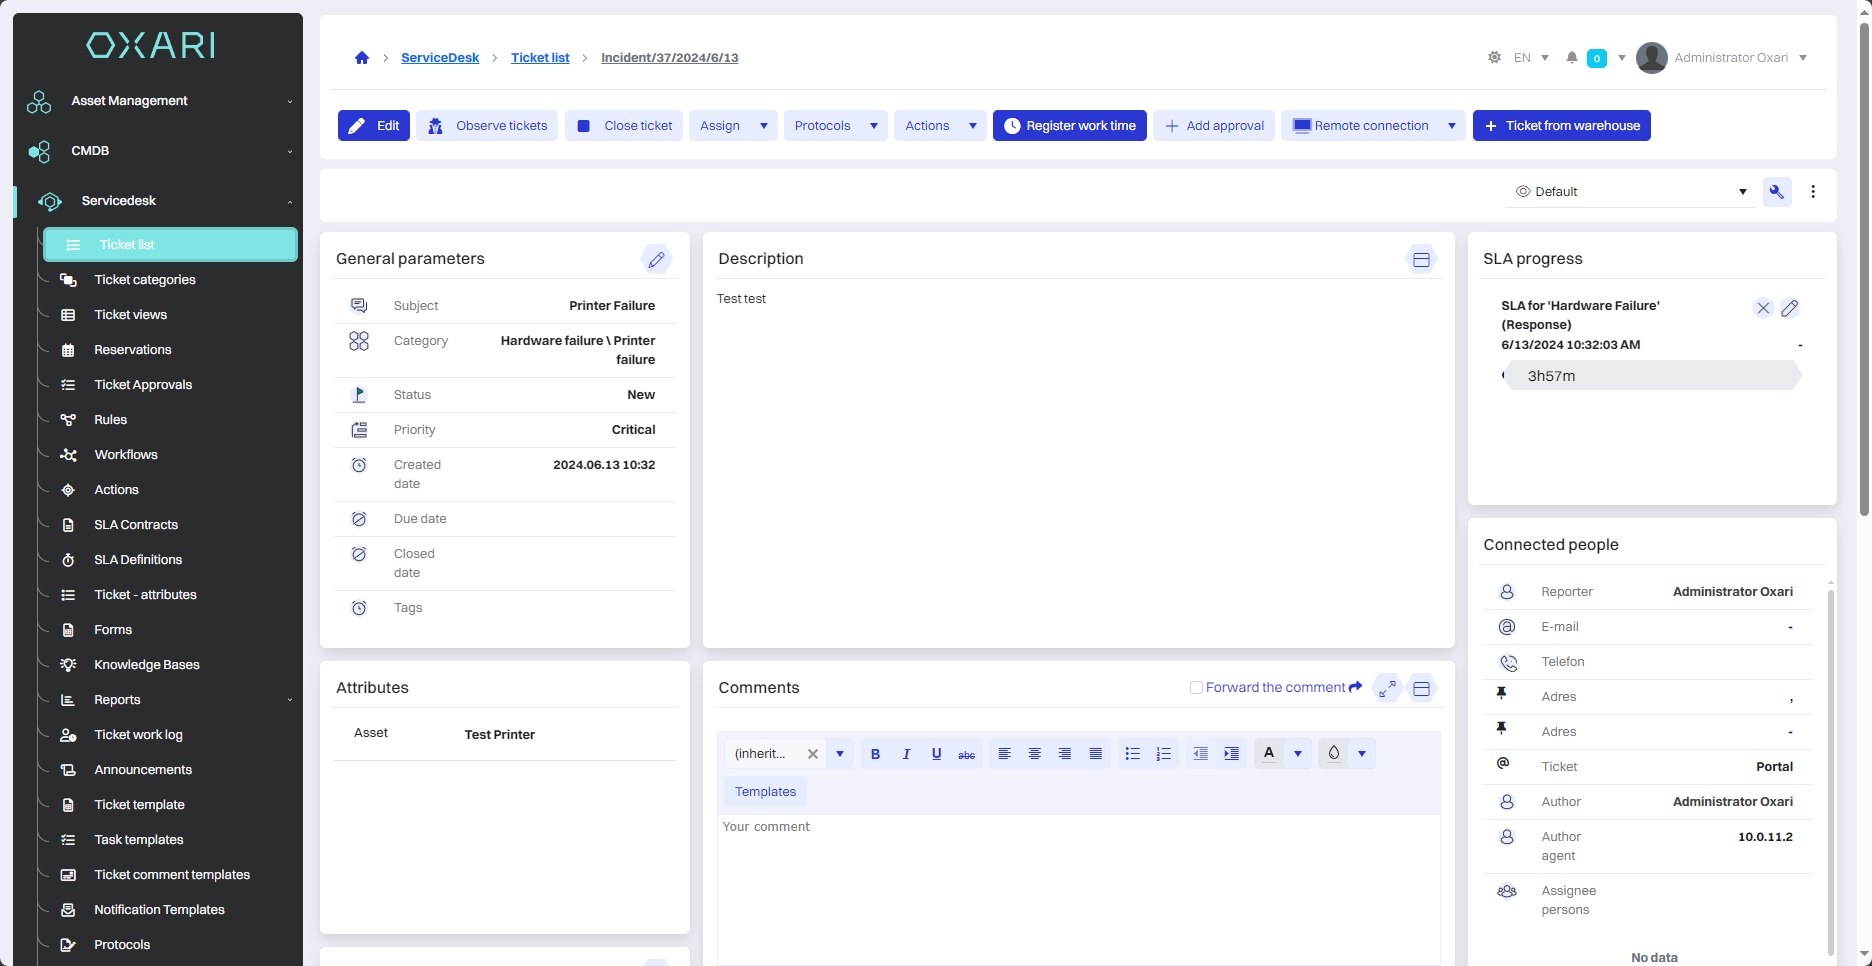
Options in the detailed view
The options that can be found in the detailed view are:
|
1 |
Edit - Allows you to modify the details of an existing ticket. |
|
2 |
Watch a ticket - Allows you to watch a ticket to receive notifications of updates or changes. |
|
3 |
Close ticket - Closes a ticket, marking it as closed. |
|
4 |
Assign - Assigns a ticket to a specific person or group to handle it. Assignment possibilities are: To me, Supervisor, Group of supervisors/guardians, Observer, Group of observers. |
|
5 |
Protocols - Displays the ticket by protocol from the Servicedesk > Protocols section. More about protocols: Go > |
|
6 |
Actions - A drop-down menu giving access to the “Change the type of ticket” action. |
|
7 |
Record work time - Allows you to record the time spent on work related to the ticket. |
|
8 |
Add approval - Enables the approval process for specific actions or decisions within a ticket. |
|
9 |
Remote connection - Enables a tool or procedure to enable remote connection in the context of resolving a ticket. |
|
10 |
Release from warehouse- May allow you to register the release of some resource or part from warehouse to resolve a ticket. |
Detailed view sections
Sections are made up of widgets, those that are in the detail view are:
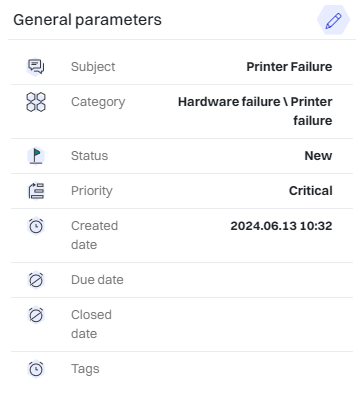
Basic parameters
The basic parameters of the ticket are shown, with the possibility to edit this data.
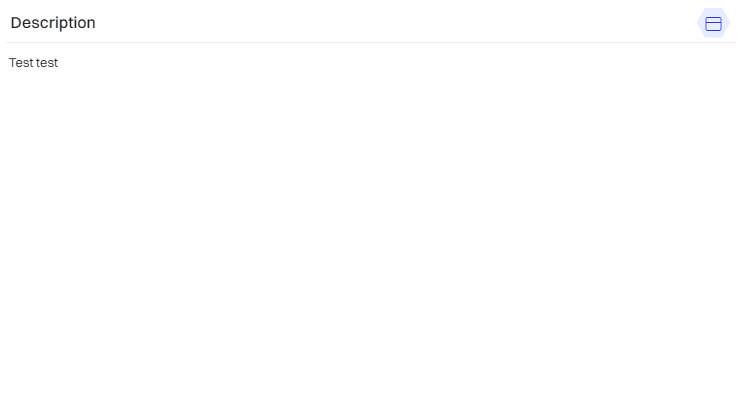
Description
Description of the problem or task that has been reported.
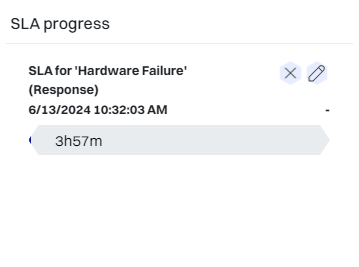
SLA
SLA (Service Level Agreement) - A block of information showing what service level commitments (e.g., response time) are associated with this ticket and how much time is left to complete them.
More about SLAs: Go >
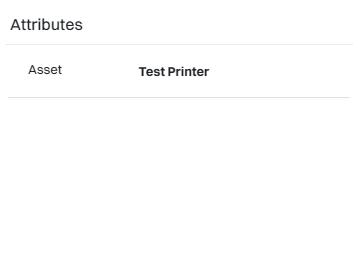
Attributes
Additional information about the ticket that can be customized to fit the organization's needs.
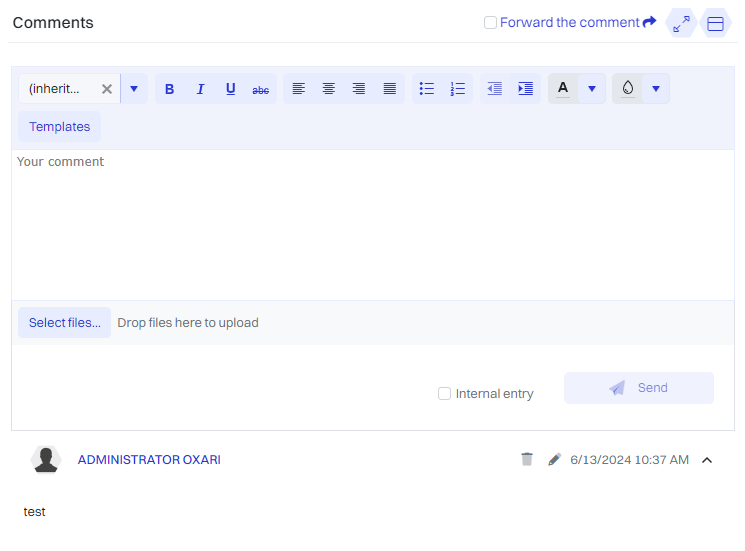
Comments
A section for adding new comments by system users and for viewing existing comments.
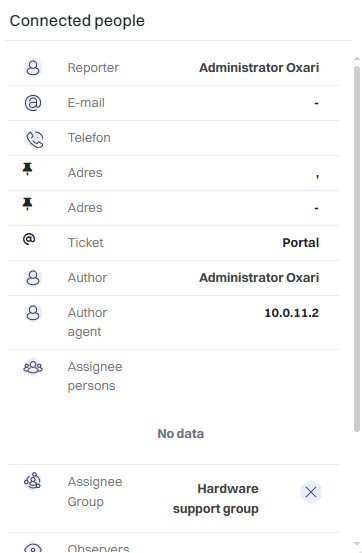
Related persons
People who are related to the ticket.
Attachments
Here users can view and add documents or other files related to the ticket.

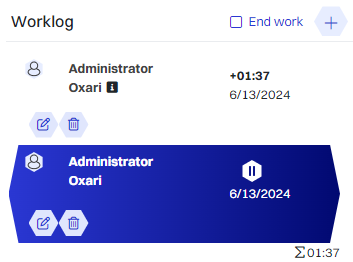
Work log
This section records the time spent working on the ticket.
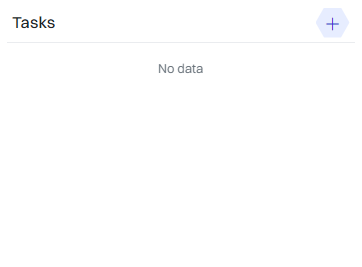
Related tasks
Here you can assign and manage tasks related to the ticket that may be necessary to solve the problem.
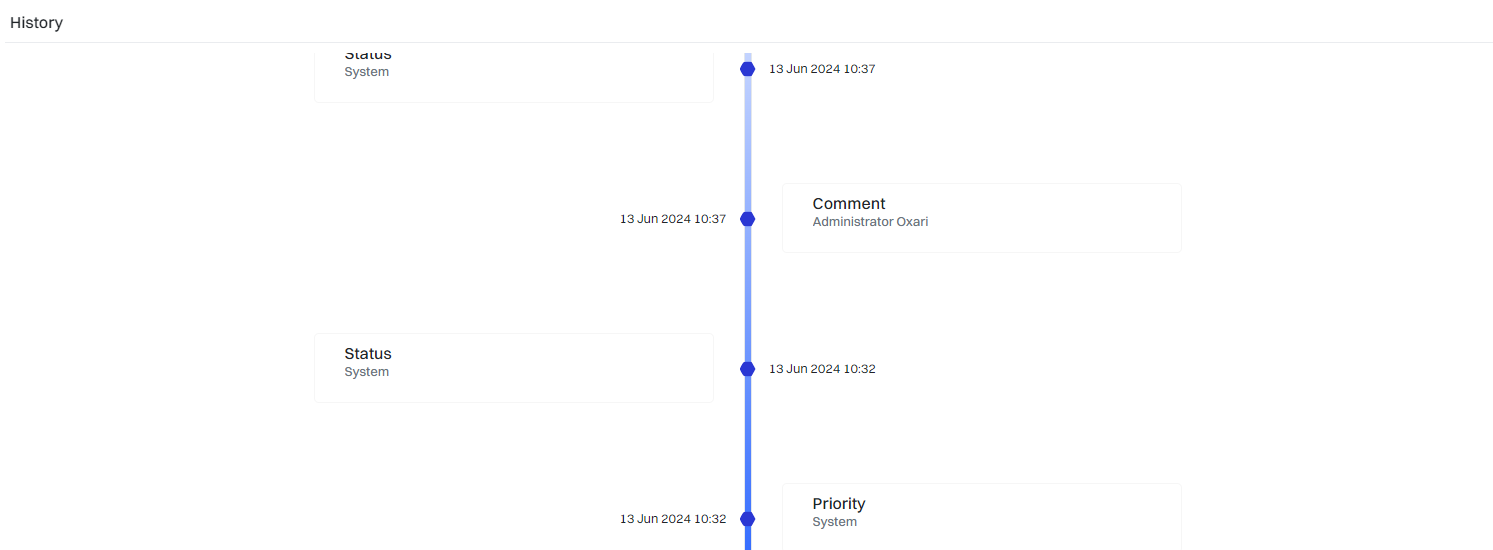
Ticket history
Contains a record of all changes and actions performed on a ticket, allowing full transparency and tracking of the case history.
Customizing the detailed view of a ticket
You can customize the ticket view, as well as create a new personalized view with selected data (widgets) by clicking the “+” button.
More about widgets: Go >
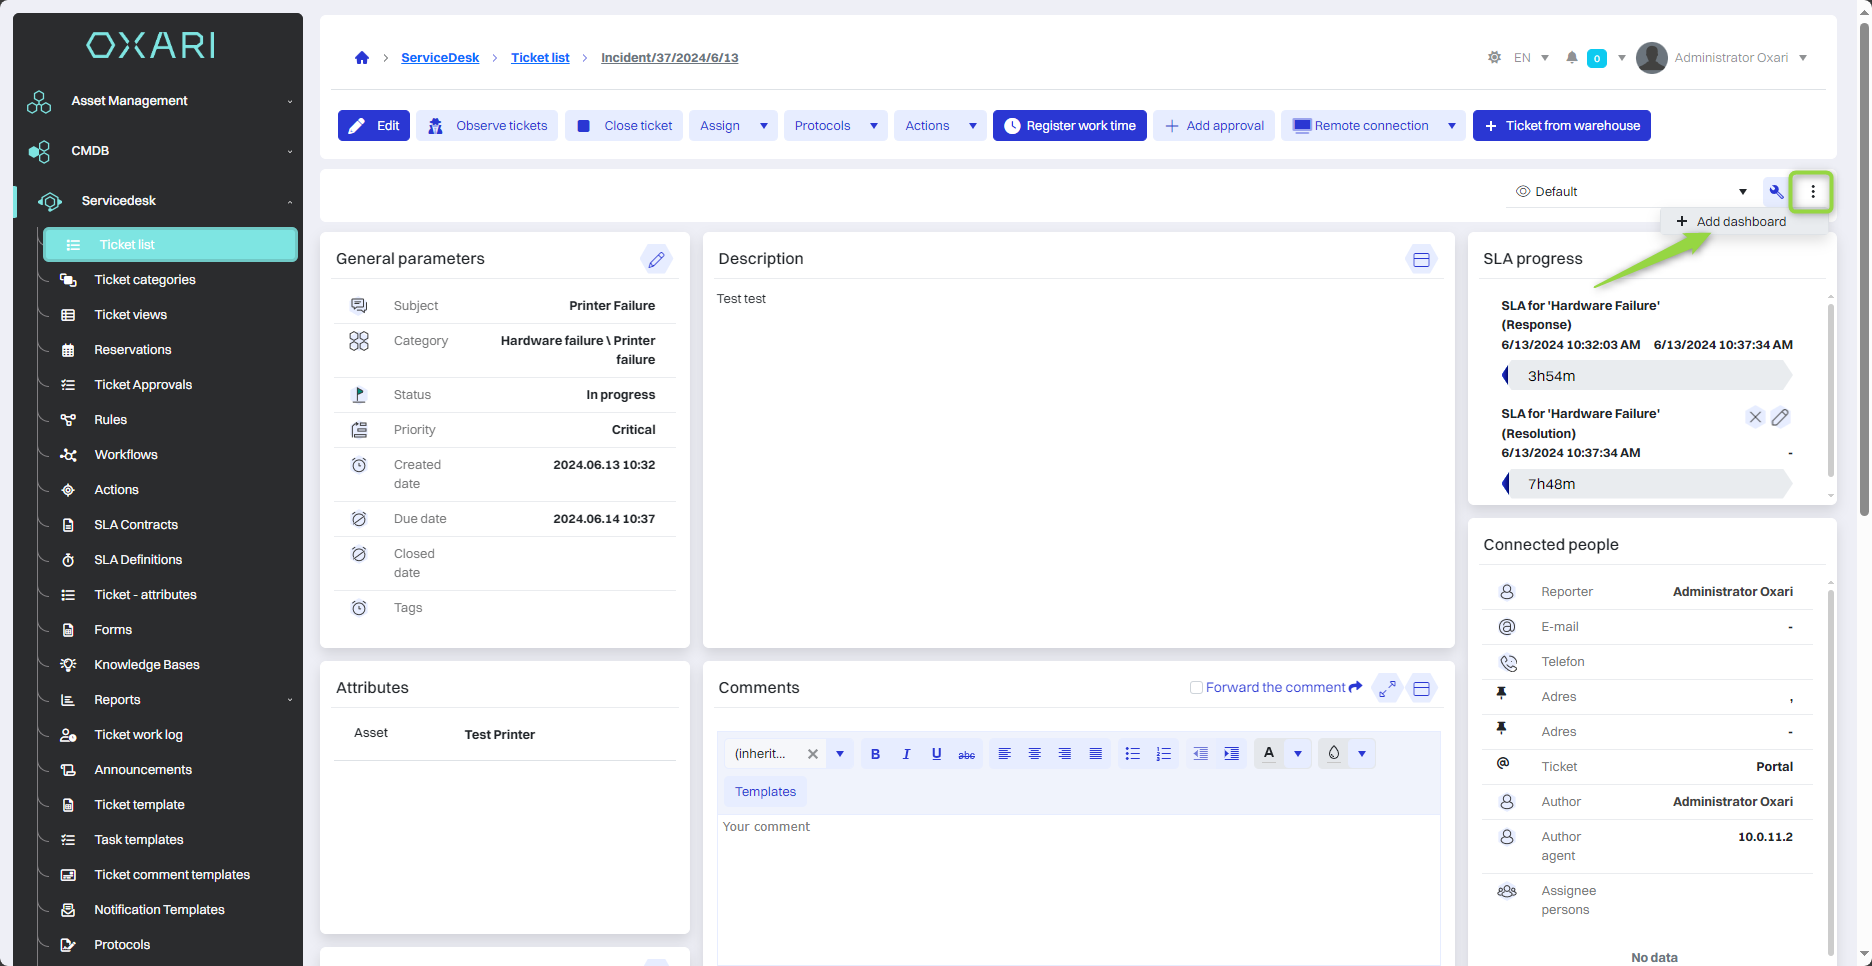
With editing, you can personalize the detail view of the ticket. To edit the desired view, click the key button.
Then in the editing view there are options such as:
|
1 |
Add widget - This function allows you to add a new widget to the view. |
|
2 |
Set for all users - This option allows you to apply the current view or configuration to all users of the system. |
|
3 |
Restore default - Allows you to quickly restore the default user interface setting. |
|
4 |
Trash icon - Allows you to remove a widget from the view. |
|
5 |
Shrink/Increase icon - Allows you to resize the widget and then move the widget around the view tiles. |
|
6 |
View tile - The view is built from these tiles, you can set widgets on them. |
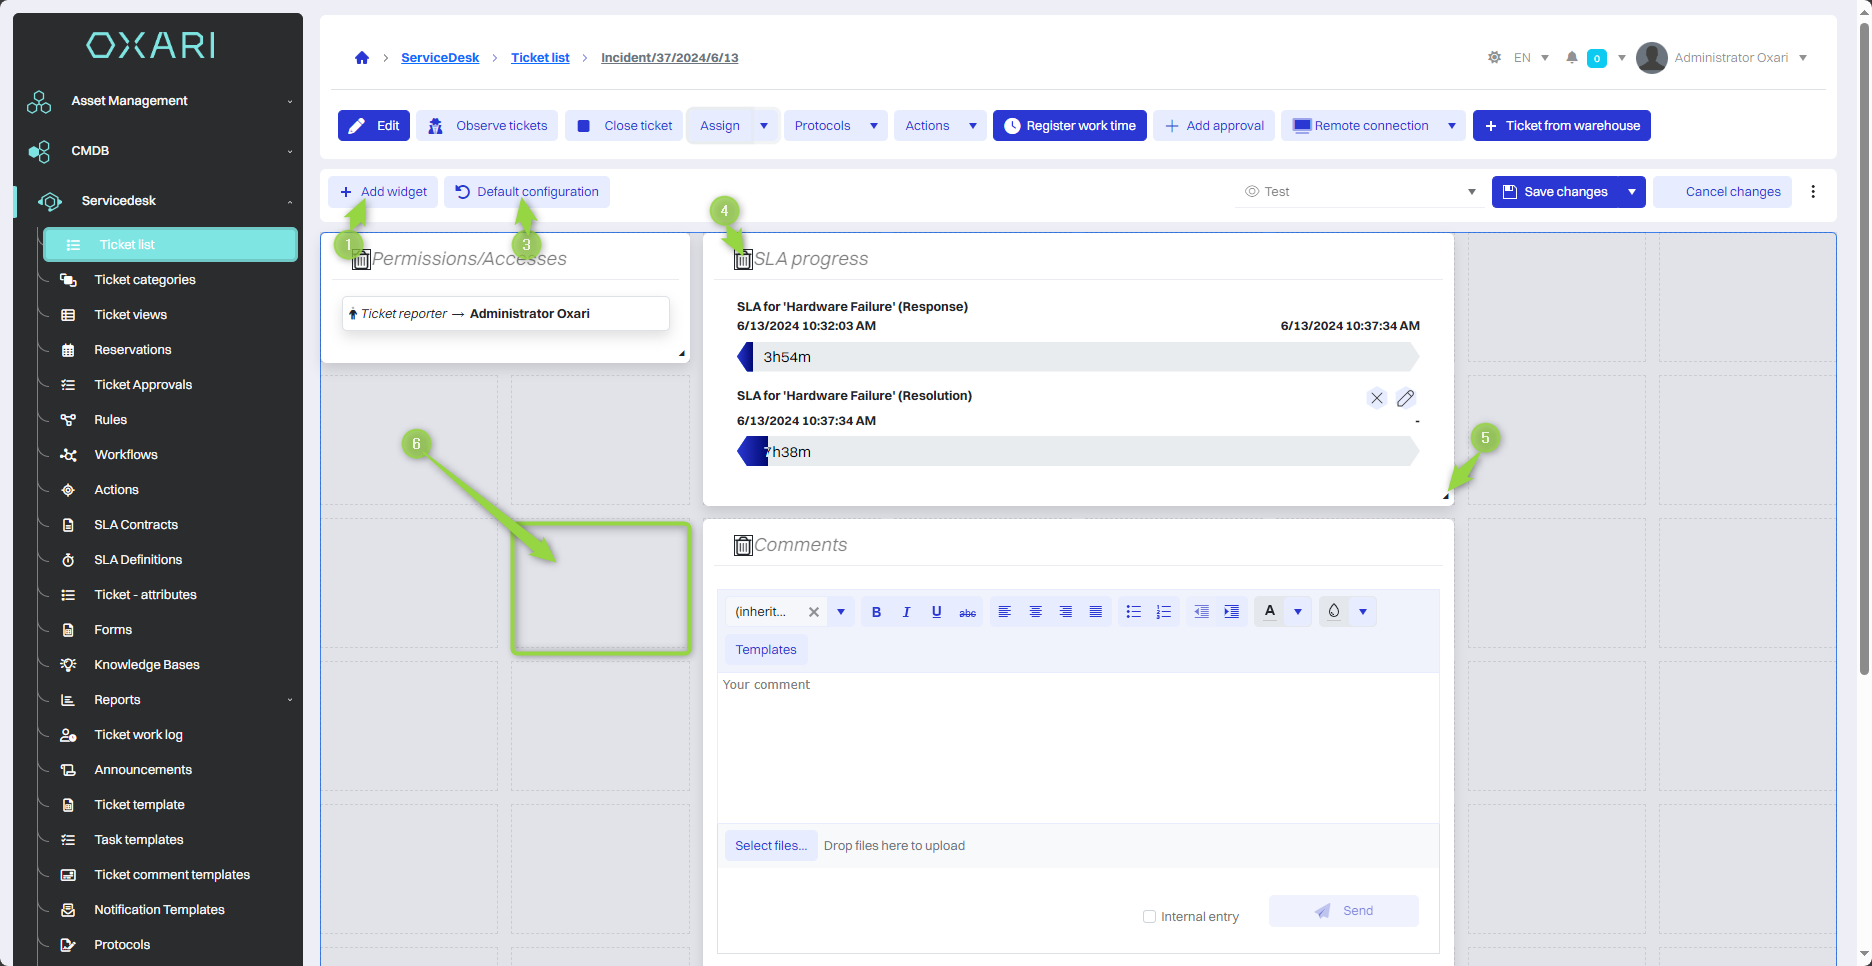
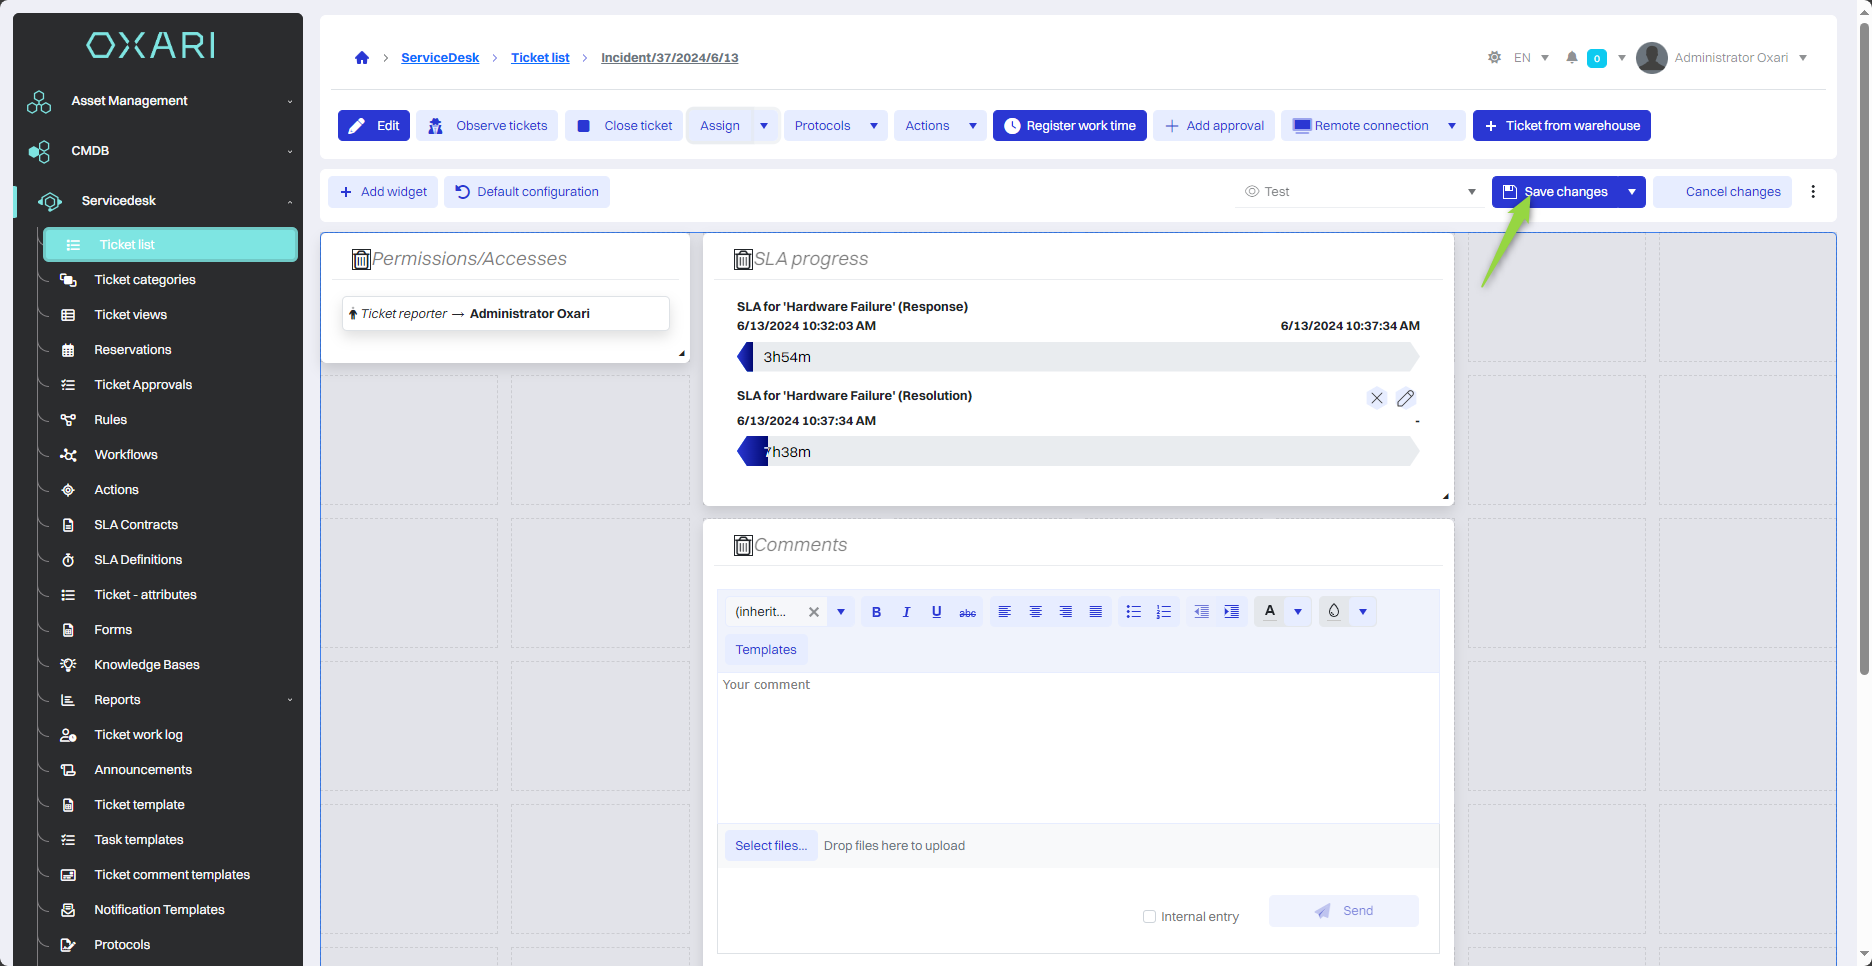
After making the desired changes, click the “Save changes” button.
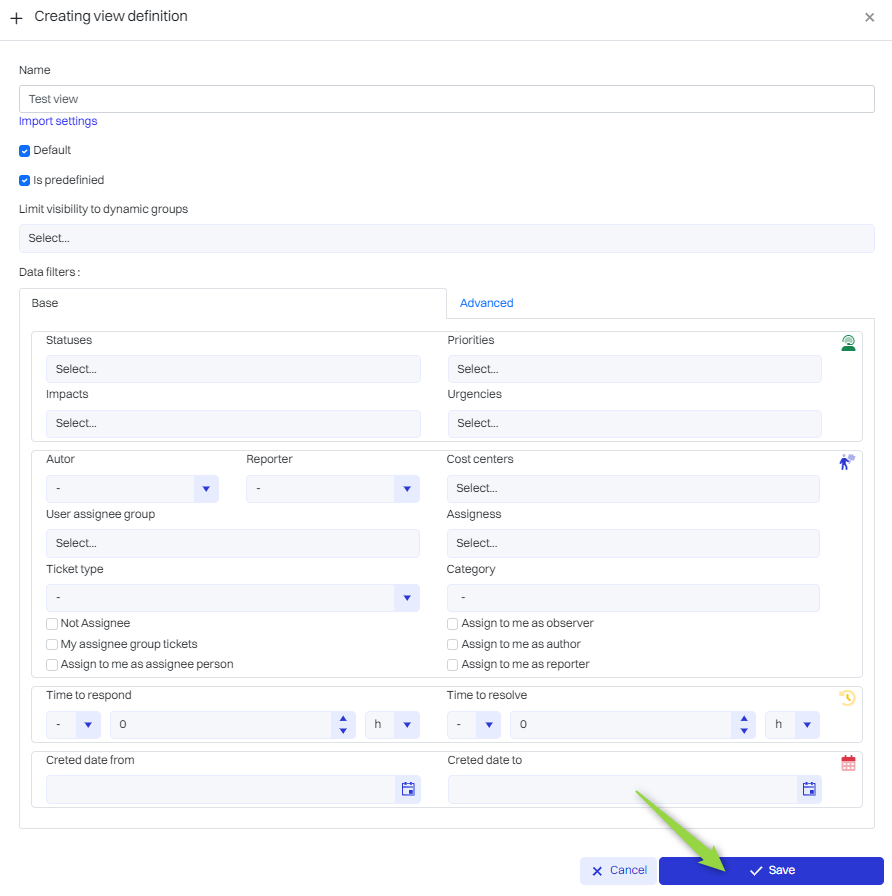
Customize the ticket list view
You can customize the ticket list view as you like, or you can create a new view with narrowed information using the “Add view” button.
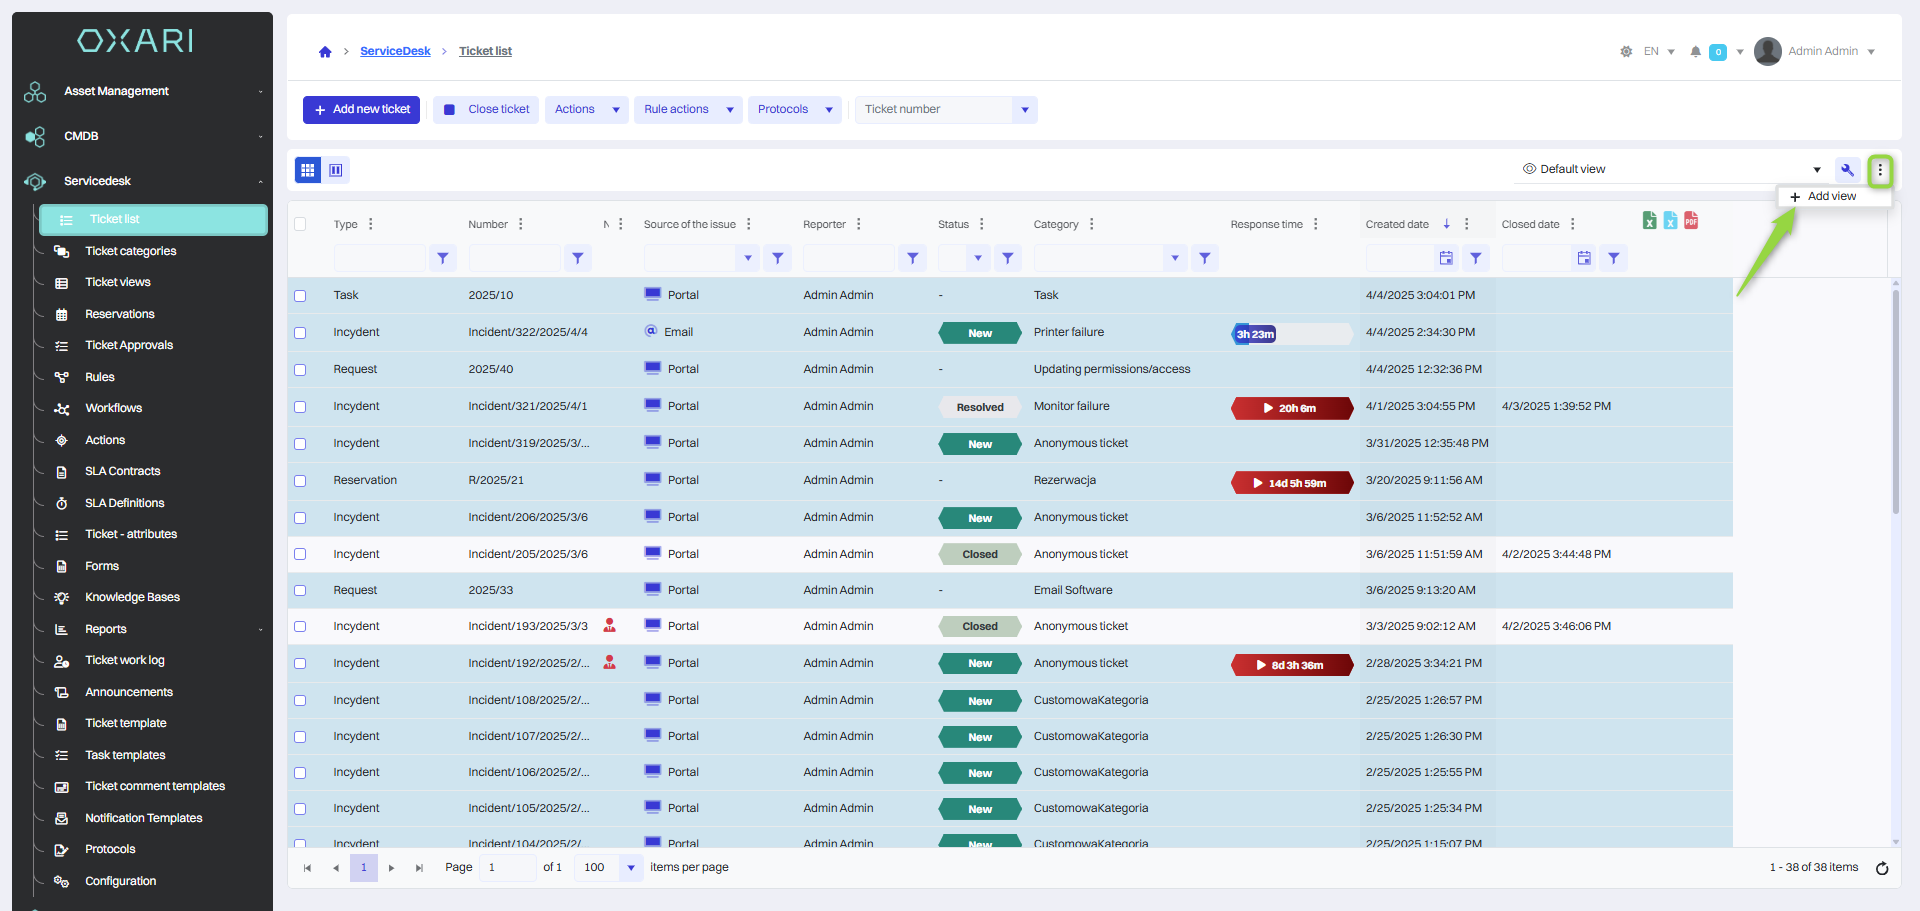
Then, in the “New view definition” window, you can personalize the view of the ticket list, the most important options described below:
|
1 |
Name - A field where the user enters the name of the newly created view. |
|
2 |
Import settings - You can retrieve a view from another already existing view. |
|
3 |
Default - Checking this box means that the view will be the default view. |
|
4 |
Is predefined - Checking this box allows you to restrict the view to dynamic groups. |
Fill in the desired fields and click the “Save” button.