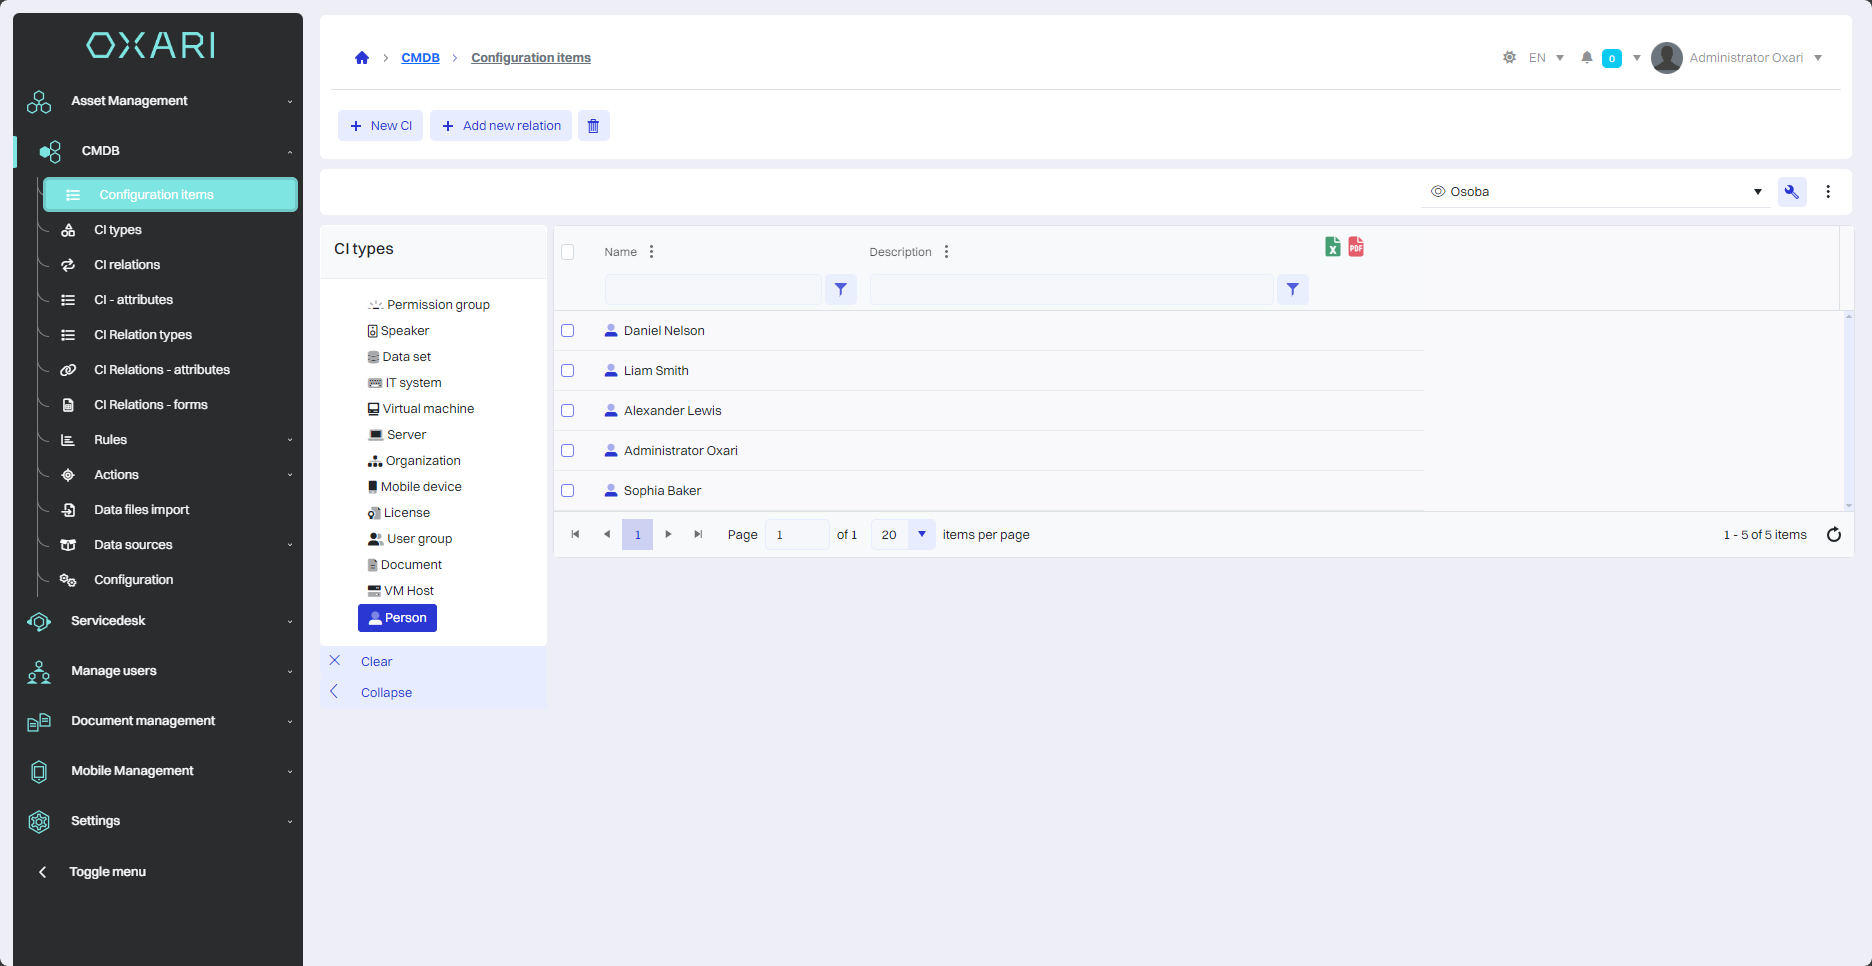
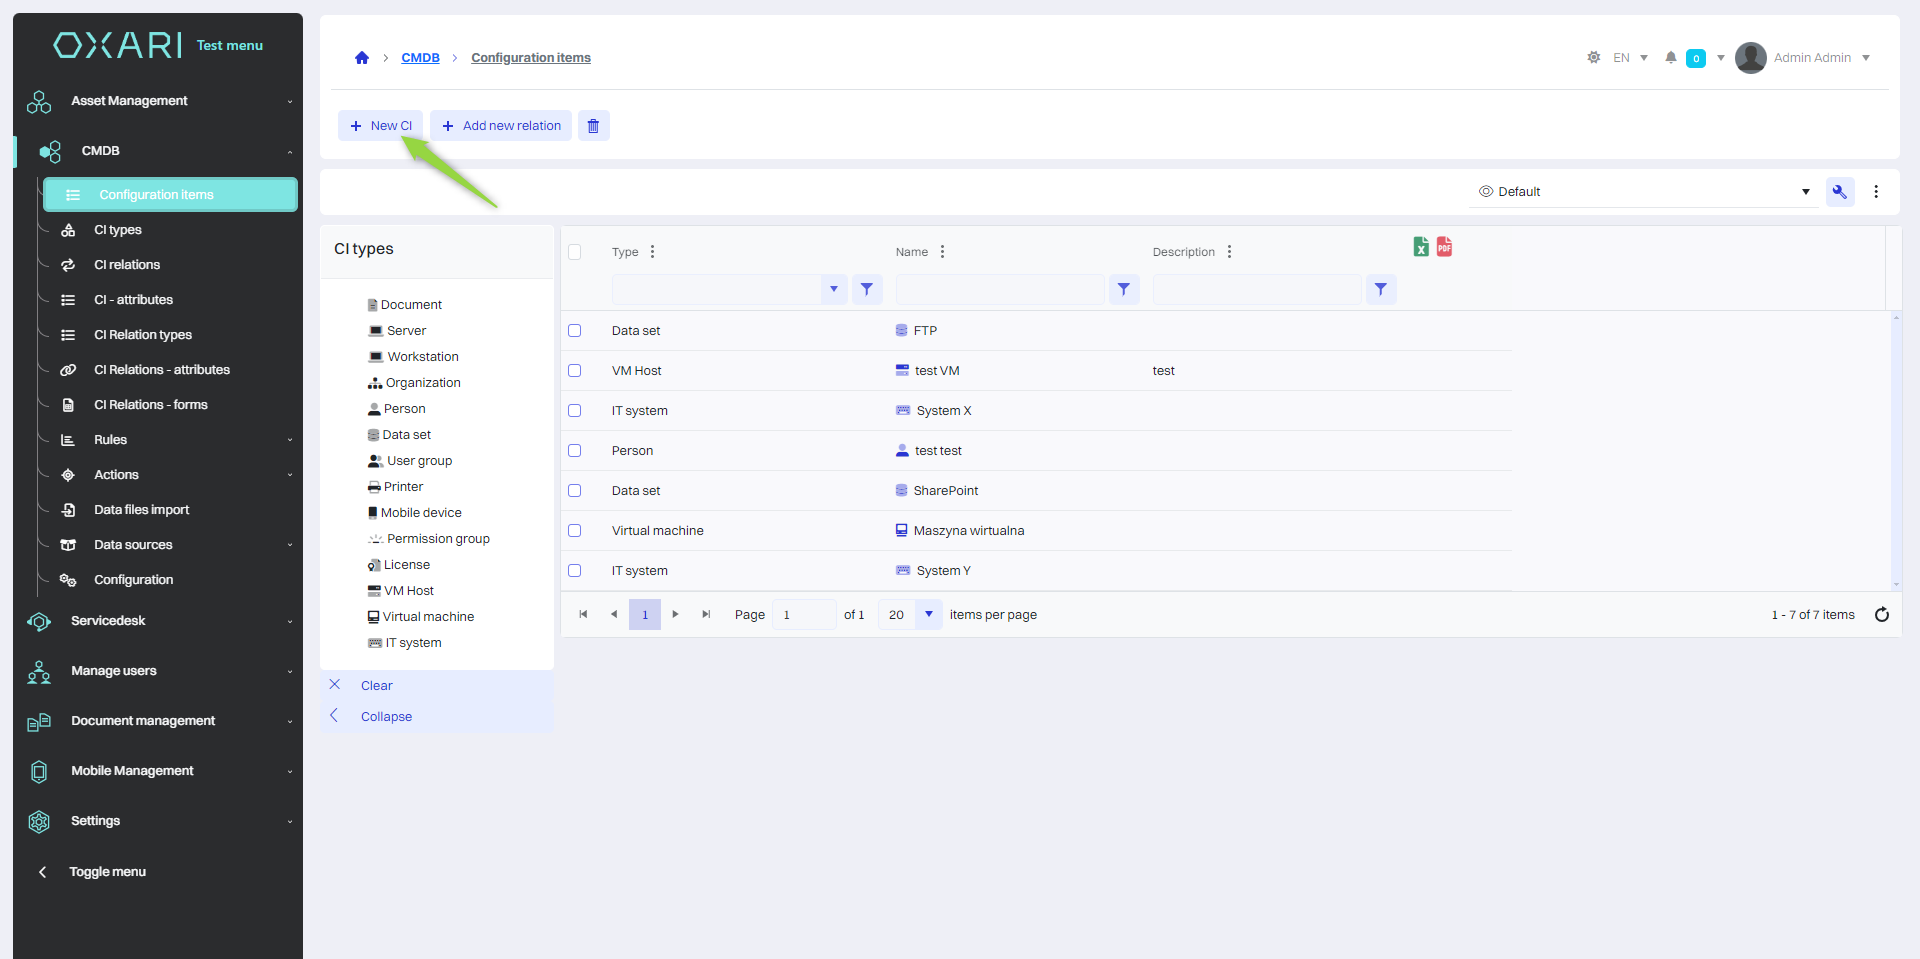
The Configuration Items (CI) section of the CMDB (Configuration Management Database) is the central component of IT service management, which is used to store information about an organization's most important IT assets. CIs can include physical hardware, software, systems, services or people who are responsible for managing and maintaining IT infrastructure. In this section, users can manage information about each item, such as servers, computers, mobile devices, applications and other IT assets. New items can be added here, existing items can be edited, their attributes and descriptions can be specified, and dependencies between them (relationships) can be mapped.
Configuration items (CI) can be retrieved from the domain by creating a synchronization with the directory service: Go >
New CI
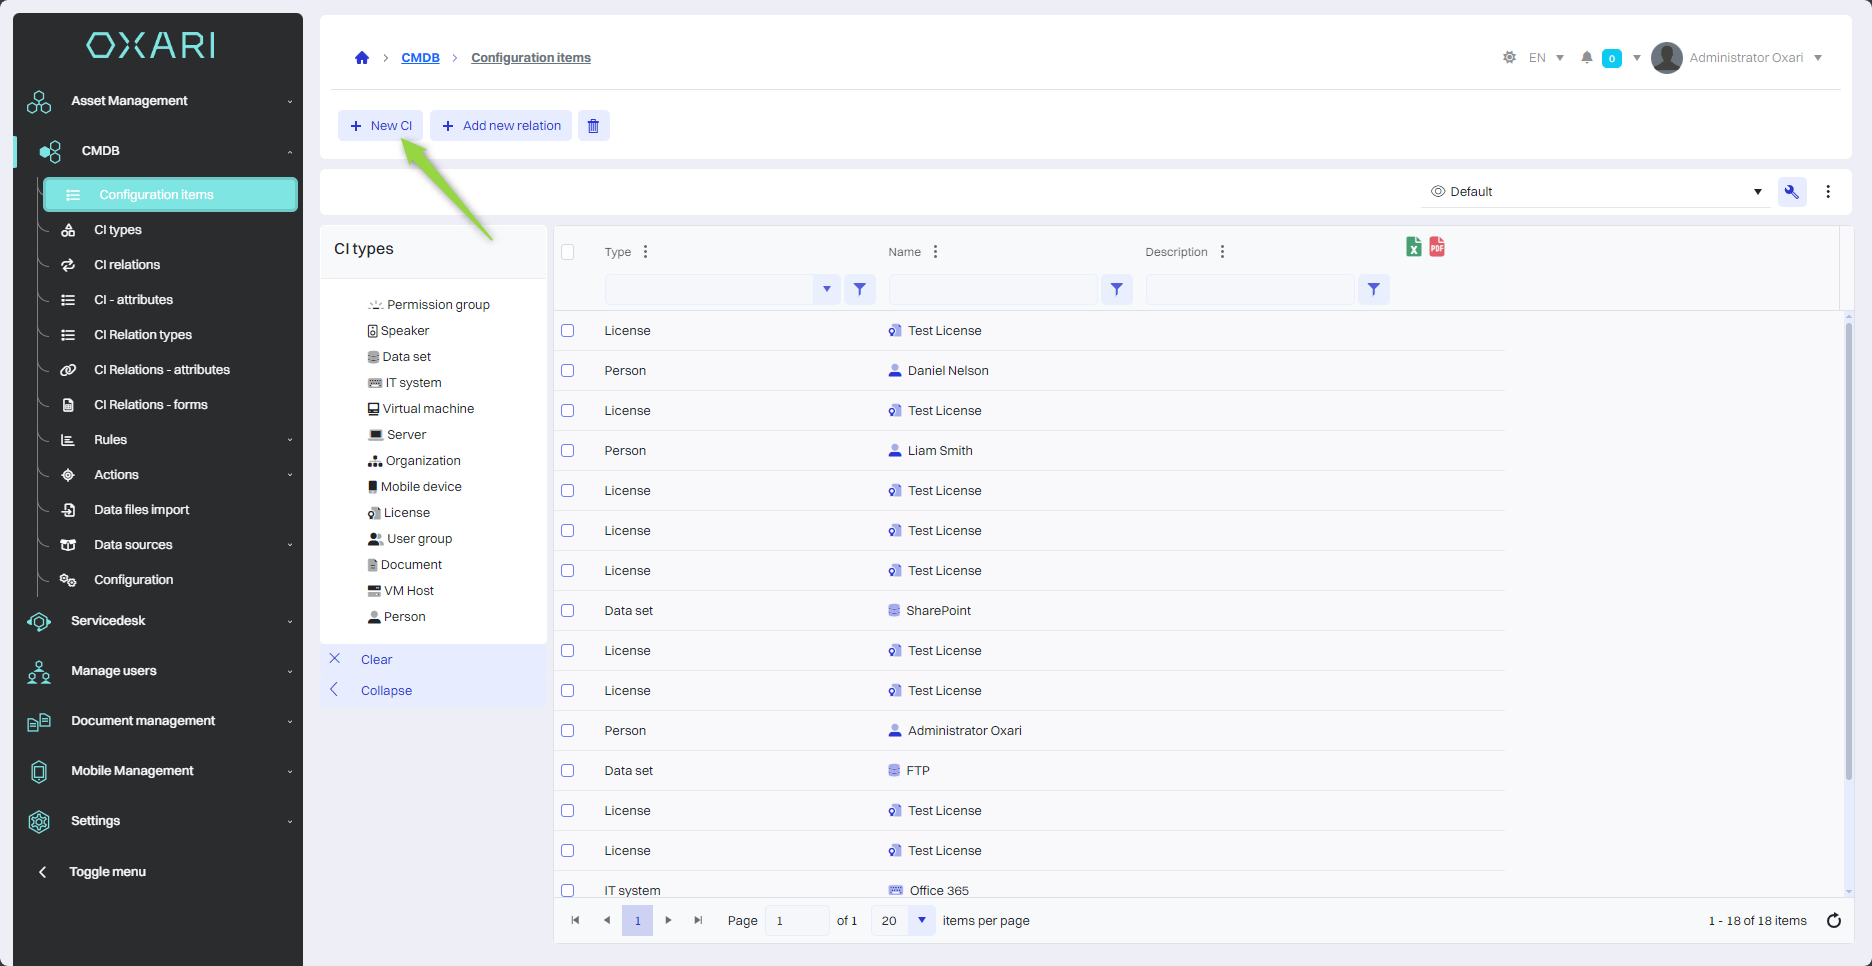
To add a new configuration item (CI), go to CMBD > Configuration items, then click the “New CI” button.
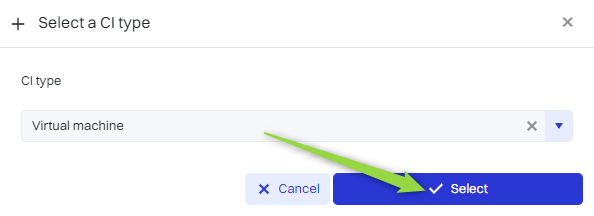
Selecting the type of CI
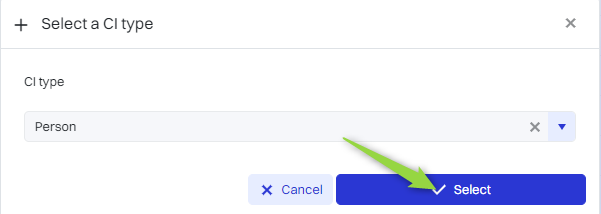
Next, in the “Select configuration item type” window, select the type of configuration item and click the “Select” button.
To configure CI types: Go >
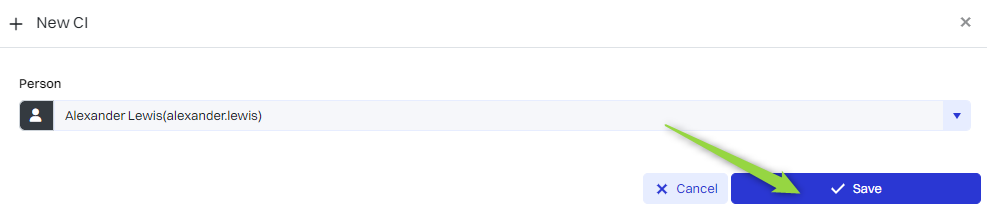
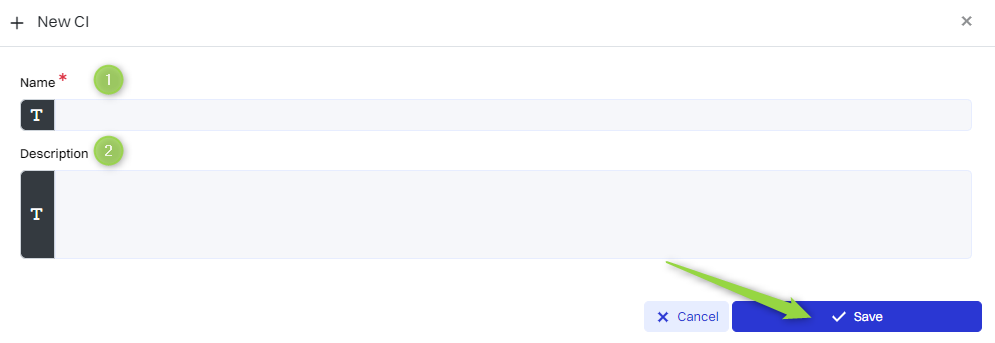
In this step, fill in the specified attributes of the CI type and click the “Save” button. Each CI type can consist of different attributes which can be configured.
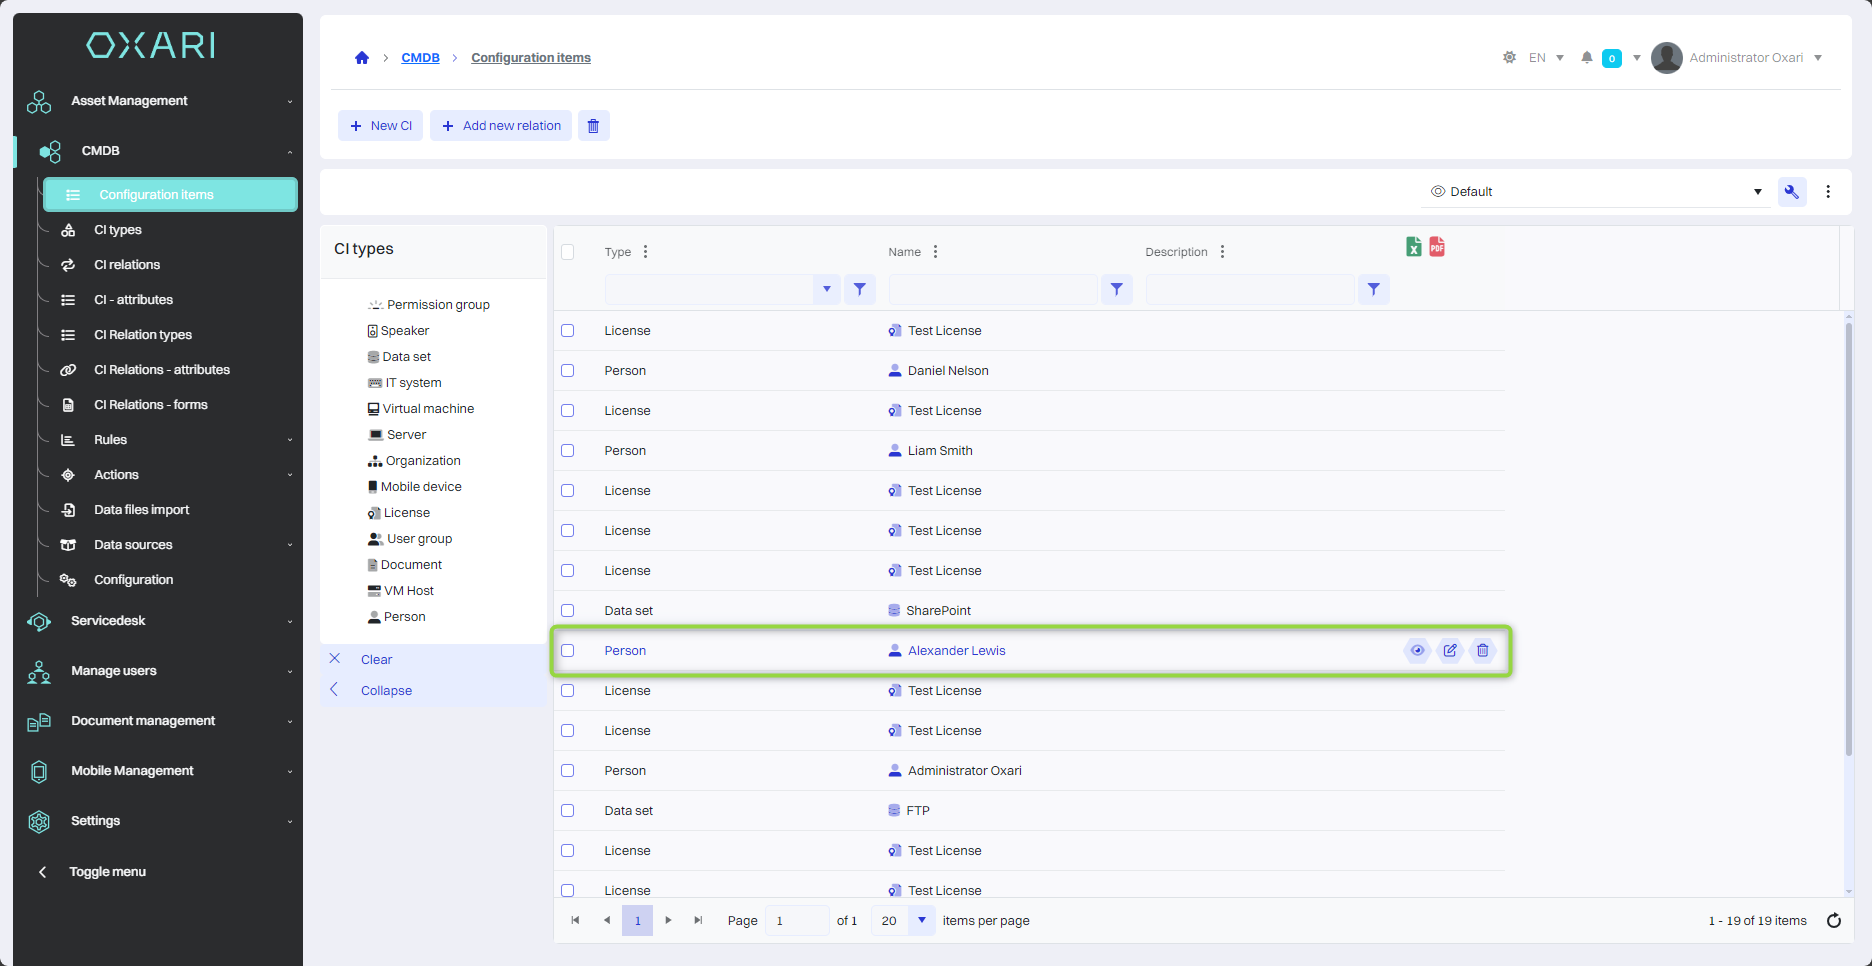
The configuration item has been added to the list.
Narrowing the CI view based on CI types
Narrowing the CI view based on CI types
To narrow the CI view for the CI type, go to CMDB > Configuration items, then click on the desired CI type.
The view is available, showing the CIs of the CI type.
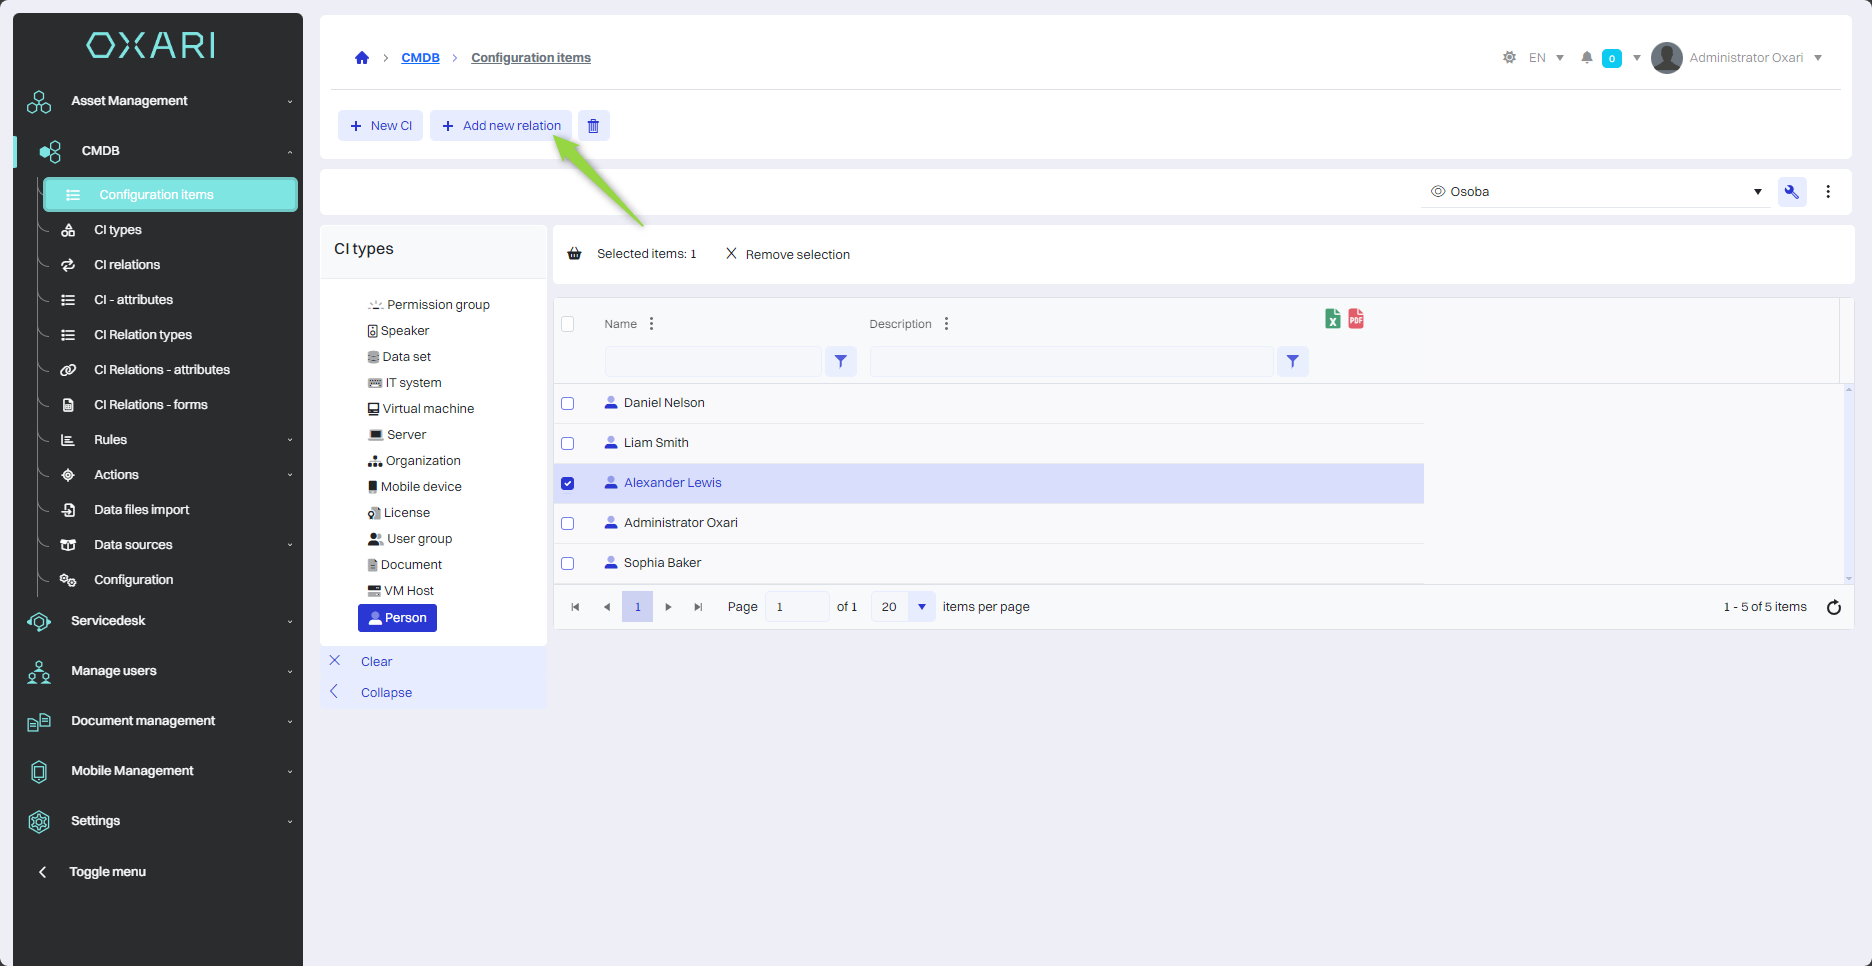
Adding a new CI relation
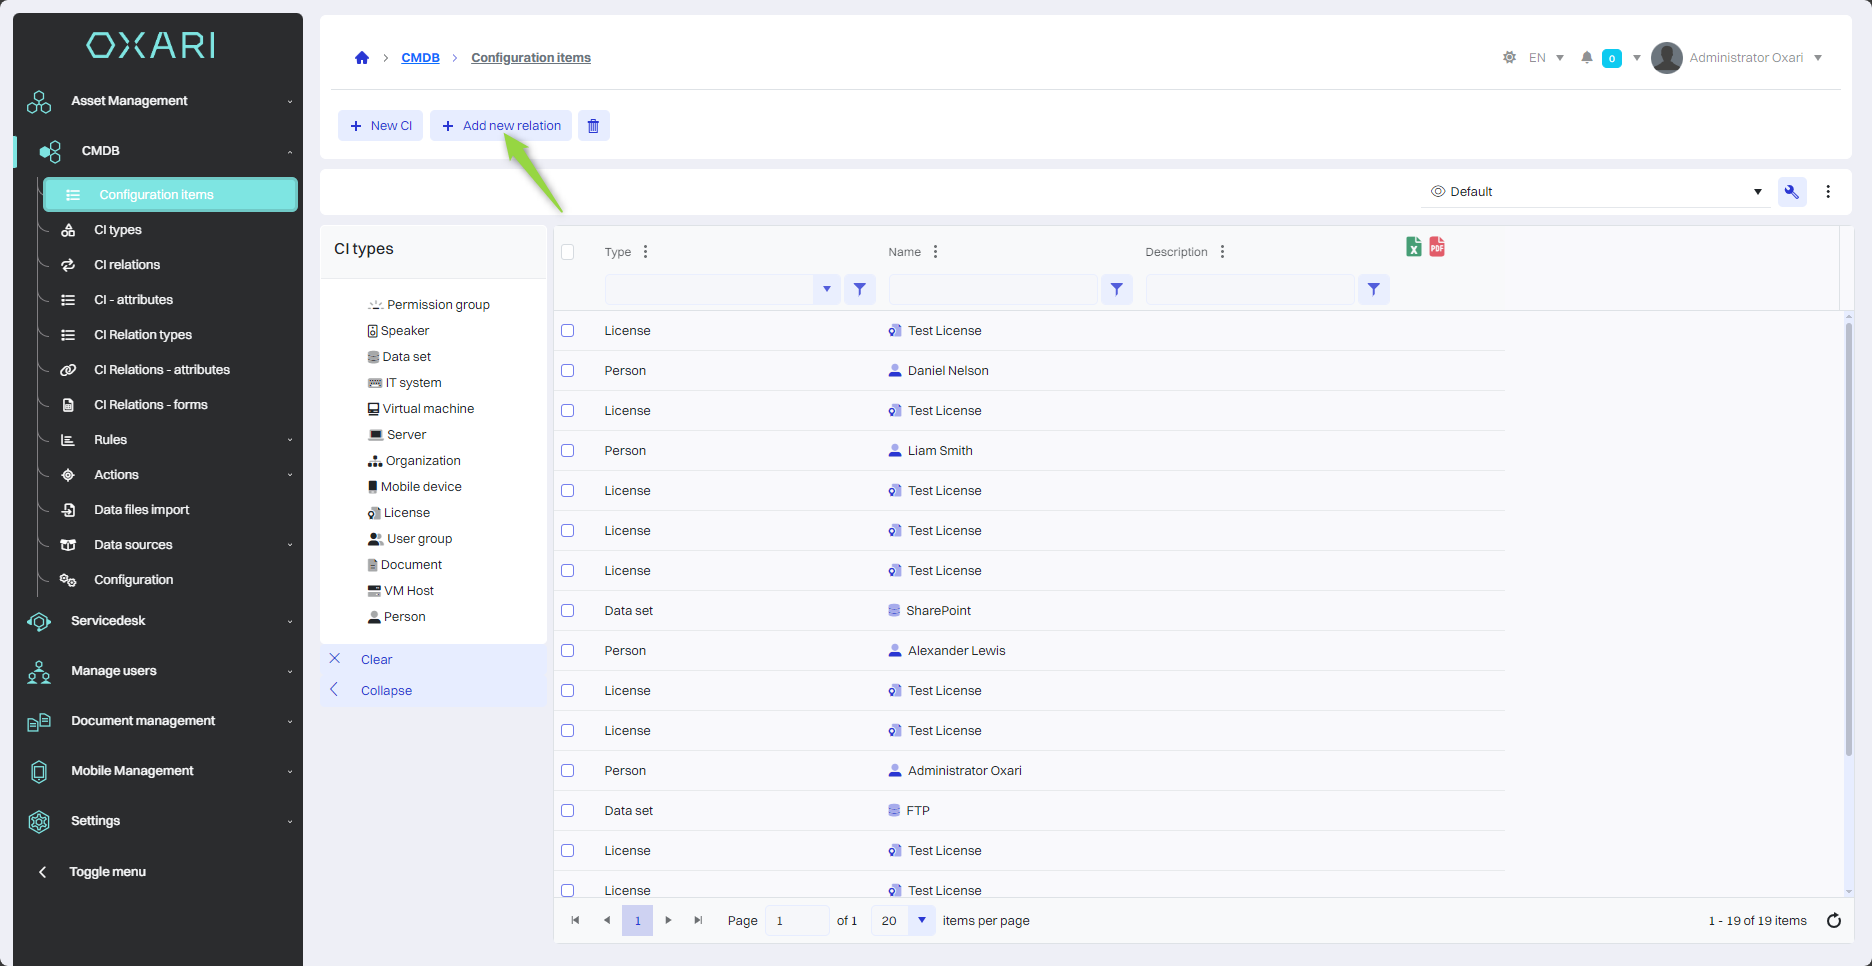
To add a new configuration item (CI) relation, go to the CMBD > Configuration items section, select the desired CI, and then click the “Add new relation” button.
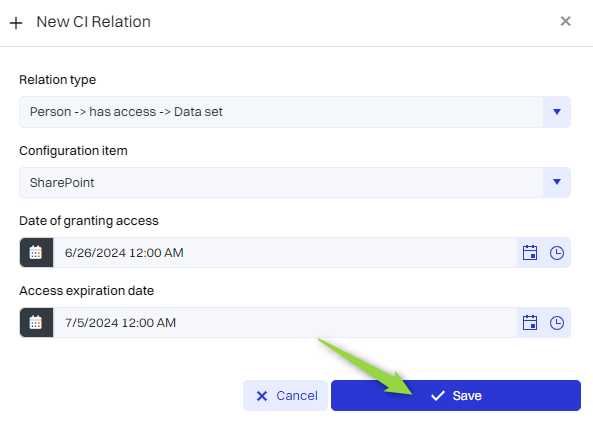
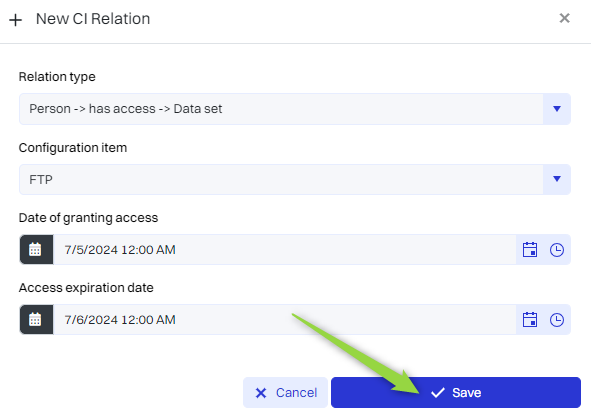
Next, the “New CI relation” window contains the items:
|
1 |
Relation type - Specifies the type of relation to be established between items. More about CI relation types: Go > |
|
2 |
Configuration item - Indicates which configuration item is to be associated with the current CI. |
Fill in the desired fields and click the “Save” button.
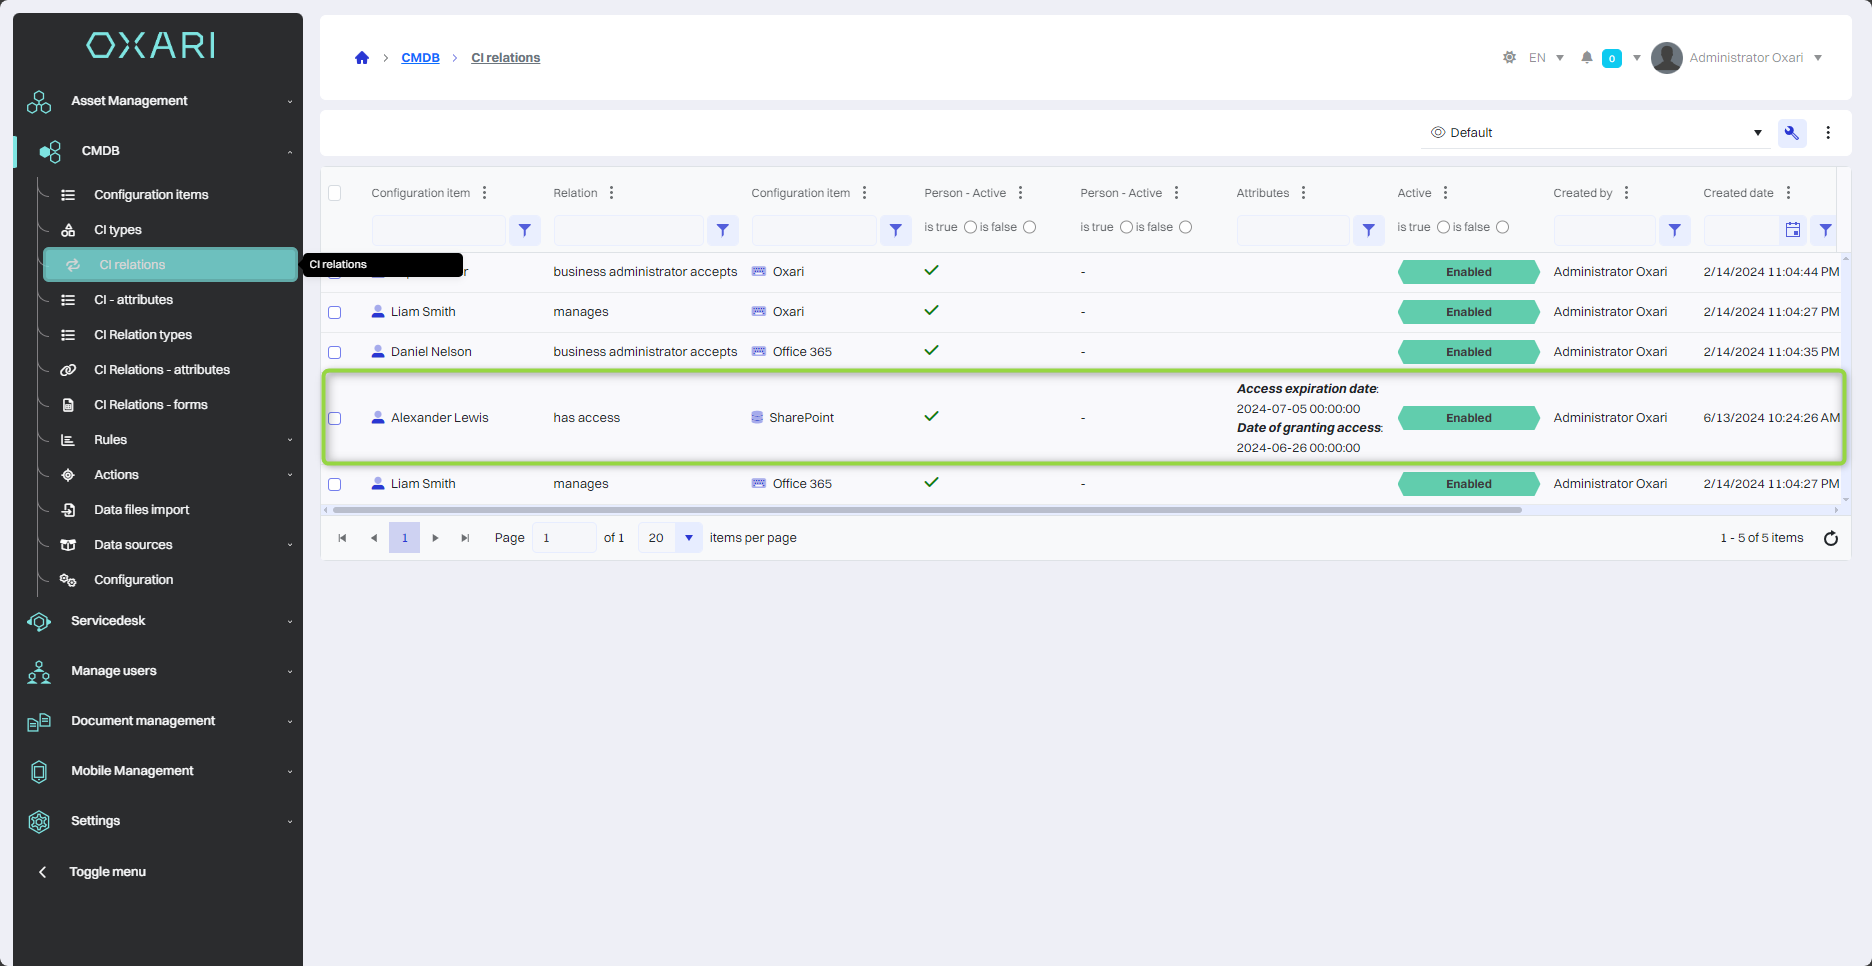
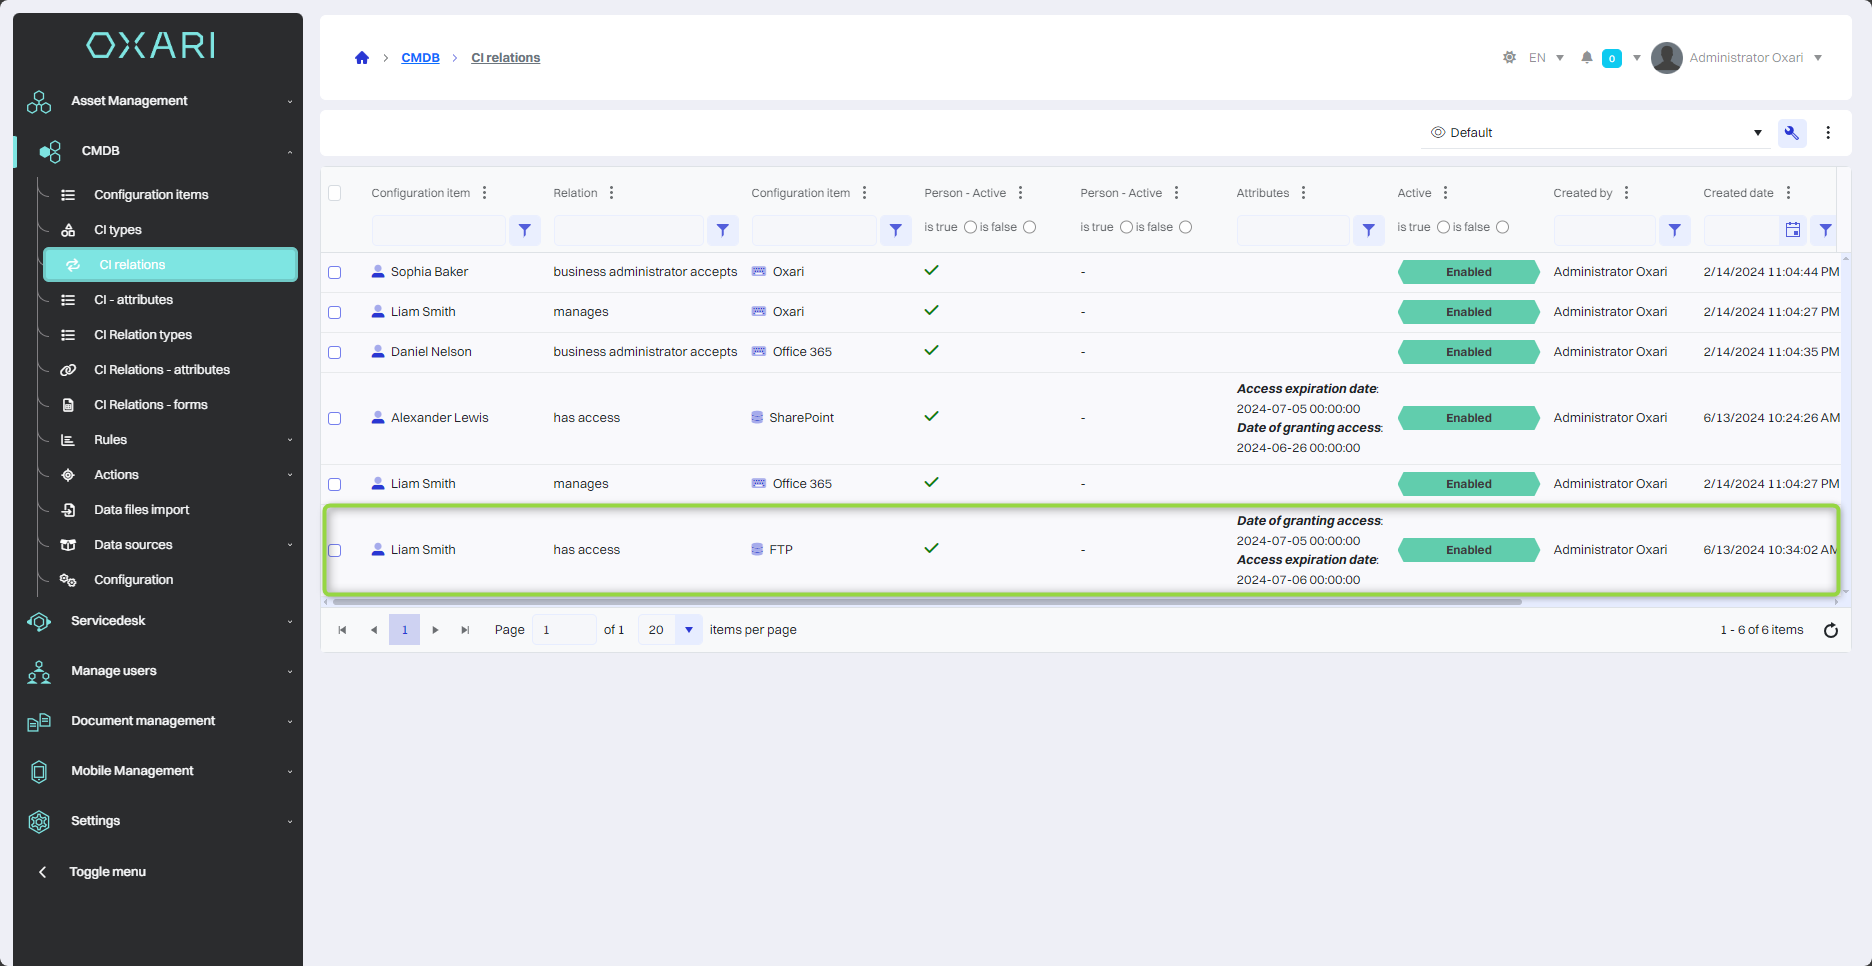
The relation has been added, it appears in the CMDB > CI Relations section.
CI detail view
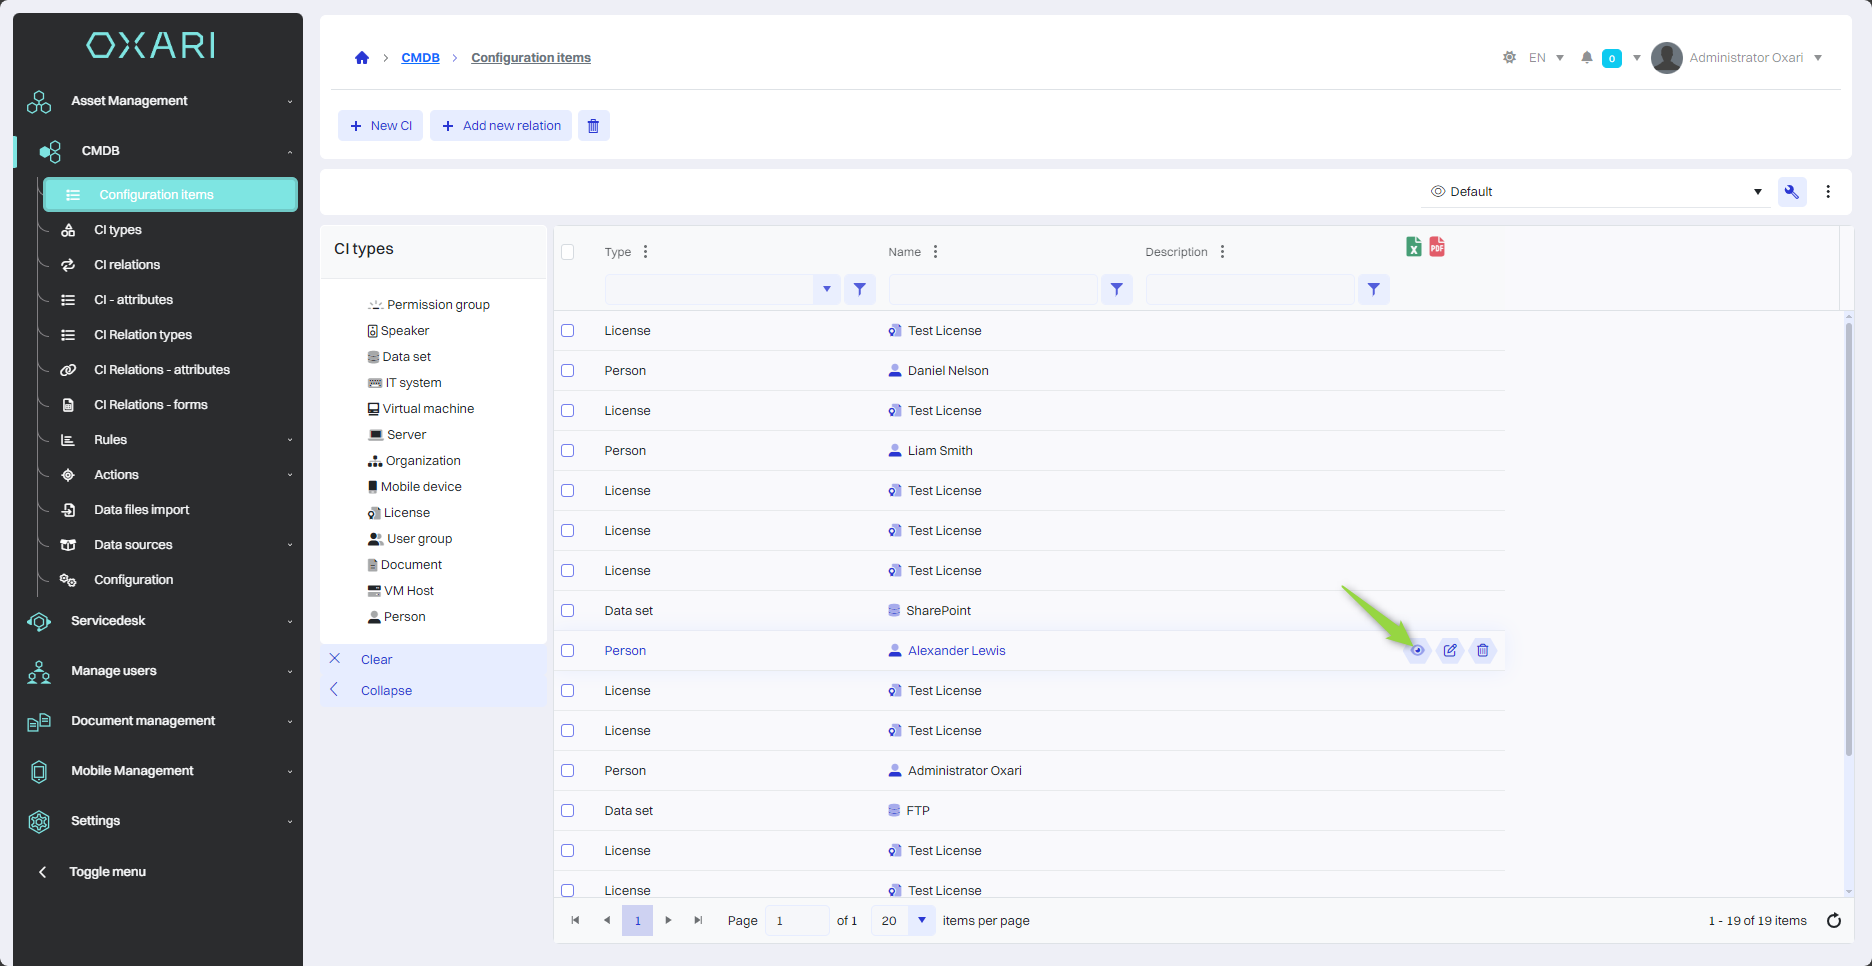
To open the Configuration Item (CI) detail view, go to CMBD > Configuration items, then click the “Details” button next to the desired CI.
CI views
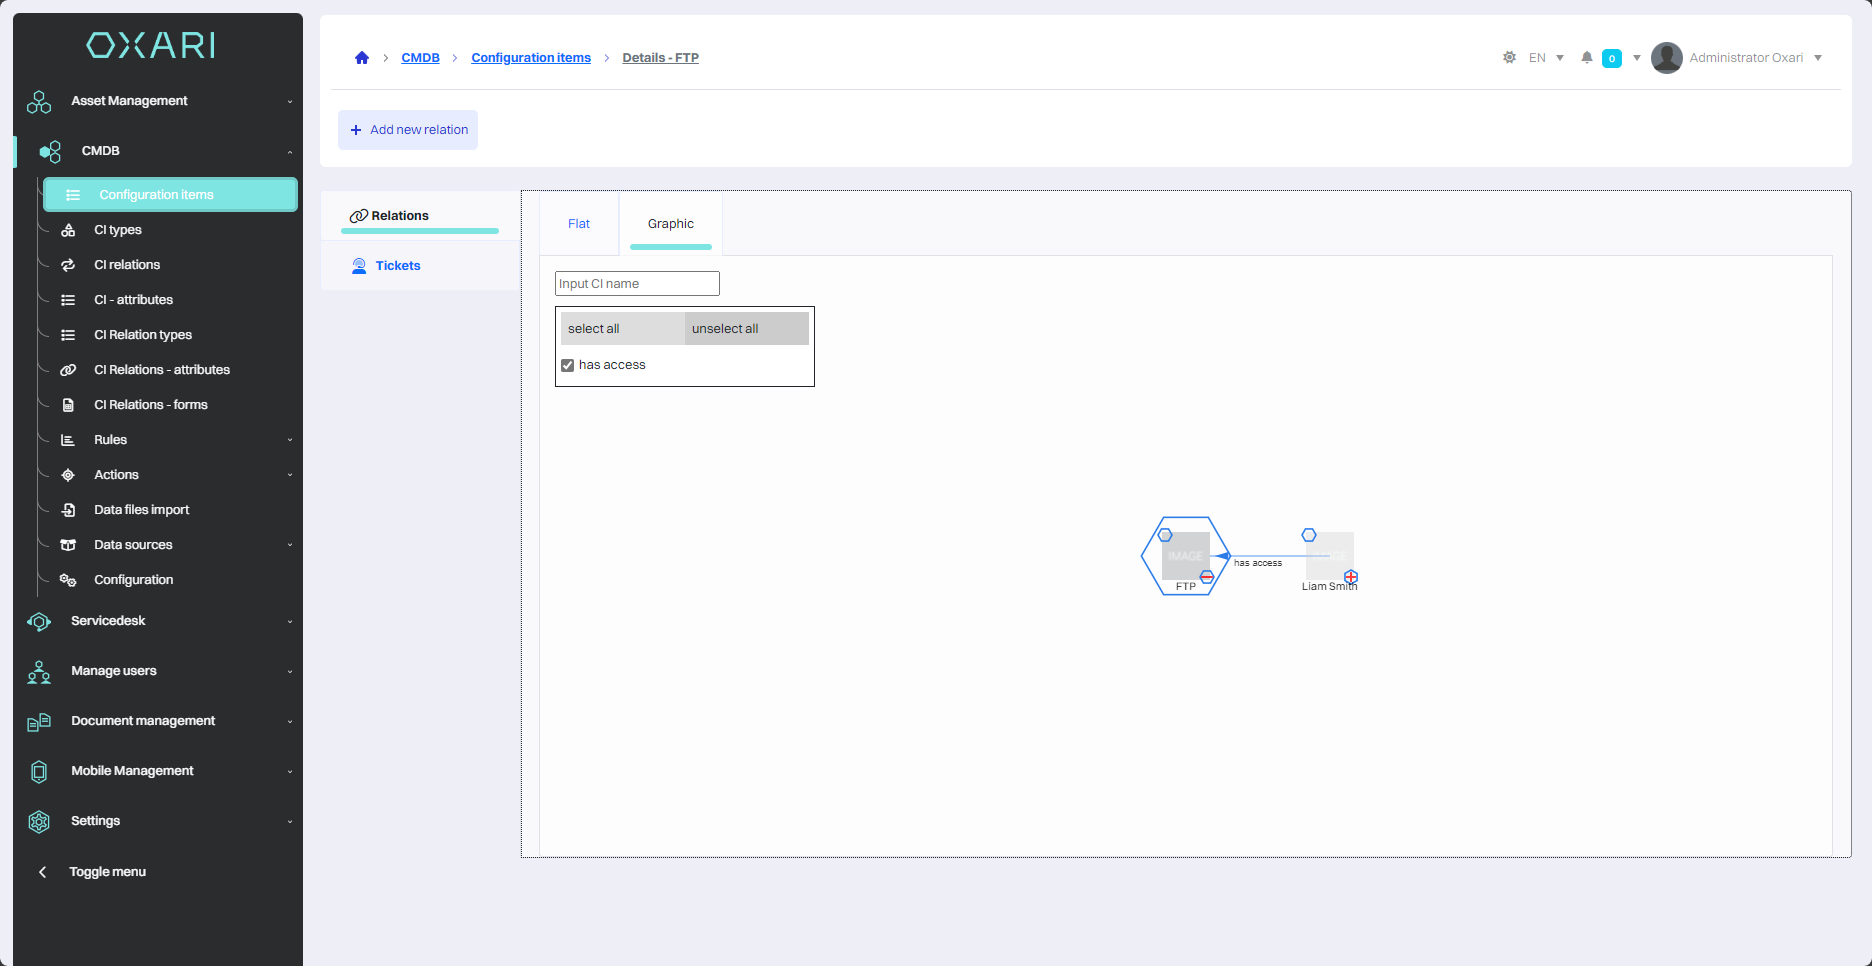
The detail view consists of a flat view and a graphical view.
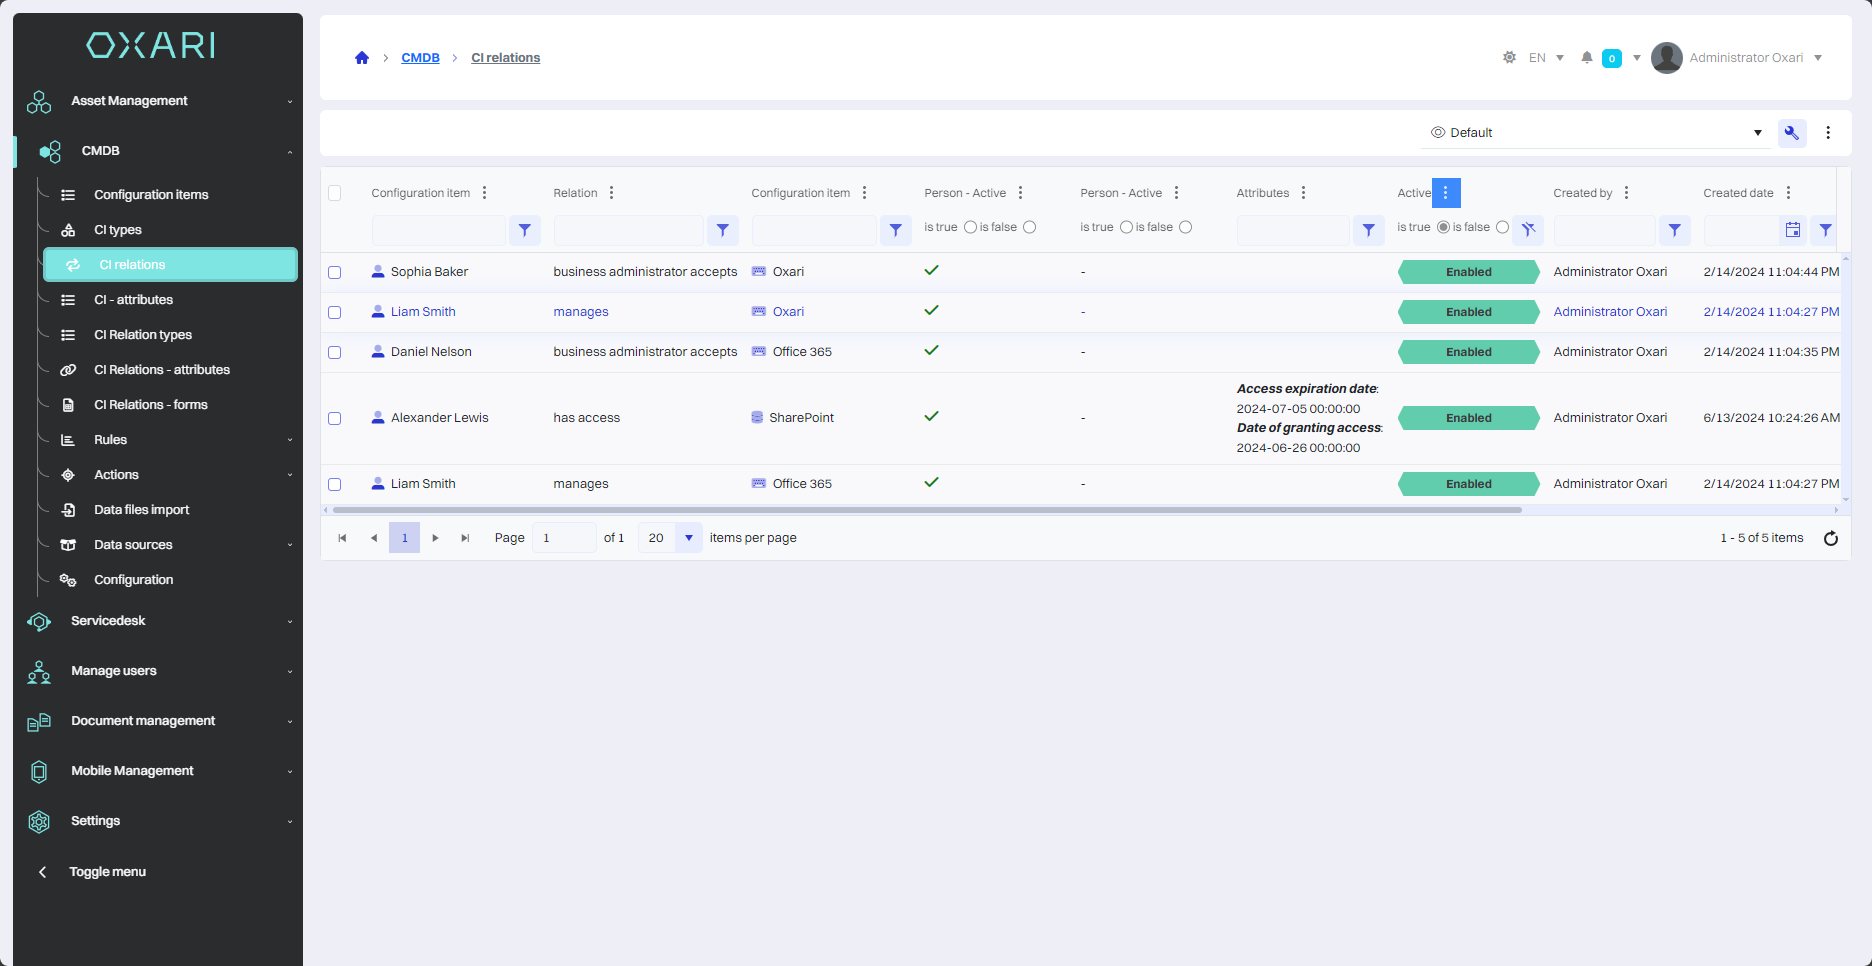
Flat view
This view shows a list of relations that have been configured for a configuration item. For each entry, you can see the name of the configuration item, the type of relation (e.g. “has access”, “manages”), the other configuration item with which the relation exists, and additional information such as attributes, activity status, the person who created the relation, and the date it was created.
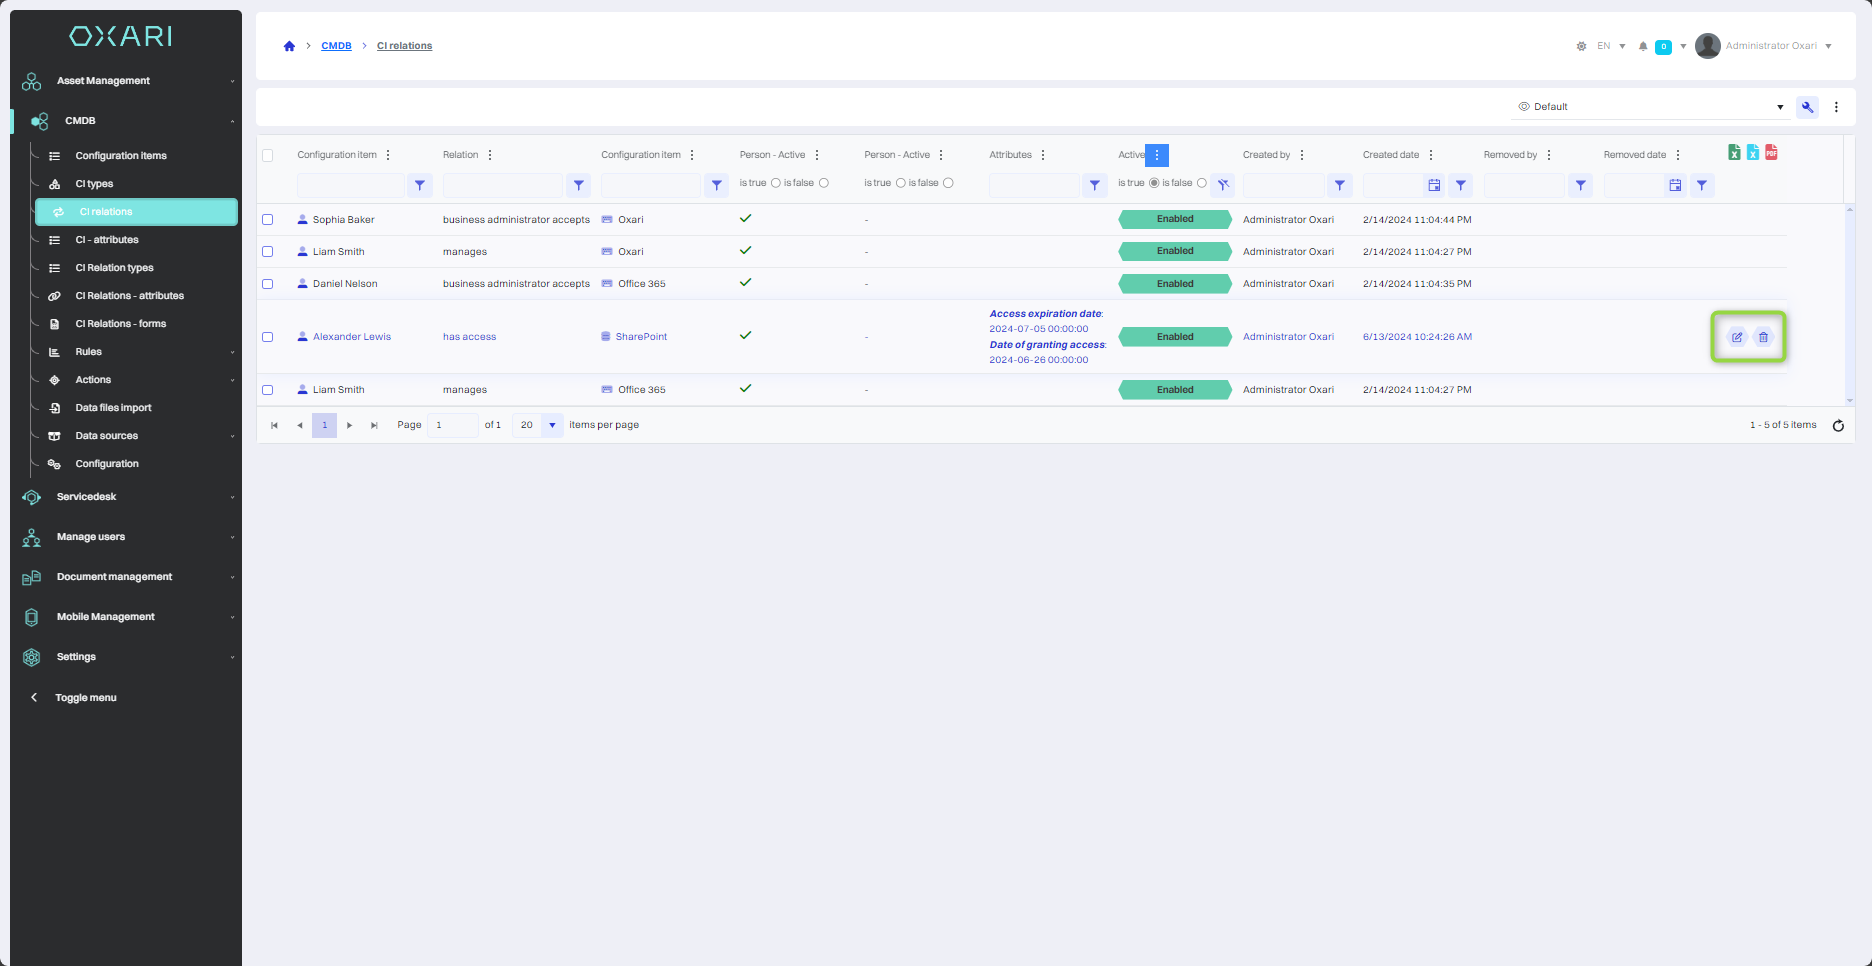
Editing/Deleting a CI relation in a flat view
To edit or delete a CI relation, hover over the desired relation, edit/delete buttons will appear.
Adding a CI relation in the flat view
To add a new configuration item (CI) relation, click the “Add new relation” button.
Then the “New CI relation” window contains the items:
|
1 |
Relation type - Specifies the type of relation to be established between items. More about CI relationship types: Go > |
|
2 |
Configuration item - Indicates which configuration item is to be associated with the current CI. |
Fill in the desired fields and click the “Save” button.
The relationship has been added to the list.
Graphical view
The graphical view is a visual representation of the relation between configuration items. It allows you to quickly understand how the items are related, for example, what IT systems are accessible through specific servers or network devices.
Graphical view options
In this view, the user is able to interact with CI items and relationships using a context menu, which is available by right-clicking.
Possible actions in the context menu include:
|
1 |
For workspace (blank space in the diagram):
|
|
2 |
For a specific CI item:
|
|
3 |
For CI relation:
|
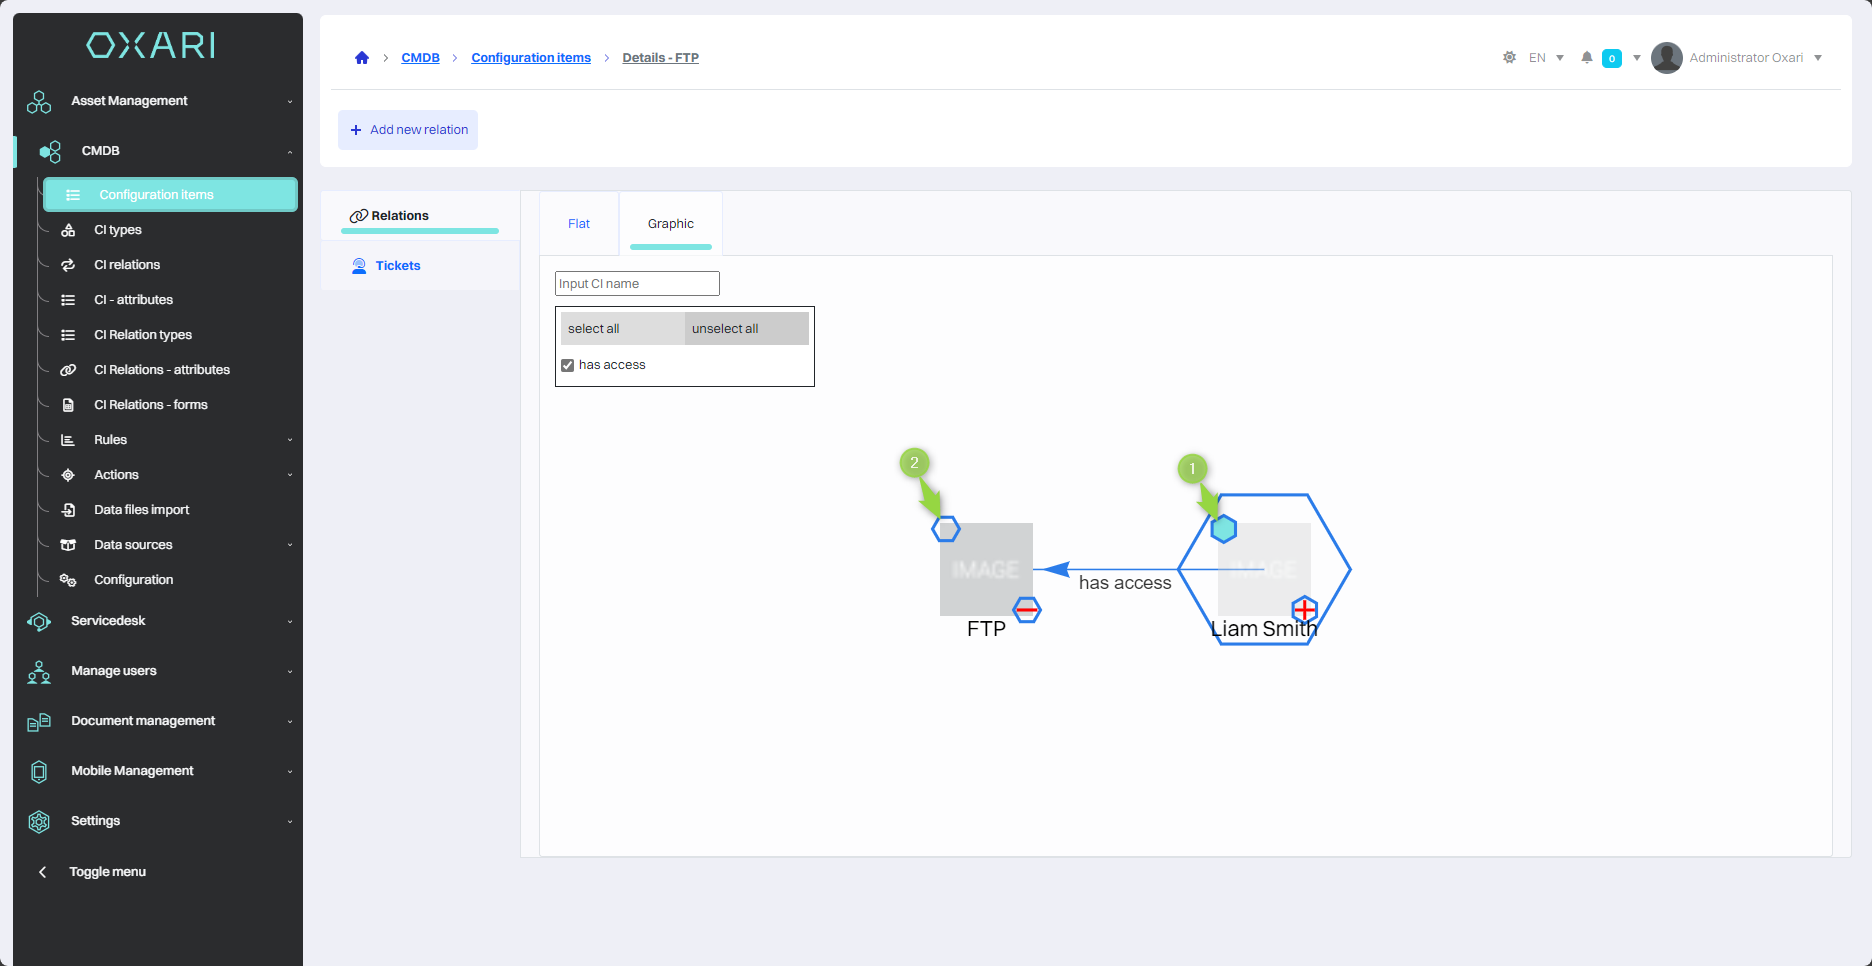
Location of items in the graphical view
On the graphic view, it is also possible to manage the display of individual CIs using the green hexagons next to their names. The user can use the left mouse button to select or deselect these hexagons, which affects how the items are presented in the graphic diagram.
|
1 |
Green hexagon - When a green hexagon is selected next to the CI, it means that its position on the graphic diagram will be locked and will not be automatically modified the next time the view is generated. This allows you to maintain a fixed view structure and manually manage the position of items. |
|
2 |
White hexagon - When the hexagon is white, it means that the algorithm generating the graphical view will have the freedom to automatically place this CI in the most optimal position in the diagram, depending on the existing relation and layout of other items. |
Editing/Deleting a CI configuration item
To edit or delete a configuration item, go to CMDB > Configuration items. Hover over the desired configuration item. The edit/delete buttons will be displayed.

Virtual Machine
In order to add a new virtual machine, go to CMDB > Configuration Items. Click the "New CI" button.
Select "Virtual Machine" from the drop-down list and click the "Select" button.
Filling out the virtual machine
Then fill in the required fields and click the "Save" button.
|
1 |
Name - name of virtual machine. |
|
2 |
Description - virtual machine description. |
How to configure VMware with virtual machine: Go >
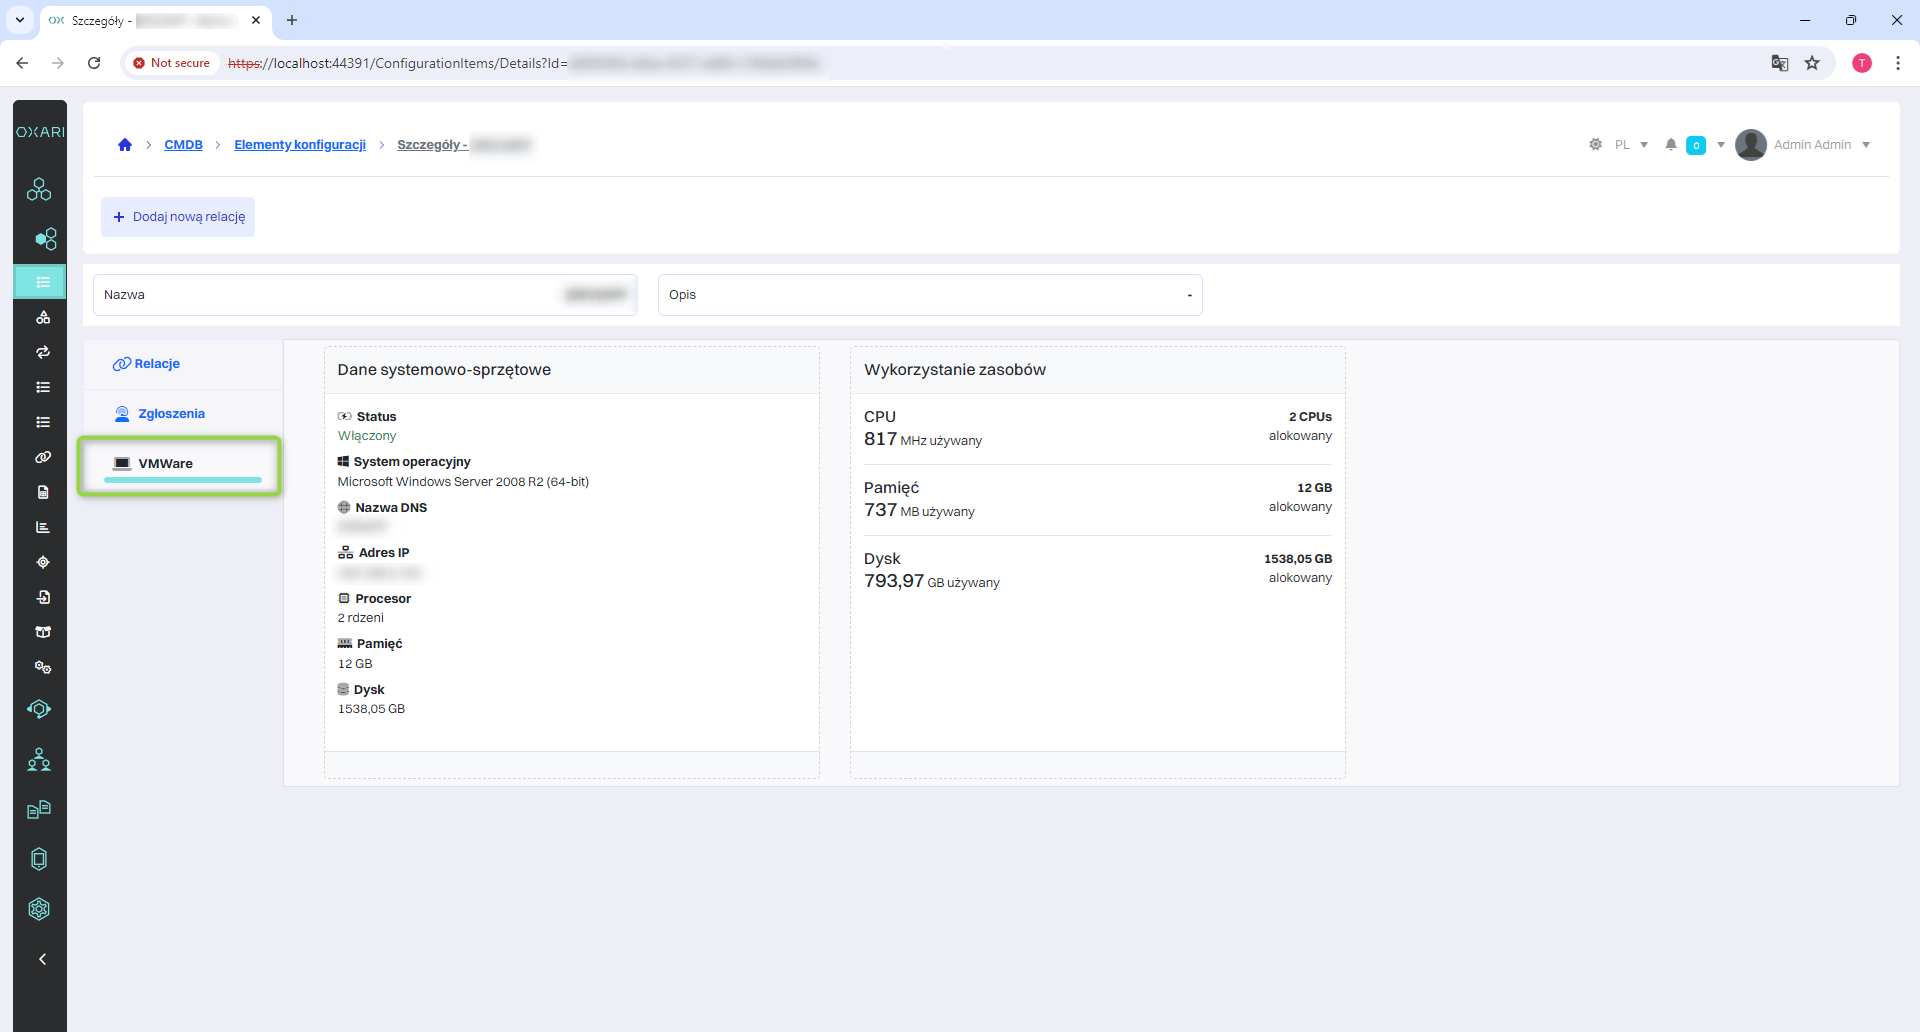
Showing information about virtual machine
Click the “details” icon.
Go to section “VMware”.
Editing/Deleting
Virtual machine can be edited and deleted by using these buttons.
VM Host
In order to add VM Host go to CMDB > Configuration items. Click “New CI” button.

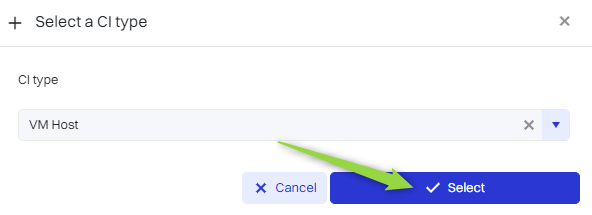
Select “VM Host” from the drop-down list and click the “Select” button
Filling out the VM Host
Then fill in the required fields and click the "Save" button.
|
1 |
Name - name of VM Host. |
|
2 |
Description - VM Host description. |
How to configure VMware with VM Host: Go >
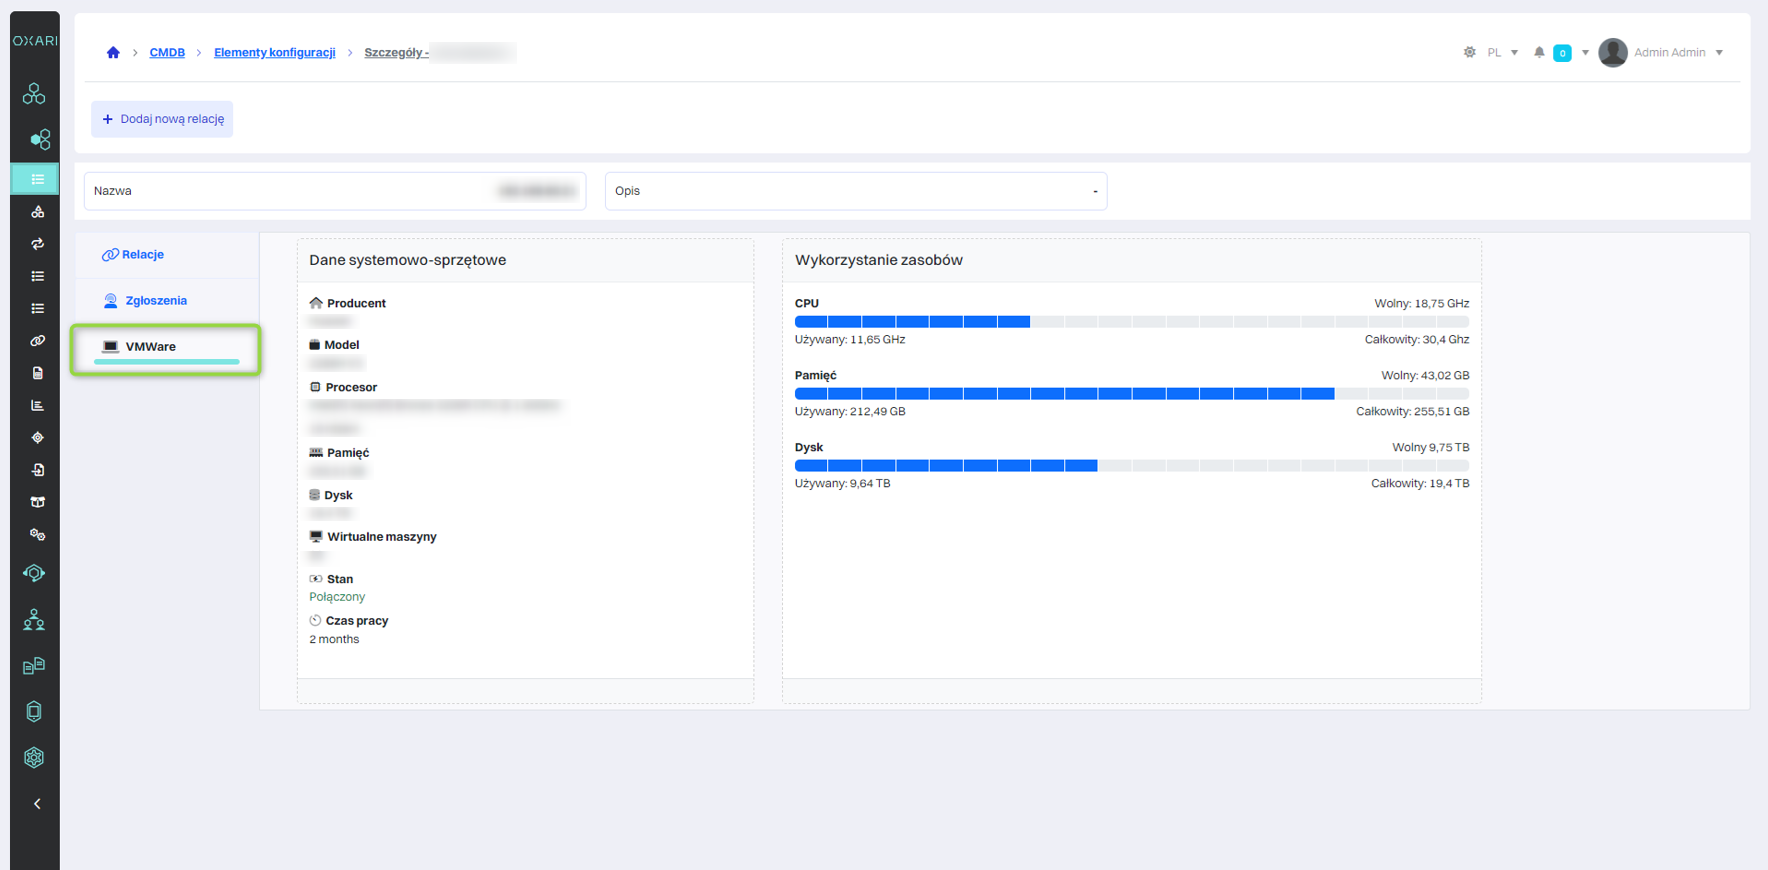
View information about VM Host
Click the "details" icon.
Go to the VMware tab.
Editing/Deleting
VM Host e can be edited and deleted by using these buttons.