Rules act as automation mechanisms that trigger specific actions in response to user management events. These events include:
-
Identity and access management:
-
User account activation
-
Deactivation of a user account
-
Deletion of an organizational structure
-
Deletion of location structure
-
-
Update information:
-
Update person
-
Update person login
-
Update organizational structure
-
Update a person's contact
-
-
Adding new items:
-
Assigning a location structure to a person
-
Adding a new person
-
Adding a new location structure
-
Adding a new login to a person
-
-
Expanding organizational structures:
-
Updating a location structure
-
Adding a new organizational structure
-
Assigning an organizational structure to a person
-
Adding a new contact to a person
-
Deactivating a user
-
Each of these events can initiate automated processes, such as sending an email, adding a request or importing an absence. Rules allow you to create an effective system that supports document management by automating processes.
For more on actions: Go >
Read more about tickets: Go >
It is crucial to design rules that are simple and thoughtful, with unambiguous names indicating their function or application. It is also important to describe each rule in detail to make it easy to understand its purpose and operation, which provides transparency and efficiency in management and makes the IT team's work easier.
New rule
To add a new rule, go to User Management > Rules, and then click the "New Rule" button.

Filling in the rule
Next, in the "New rule definition" window, fill in the desired fields and click the "Save" button.
|
1 |
Rule activation - Checking the "Active" option activates the rule. |
|
2 |
Name - Used to identify the rule. |
|
3 |
Description - Allows you to understand the purpose of the rule. |
|
4 |
Trigger event - Select the event that will trigger the rule, for example, "Add new organizational structure" (Optional). |
|
5 |
Schedule(tasks) - Specify when the rule is to be active (Optional). More regarding schedules: Go > |
|
6 |
Position - Determine the order in which rules are executed, if there are more rules. |
|
7 |
Starting rule - Optional setting of the rule to be the trigger for the current rule. |

Specifying the action/condition of the rule
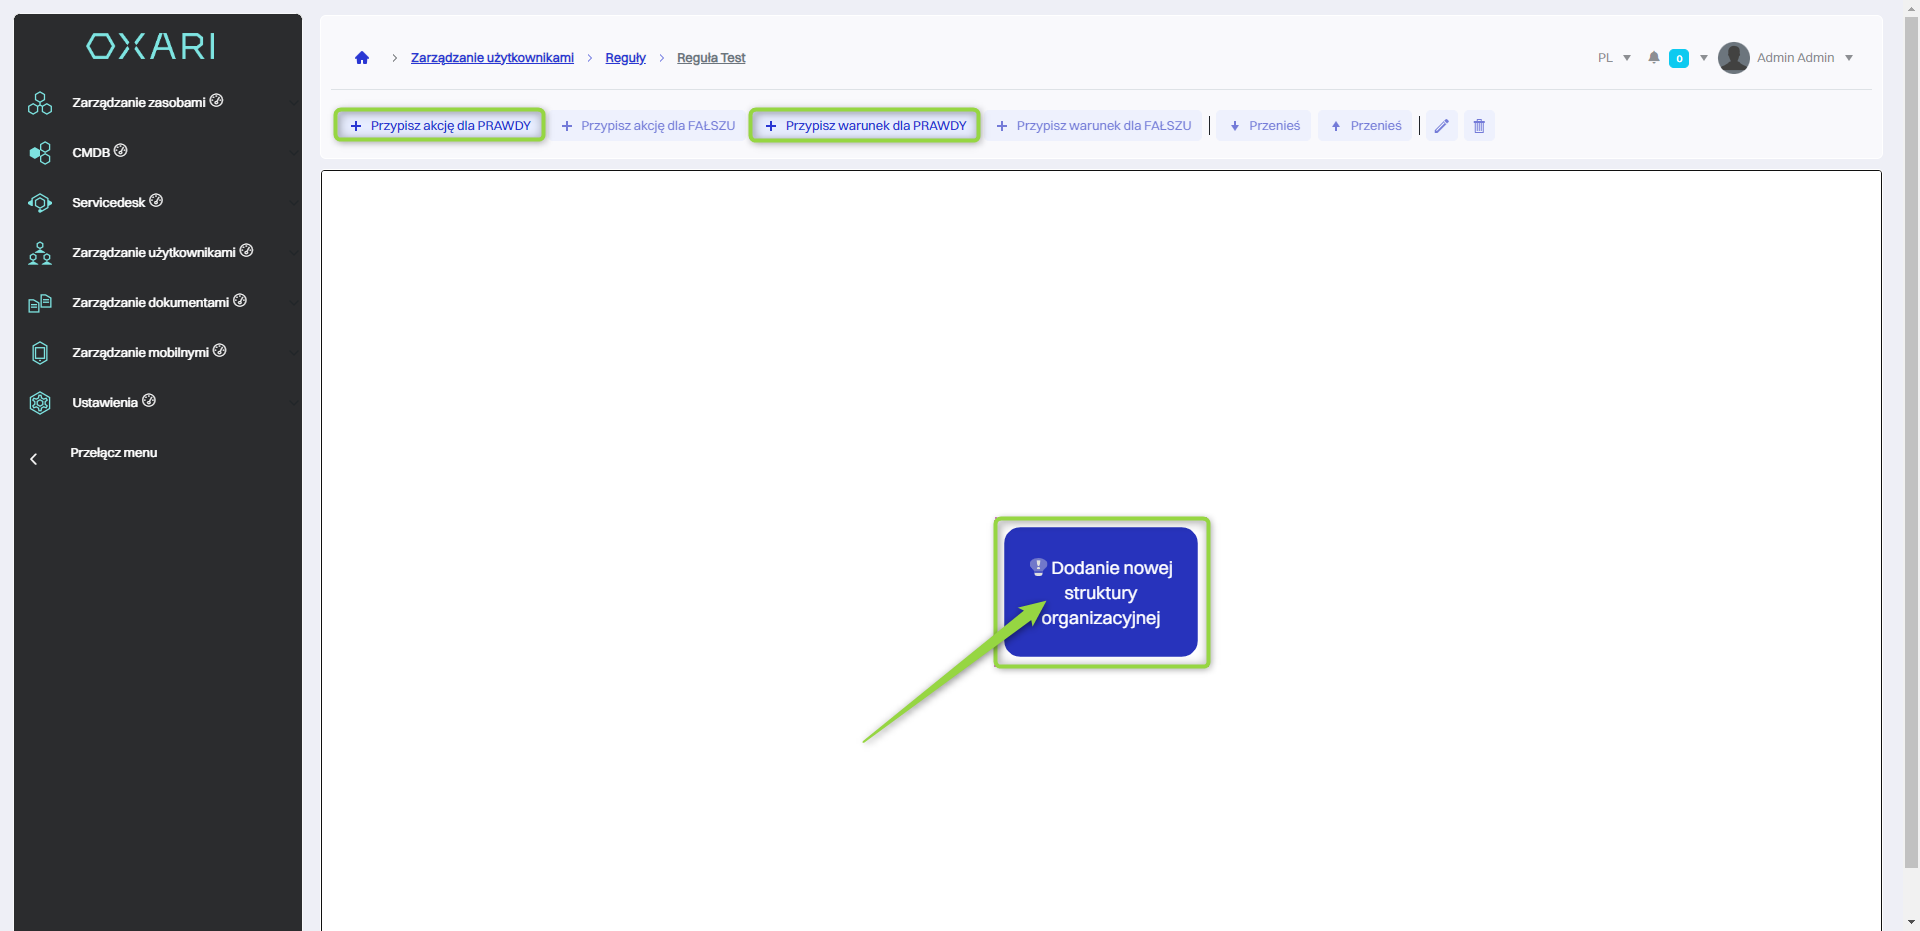
After creating a rule, the user will be taken to the rule creation window. Rules in the OXARI system work on an "if-then" basis, where certain conditions (if) trigger certain actions (this). In this case, the triggering event is "Add new organizational structure." To assign an action or condition to the event, click on the tile in question.
Assign action
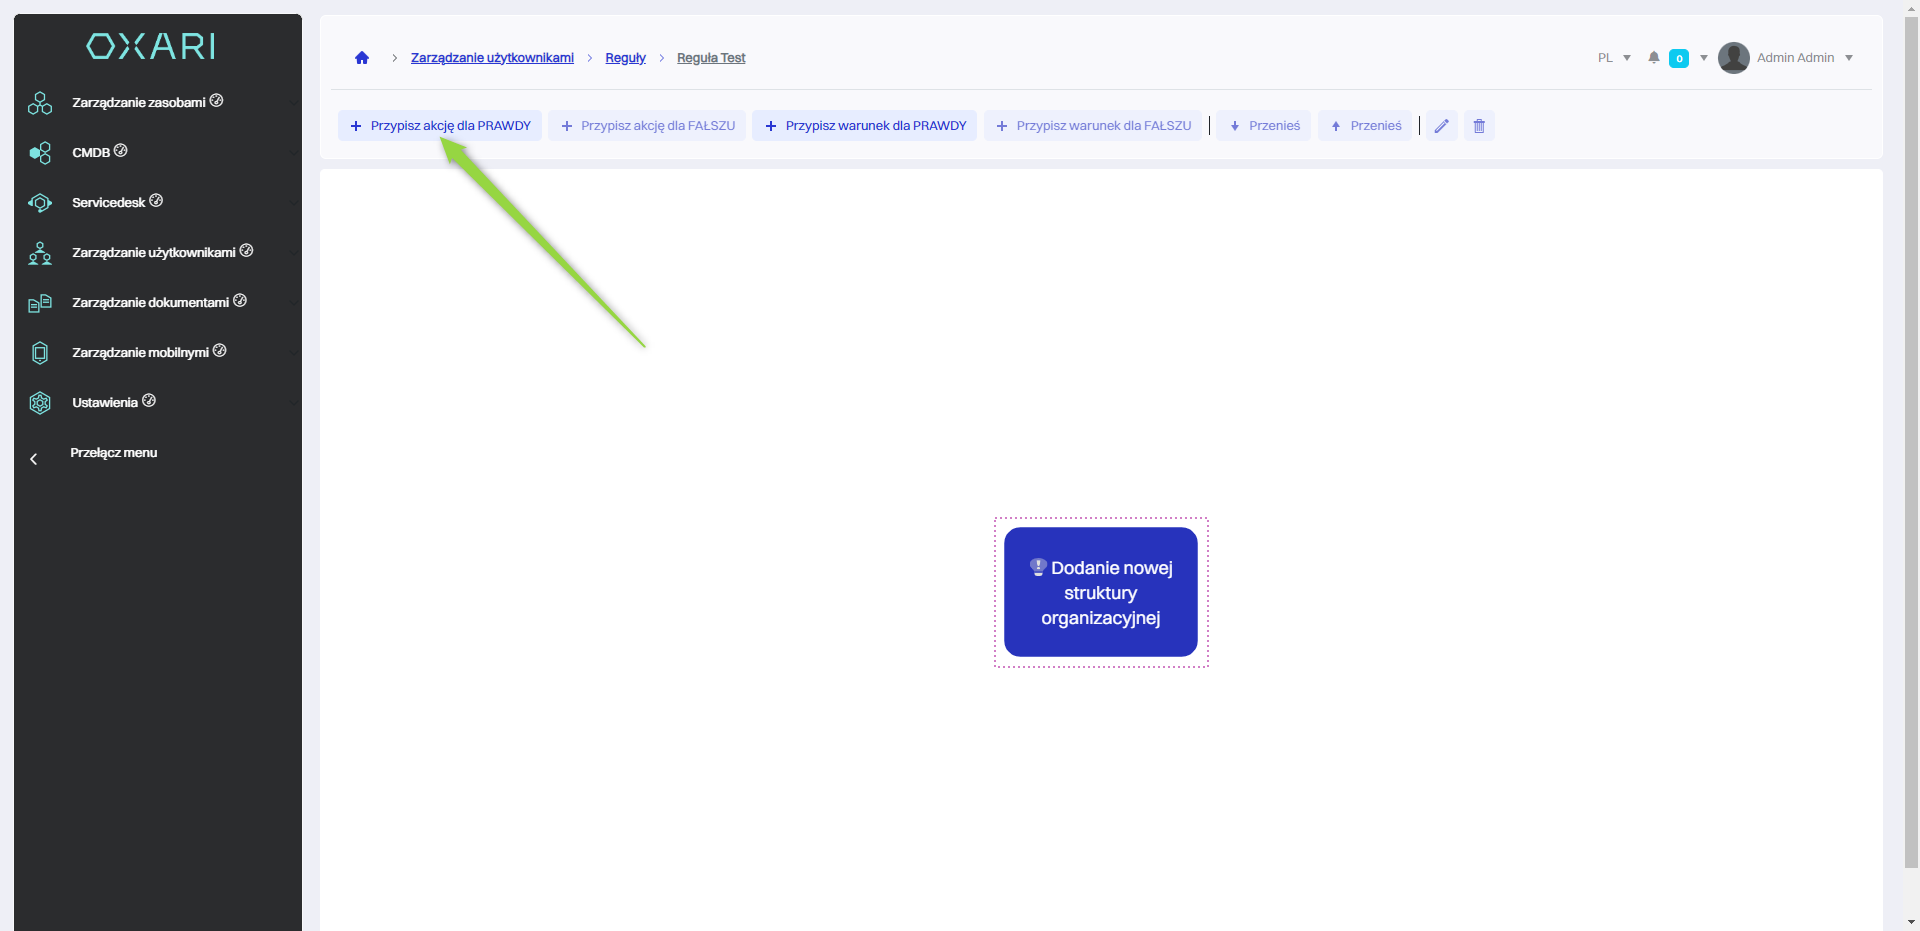
After clicking on the tile, two options will be usable "Assign action for TRUE" and "Assign condition for TRUE". In this example, an action will be added to send an email to the desired people when a new organizational structure is added. Click the "Assign action for TRUE" button.
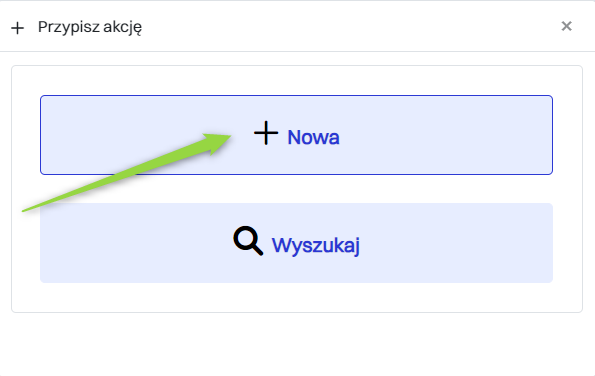
Then in the "Assign action" window there are two available options:
|
1 |
"New" - Allows you to create a new action that will be executed when the condition is met. |
|
2 |
"Search" - Allows you to select actions that have already been defined in the User Management > Actions section. For more on actions: Go > |
In the example under discussion, a new action is created. To create a new action, the user should select the "New" option and proceed to the process of configuring this action.
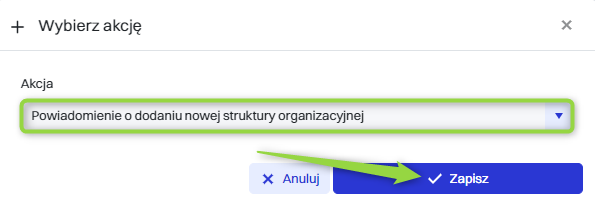
Then, in the "Select Action" window, there are action types to choose from, such as:
|
1 |
Import absences - This action allows you to automatically import user absence data, which can include vacation, sick leave or other forms of absences. |
|
2 |
Send Email - This action is used to automatically send email notifications to users or stakeholders. |
|
3 |
Add ticket - Allows automatic generation of new requests in the system, for example, when errors are detected, support requests or service intervention is needed. |
In the example in question, the "Send Email" action is assigned, click in the field, and then click the "Select" button.

And then configure the message in question and click the "Save" button.
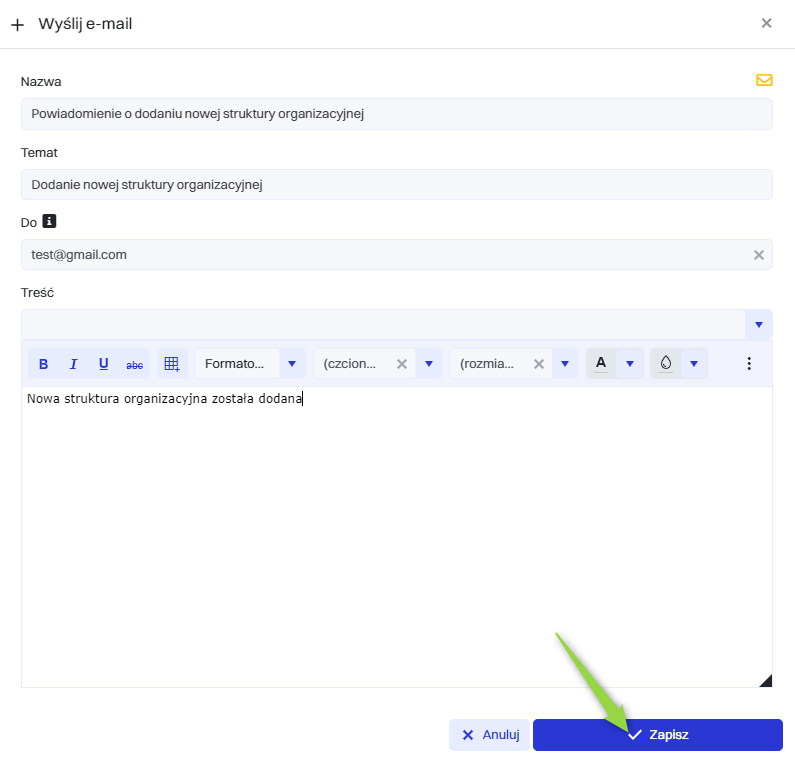
The given action has been added to the rule. It may happen that it is not immediately visible, in which case you need to refresh the page.

Once a new action is created in the OXARI user management system, it becomes available in the User Management > Actions section and can be reused in various rules. To use an already existing action, in the "Assign Action" window, simply select the "Search" option, find the desired action in the list and confirm the selection by clicking "Save." This allows you to effectively use the action in different scenarios without having to create it again.
Editing/deleting actions and conditions
To edit or delete actions and conditions, simply go to User Management > Rules. Then, to see more options for a rule, click the "Details" button next to the selected rule.
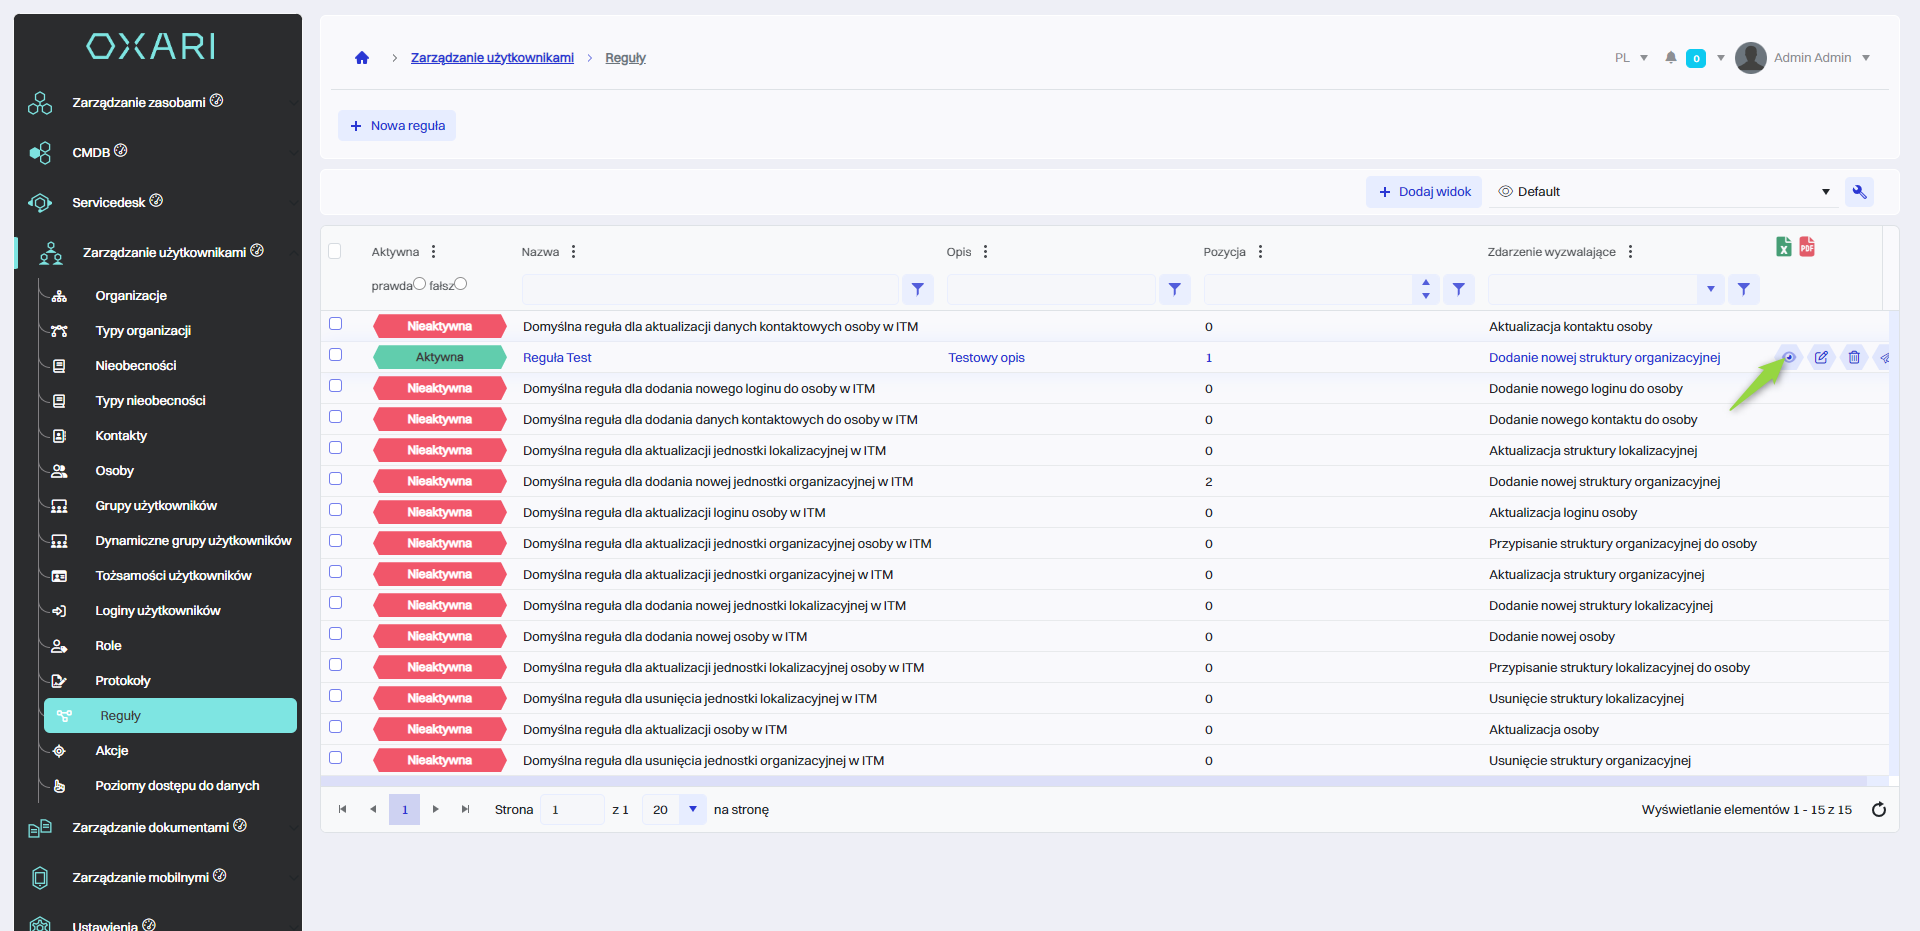
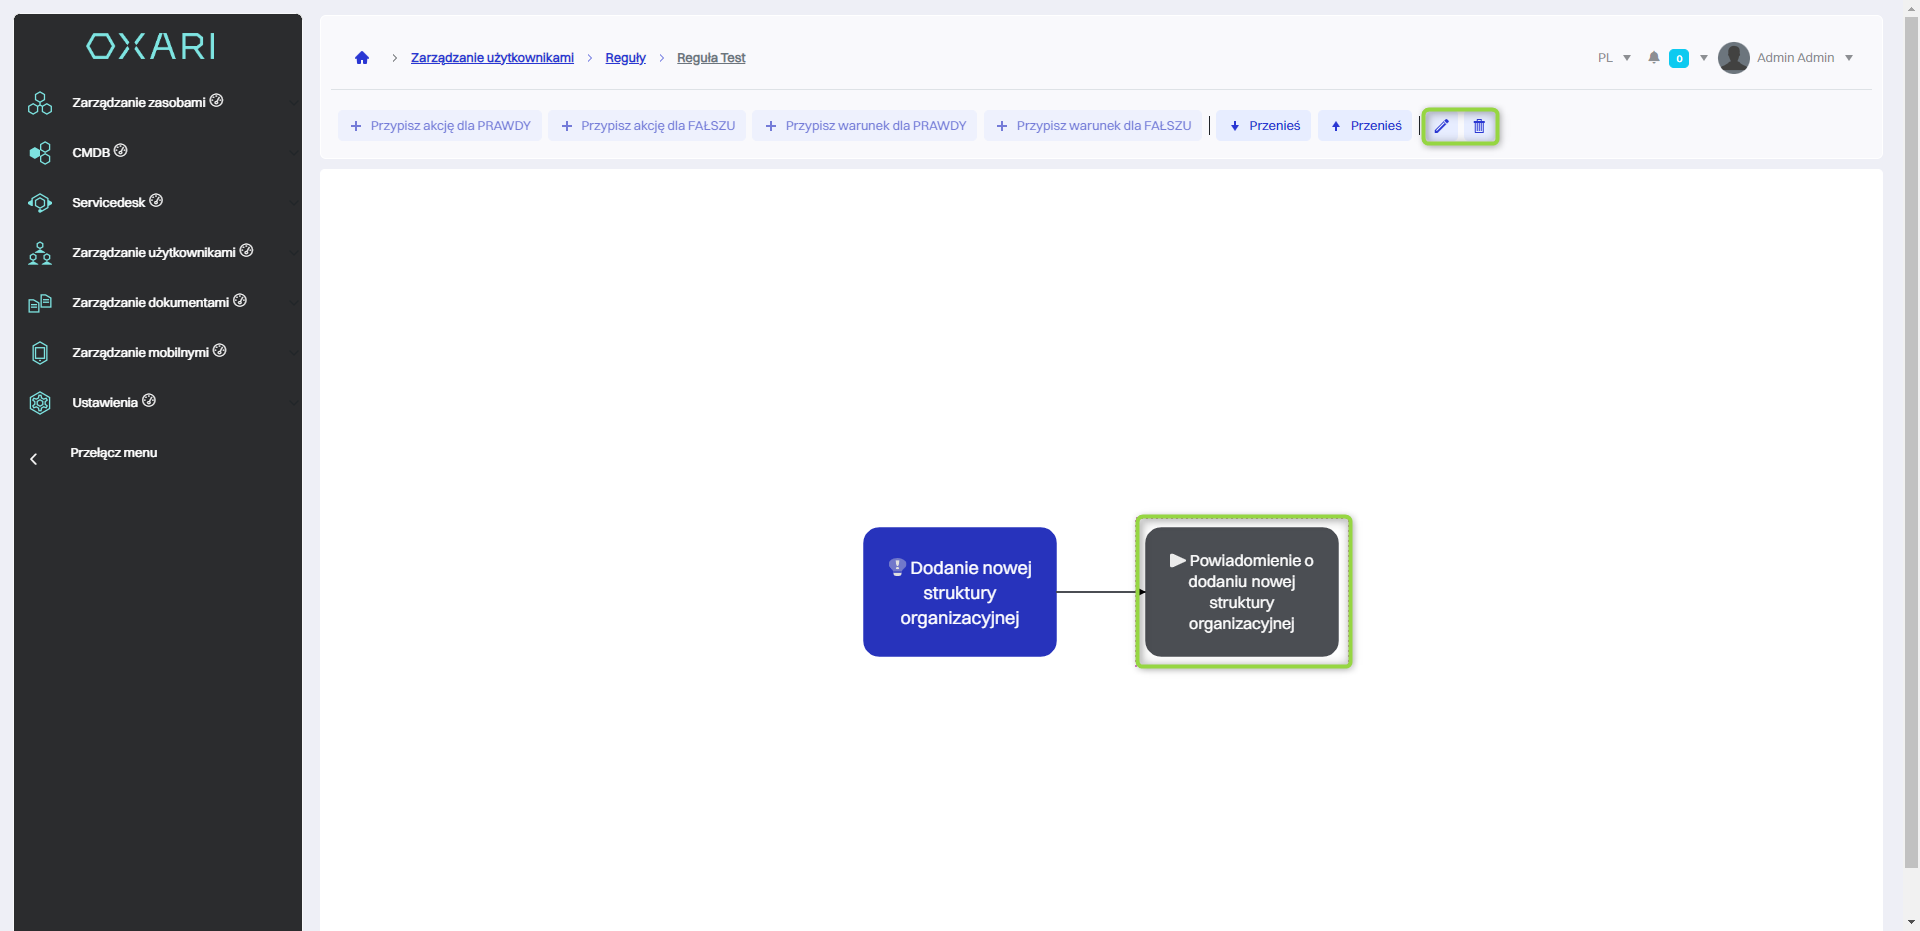
In the rule details, select the desired action/condition by clicking on the tile of the corresponding action/condition. The edit/delete options will be visible in the upper right corner.
Editing/Deleting a rule
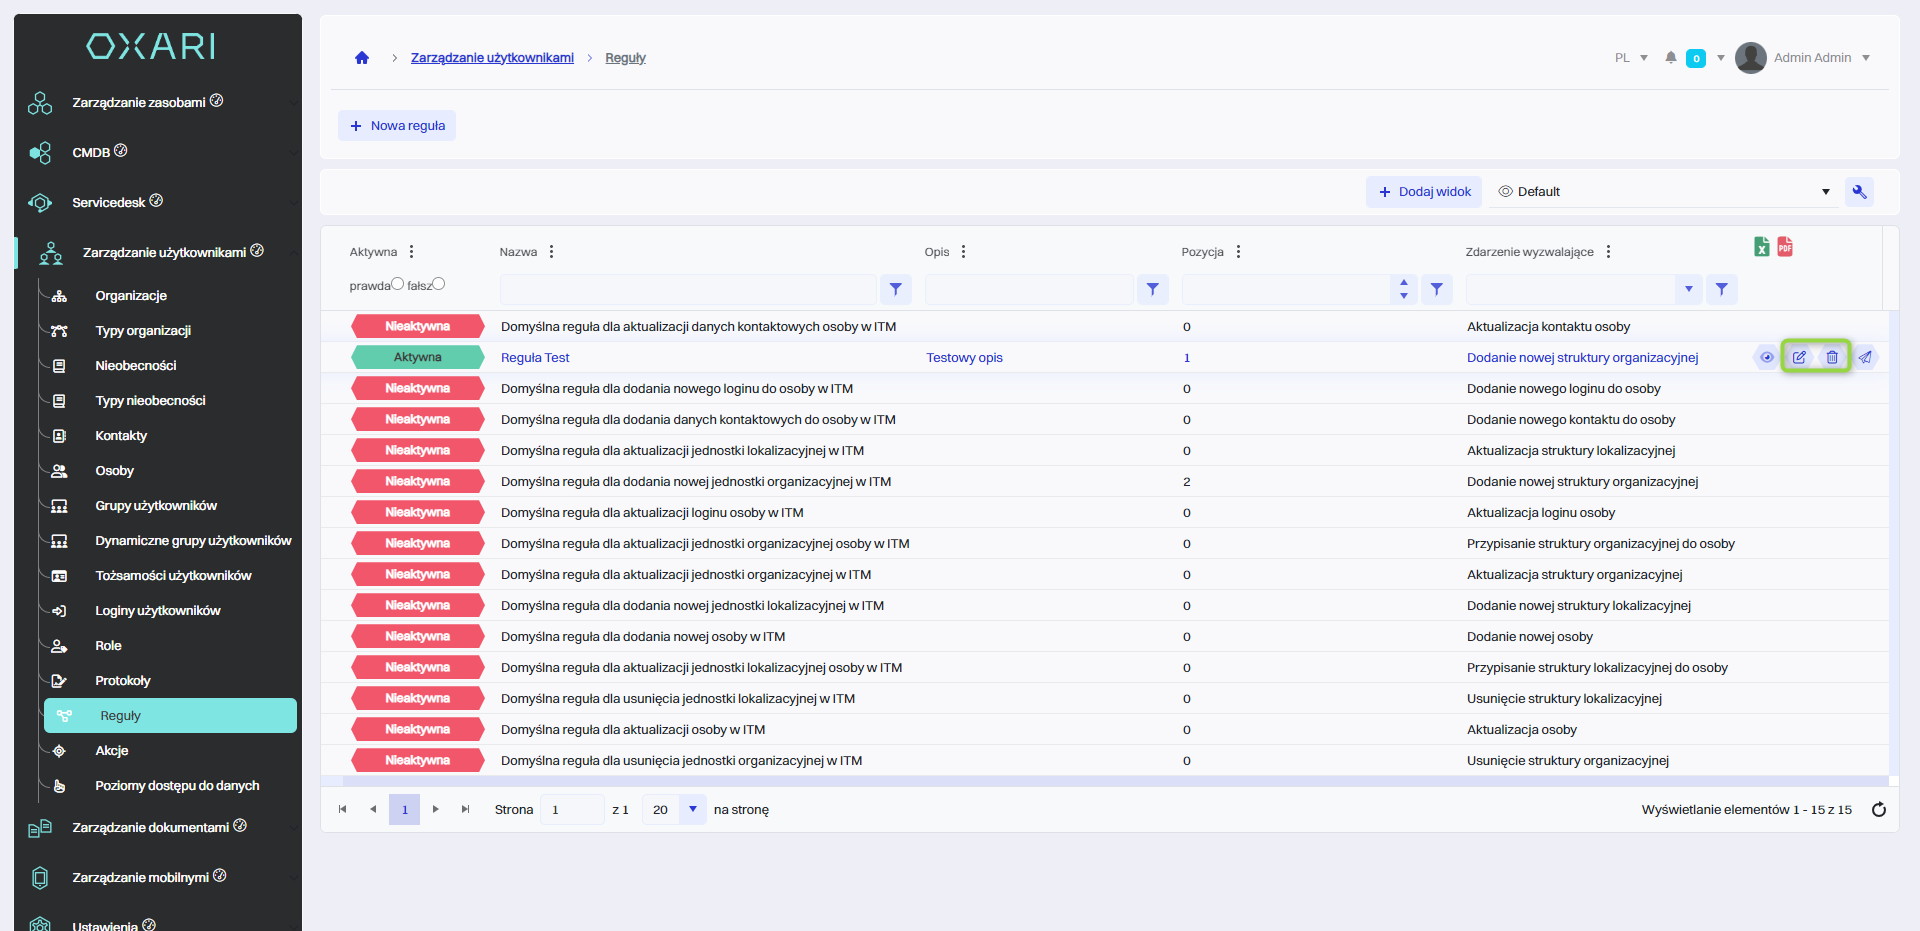
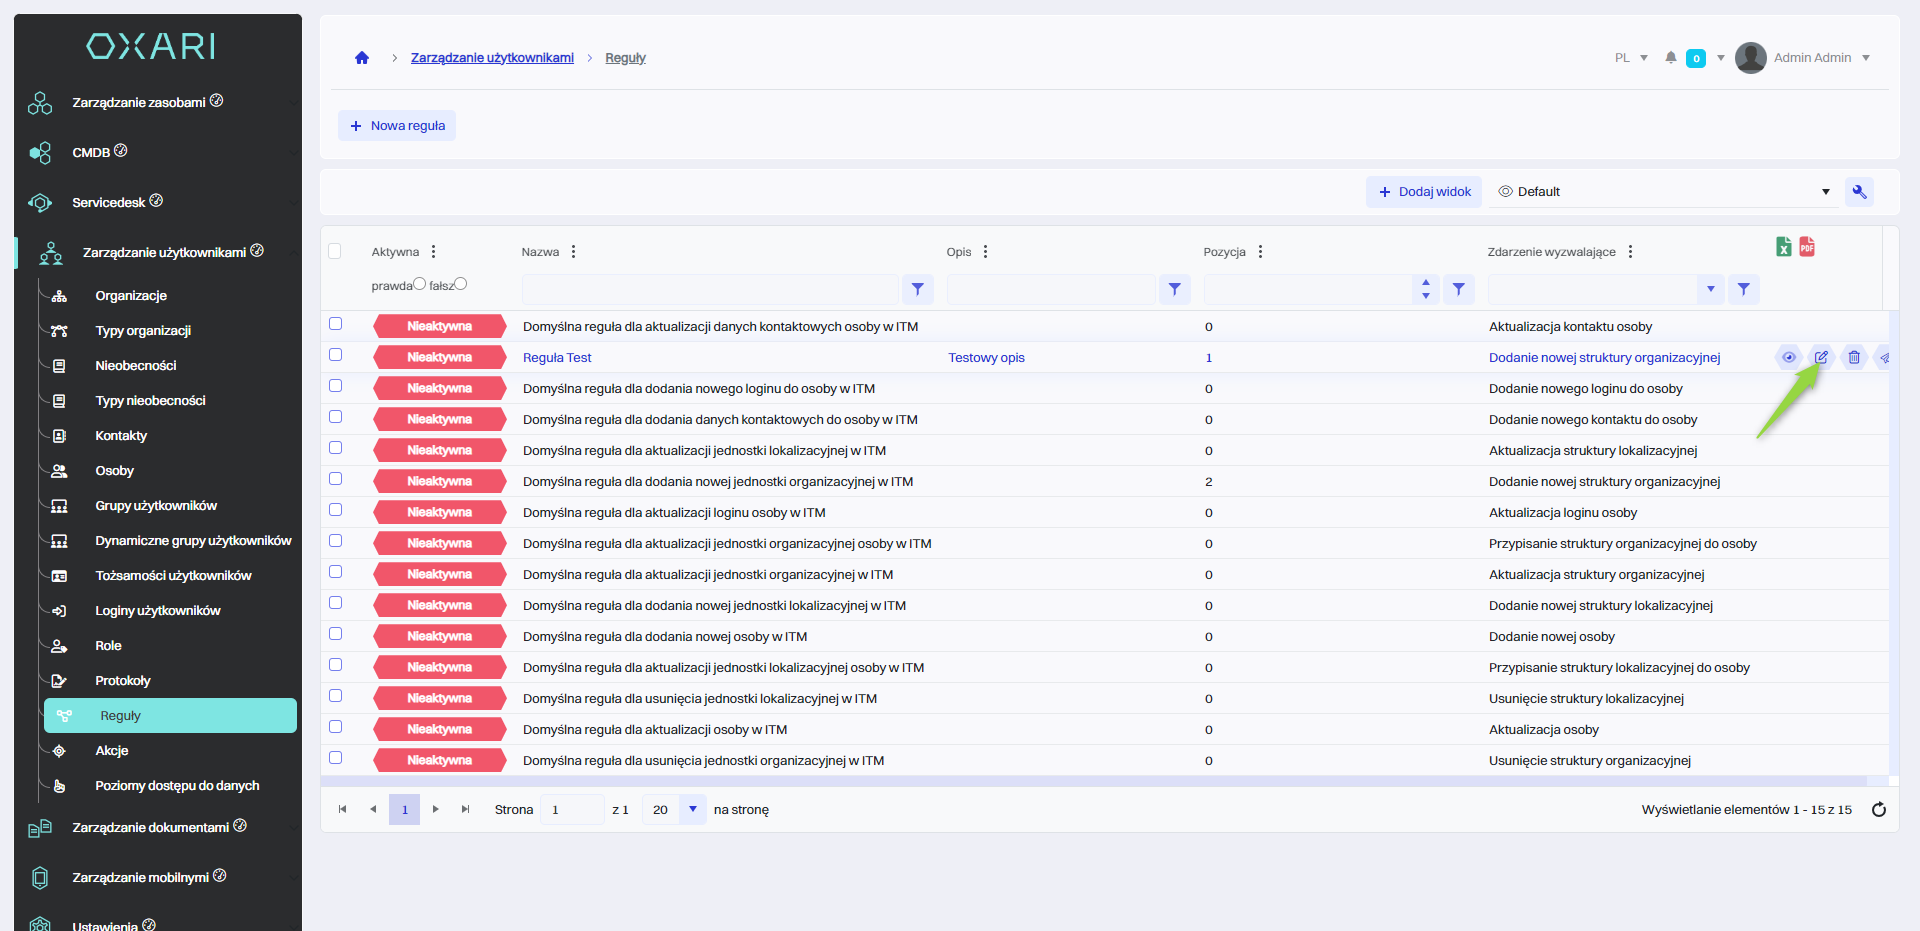
To edit or delete rules, go to User Management > Rules. Hover over the desired rule. The edit/delete buttons will be displayed.
Activating/Deactivating a rule
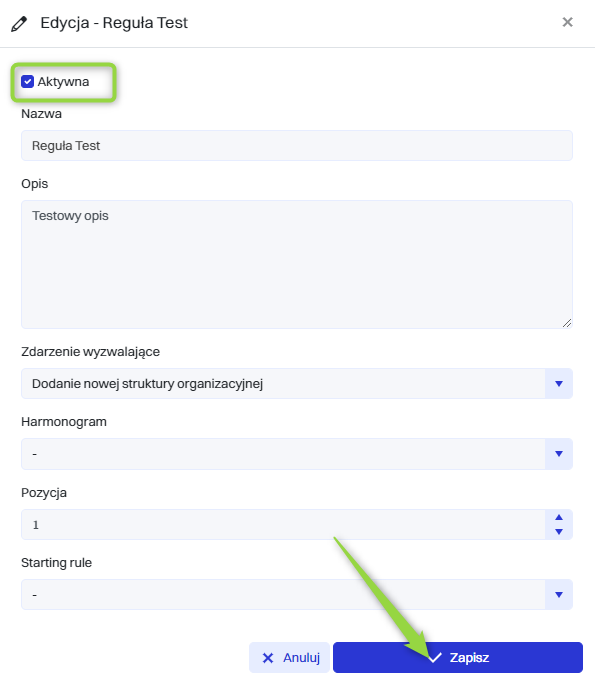
Each rule can be activated or deactivated. To activate/deactivate a rule, go to User Management > Rules. Hover over the desired rule and click the edit button.
Then, in the edit window, click on the "Active" checkbox (a checked box means that the rule will be Active), finally click the "Save" button.
Testing a rule
To test rules, go to User Management > Rules. Hover over the desired rule. A button to perform the test is displayed.
Only rules with an assigned schedule can be tested.
