Actions in OXARI's Manage Users system are actions that can be triggered automatically within defined rules. These are predefined tasks that the system performs when certain conditions are met.
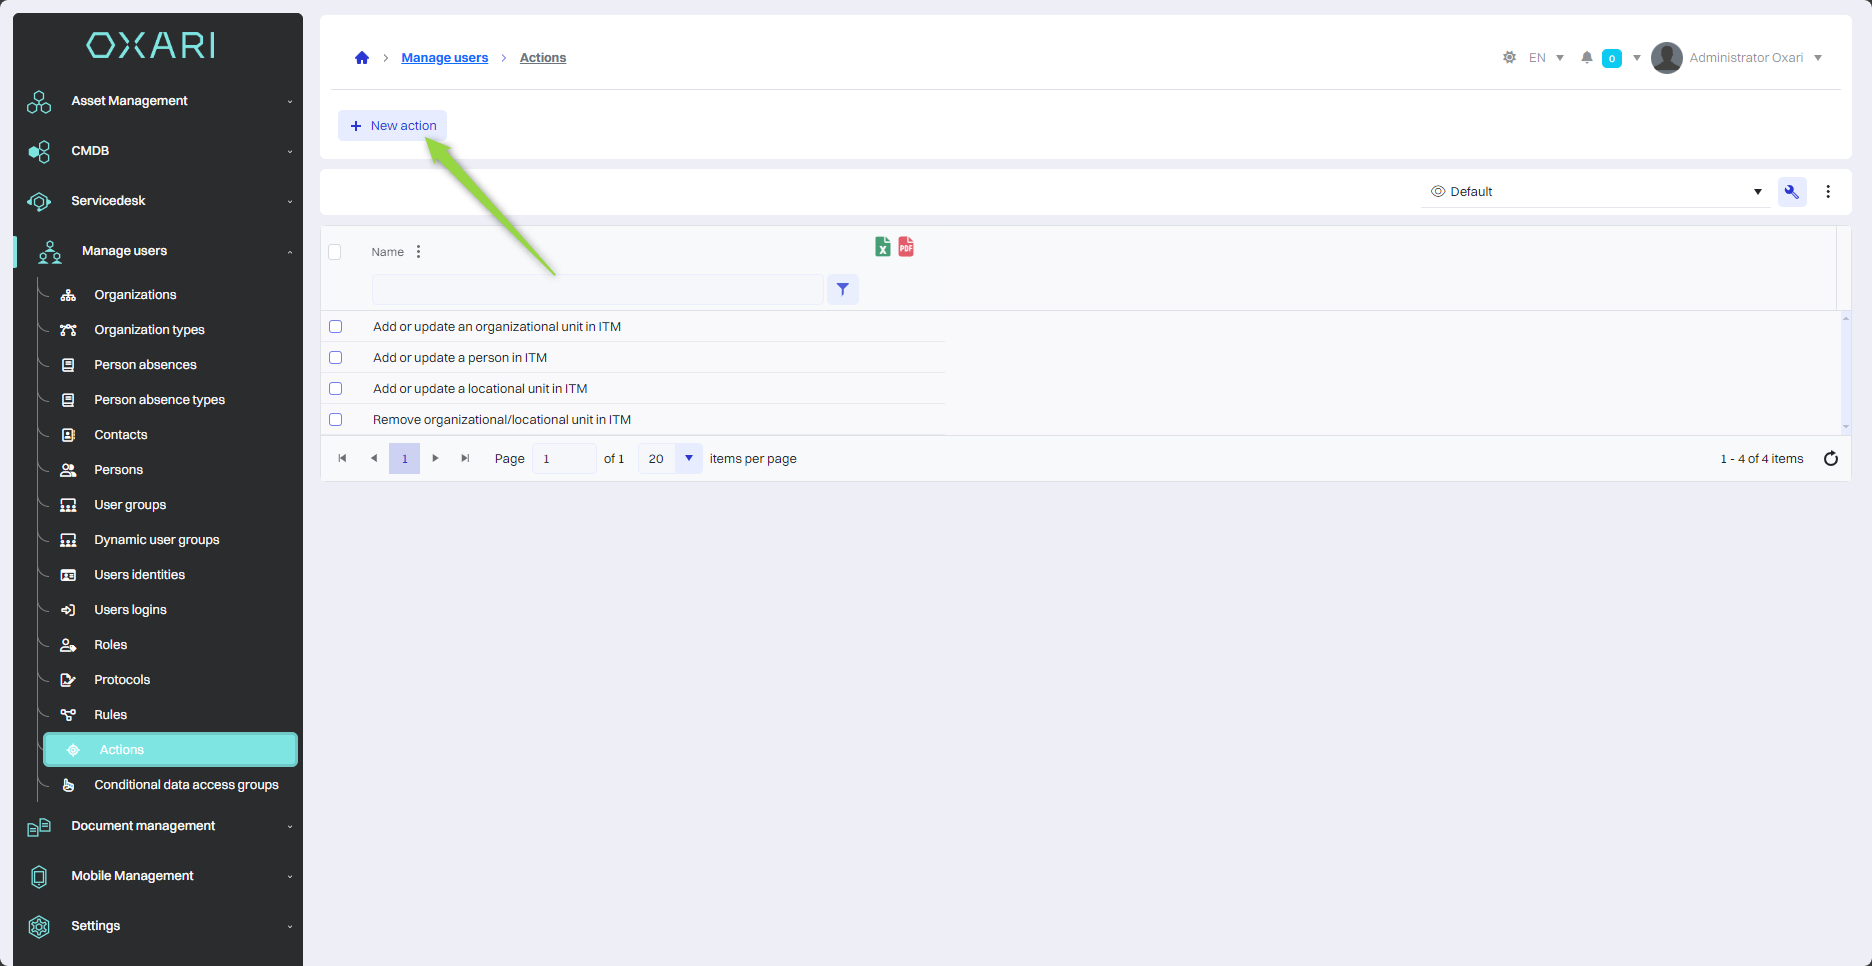
New action
To add a new action, go to Manage Users > Actions, and then click the "New Action" button.
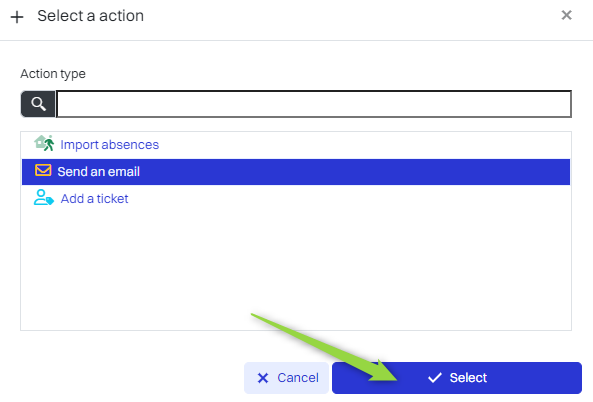
Action selection
Next, in the "Select Action" window, there are action types to choose from, such as:
|
1 |
Import absences - This action allows you to automatically import user absence data, which can include vacation, sick leave or other forms of absences. |
|
2 |
Send Email - This action is used to automatically send email notifications to users or stakeholders. |
|
3 |
Add ticket - Allows automatic generation of new requests in the system, for example, when errors are detected, support requests or service intervention is needed. |
In the example in question, the "Send Email" action is assigned, click in the field, and then click the "Select" button.
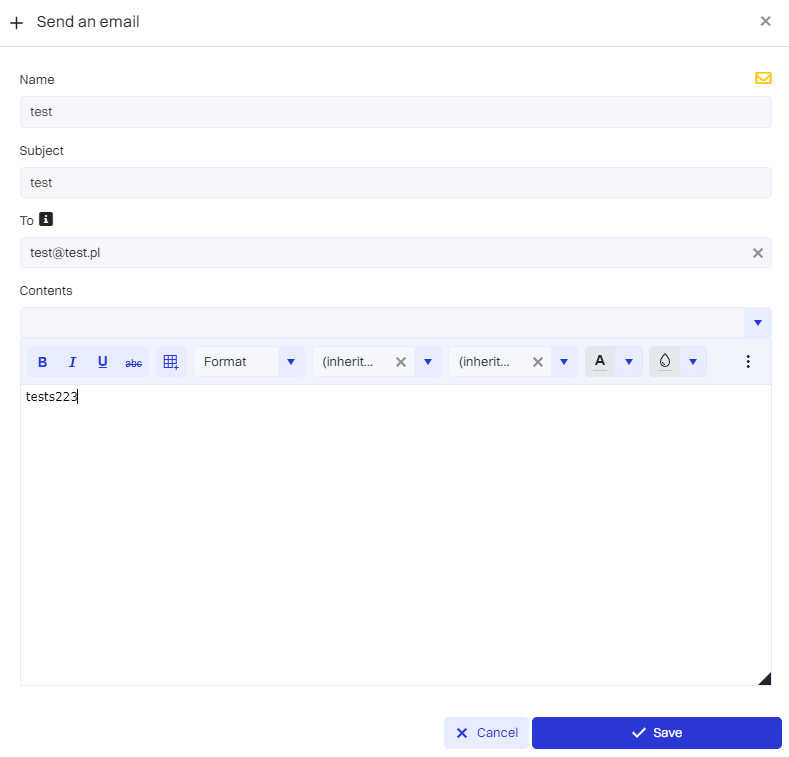
Then, in the "Send e-mail" window, fill in the fields and click the "Save" button.
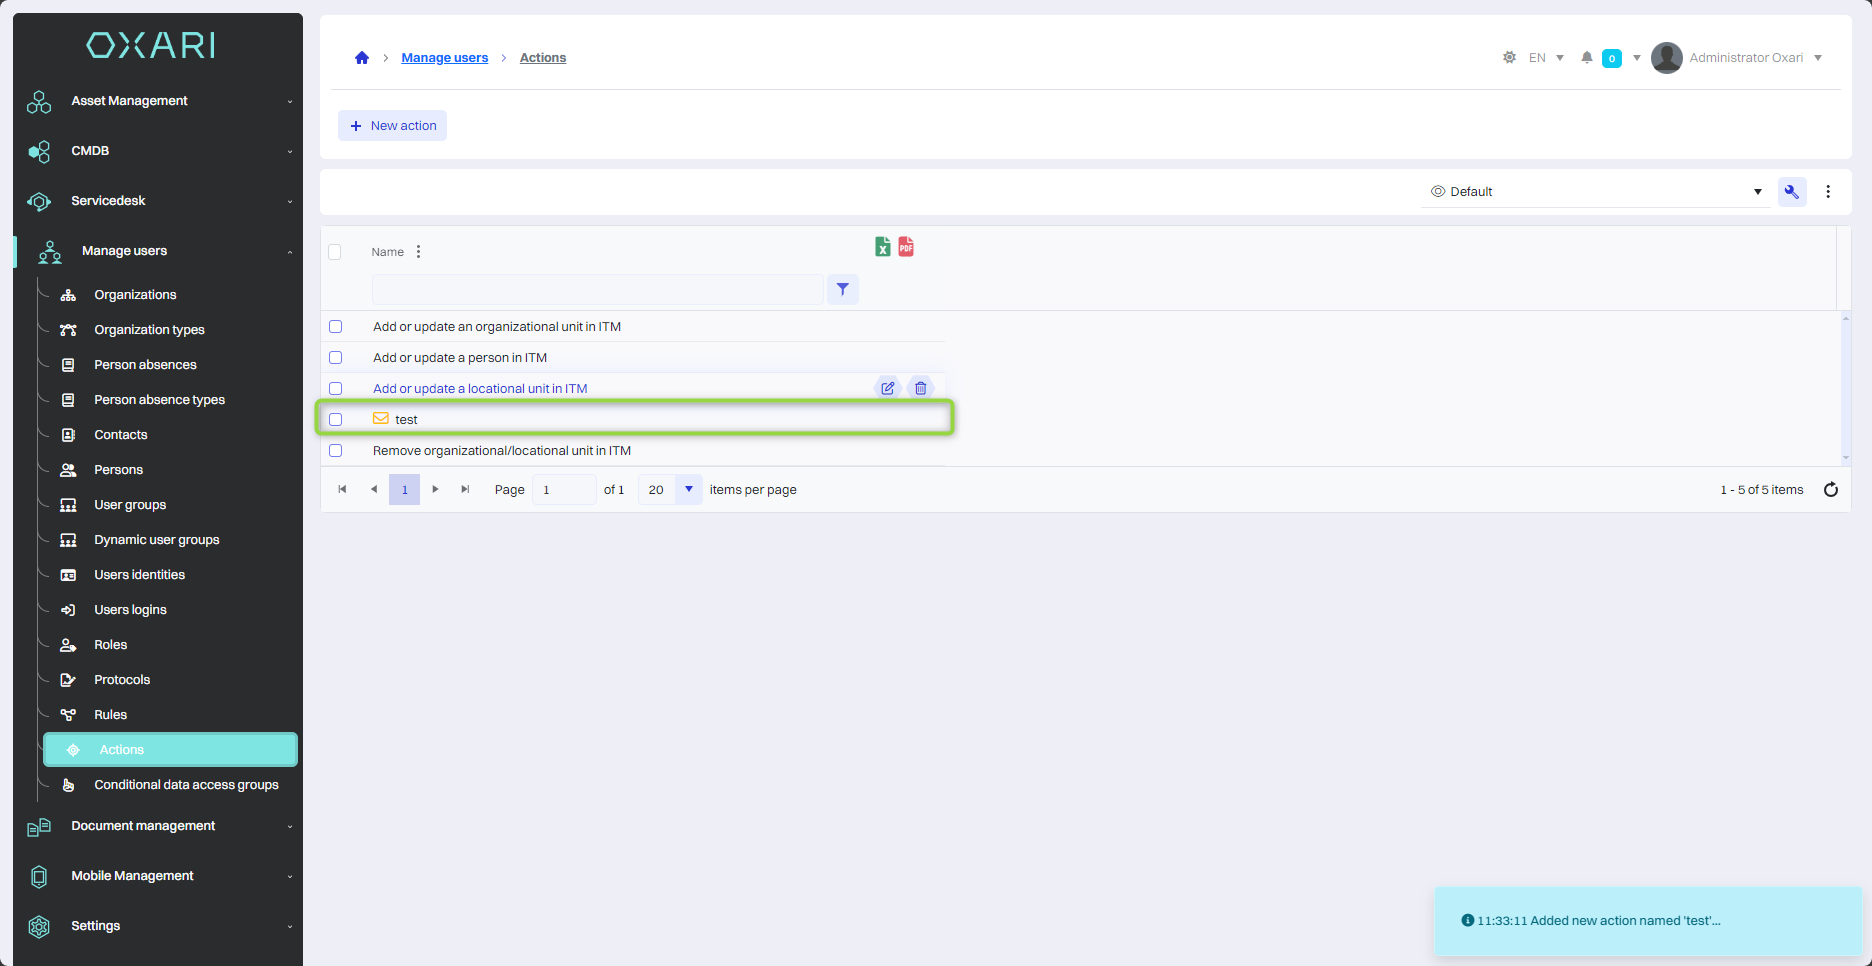
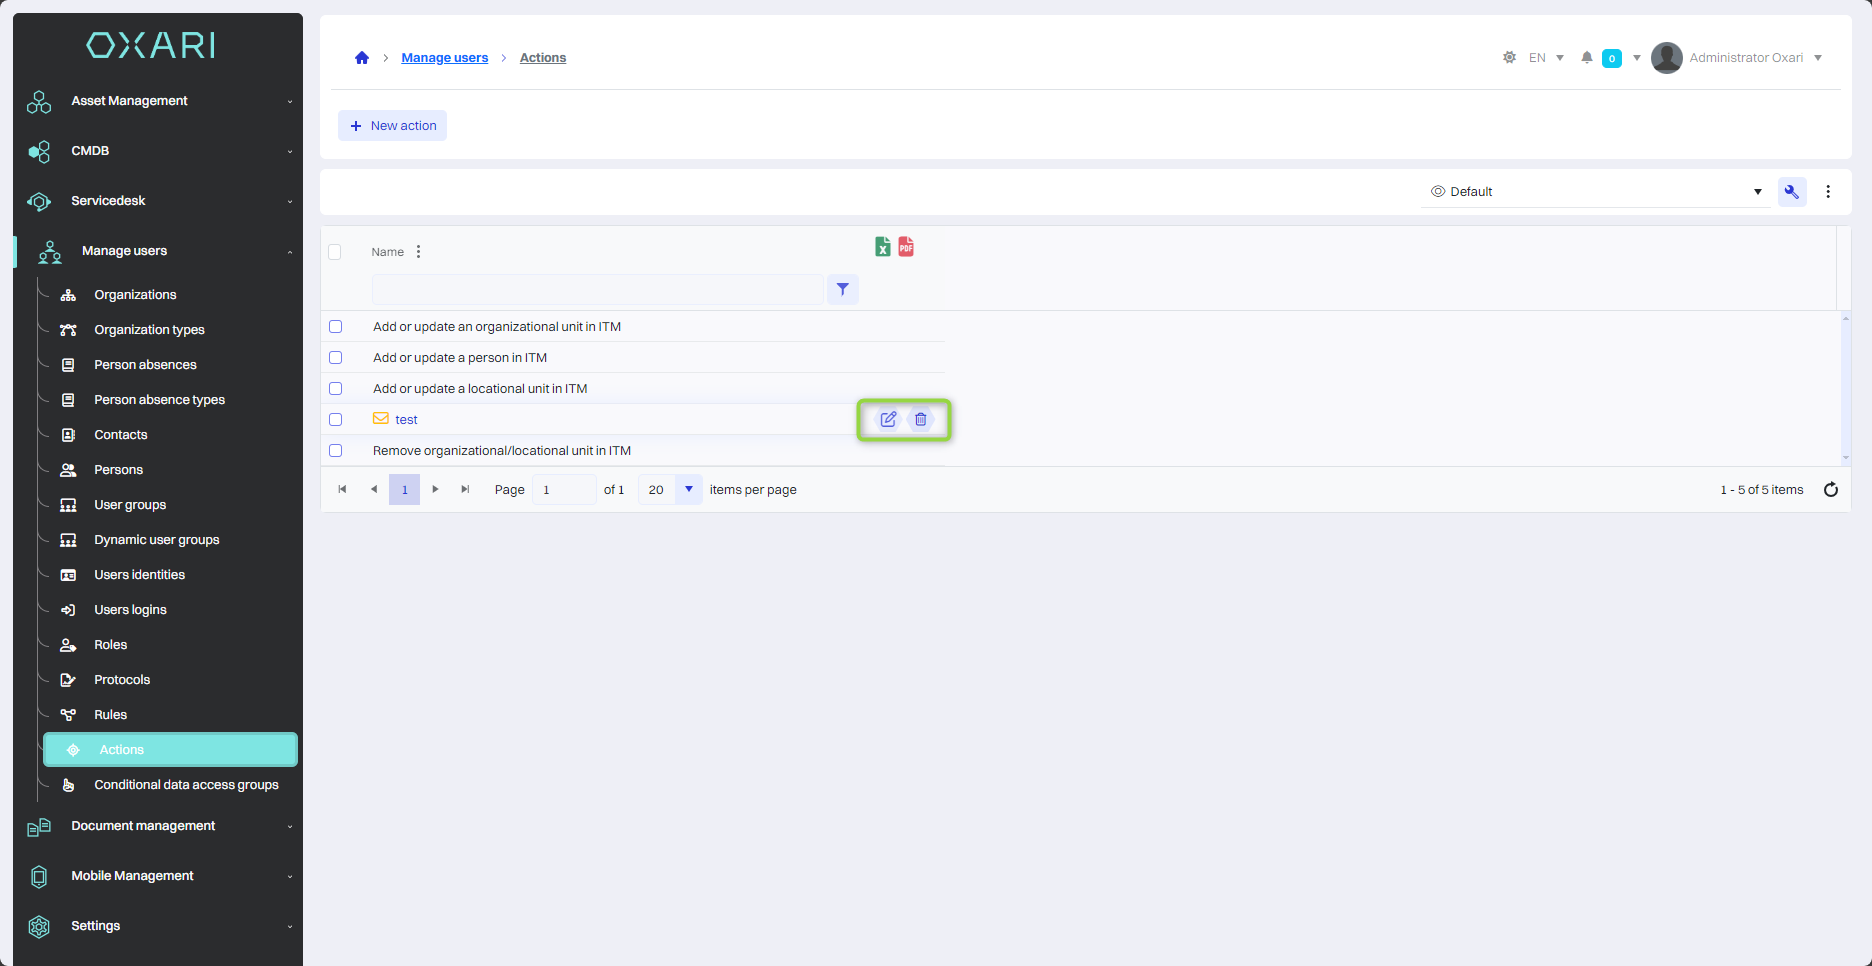
The given share was recorded in the share list:
Editing/Deleting Actions
To edit or delete actions, go to Manage Users > Actions. Hover over the desired action. The edit/delete buttons will be displayed.
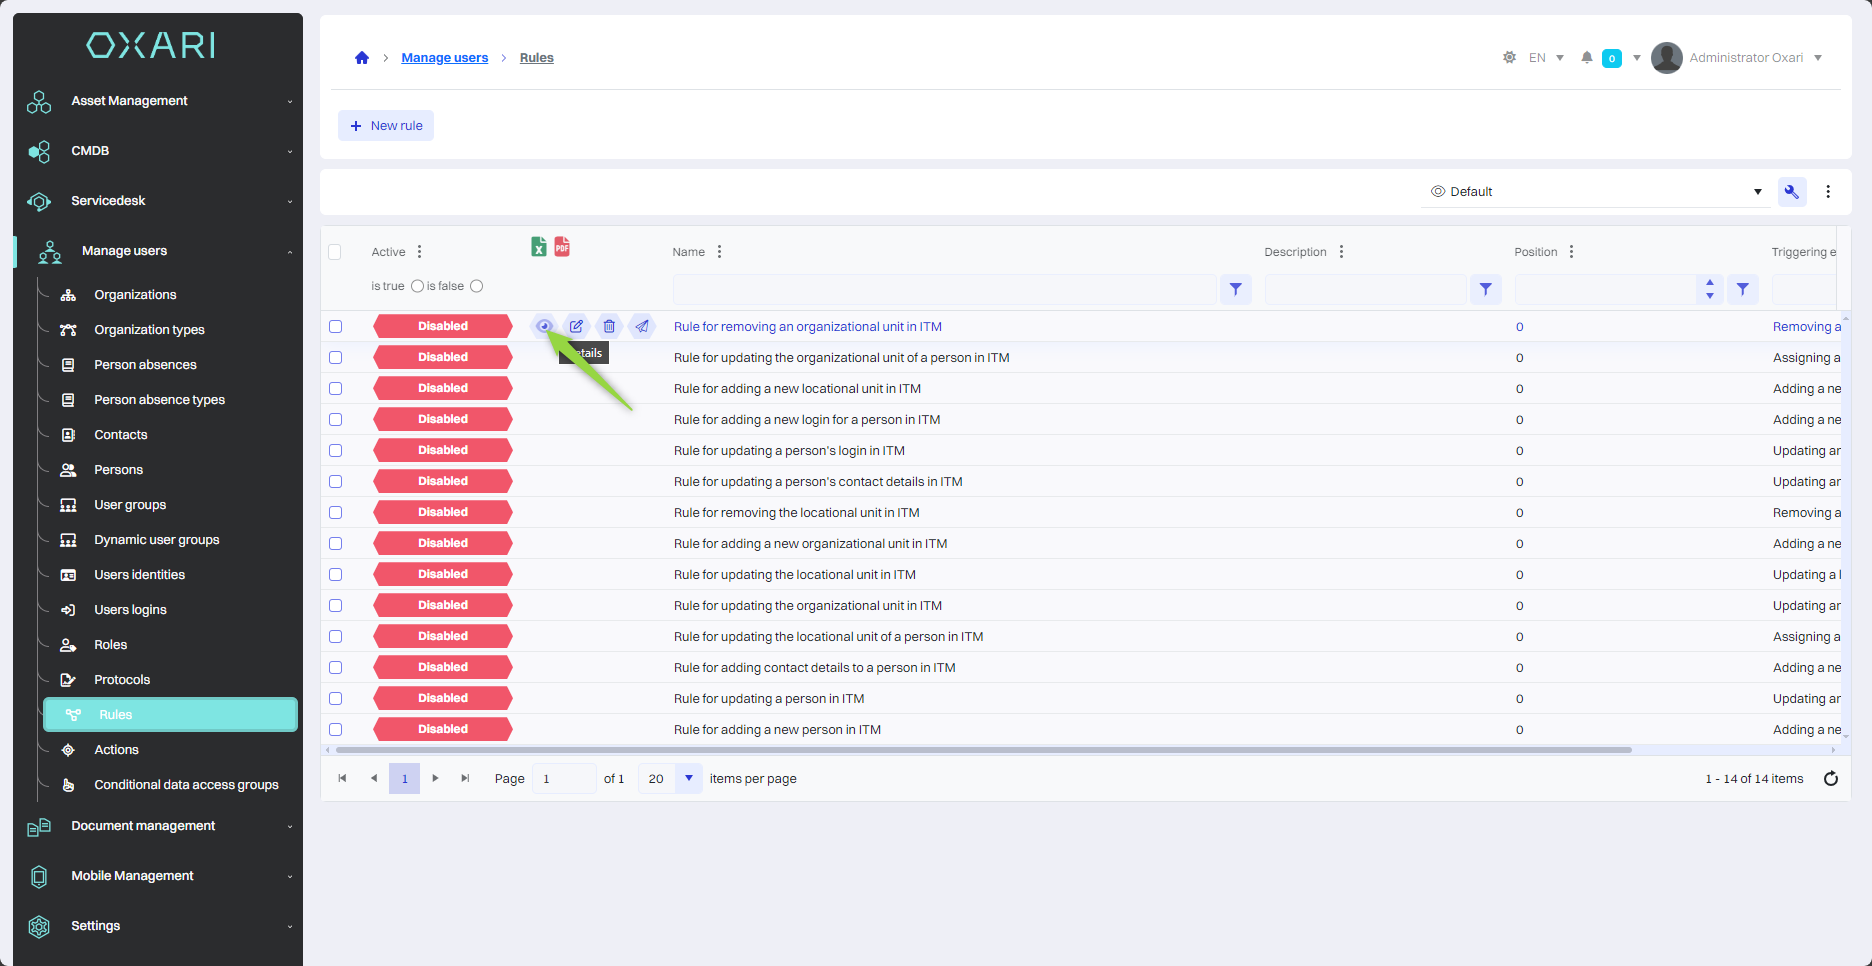
Assigning actions to a rule
Assigning actions to rules allows you to automate tasks. To assign a created action to a rule, go to Manage Users > Rules, then click the "Details" button next to the rule.
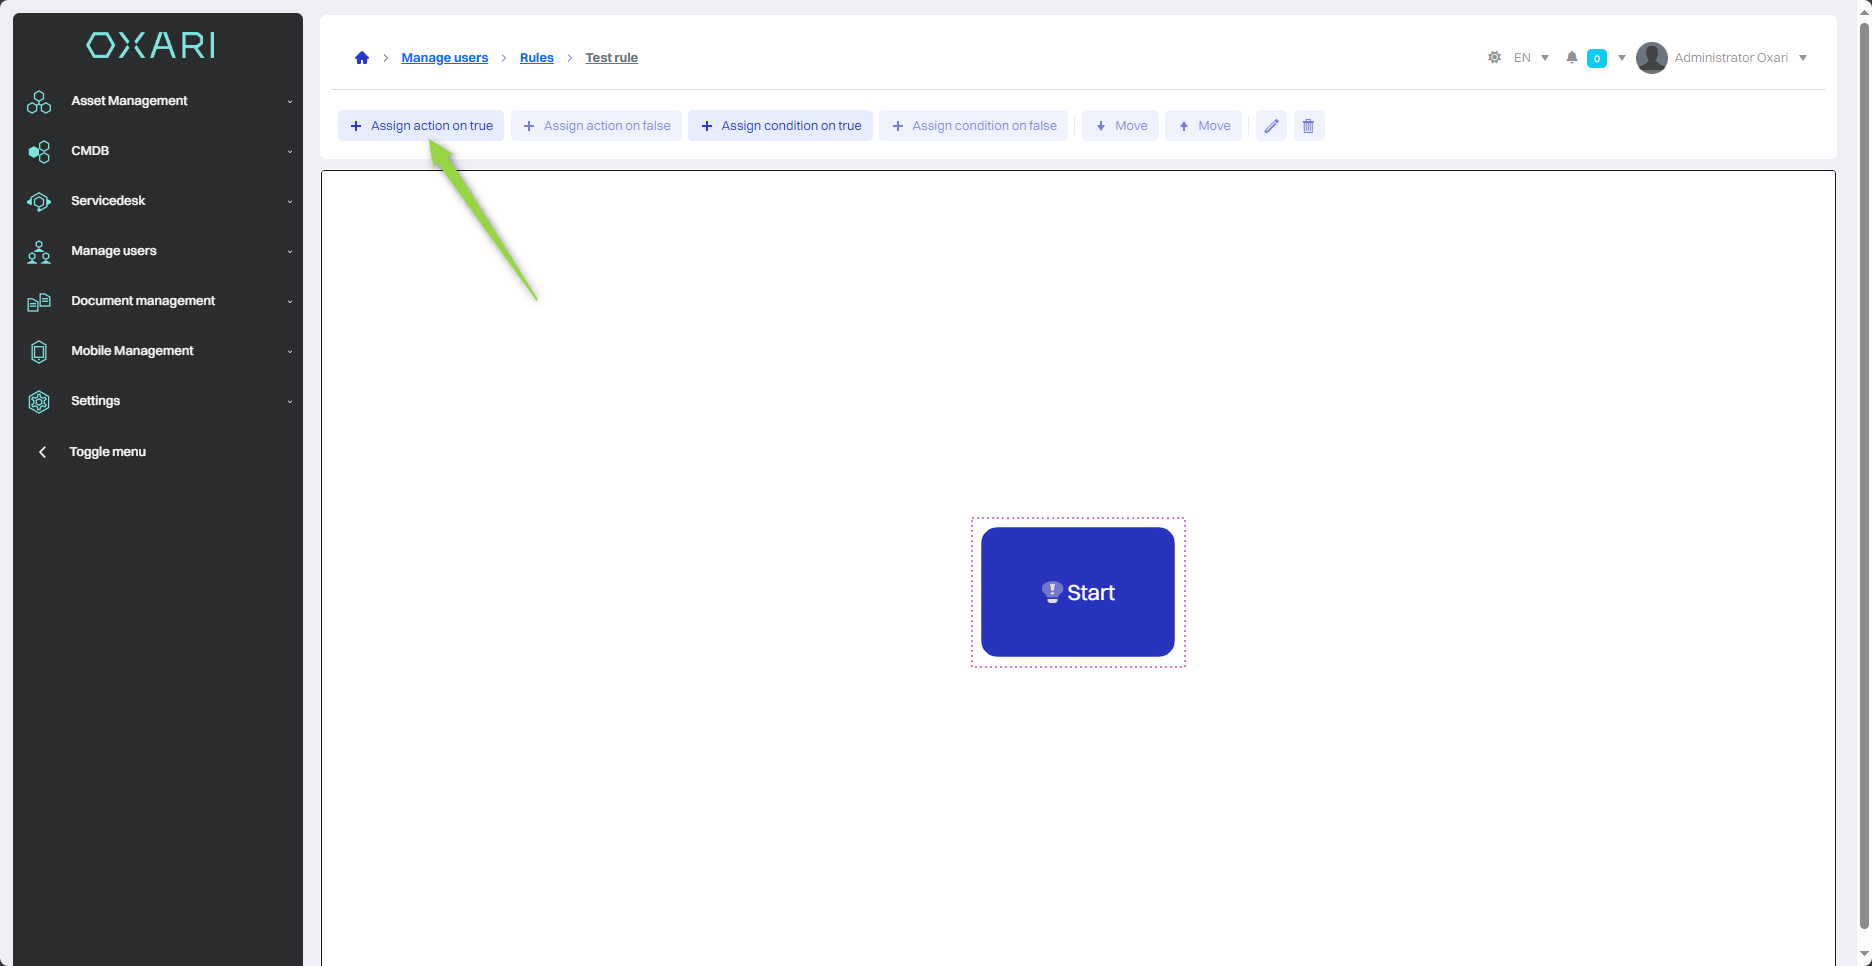
Next, assign an action to the given condition "Adding a new organizational structure", click on the given tile and click the "Assign action for TRUE" button.
In the "Assign Action" window, click the "Search" button.
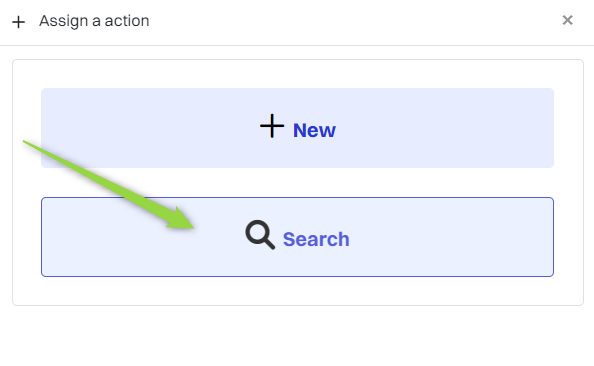
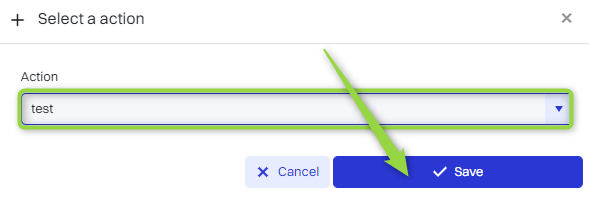
Then, in the "Select Action" window, select the appropriate action from the list in the "Action" field and click the "Save" button.
A given action has been assigned to a rule:
