Rules in servicedesk
Rules act as automation mechanisms that trigger specific actions in response to document events. These events include, for example:
Registering a new service, that is, adding a ticket with a service category.
Registering a new incident, that ist, adding a ticket with an incident category.
Registering a new reservation, that is, adding a ticket with a reservation category.
A variety of actions can be assigned to rules, Here are some of the actions that can be defined and assigned to rules:
Set ticket status, automatically specify the phase in which the ticket is in, such as “New”, “In progress”.
Assign guardian, selection of the person responsible for handling the ticket.
Set the urgency of the ticket, determining the priority of the ticket based on its type, for example.
Rules allow you to create an effective system that supports the Servicedesk section by automating processes.
More about notifications: Go >
More about actions: Go >
It is crucial to design rules that are simple and thoughtful, with unambiguous names indicating their function or application. It is also important to describe each rule in detail to make it easy to understand its purpose and operation, which provides transparency and efficiency in management and makes the IT team's work easier.
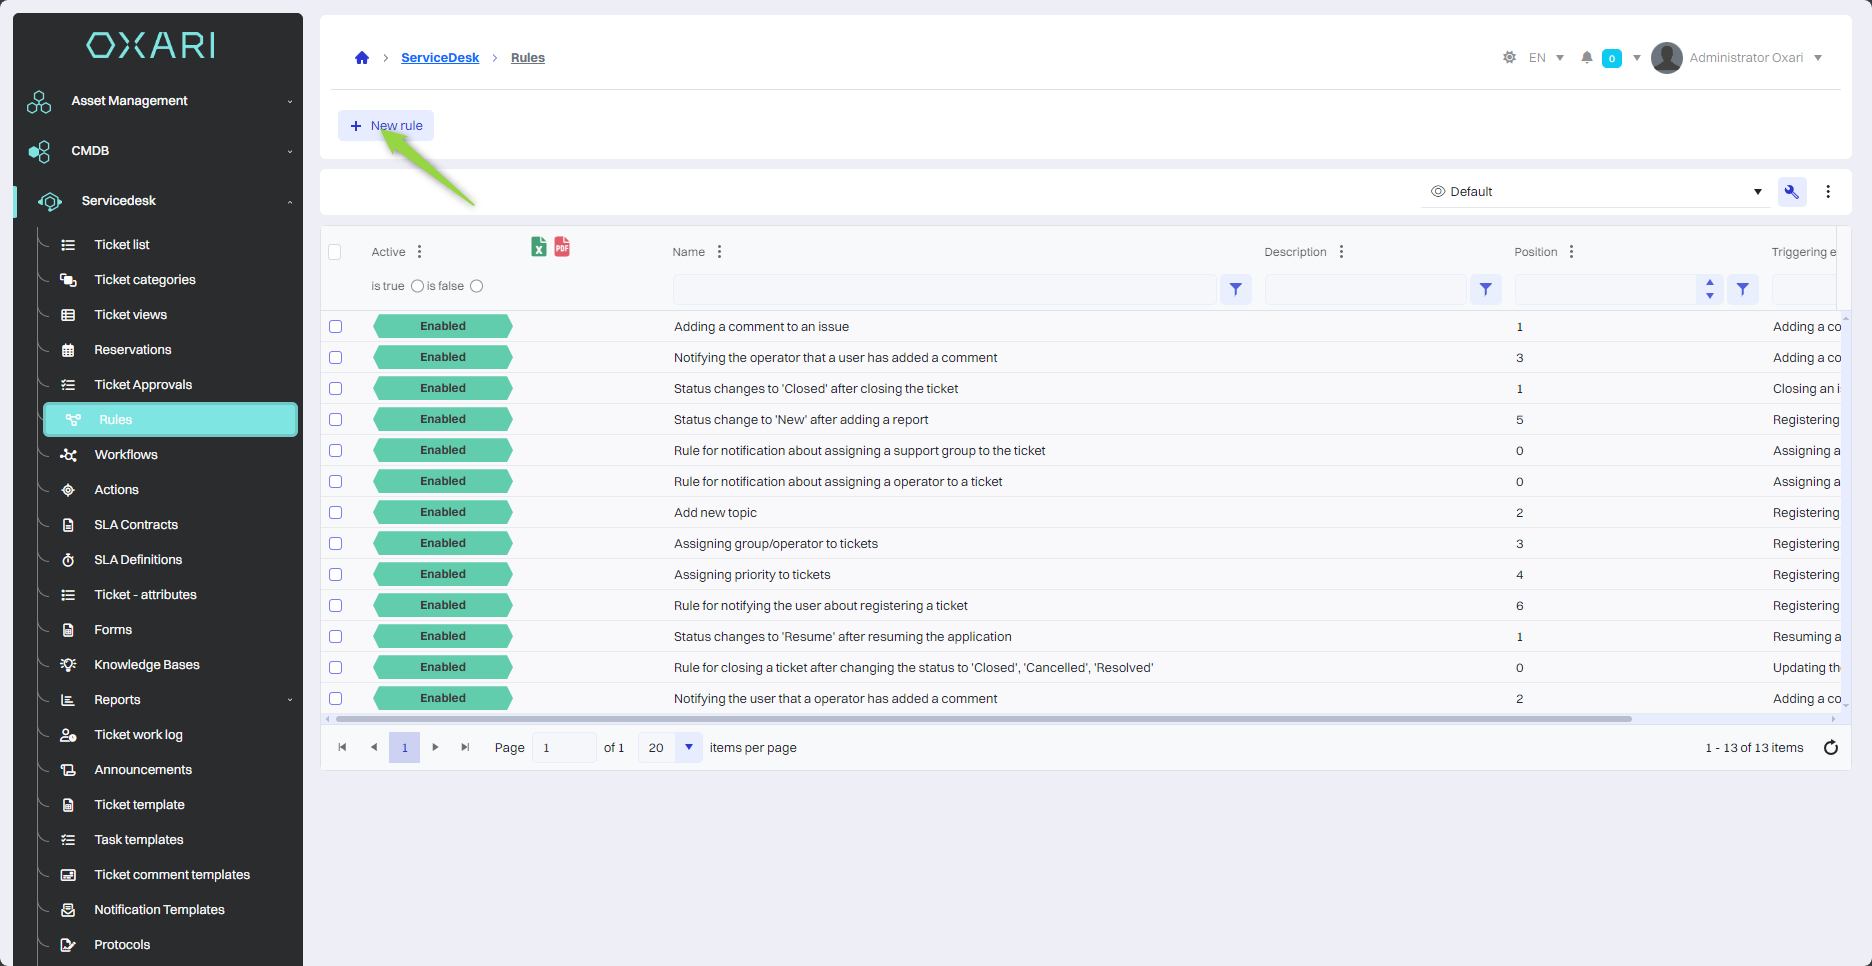
New rule
To add a new rule, go to Servicedesk > Rules, and then click the “New rule” button.
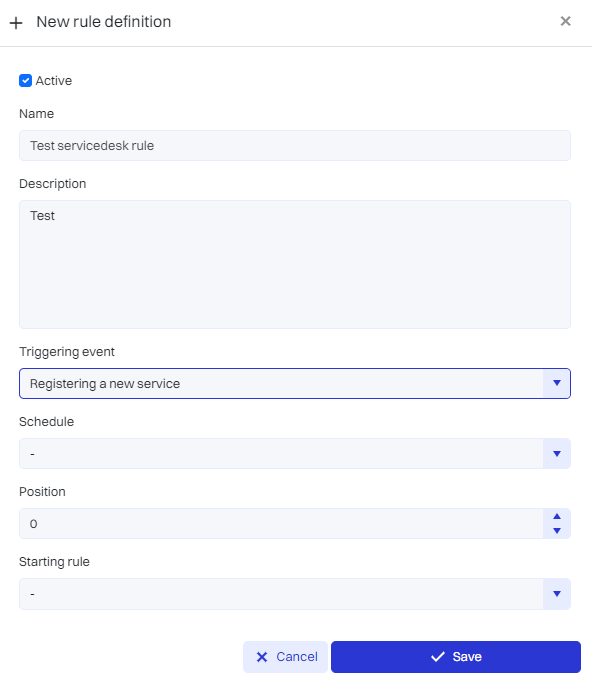
Filling in the rule
Next, in the “New rule definition” window, fill in the desired fields and click the “Save” button.
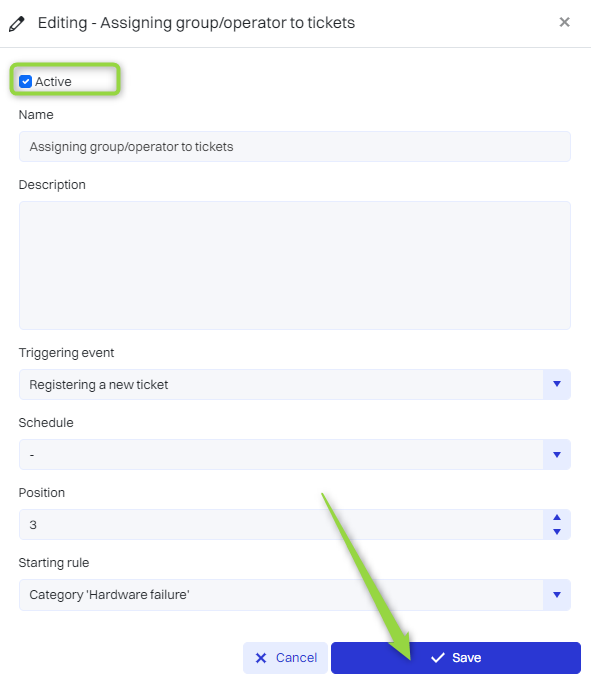
| 1 | Rule activation - Checking the “Active” option activates the rule. |
| 2 | Name - This is used to identify the rule. |
| 3 | Description - Allows you to understand the purpose of the rule. |
| 4 | Trigger event - Select the event that will trigger the rule, for example, “Registration of a new service” (Optional). |
| 5 | Schedule - Specify when the rule should be activated (Optional). More regarding schedules: Go > |
| 6 | Sort - |
| 7 | Next sort - |
| 8 | Position - specifying the order of the rule, if there are more. |
| 9 | Starting rule - Optional setting of the rule to be the trigger for the current rule. |
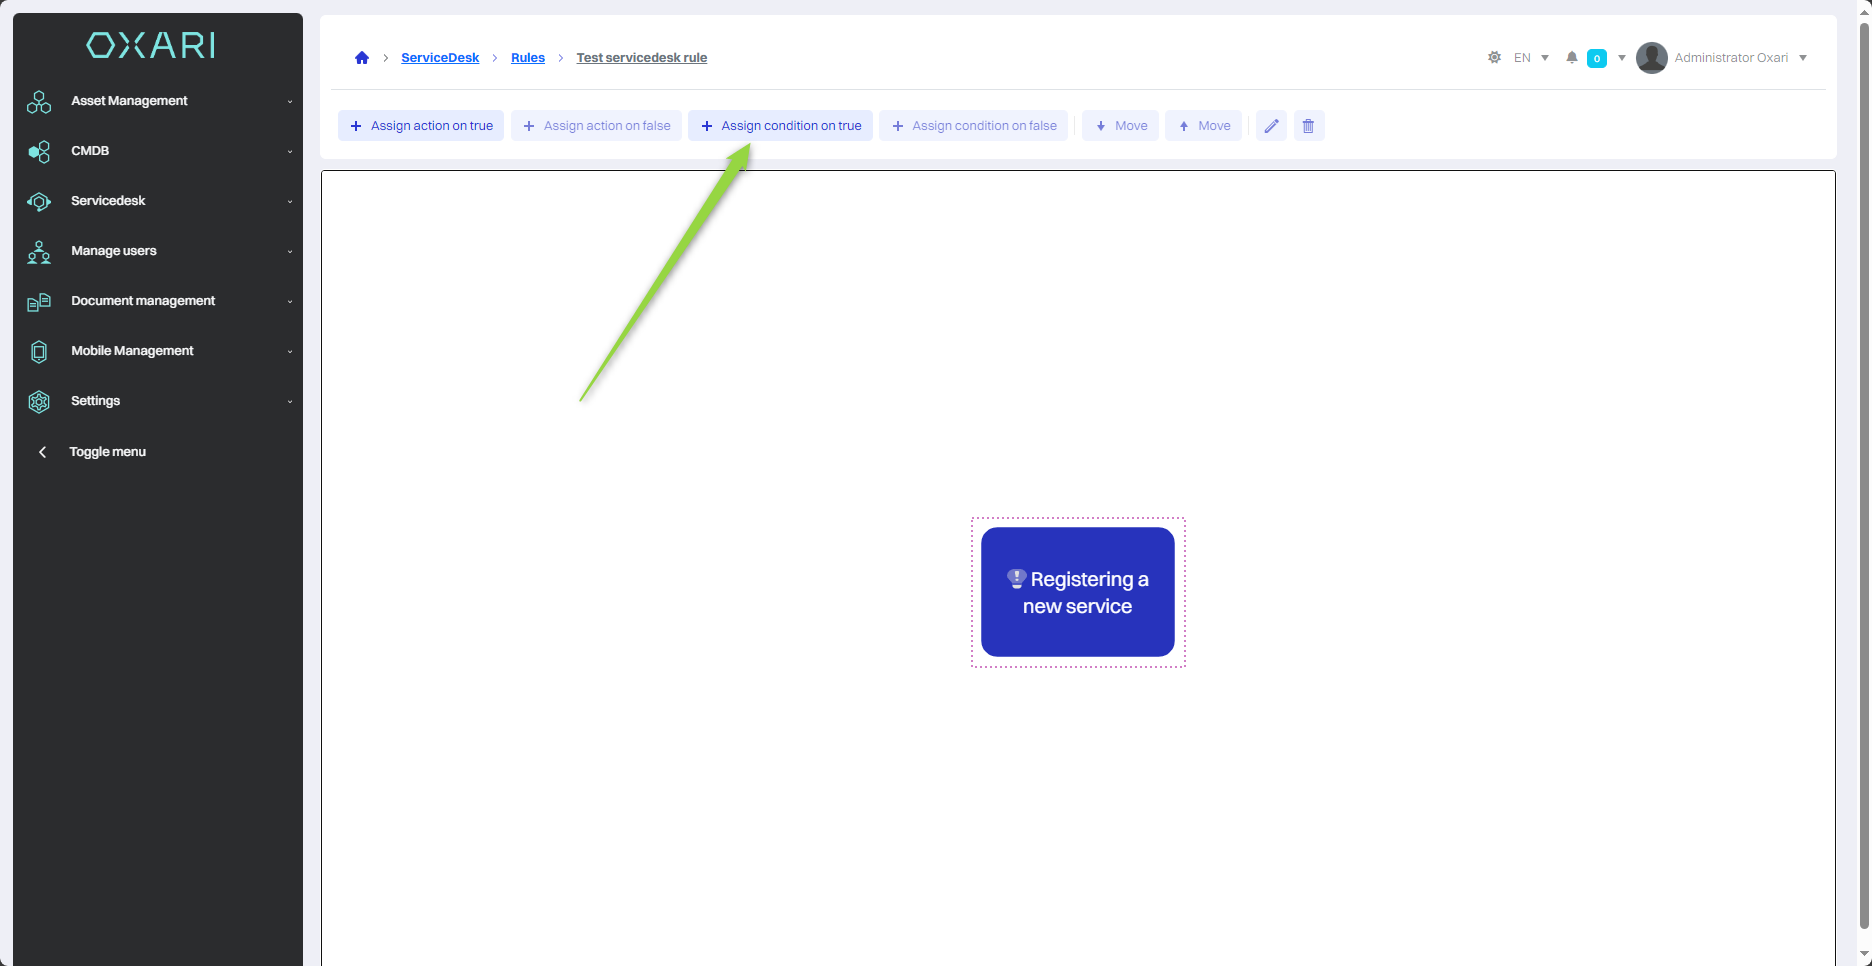
Specifying the action/condition of the rule
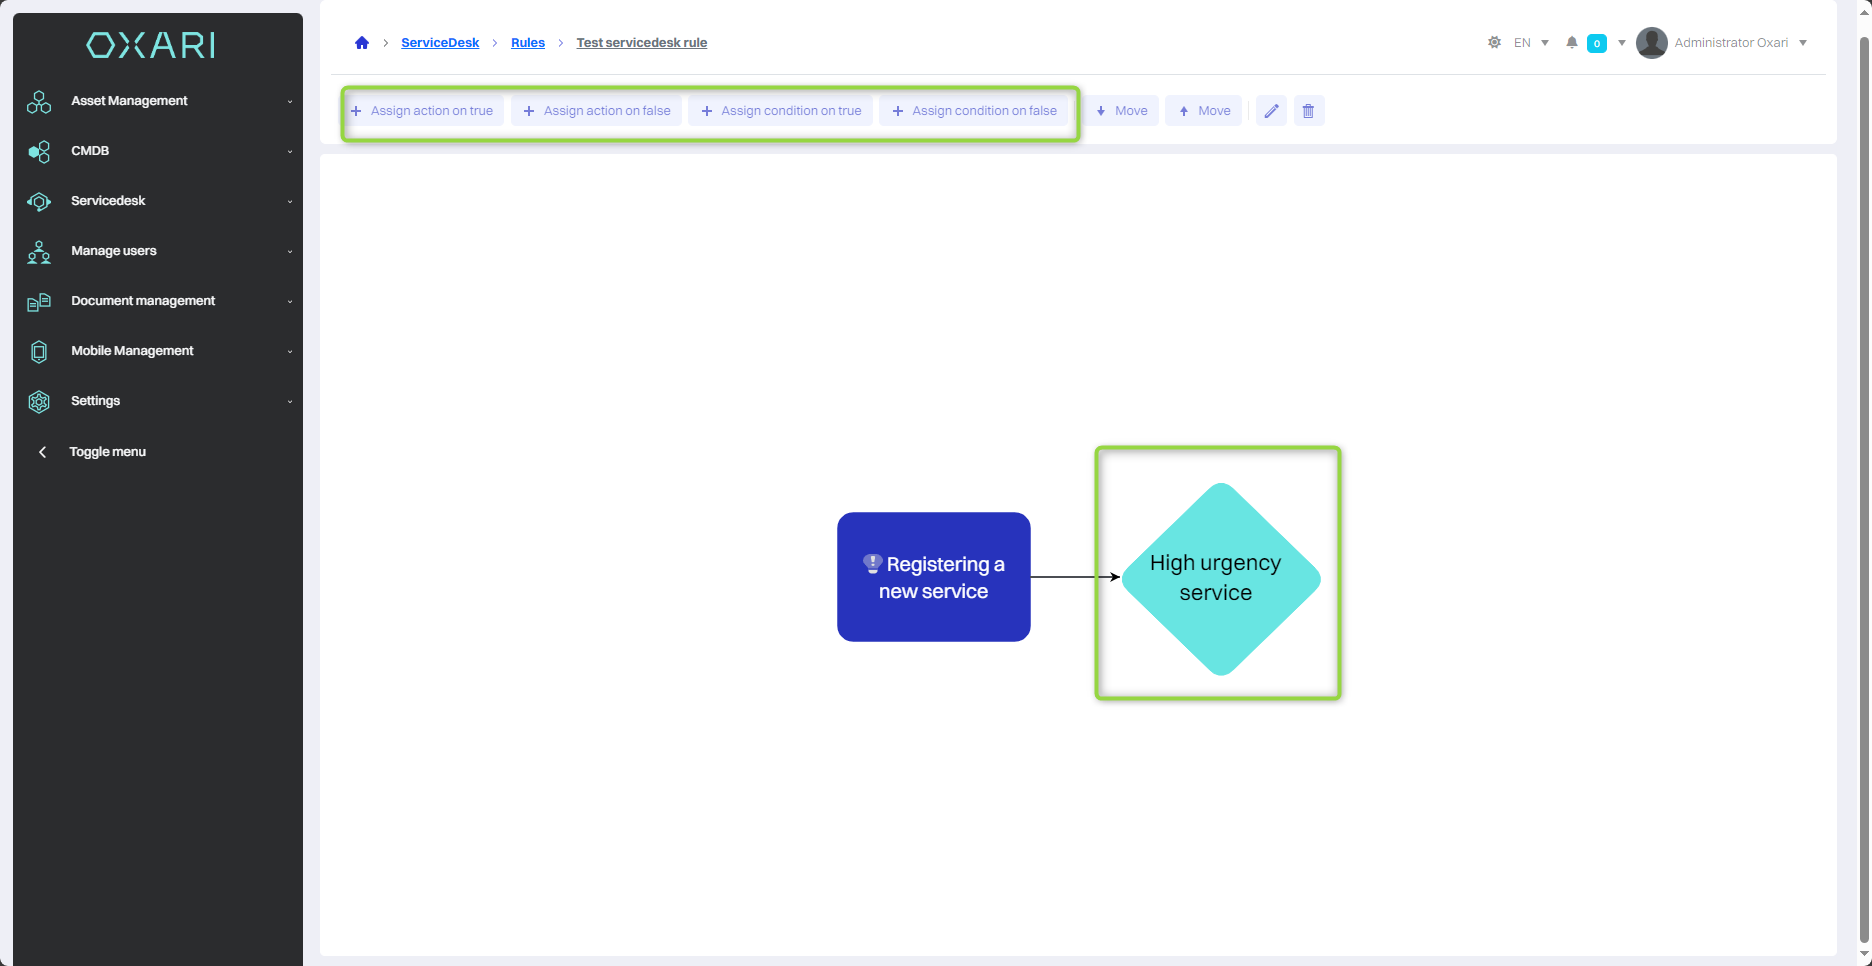
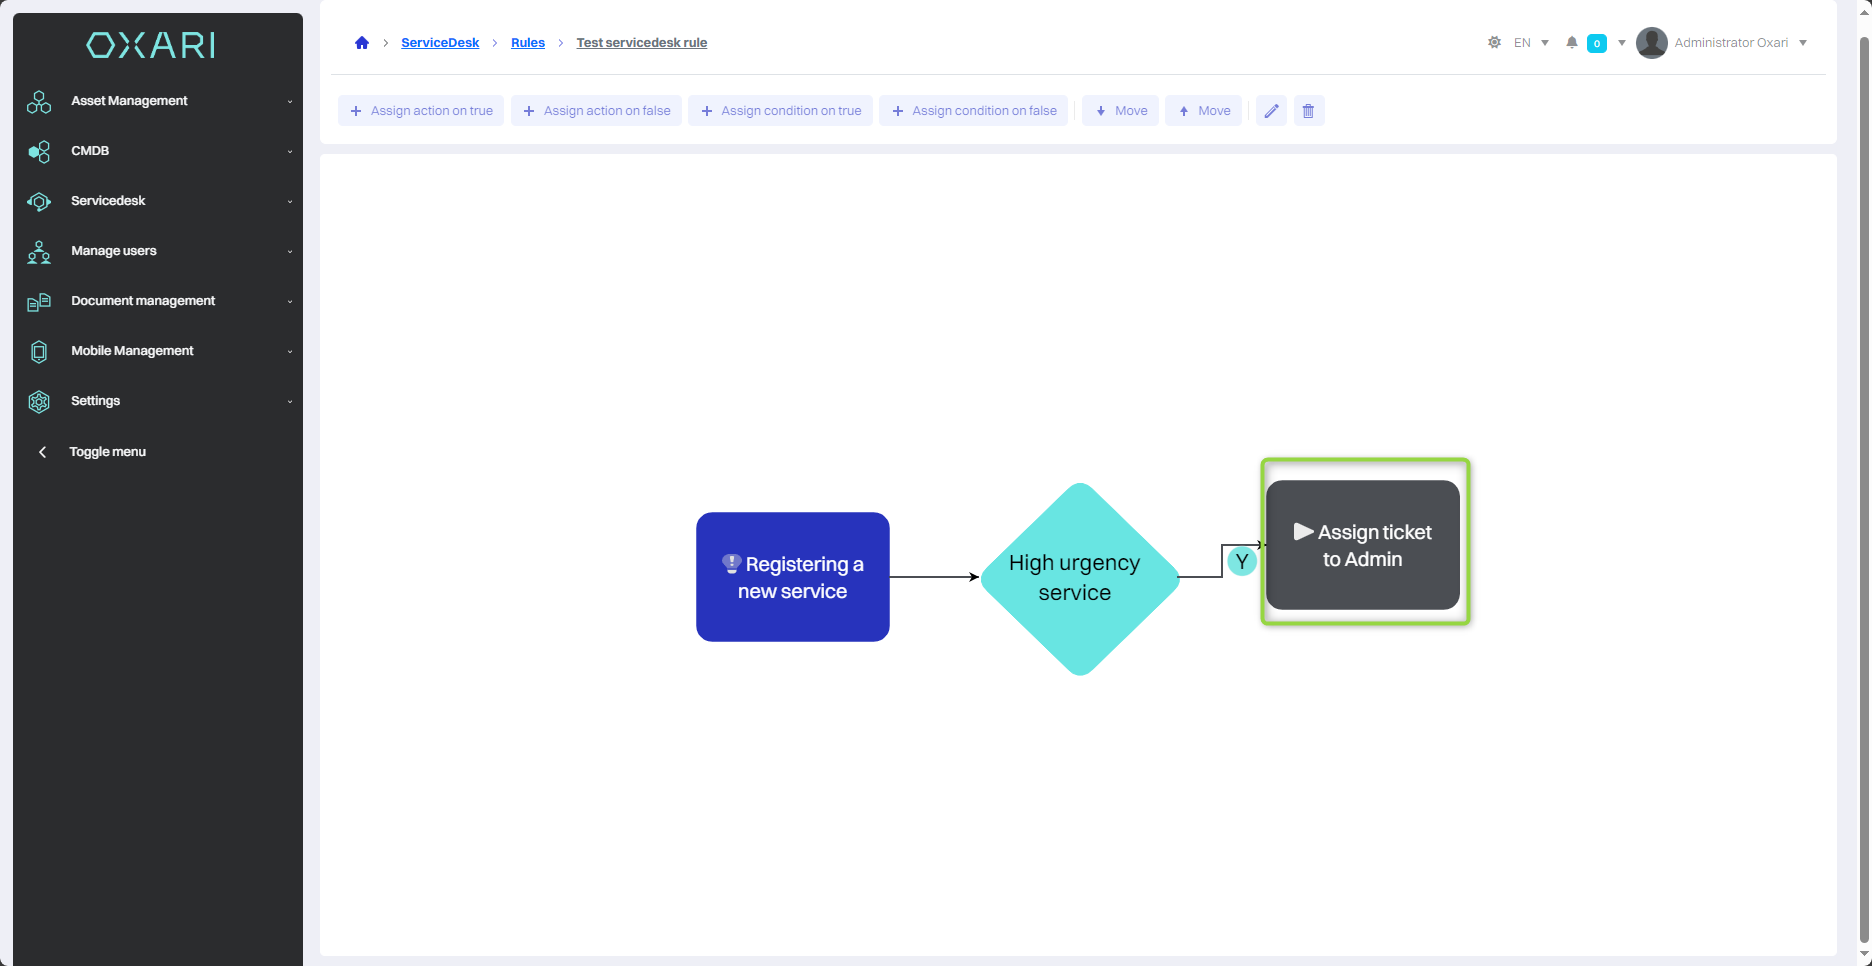
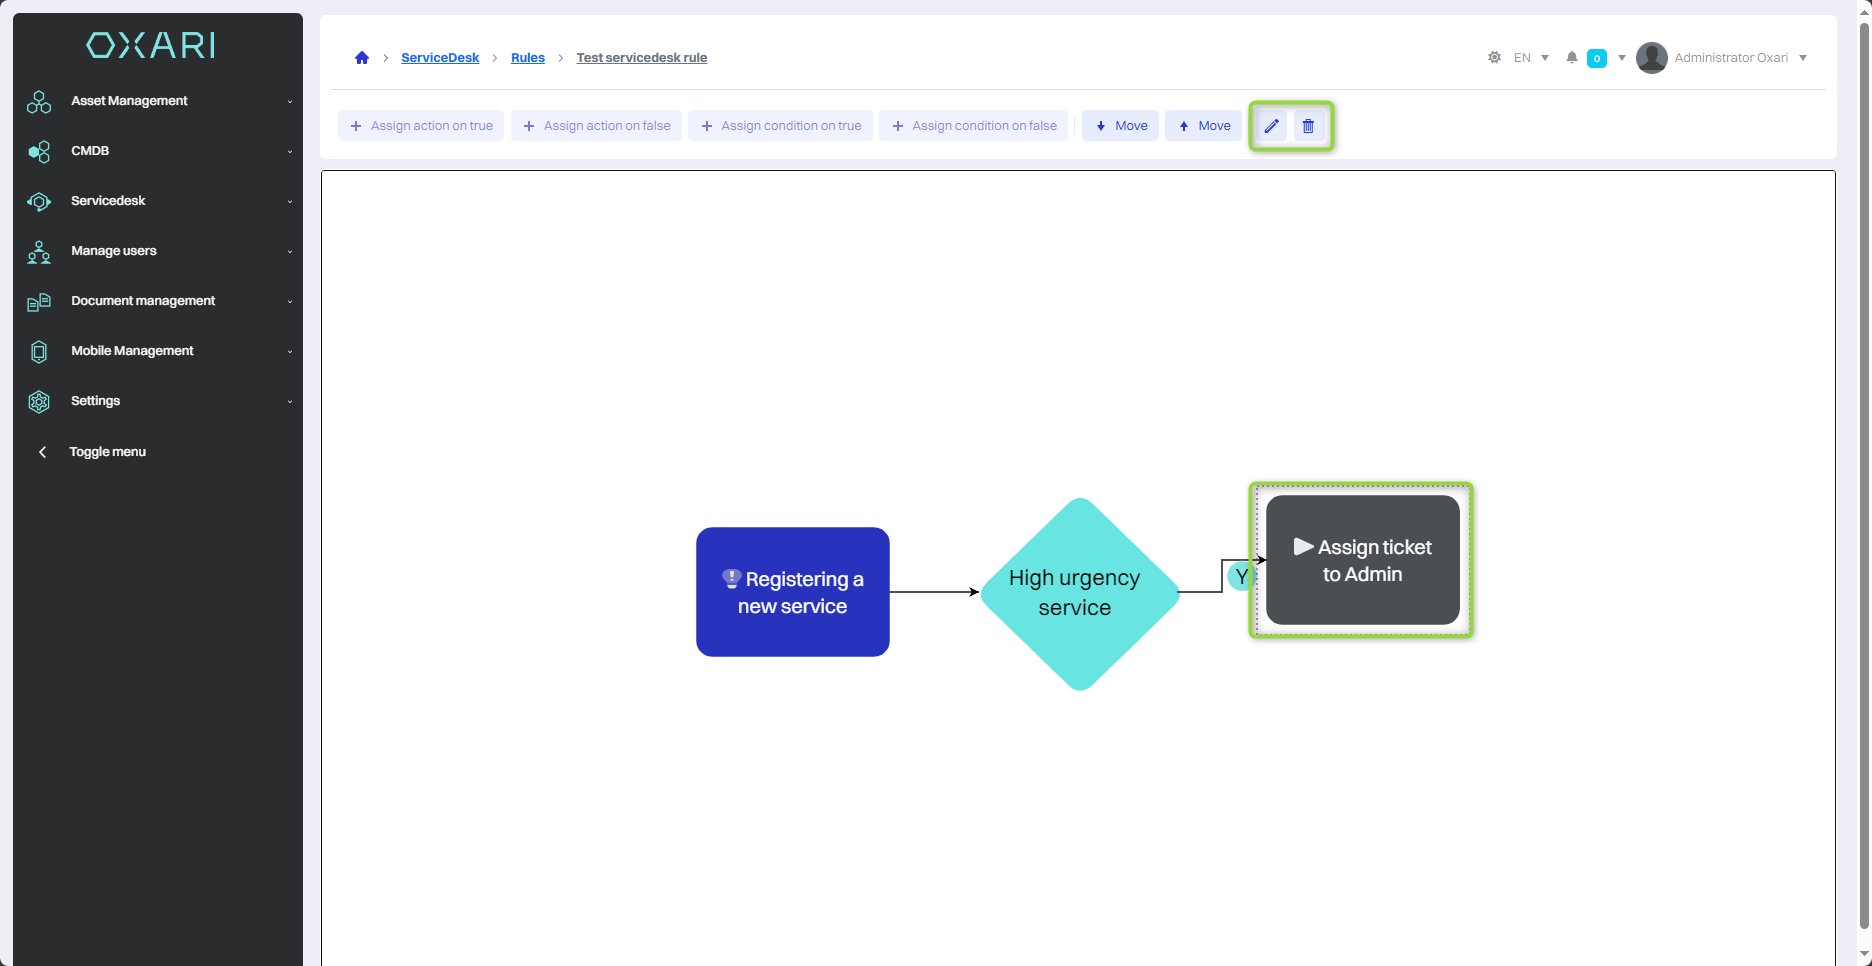
After the creation of the rule, the user will be transferred to a window to create a rule. Rules in OXARI work on an “if-then” basis, where certain conditions (if) trigger certain actions (this). In this case, the triggering event is “Register new service.” To assign an action or condition to the event, click on the tile in question.
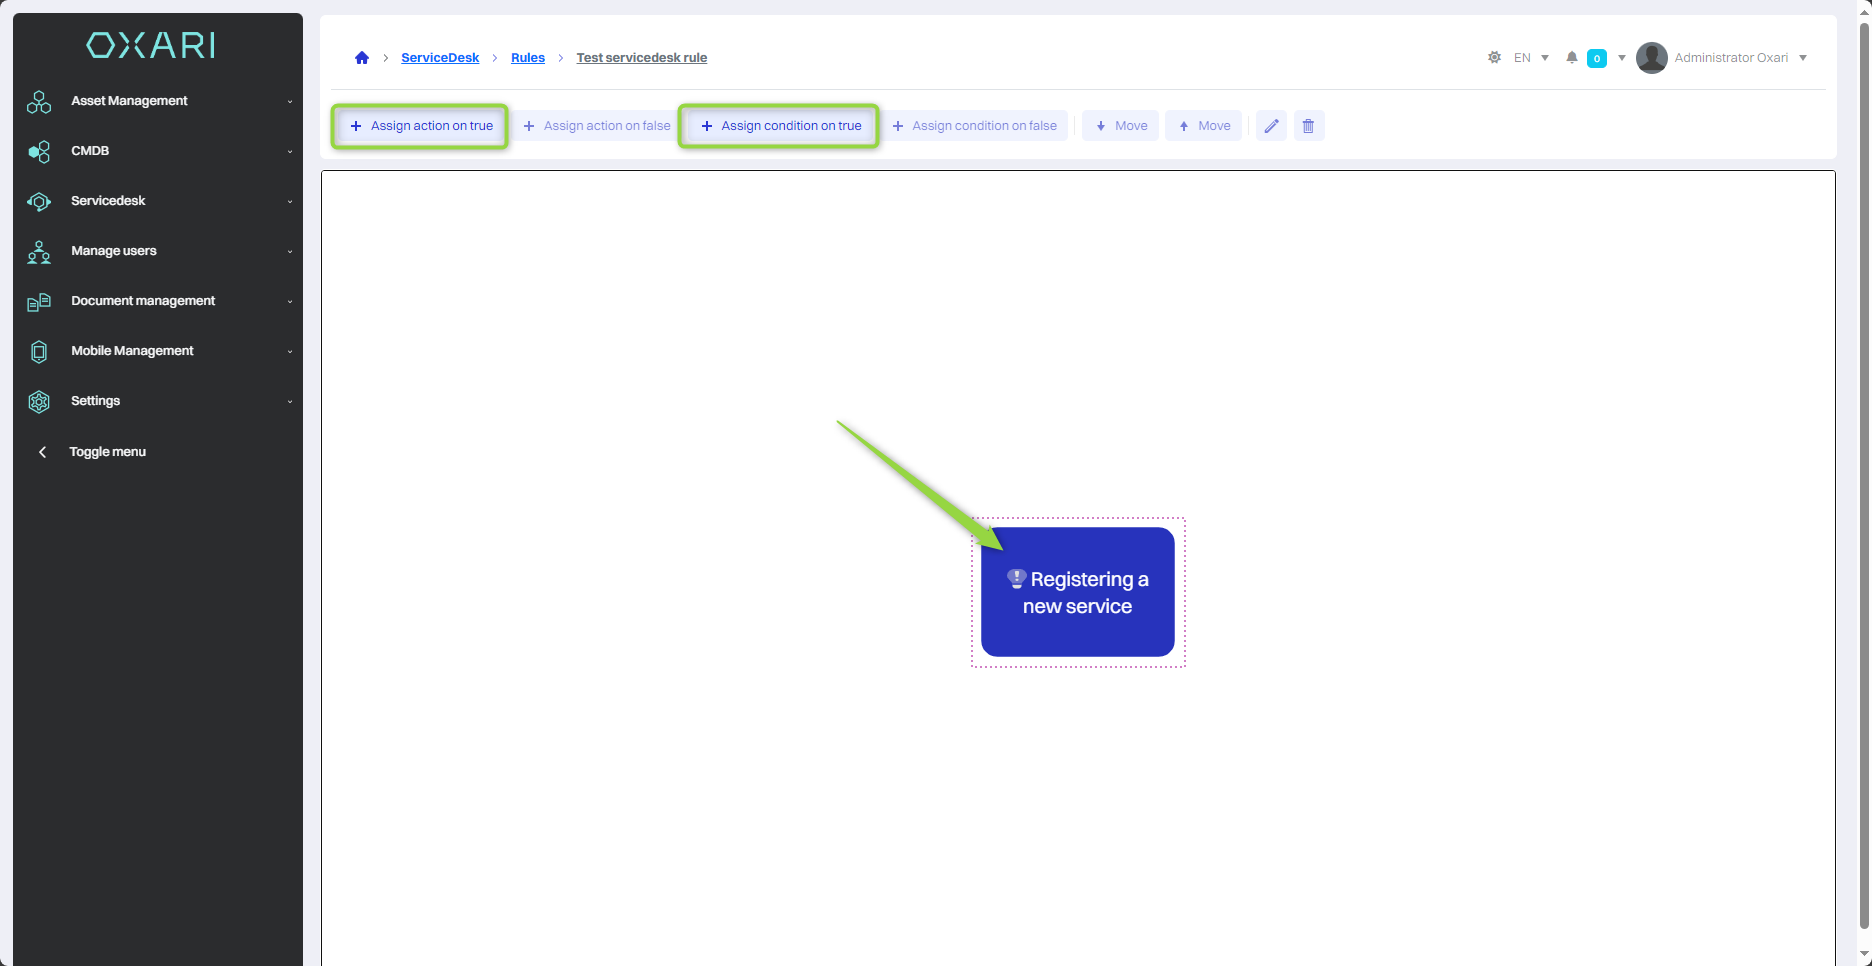
Assigning a condition
After clicking on the tile, two options will be usable “Assign action for TRUE” and “Assign condition for TRUE”. The condition will be added first condition. Click the “Assign a warrant for TRUE” button.
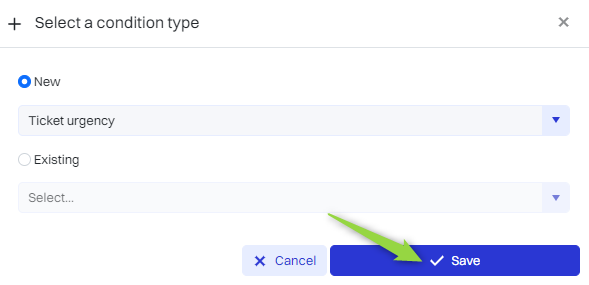
Next, in the “Select condition type” window, the user has a choice to specify conditions for the newly created rule. In the “New” field, you can select the criterion by which the rule will be applied, for example, “Urgency of the request”. Click the “Save” button to configure the condition.
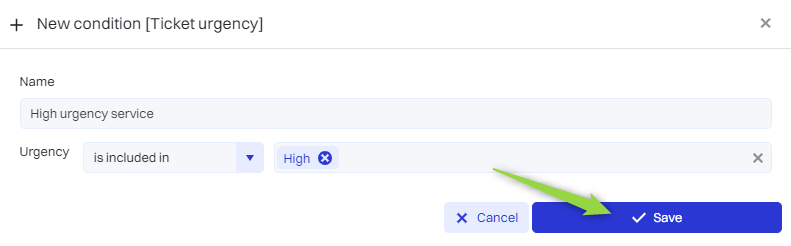
Then in the “New condition” window you will find:
| 1 | A field for entering the name of the new condition. |
| 2 | A drop-down menu with the “includes in” option, so that the condition can be specified based on urgency. |
| 3 | Field for entering the condition (Urgency contains in High) which means that the condition will work when the urgency of the service is high. |
You should, fill in the fields, and then click the “Save” button.
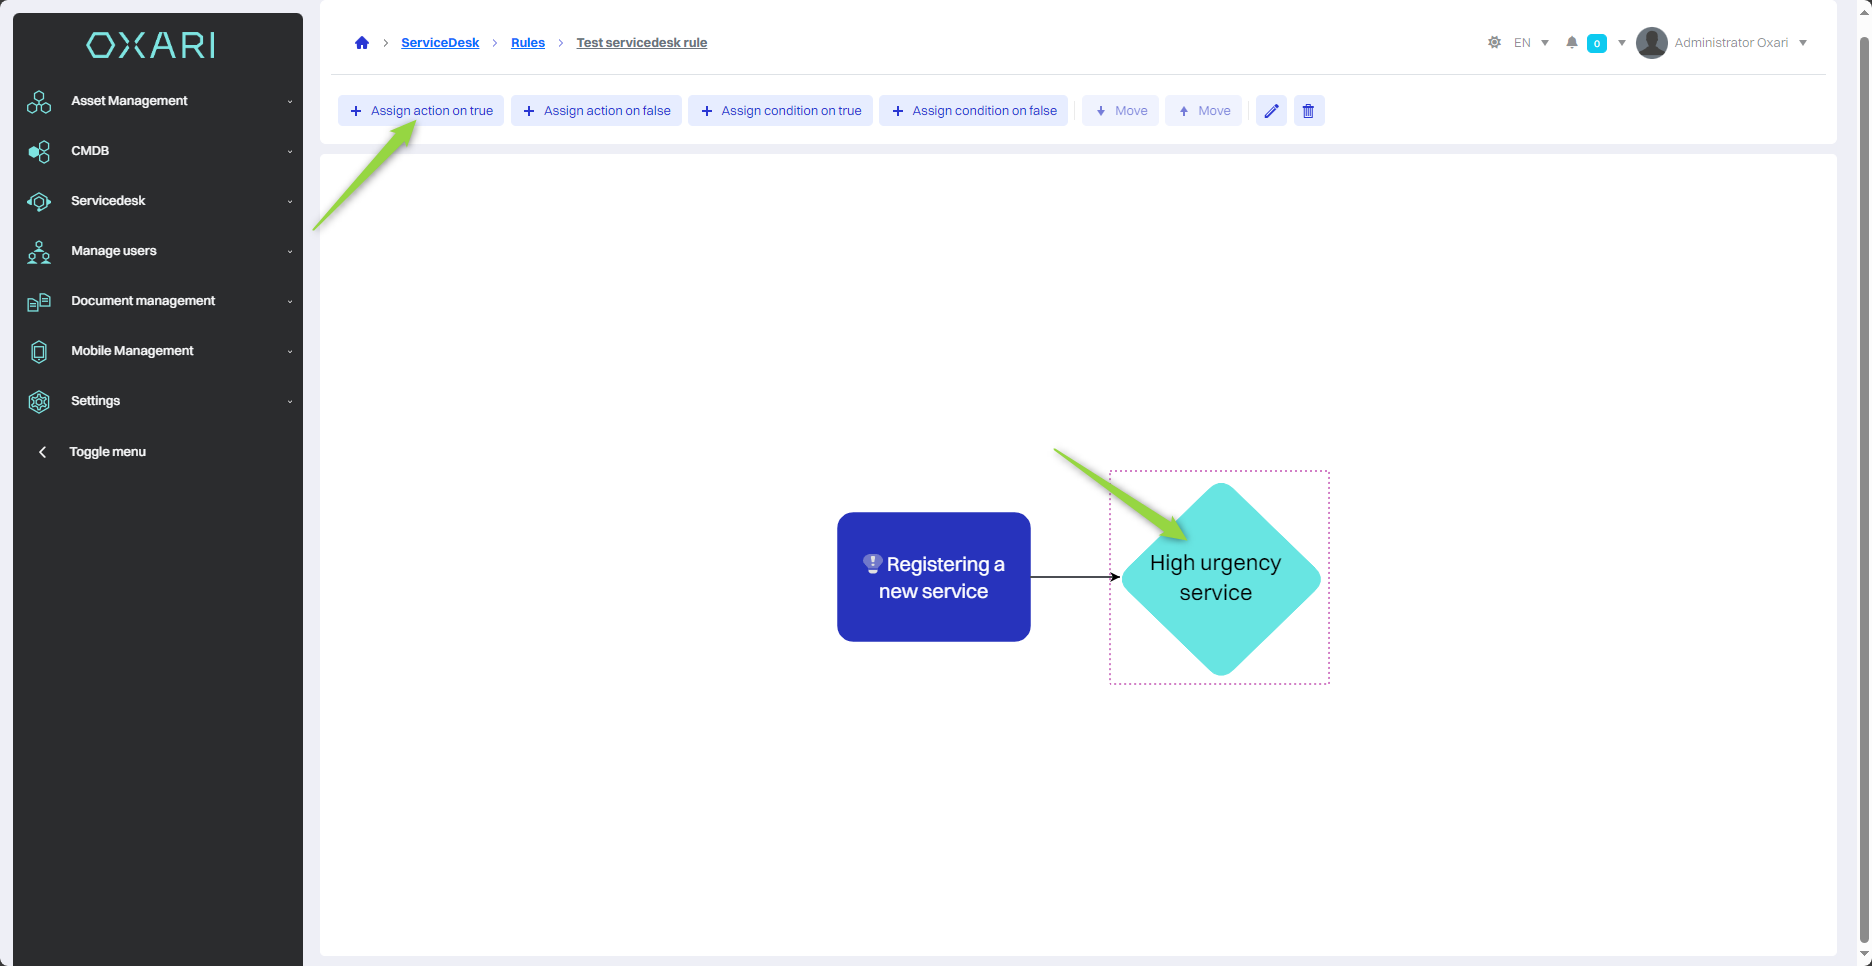
The condition has been created and both actions and further conditions can be assigned to it in the OXARI system. These actions and conditions are designated to be executed when the original condition is met (TRUE), as well as to be executed when the condition is not met (FALSE).
Assigning an action
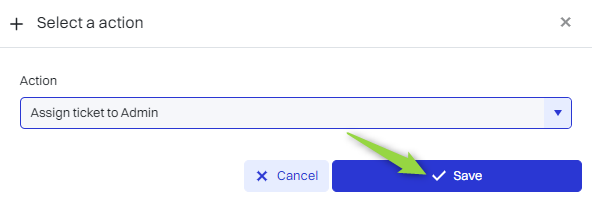
In the example in question, when the high urgency service condition is met, to assign an action to it, click on the “High urgency service” tile and then select “Assign action for TRUE”.
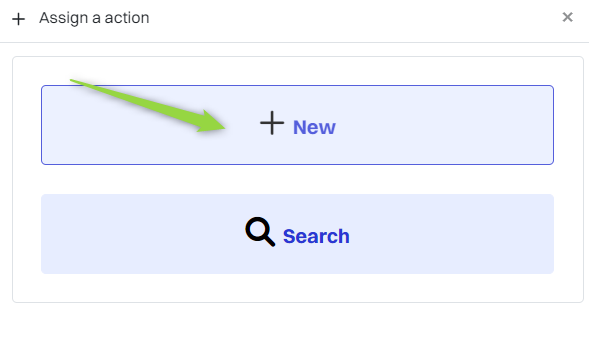
In the process of defining rules in the OXARI system, after creating a condition, the user can proceed to assign an action. There are two options available:
| 1 | “New” - Allows you to create a new action that will be executed when the condition is met. |
| 2 | “Search” - Allows you to select actions that have already been defined in the Servicedesk > Actions section. More about actions: Go > |
In the example under discussion, a new action is created. To create a new action, the user should select “New” and proceed to the process of configuring this action.
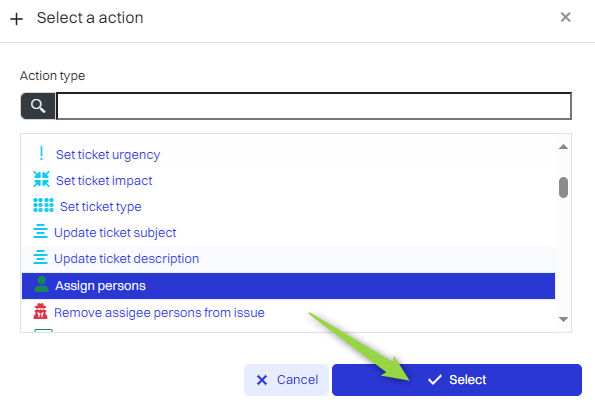
Then in the “Select action” window, there are action types to choose from, such as:
| 1 | Assign person - Allows you to automatically assign a ticket to a specific person. |
| 2 | Set ticket priority - Automatically determines the priority of the request. |
| 3 | Send SMS - Automatically sends SMS notifications to the desired user or group. |
In the example discussed here, the “Assign person” action is assigned, you need to click in the given field, and then click the “Select” button.
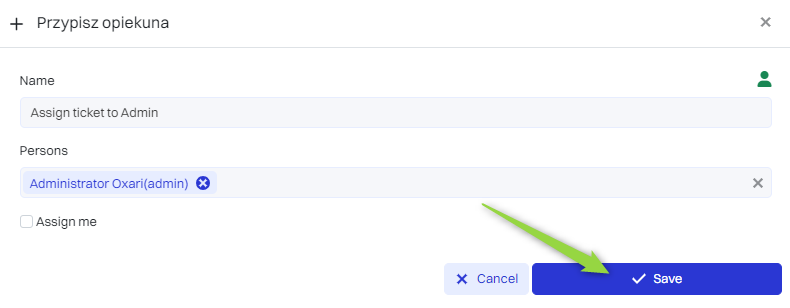
Next, the “Assign person” window is used to designate the person responsible for a particular application in the application management system.
| 1 | Name - The user can enter the title of the action for easy identification. |
| 2 | Persons - You can select from a list of specific persons to whom the notification is to be assigned. |
| 3 | Assign to me - Allows the user who creates the action to automatically assign the ticket to himself. |
Fill in the desired fields and click the “Save” button.
The action has been added to the rule. It may happen that it is not immediately visible, in which case you should refresh the page.
Once a new action is created, it becomes available in the Servicedesk > Actions section and can be reused in various rules. To use an already existing action, in the “Assign action” window, simply select “Search”, find the desired action in the list and confirm the selection by clicking “Save”. This allows you to effectively use the action in different scenarios without having to create it again.
Editing/deleting actions and conditions
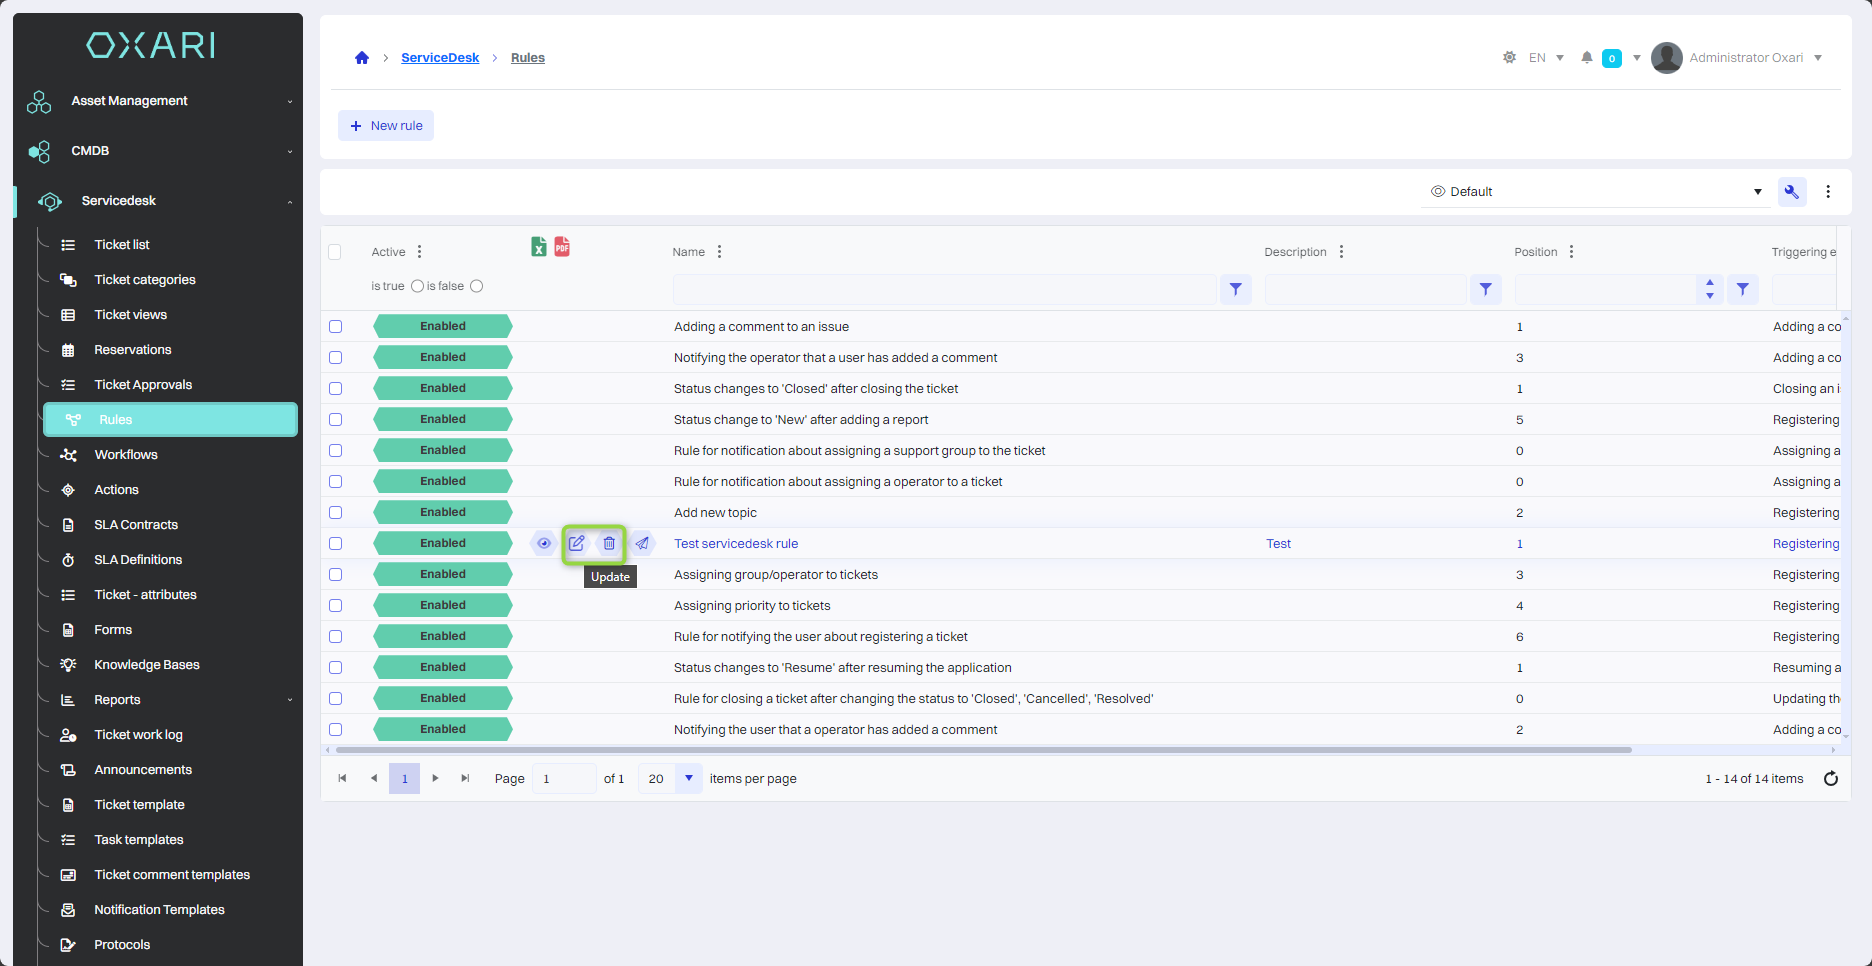
To edit or delete actions and conditions, simply go to Servicedesk > Rules. Then, to see more options for a rule, click the “Details” button next to the selected rule.

In the rule details, select the desired action/condition by clicking on the tile of the corresponding action/condition. The edit/delete options will be visible in the upper right corner.
Editing/deleting a rule
To edit or delete rules, go to Servicedesk > Rules. Hover over the desired rule. The edit/delete buttons will be displayed.
Activating/Deactivating a rule
Each rule can be activated or deactivated. To activate/deactivate a rule, go to Servicedesk > Rules. Hover over the desired rule and click the edit button.

Then, in the edit window, click on the “Active” checkbox (the checked box means that the rule will be Active), finally click the “Save” button.
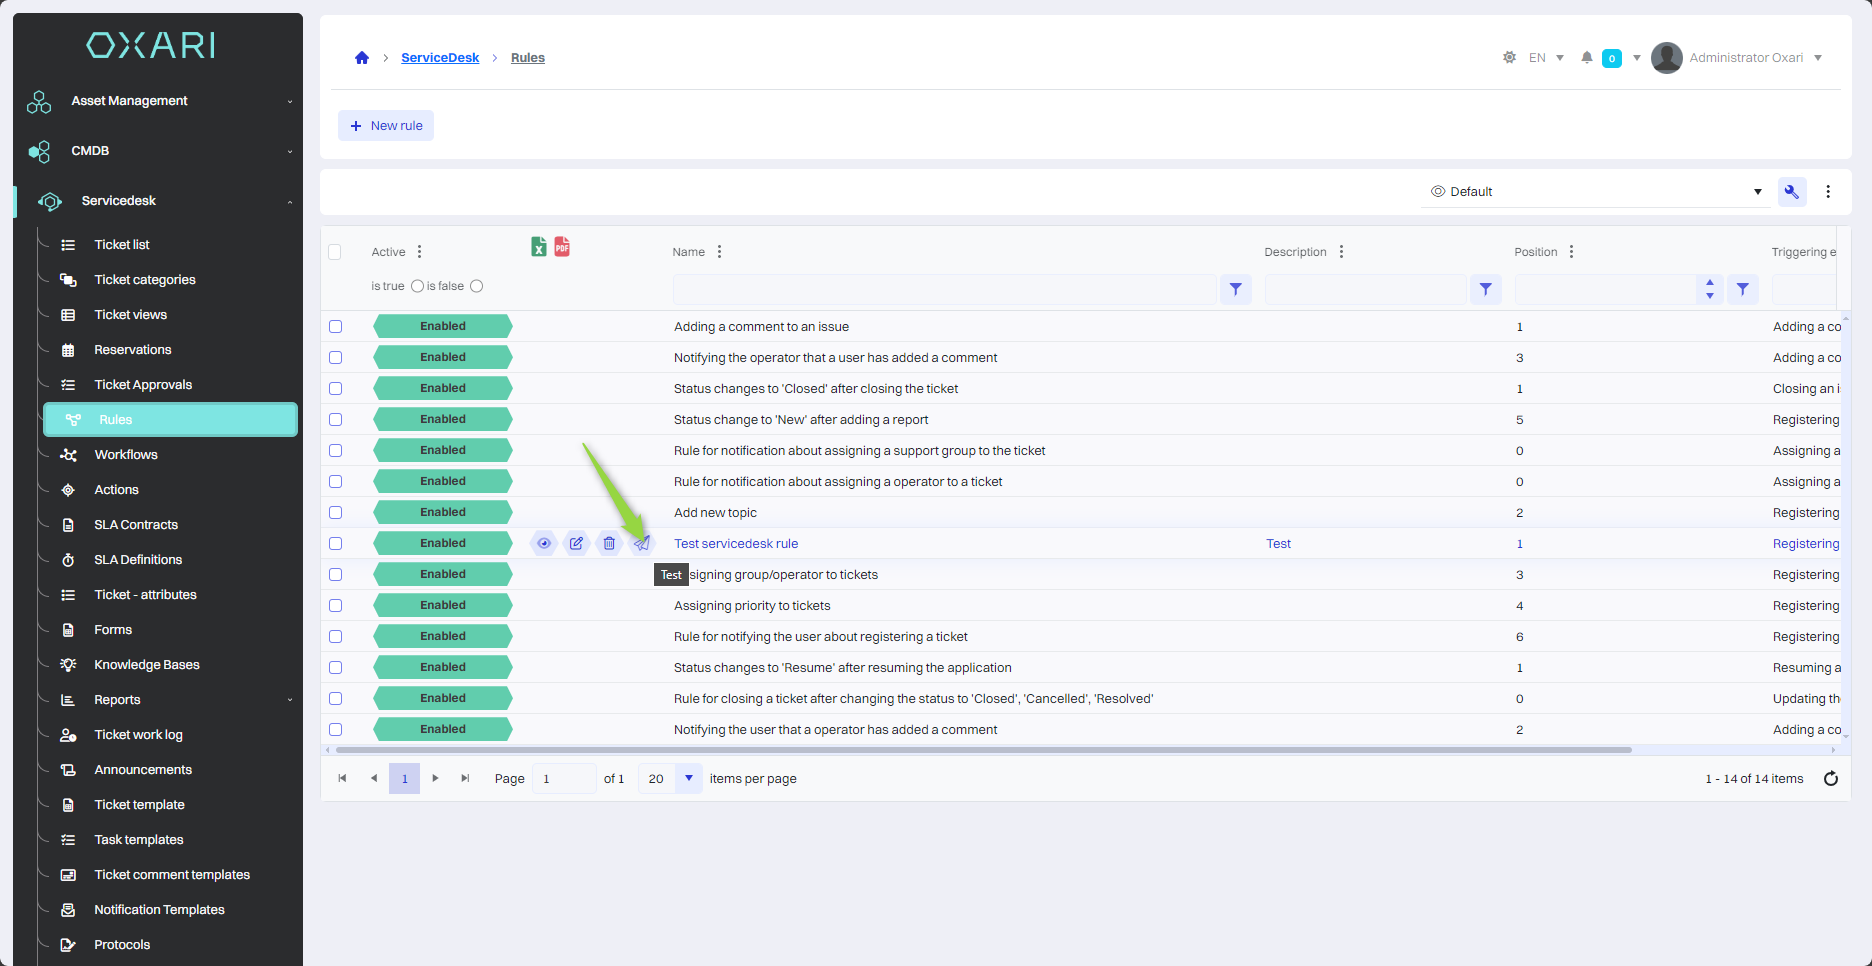
Testing a rule
To test rules, go to Servicedesk > Rules. Hover over the desired rule. A button to perform the test is displayed.
Only rules with an assigned schedule can be tested.
Description of triggering events
See the table below for a brief description of each trigger event:
| 1 | Ticket priority update - Changes the priority of a ticket, which may affect the order in which it is handled. |
| 2 | Assign a group of handlers and a handler - Assign a group of people or a single person to be responsible for a ticket. |
| 3 | Registering a new service - Entering information about a new service into the system. |
| 4 | Completion of time registration for the ticket - Completion of the countdown of the working time assigned to the ticket. |
| 5 | Registering a new incident - Declaring a new incident, i.e. an unplanned interruption or downgrade of the service. |
| 6 | Assigning a service company to a ticket - Assigning an outside company to work on a ticket. |
| 7 | Updating the assignee person - Update the details of the assignee person. |
| 8 | Updating the impact of the ticket - Changing the assessment of the impact of the ticket on the company's business or customers. |
| 9 | Resumption of notification - Re-activate a previously suspended notification. |
| 10 | Start time recording for a ticket - Activate the time counter assigned to a ticket. |
| 11 | Selecting an action in the ticket details - Selecting specific actions to be taken as part of the ticket handling process. |
| 12 | Registering a new task - Creating a new task that is part of the ticket resolution process. |
| 13 | Updating the status of a ticket - Changing the status of a ticket, which indicates the stage of its processing. |
| 14 | Adding a comment to a ticket - Entering a new comment to a ticket, which can provide additional information. |
| 15 | Assigning an observer to a ticket - Adding a person who will receive notification of changes to a ticket, but who will not be directly responsible for resolving it. |
| 16 | Recording work time for a ticket - Record the work time spent on a ticket, which is important for effort tracking and billing. |
| 17 | Assigning an observer group to a ticket - Add a group of people to observe the progress of a ticket. |
| 18 | Closing a ticket - Marking a ticket as resolved. |
| 19 | Assigning yourself to a ticket - Assigning yourself to a ticket, taking responsibility for its solution. |
| 20 | Registering a new reservation - Creating a new reservation, which may be related to resource allocation. |
| 21 | Updating the urgency of a ticket - Changing the urgency rating of a ticket, which may affect the speed of its resolution. |
| 22 | Assigning a supervisor to a ticket - Assigning a specific person to supervise the ticket. |
| 23 | Approval of a ticket - Official acceptance of a ticket, which may be required before certain actions can be taken. |
| 24 | Category update - Changing the category of a ticket, which helps classify and direct it to the appropriate team. |
| 25 | Accepting a ticket - Confirming that a ticket has been accepted for processing. |
| 26 | Cancellation of acceptance in a ticket - Withdrawing earlier acceptance of a ticket, perhaps due to a mistake. |
| 27 | Rejection of a ticket - Refusal to accept a ticket that may be considered invalid or out of scope for support. |
| 28 | Adding acceptance to a ticket - Attaching consent to process a ticket, perhaps as part of the process requirements. |
| 29 | Changing the type of ticket - Modifying the type of ticket, for example, from incident to problem. |
| 30 | Adding a workflow form to a ticket - Entering a form to be used in the processing of a ticket. |
| 31 | Registering a new problem - Report a new problem, which is usually more complex than an incident and requires longer analysis. |
| 32 | Registering a new ticket - Creating a new ticket in the system. |
| 33 | Completing a ticket survey - Evaluating a ticket or service by completing a survey. |