“CI Relation” forms perform a fundamental function in defining and standardizing information related to relation between different configuration elements (CIs). They are essential for configuration management processes, enabling the collection, viewing and processing of detailed information about the relations between IT components. Forms can contain a variety of fields (attributes), such as text, date selectors, drop-down lists, checkboxes or attachment spaces, which are tailored to document specific attributes and properties of CI relations.
More about CI relation attributes: Go >
More about configuration elements: Go >
New CI relation form
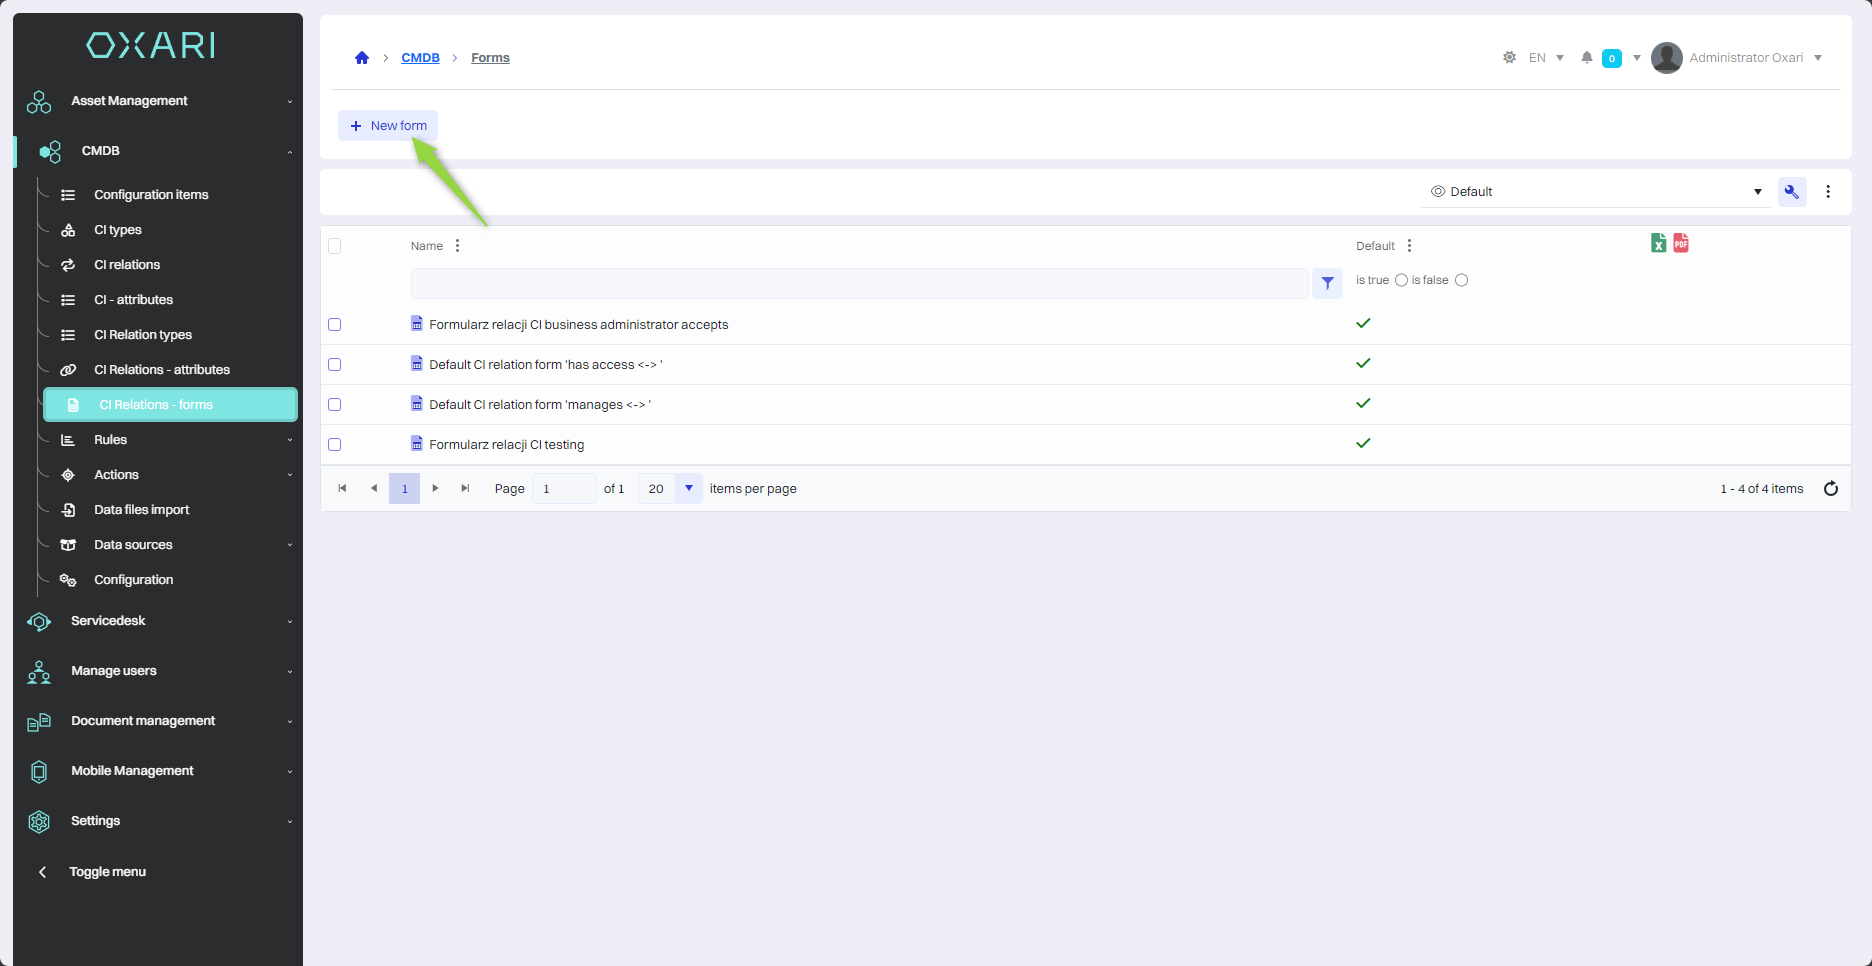
To add a new CI relation form, go to CMDB > CI relation - Forms, and then click the “New form” button.
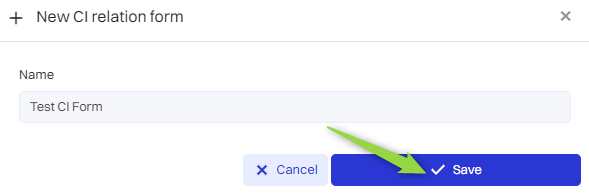
Then name the CI relation form and click the “Save” button.
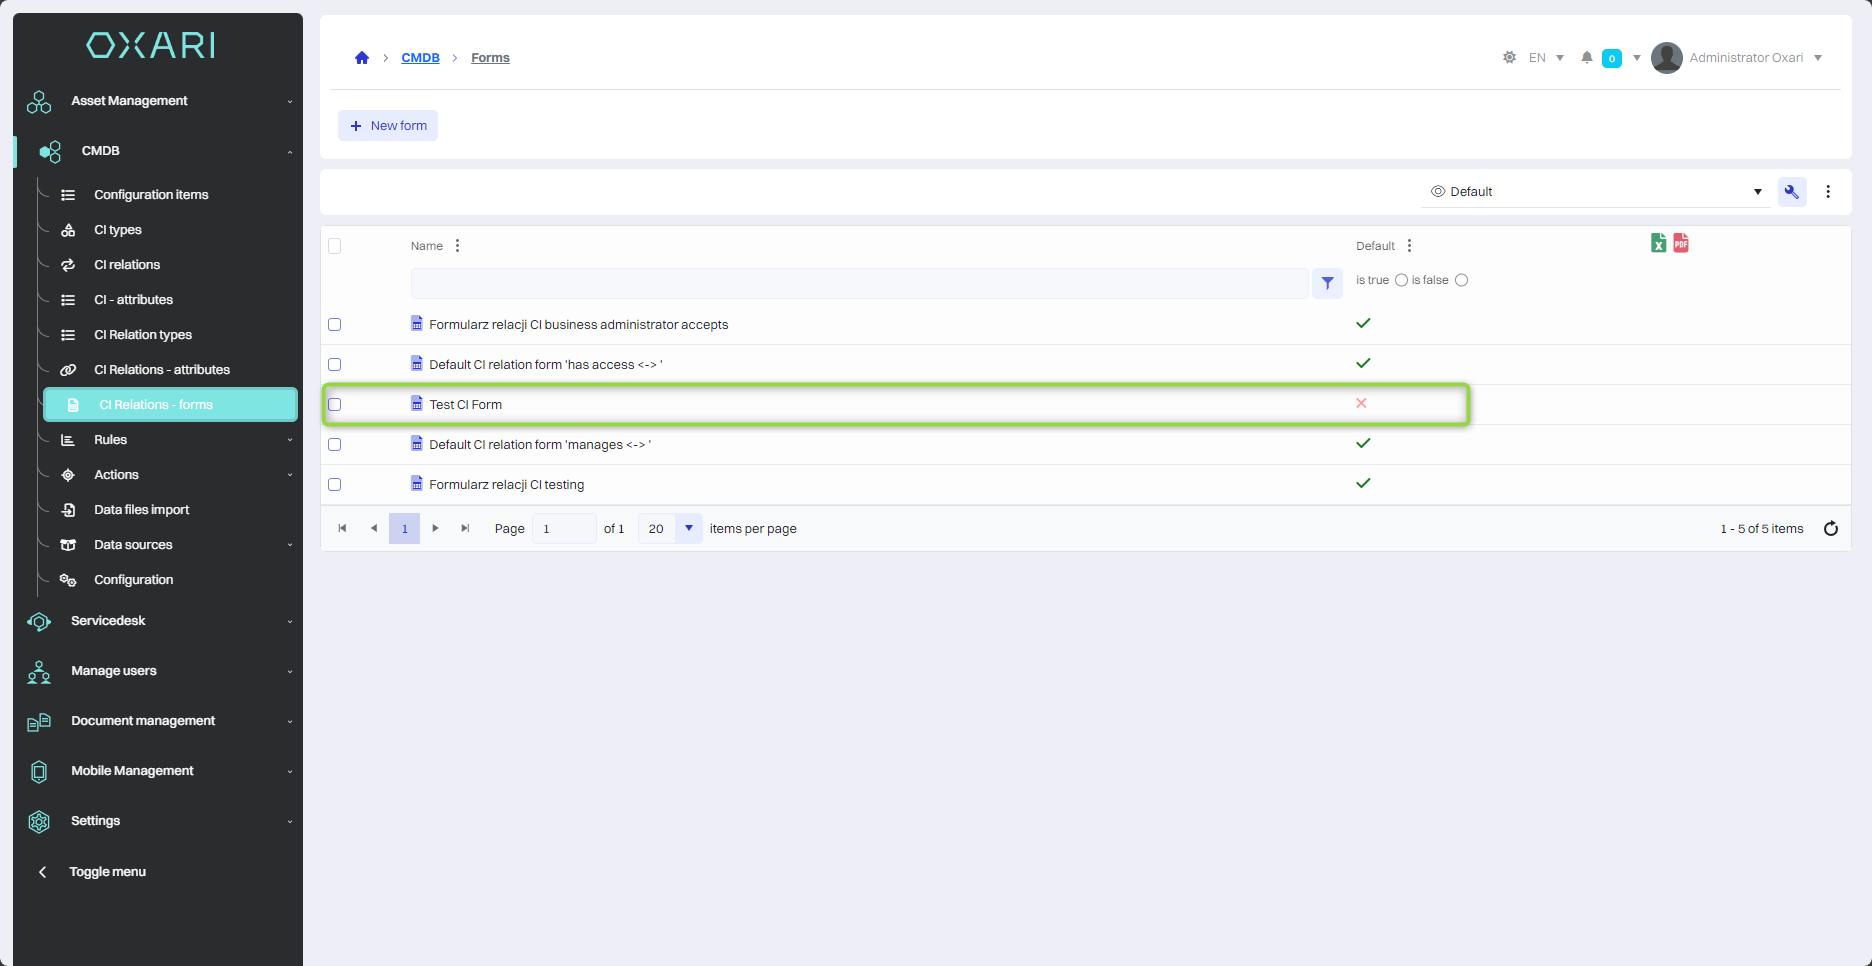
The form has been added to the list.
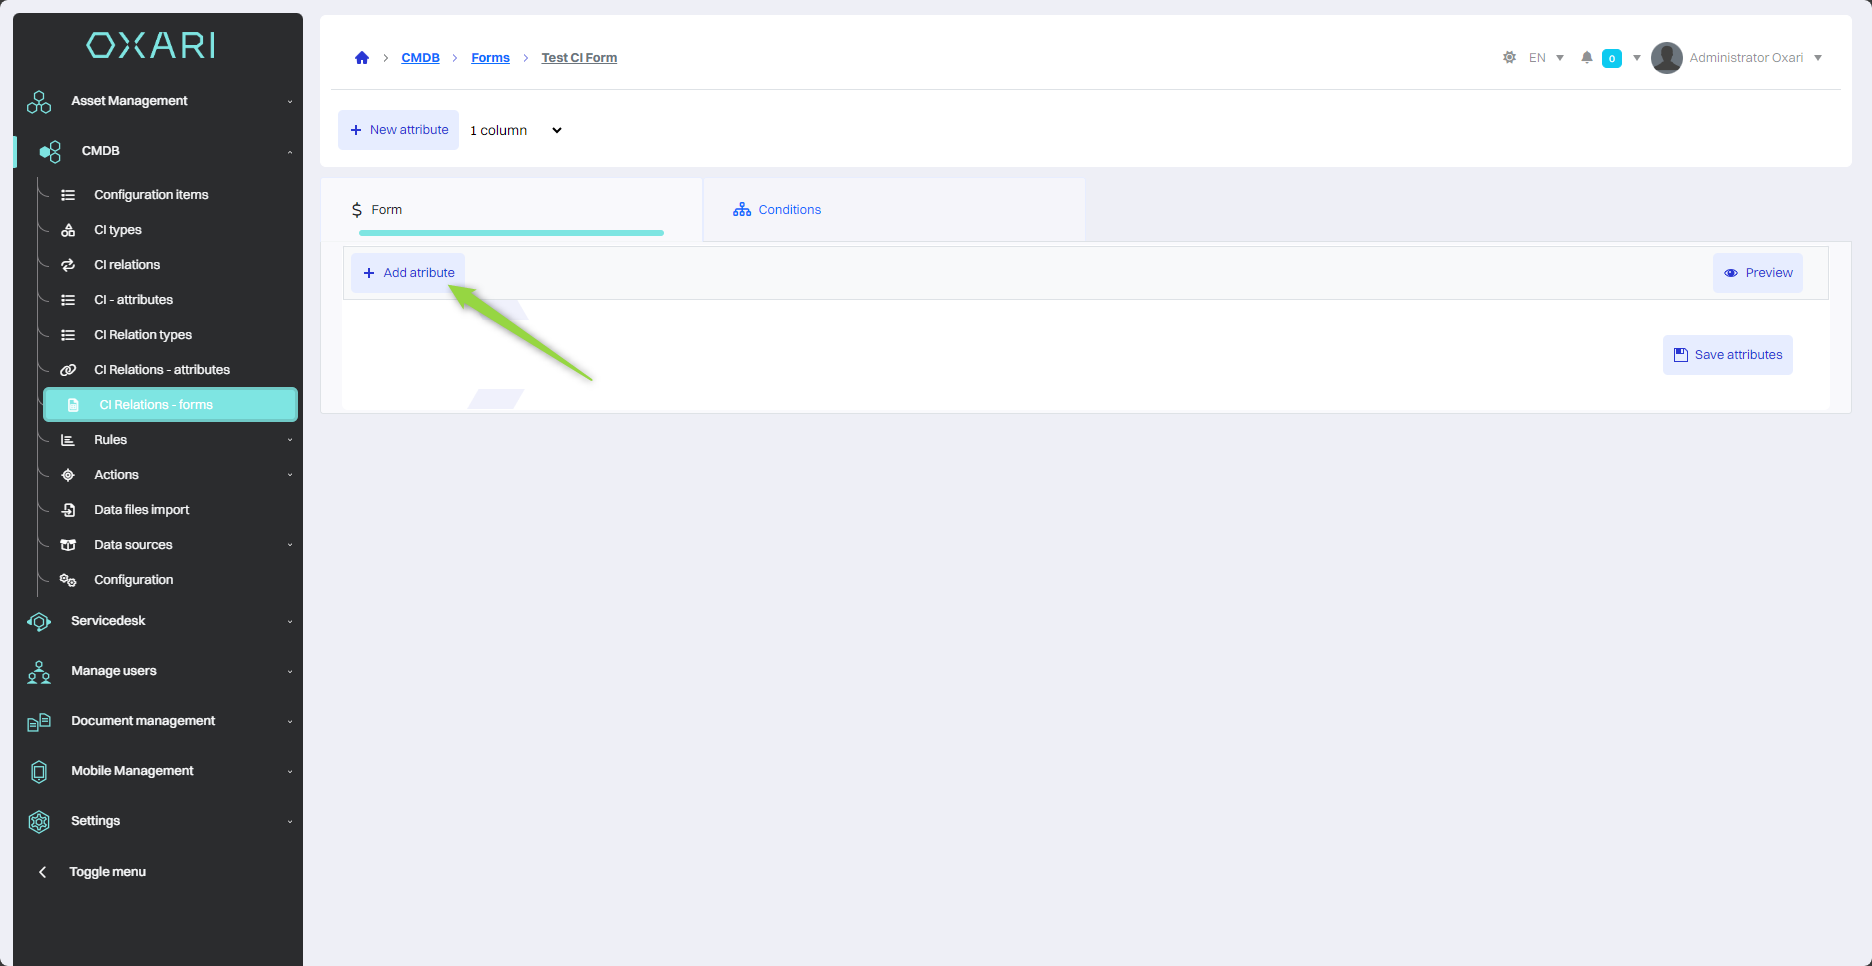
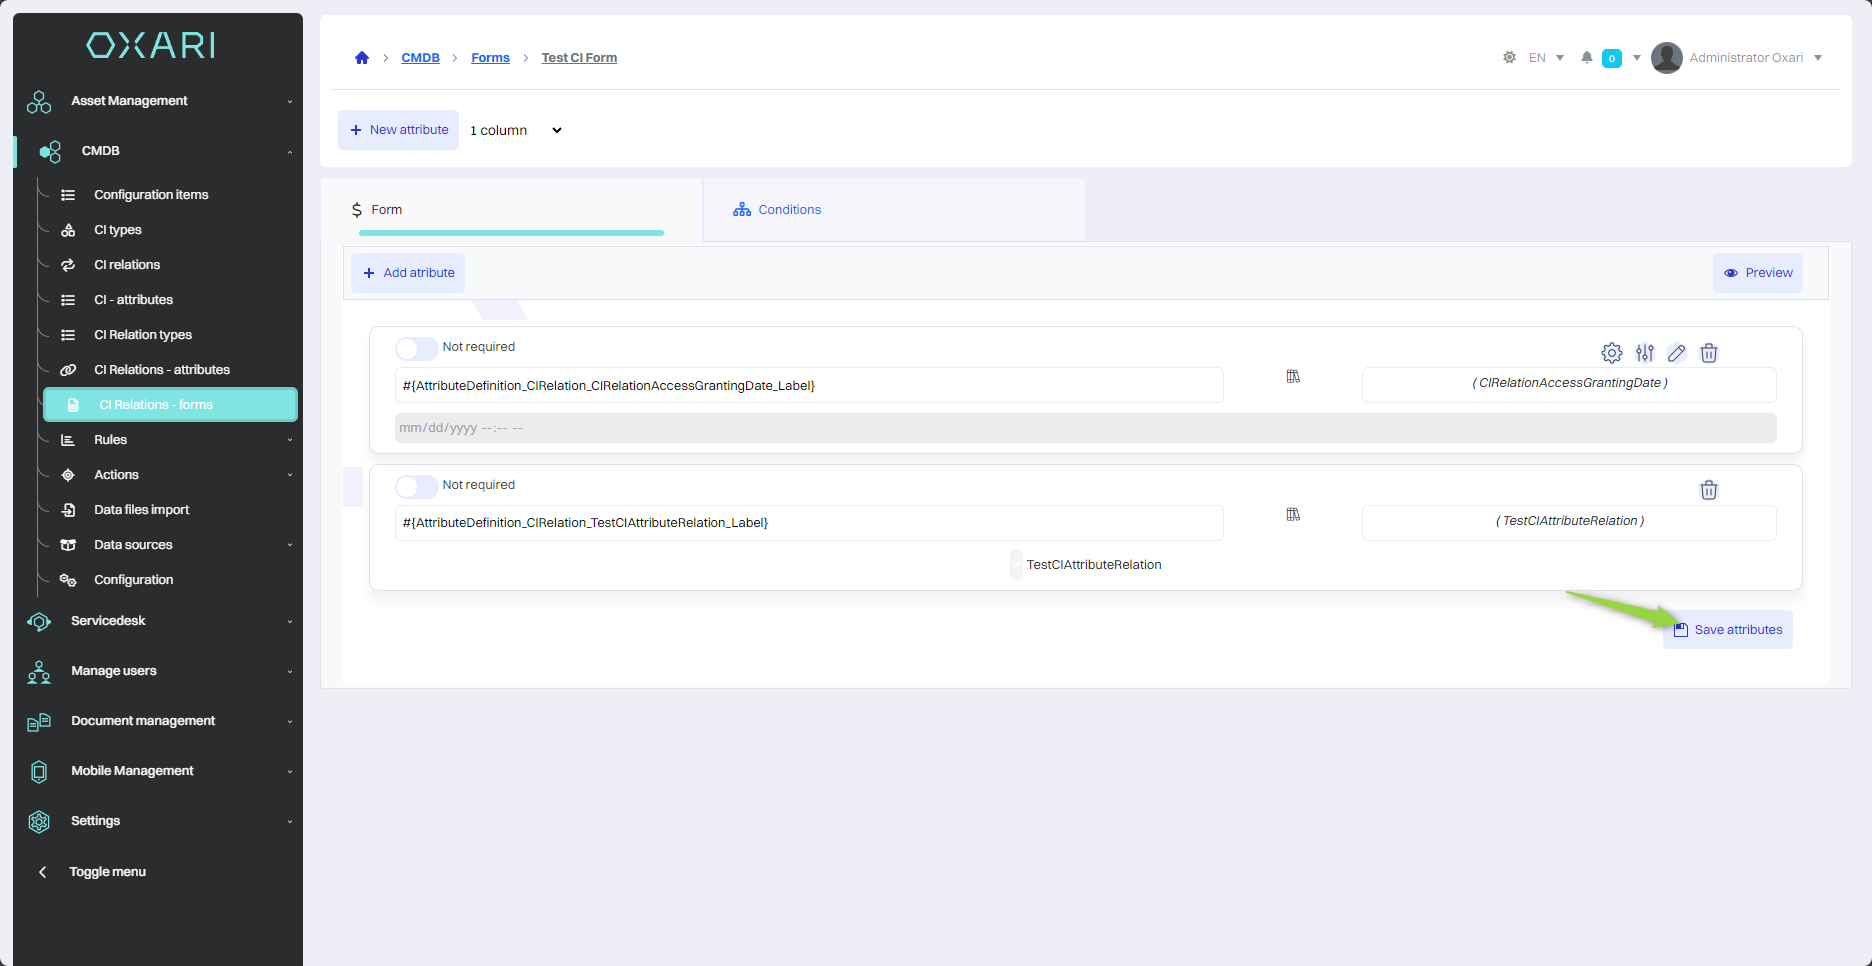
Adding attributes to a form
To add an attribute to a form, go to CMDB > CI relation - Forms, and then click the “Details” button, next to the desired form.

Adding an attribute from the list
New attributes can be added as part of form editing. To add a new attribute, click the “Add attribute” button.
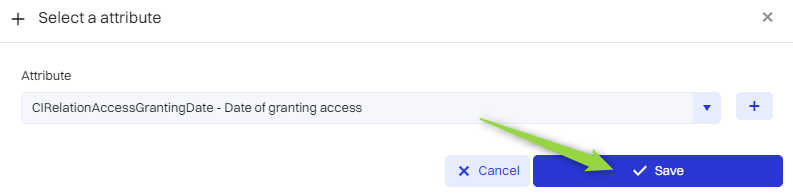
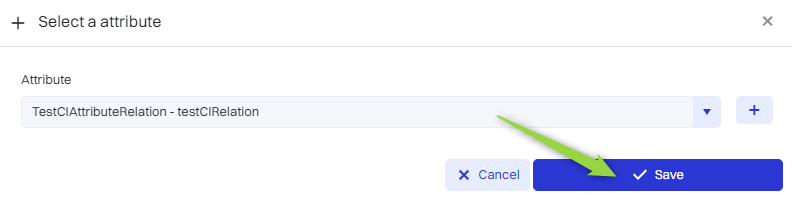
Then select the attribute from the list of saved attributes, finally click the “Save” button.
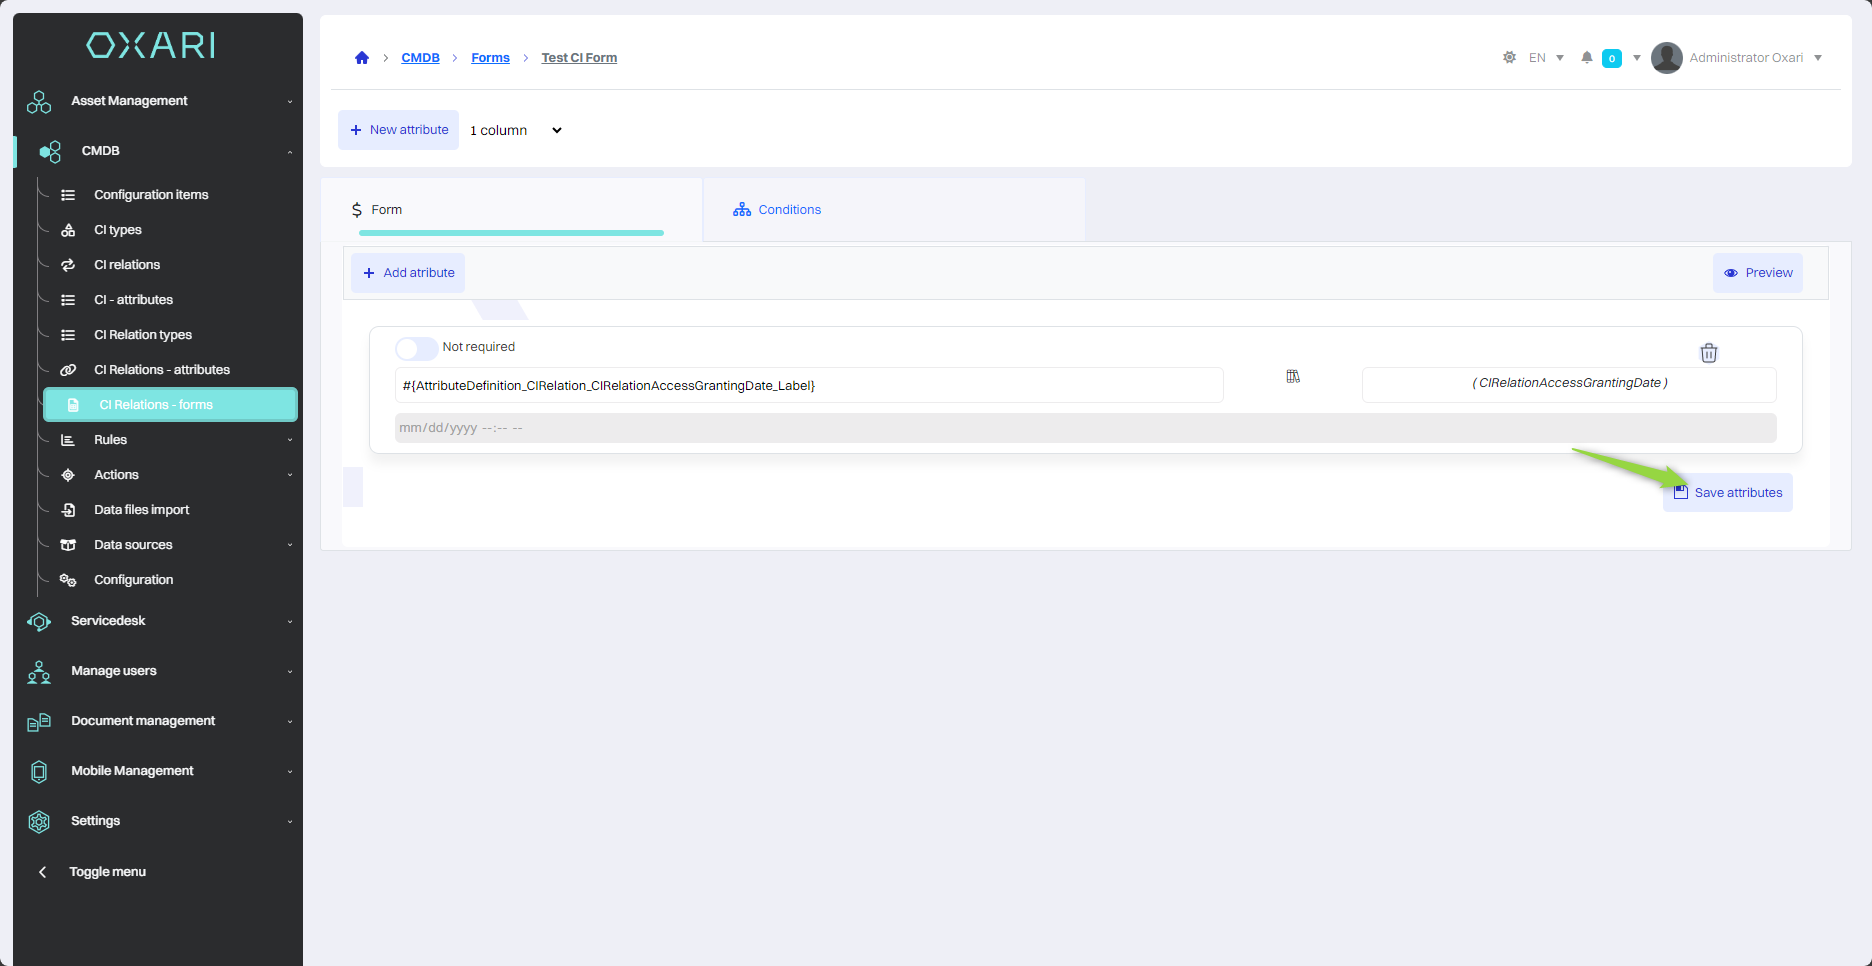
To save the attribute to the form at the very end, you need to click the “Save attributes” button.
Adding a new attribute
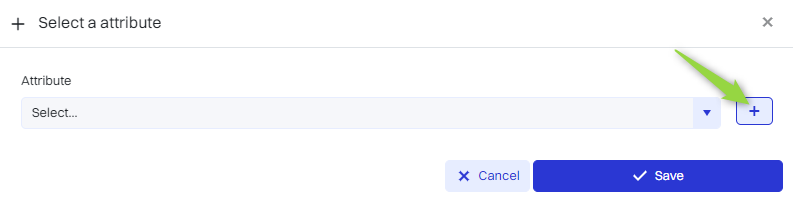
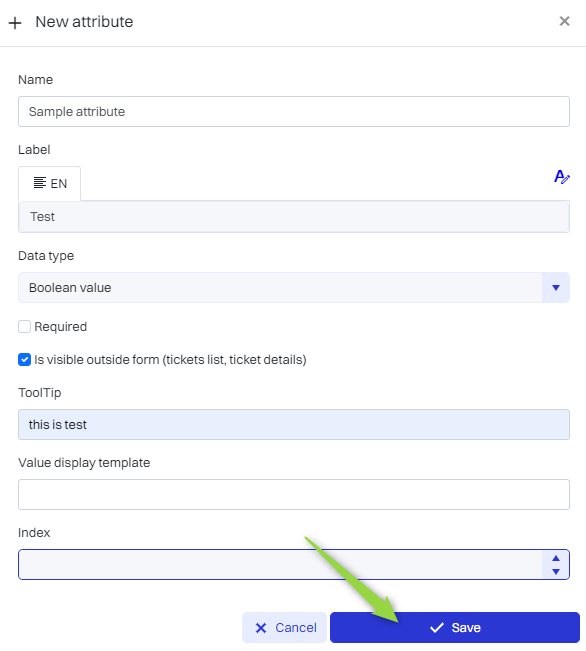
It is possible to adjust attributes under organizational requirements, in this case, you need to create a new attribute. To add a new attribute in the “Select attribute” window, click the “+” button.
Next, in the new attribute view, configure the attribute, and then click the “Save” button.
|
1 |
Name - Unique identifier of the attribute in the system. |
|
2 |
Label - Set the attribute's label in different languages, if the system offers multilingualism. |
|
3 |
Data type - Selection of the type of data that will be stored as an attribute, for example, “Boolean value” for yes/no type data. |
|
4 |
Checkbox Required - Select the option if the attribute is mandatory in the form. |
|
5 |
Attribute also visible outside the form - An option that, when enabled, allows the attribute to be displayed elsewhere in the system as well. |
|
6 |
Attribute type associated CI with a request - Checkbox that indicates whether the attribute is associated with a specific configuration item (CI). |
|
7 |
Hint - A place where user support text can be added regarding the attribute. |
|
8 |
Value display template - Determine the format for presenting the attribute value, if required. |
|
9 |
Position - Determining where in the form structure the attribute should appear. |
The attribute will be saved, it will be visible in the list of saved attributes. To use the attribute, select it from the list and click the “Save” button.
To save the attribute assignment to the form at the very end, you need to click the “Save attributes” button.
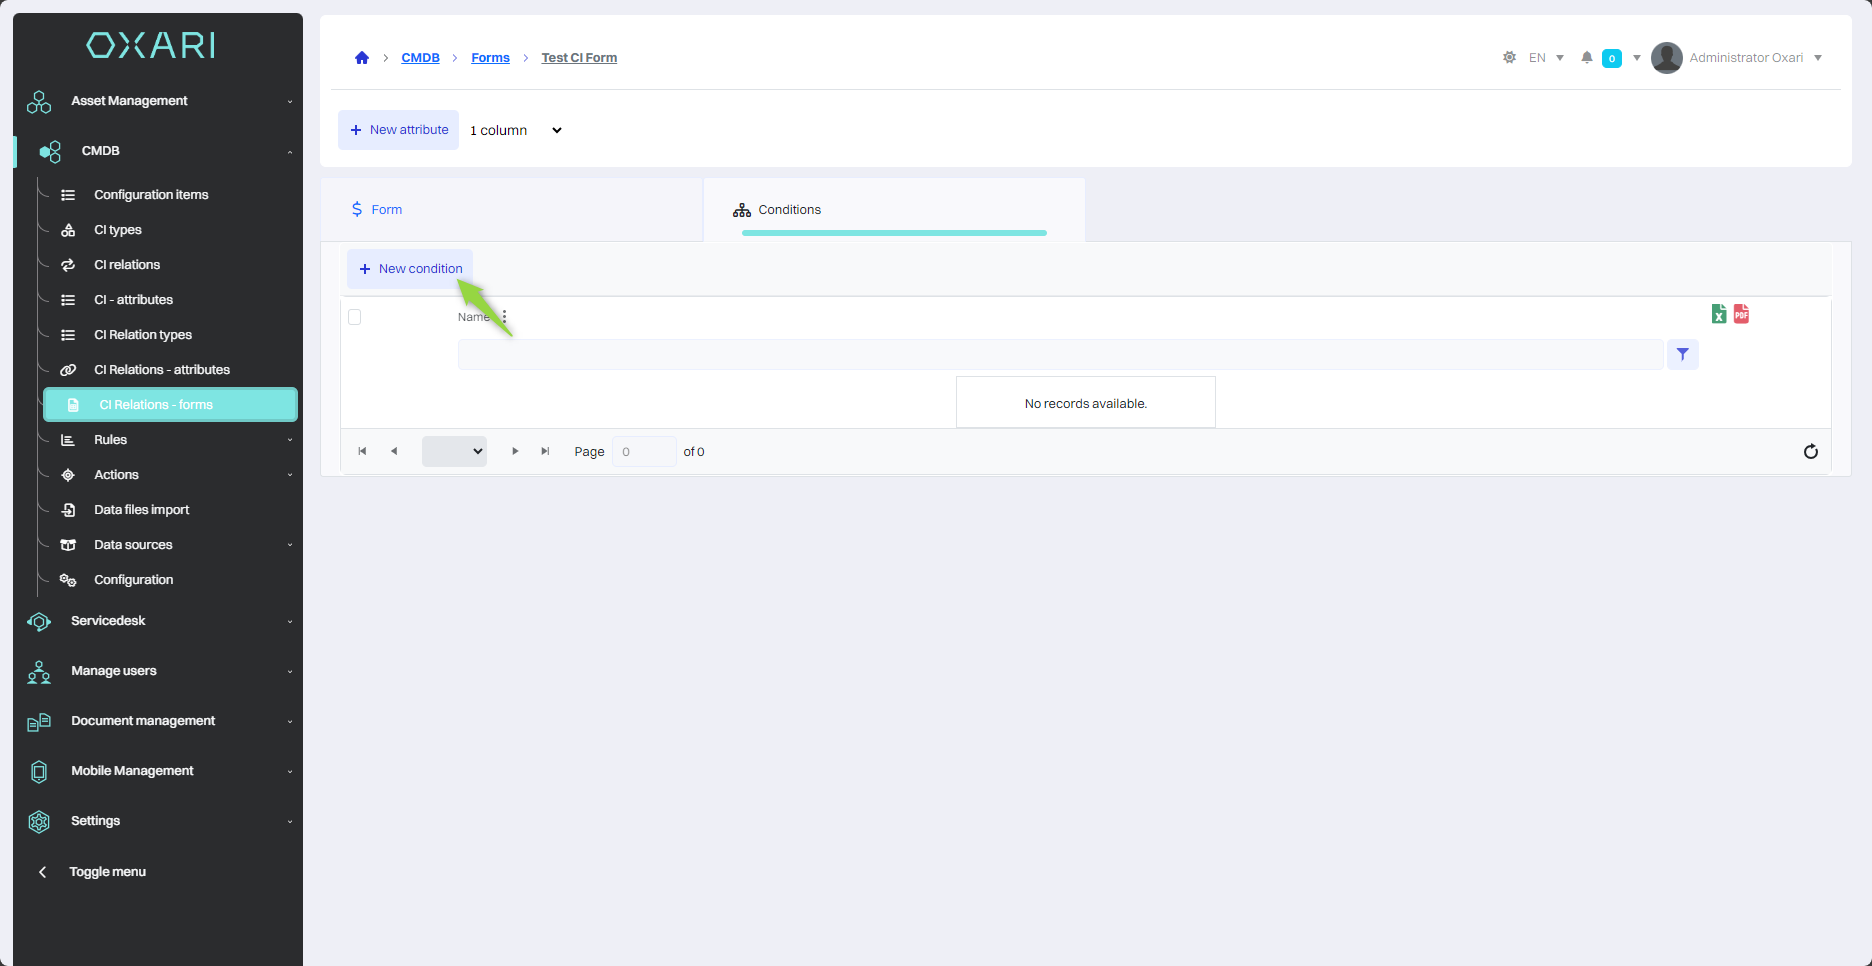
Adding a condition
To add a condition to the form, go to the “Conditions” tab, and then click the “Select condition” button.
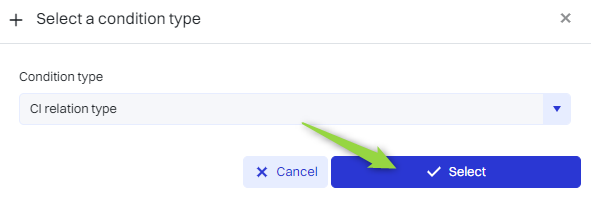
Then in the “Select condition type” window, there are condition types:
|
1 |
CI relation type - Specifies the type of relation between different configuration elements (CI) in the CMDB, for example, “has access”, “uses” or “hosts”. More about CI relation types: Go > |
|
2 |
CI type - Defines the category of a configuration element, which can refer to hardware, software, business process or another IT component, such as “information system,” “organization” or “server.” More about CI types: Go > |
|
3 |
Configuration element - Indicates a specific object in the CMDB that is the subject of the condition, such as “Server X,” “Router A” or “ERP system.” More about configuration elements: Go > |
Select the desired type of condition, and then click the “Select” button.
In this step in the “New condition” window, name the condition and select the type of CI relation, in this case it will be “has access”, and then click the “Save” button.
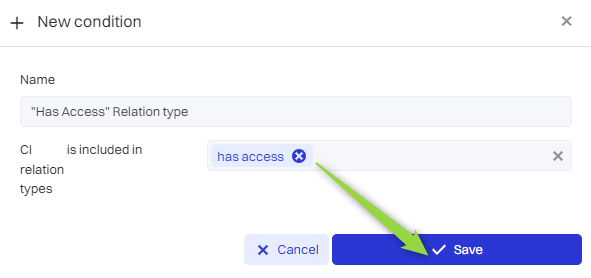
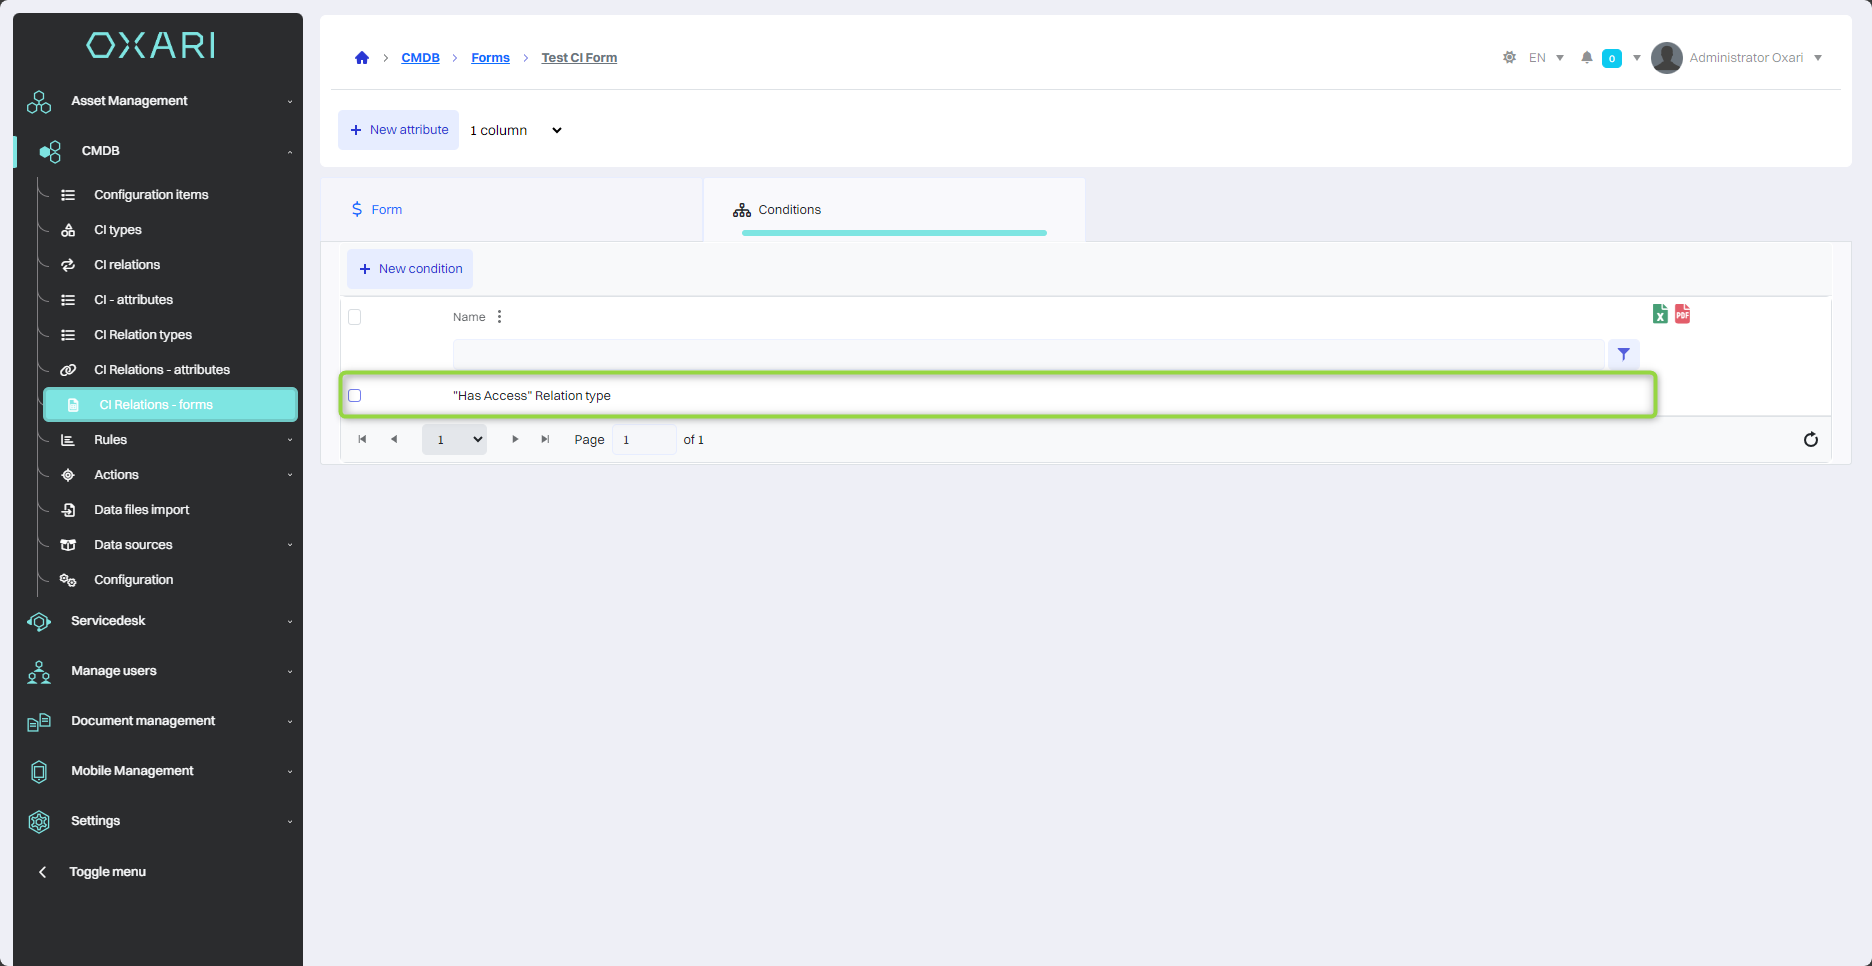
The condition has been added.
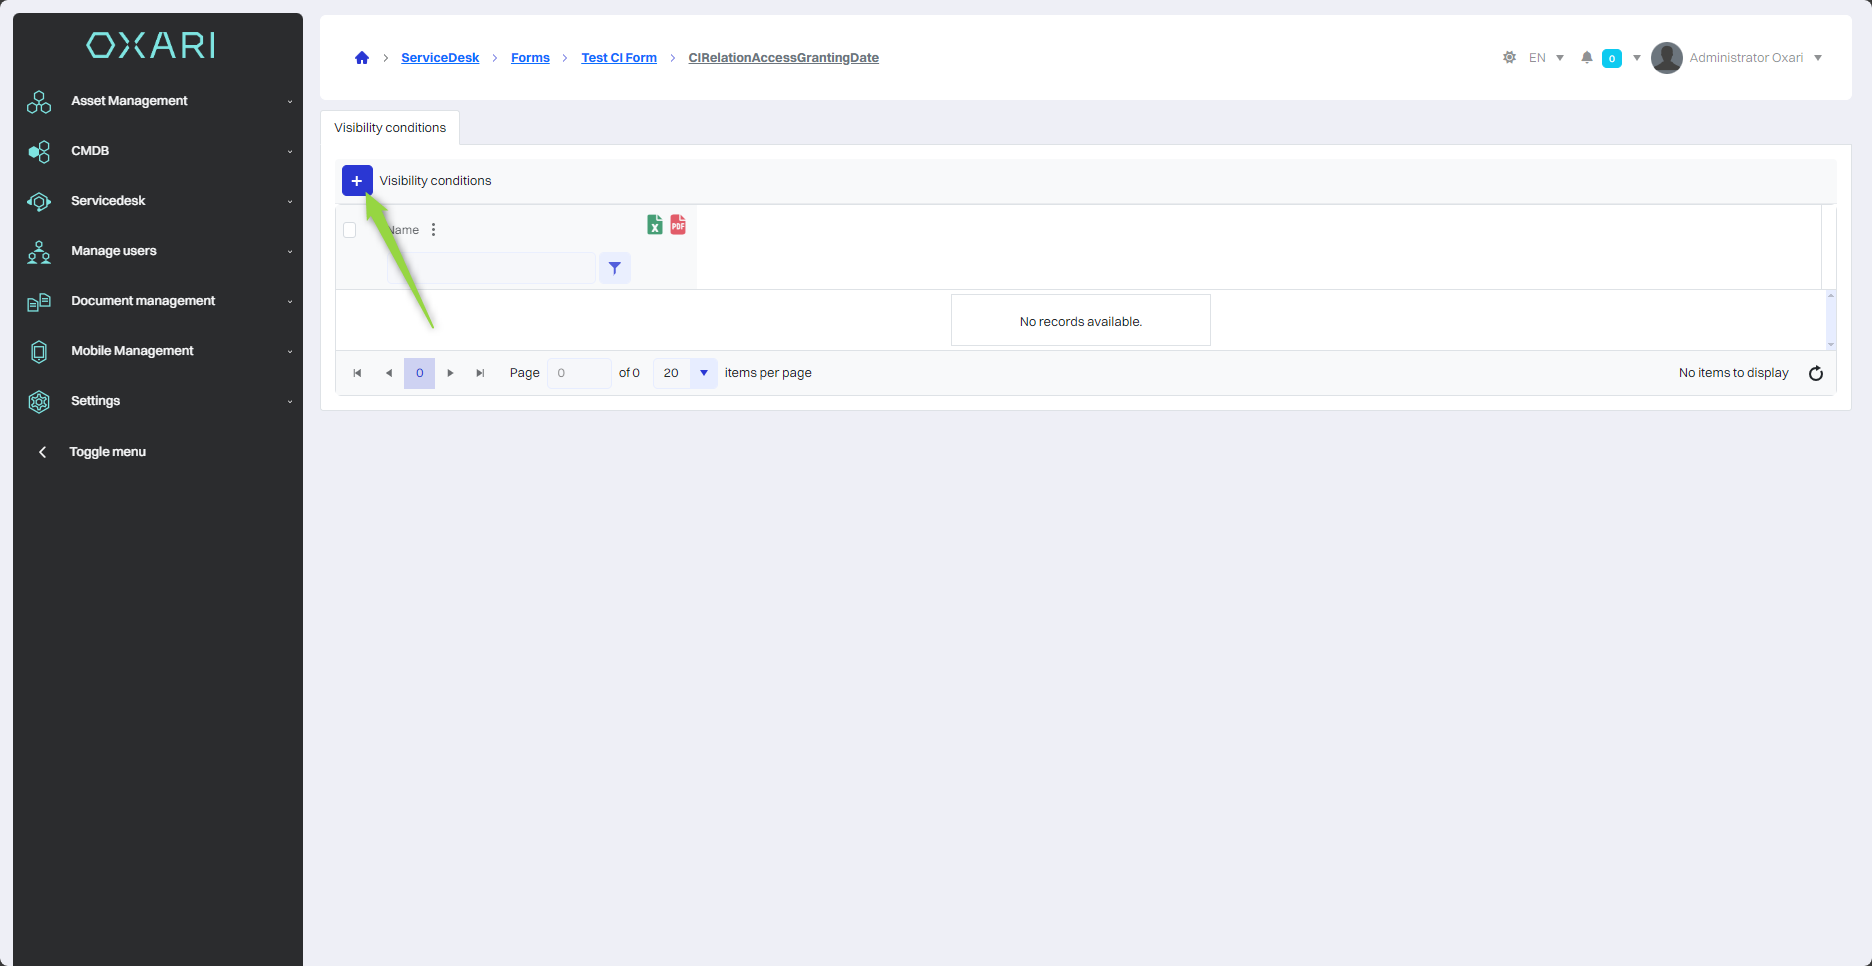
Attribute visibility conditions
Attribute visibility conditions allow you to control when individual form attributes are displayed to users. They can be used to create dynamic forms where certain fields become visible only under certain conditions. Go into the details of the form.
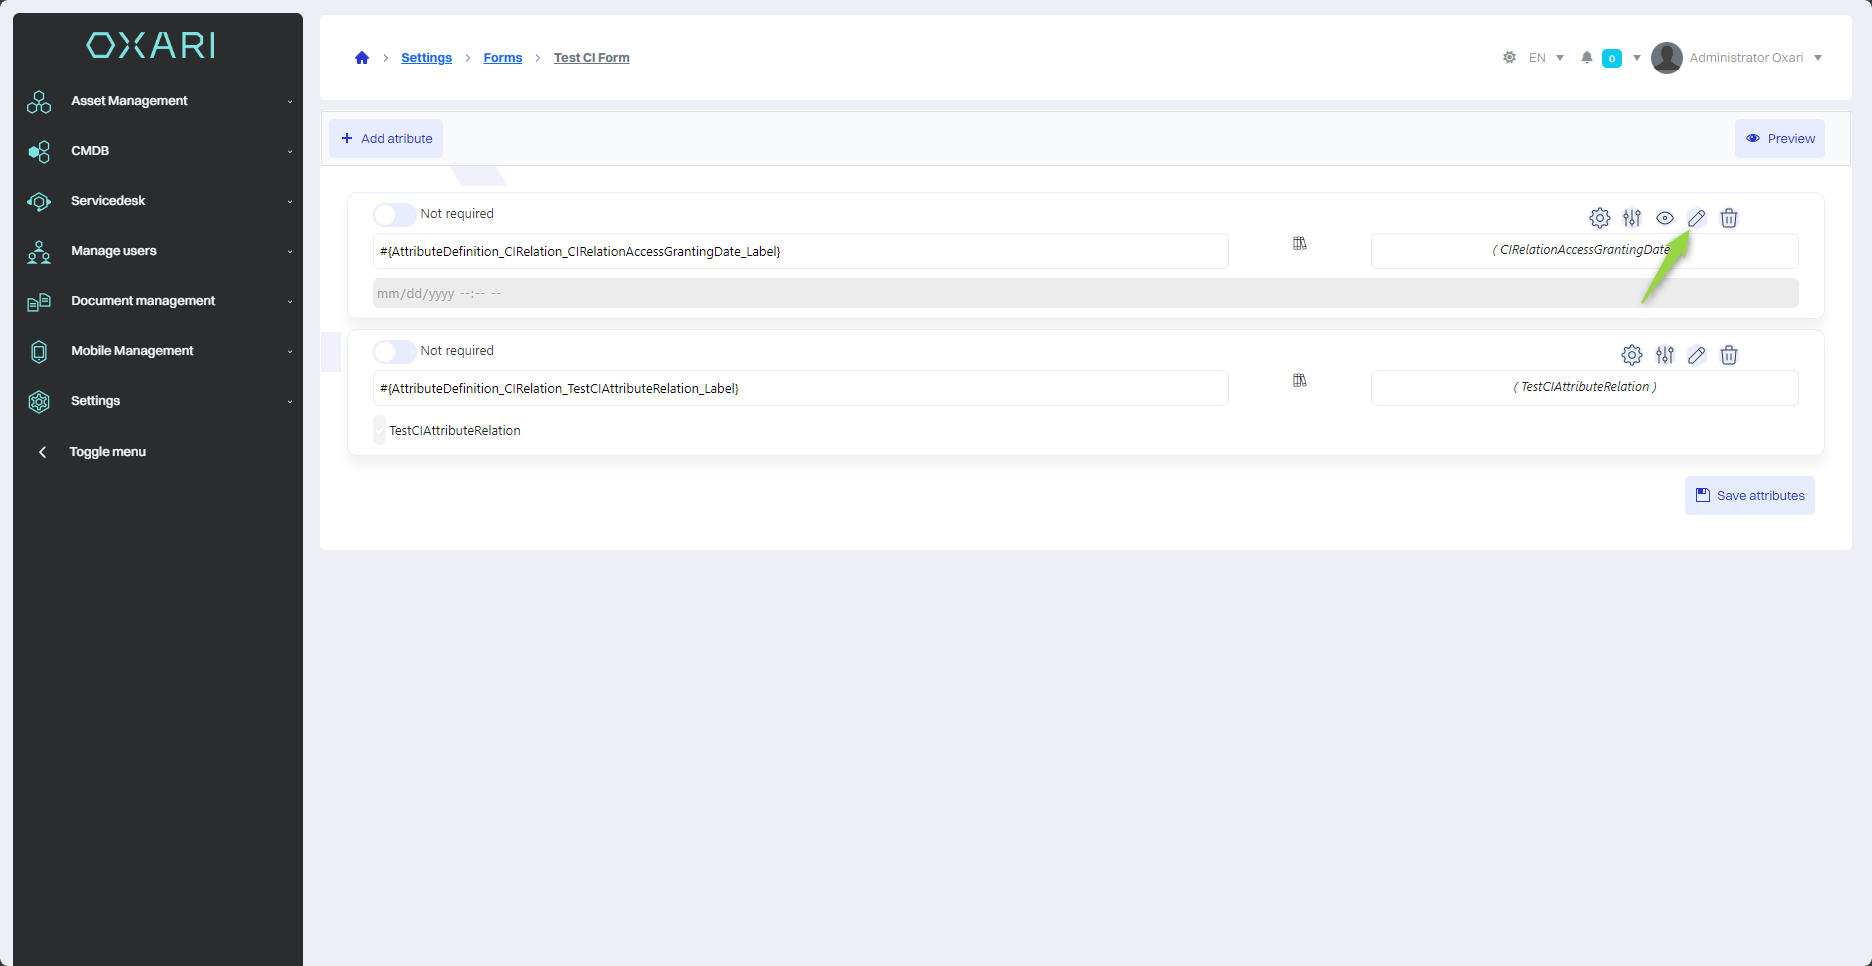
And then into attribute editing mode.
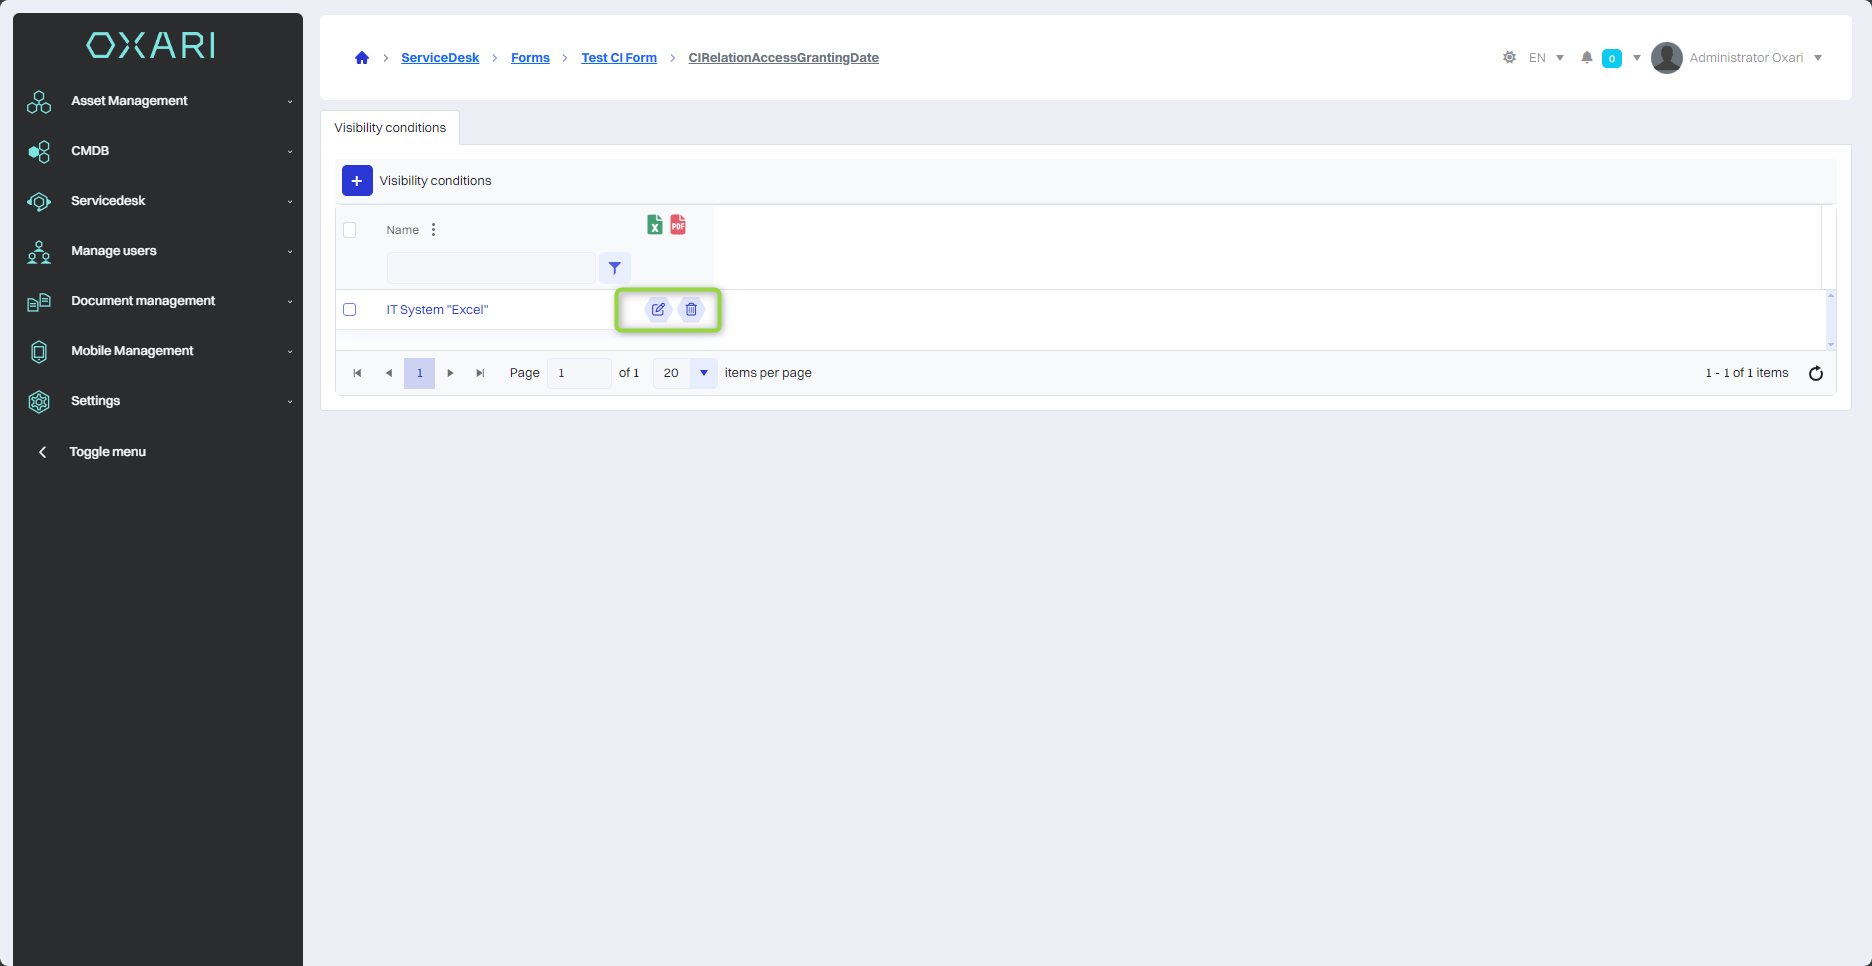
In this step, click the “+” button to add a visibility condition.
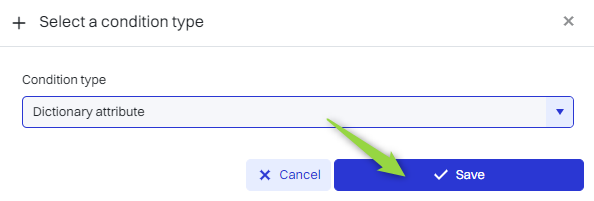
Next, in the “Select condition type” window, select the condition type from the list and click the “Save” button.
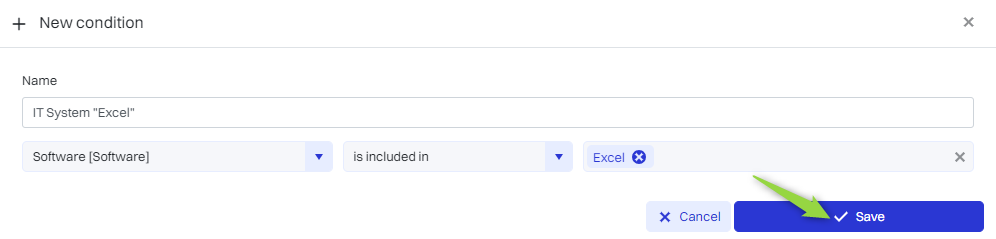
Next, the “New condition” window contains:
|
1 |
Name - A field to enter the name of the new condition that identifies it in the system, for example, “IT System ‘ERP’”. |
|
2 |
Condition selector - A drop-down menu that allows you to select the category of the condition, here “1234 [Information Systems]” is selected, which stands for the category or type of configuration item. |
|
3 |
Condition criterion - A field that specifies the scope of the condition, in this case “includes in ERP System,” meaning that the condition applies to configuration items that are part of or related to the ERP system. |
You should, fill in the fields, and then click the “Save” button.
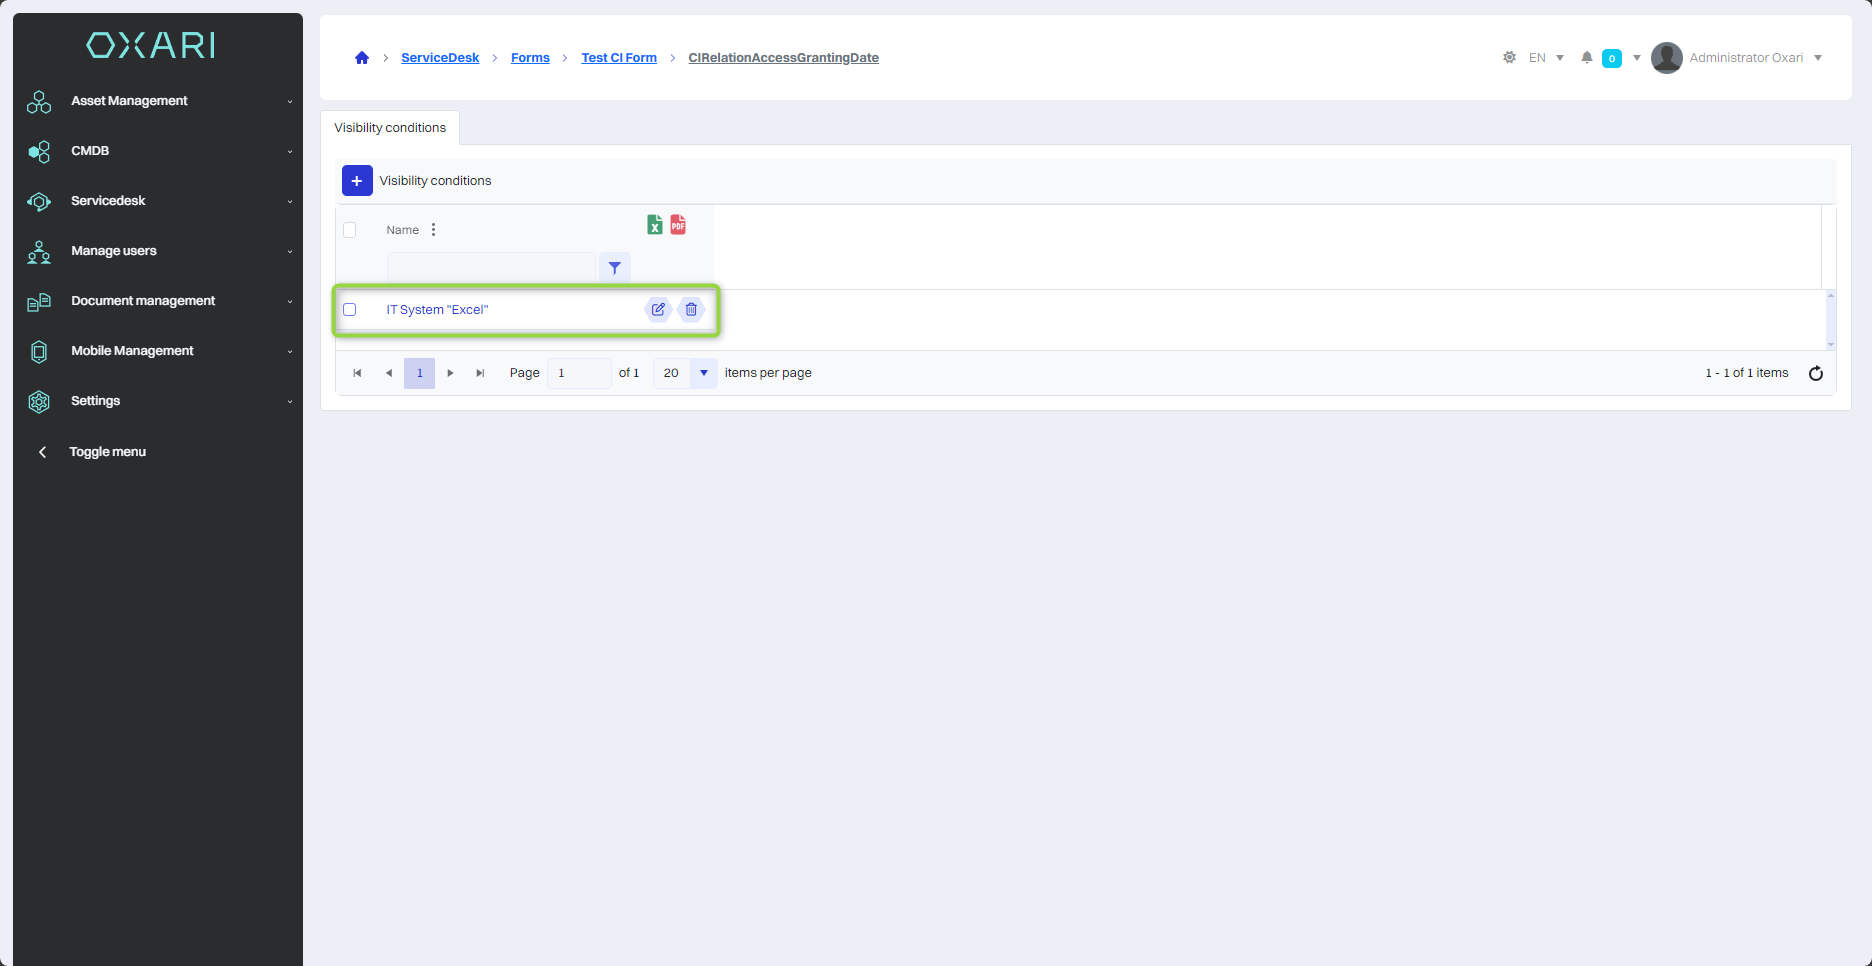
The condition is shown in the list:
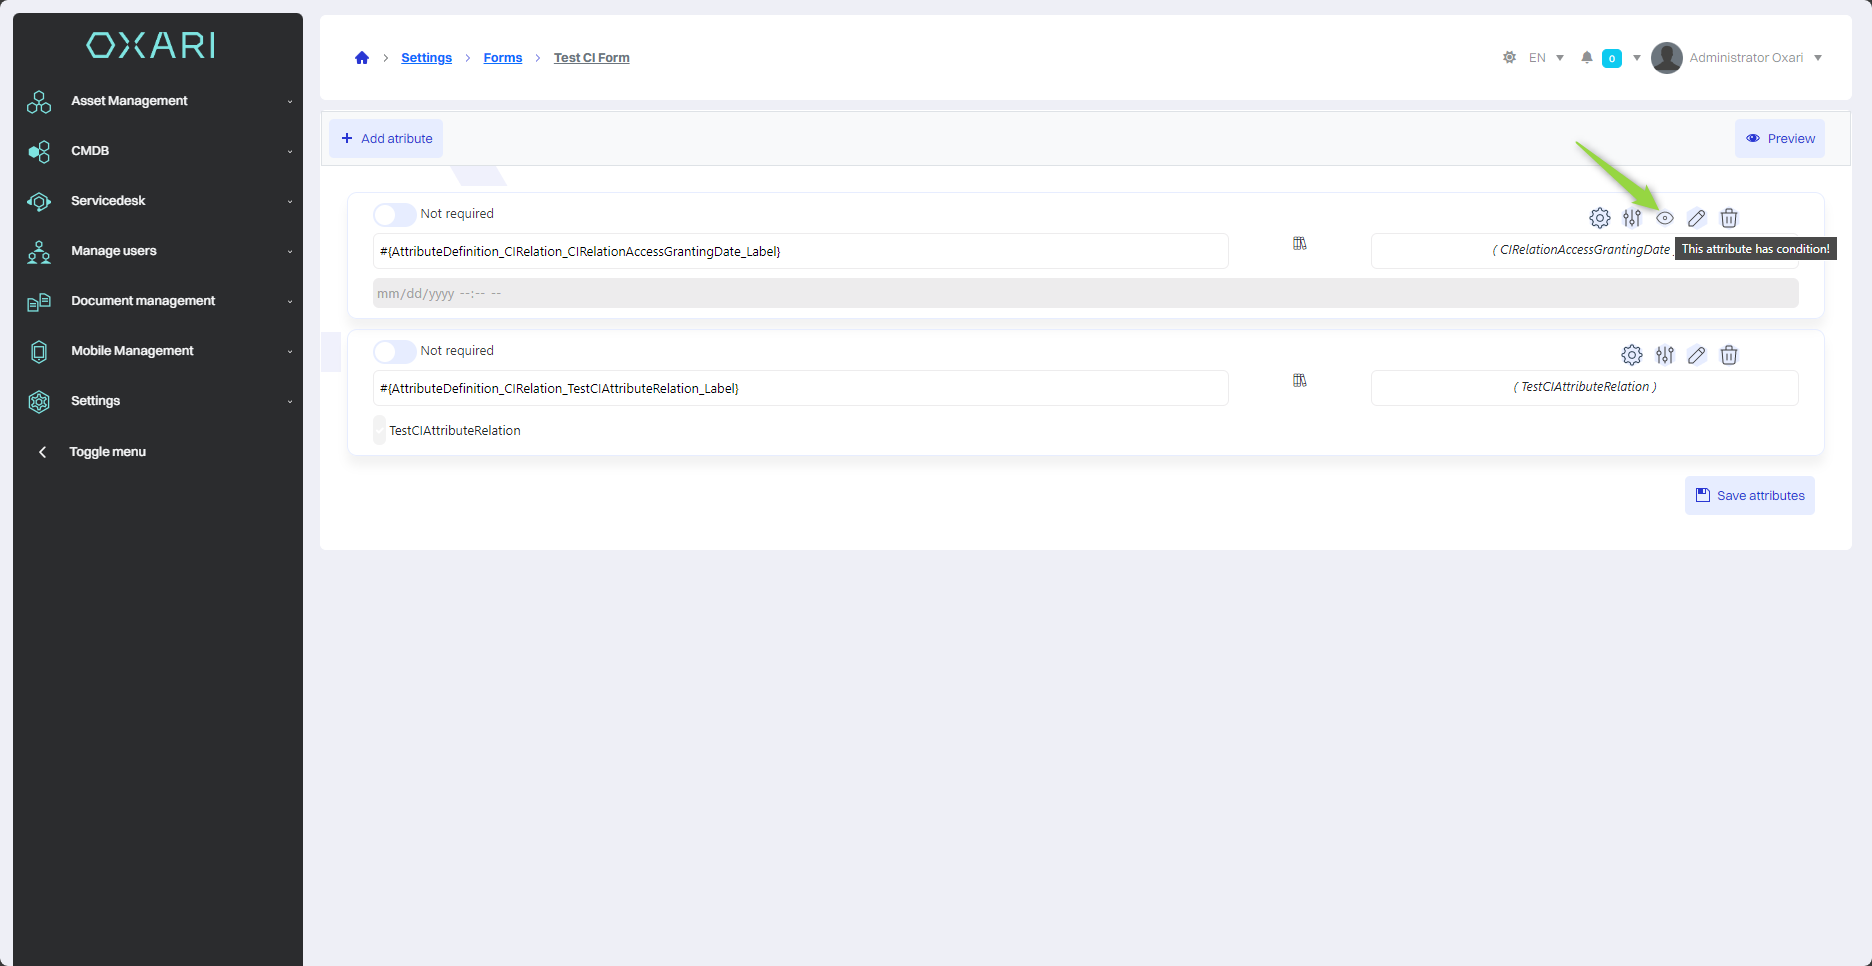
View of attribute with visibility condition
An additional icon appears next to an attribute with a visibility condition to indicate that the condition is held.
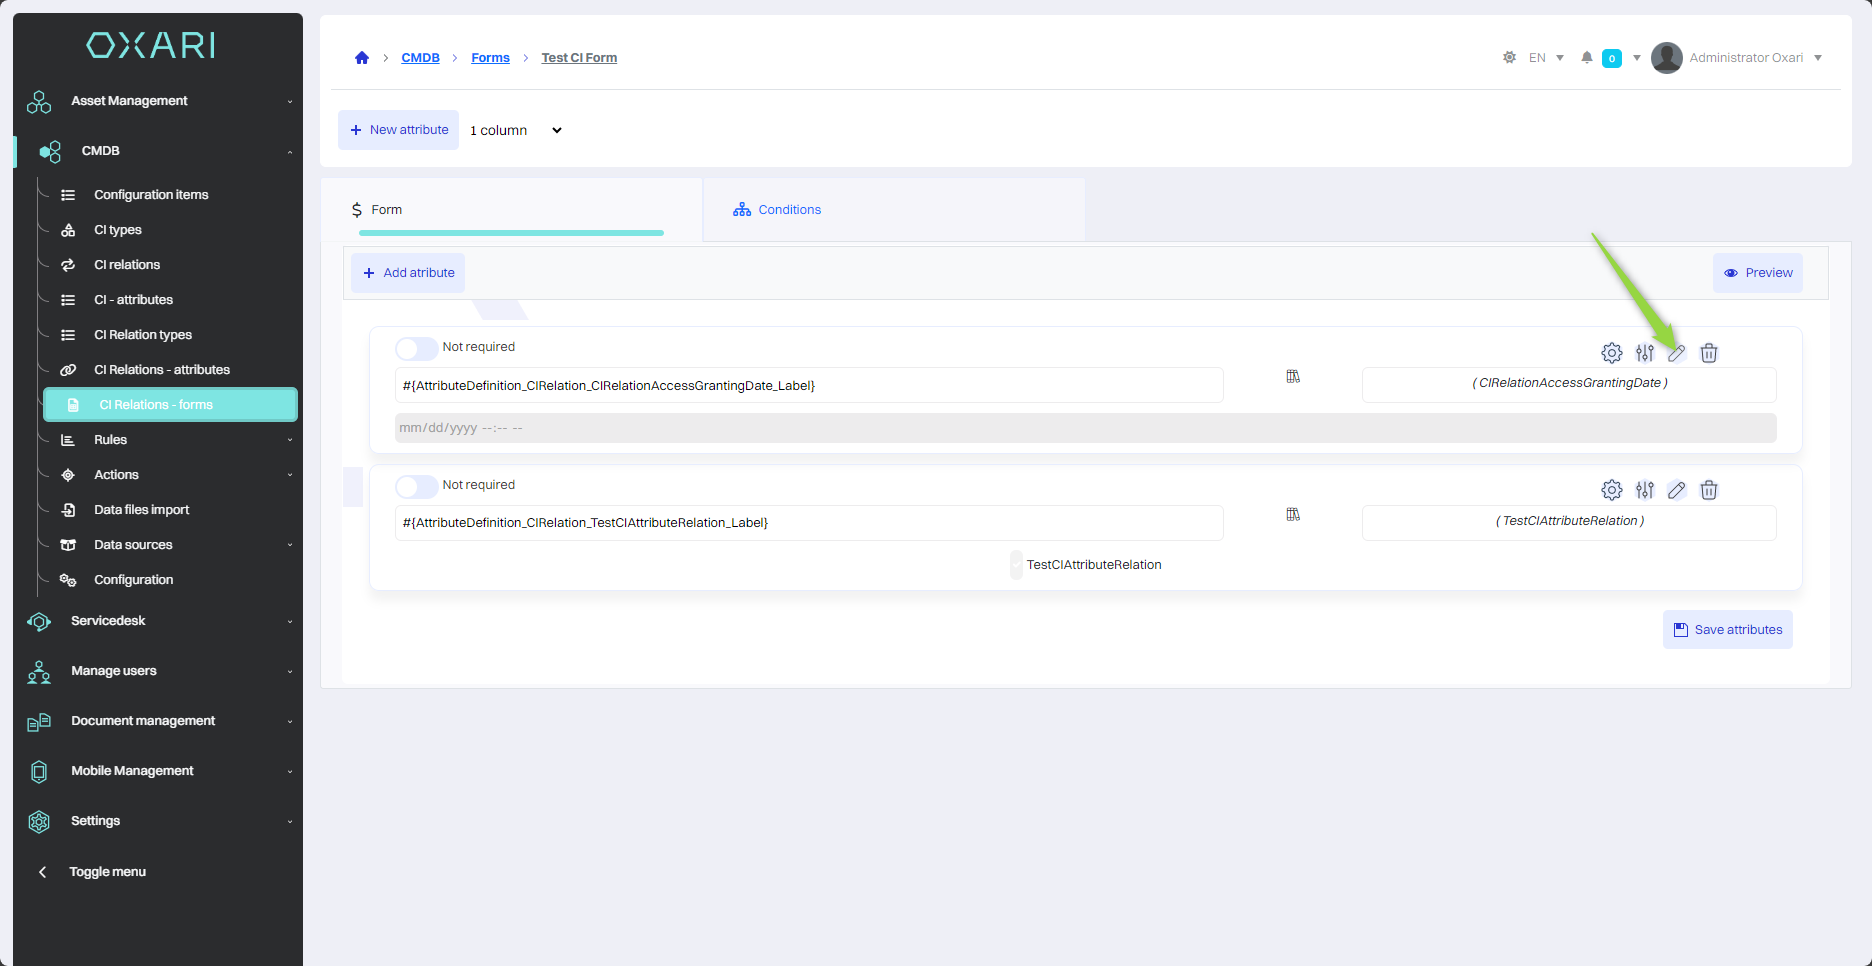
Editing/Removing an attribute's visibility condition
To edit/remove a visibility condition from an attribute, go to the detail view of the desired attribute.
Then hover over the desired condition. Edit/delete buttons will be displayed.
Editing/Deleting a form
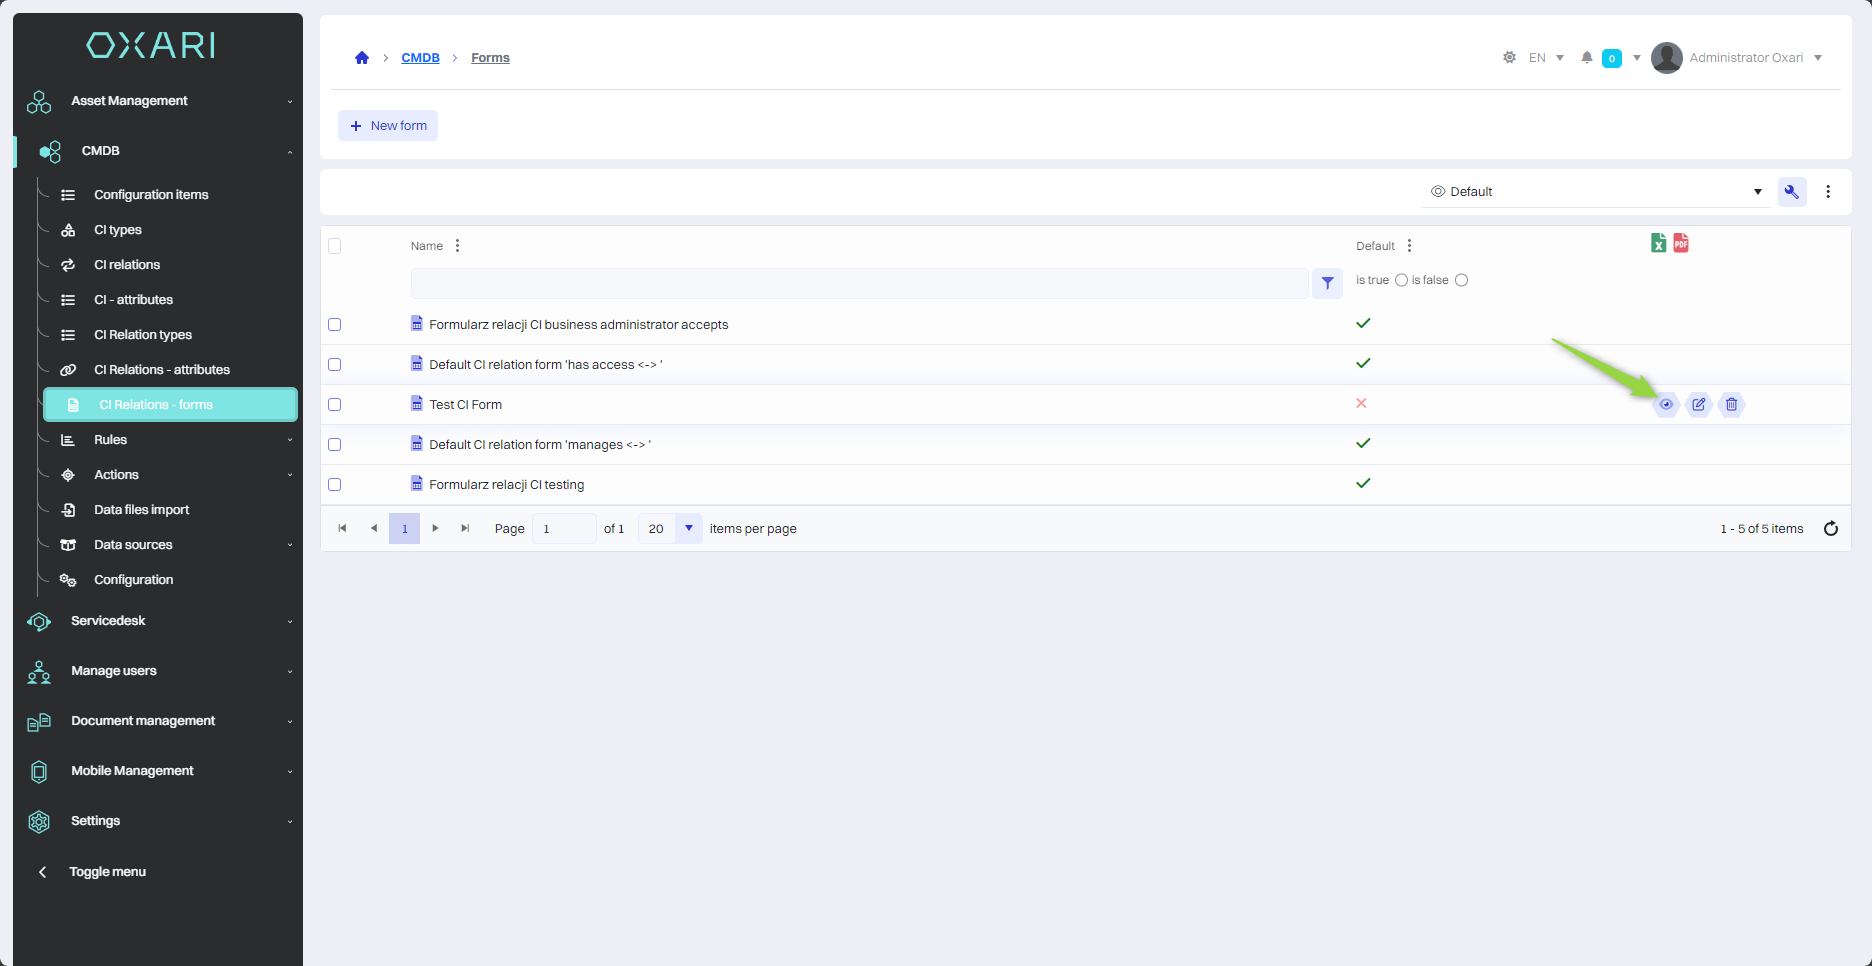
To edit or delete a form, go to CMDB > CI relation - Forms. Hover over the desired form. The edit/delete buttons will be displayed.