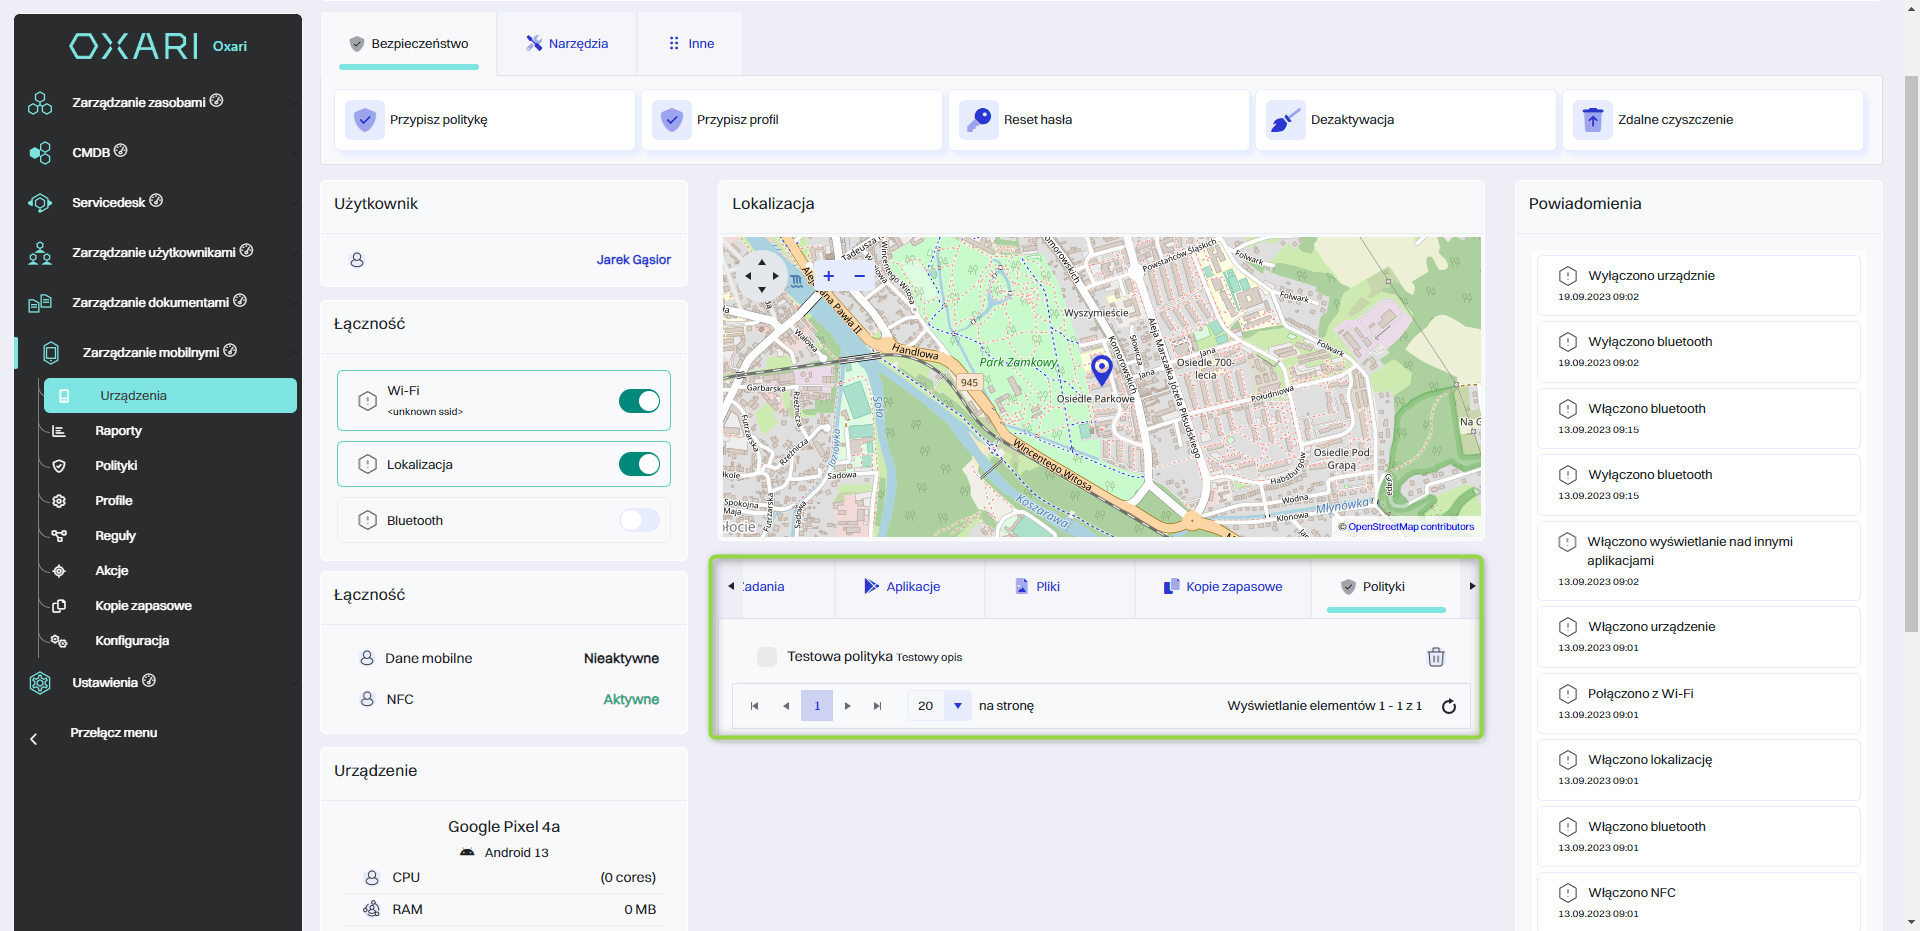
OXARI's mobile management policies, allow detailed control over various aspects of device management. Users can create new policies, such as connectivity, applications, management, passwords. Policies can be assigned to a particular device in Mobile Management > Devices.
New policy
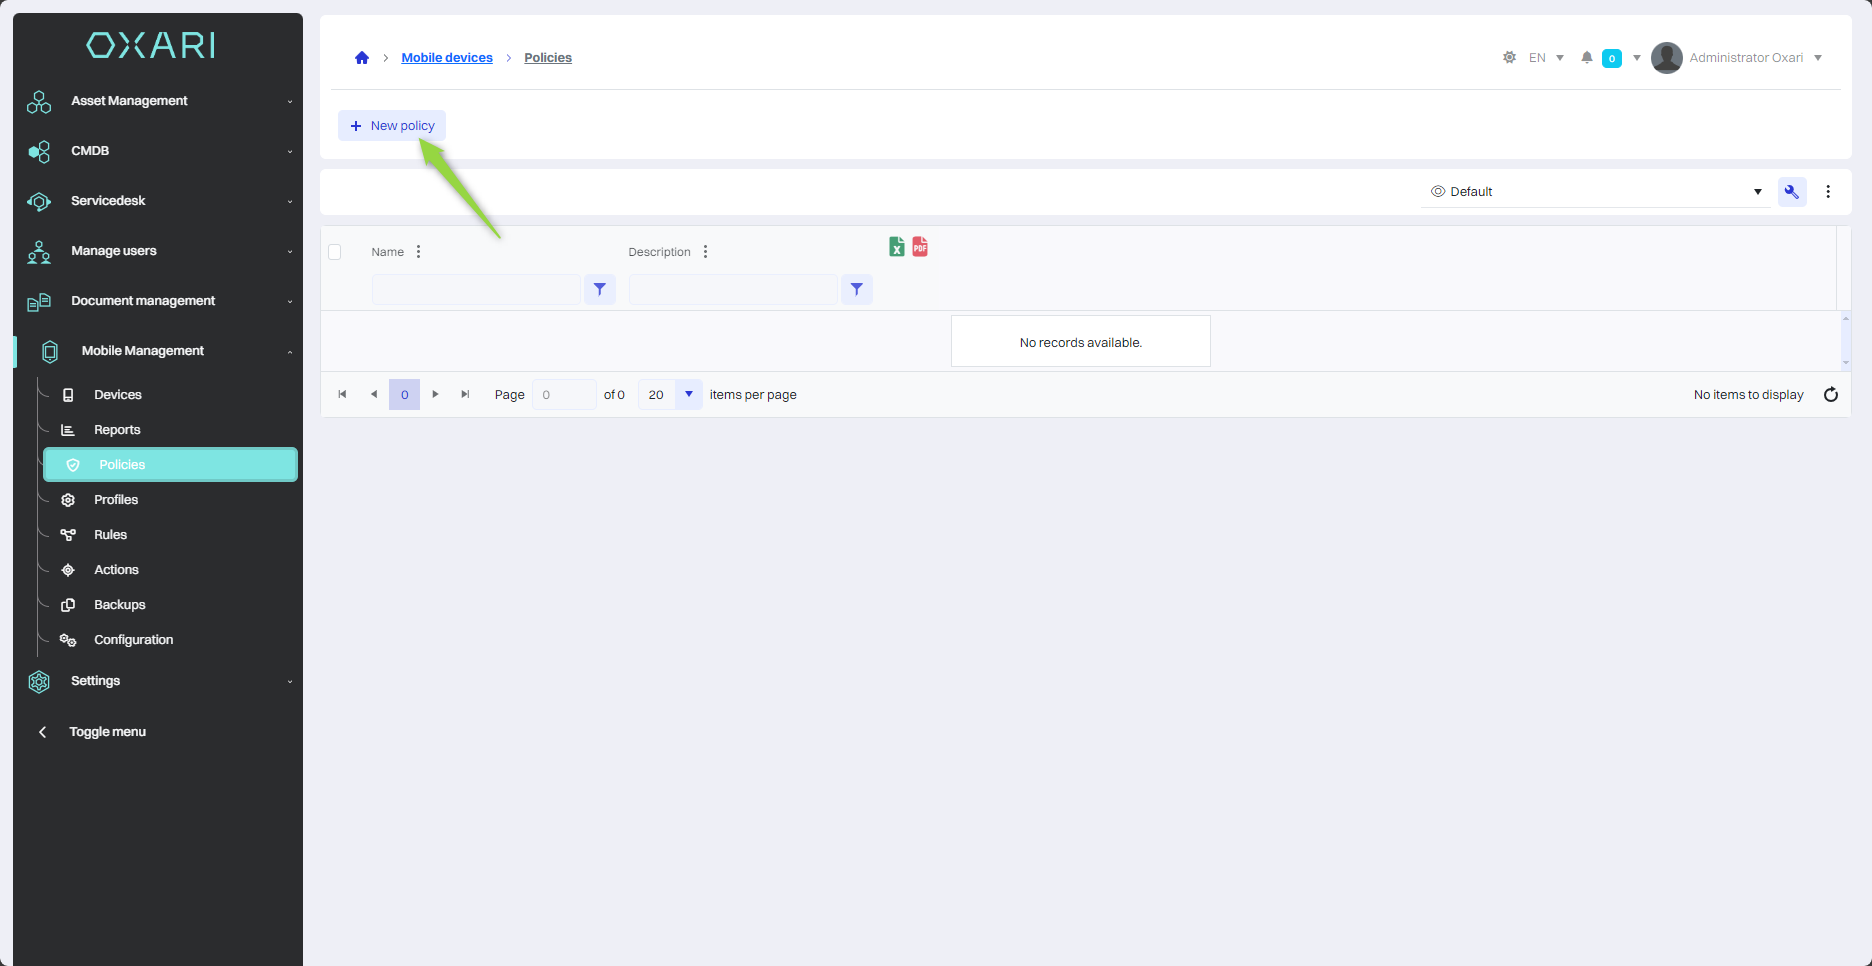
To add a new policy, go to the section in question and then click the “New Policy” button.
Filling out a new policy
Fill in the fields and select the policy configuration in the tabs.
|
1 |
Name - The name of the new policy. |
|
2 |
Description - Description of the new policy. |
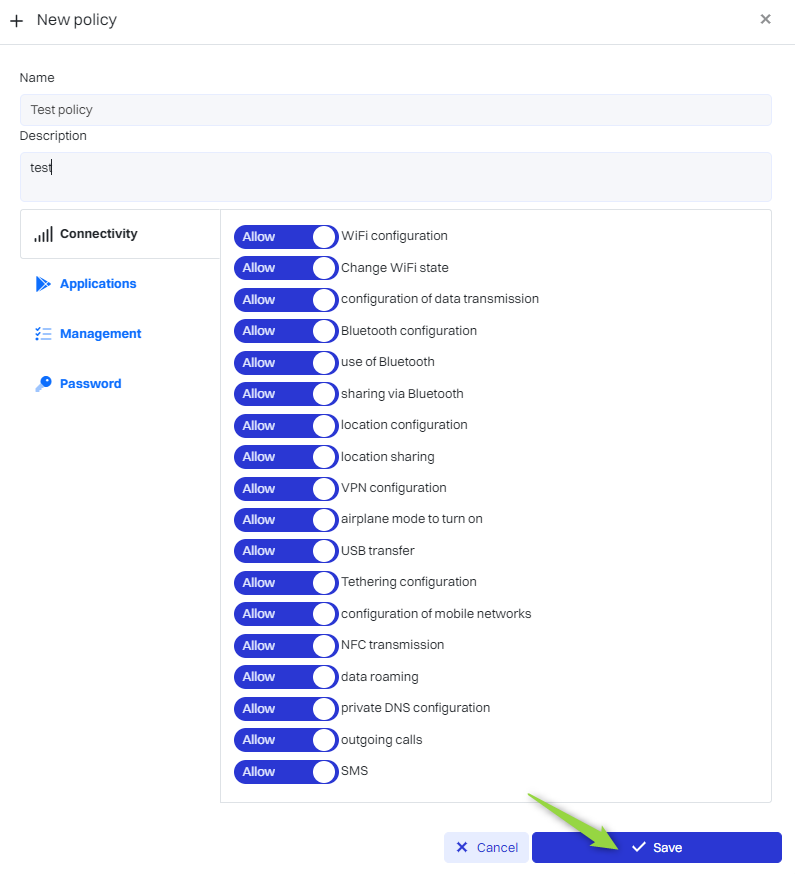
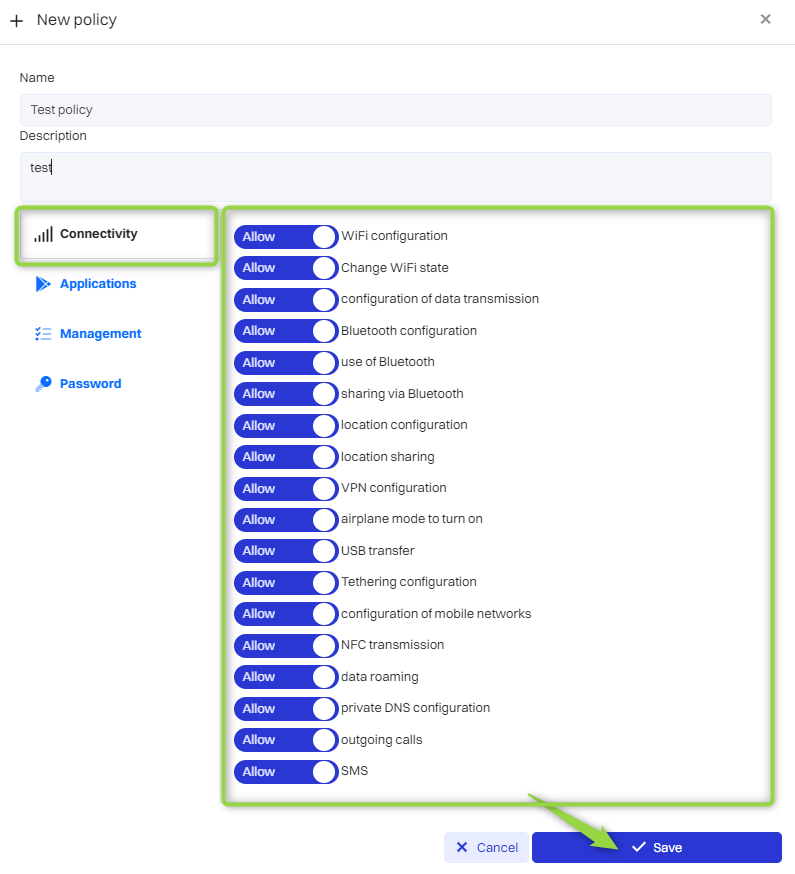
Connectivity tab
The following options are available in the connectivity tab:
-
Wi-Fi configuration
-
Data transmission configuration
-
Bluetooth configuration
-
Using Bluetooth
-
Sharing via Bluetooth
-
Location configuration
-
Location sharing
-
VPN configuration
-
Enabling airplane mode
-
Transferring via USB
-
Setting up Tethering (sharing an Internet connection)
-
Configuring mobile networks
-
NFC transmission
-
Data roaming
-
Private DNS configuration
-
Outgoing calls
-
SMS
Each of these options has a “Allow” button that allows you to enable or disable the feature for managed mobile devices.
Applications tab
The “Applications” tab includes:
-
Allow installation of applications: Grants permission to install new apps on your device.
-
Allow uninstalling apps: Grants permission to remove existing apps from the device.
-
Allow installation from unknown sources: Allow installation of apps from sources other than the official app store.
-
Enforce app verification: Requires all apps to pass a verification process before installing or running them, which can be a security measure to prevent malware.
-
Allow app control: Provides the ability to manage and control application settings.
-
Allow system windows: Grants applications permission to display content over other applications.
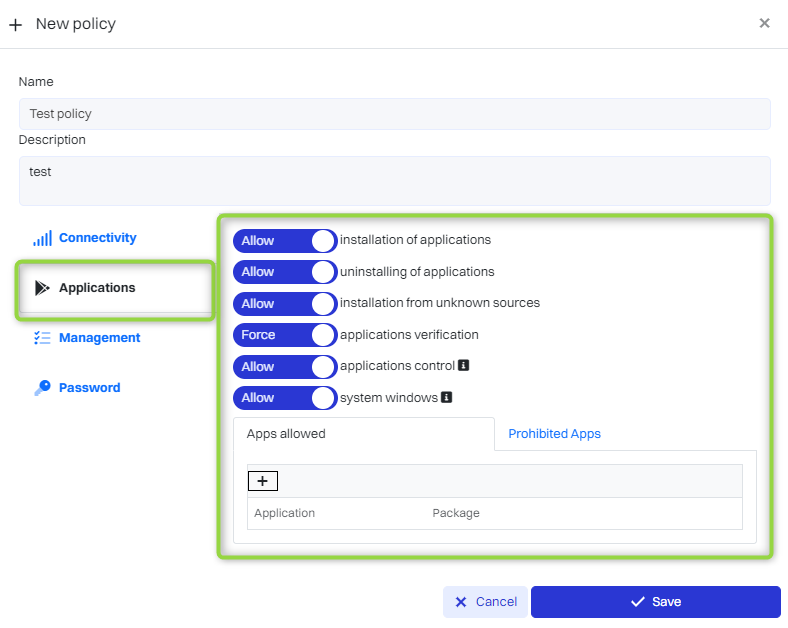
Each of these options has a “Allow” or “Enforce” button that allows you to enable or disable a particular feature for managed mobile devices. The section can also include a list where you can specify which specific apps are allowed or prohibited, increasing your control over the software environment of managed devices.
To add specific apps allowed, click on the “Apps allowed” tab and then click the “+” button.

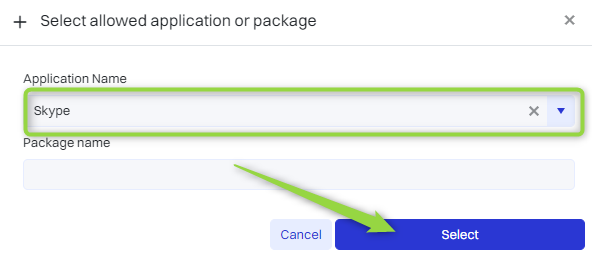
Then in the “Select allowed application or package” window, it is possible to select a specific application from the list in the “Application” field, after selecting the application, click the “Select” button.
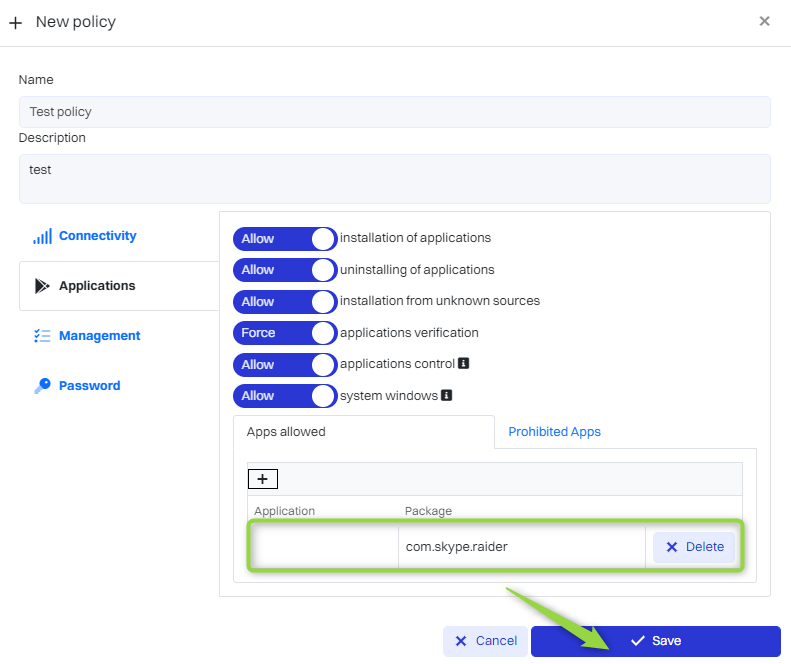
The selected action is shown in the list under the “Apps allowed” tab, and you can delete it or add more apps to the list.
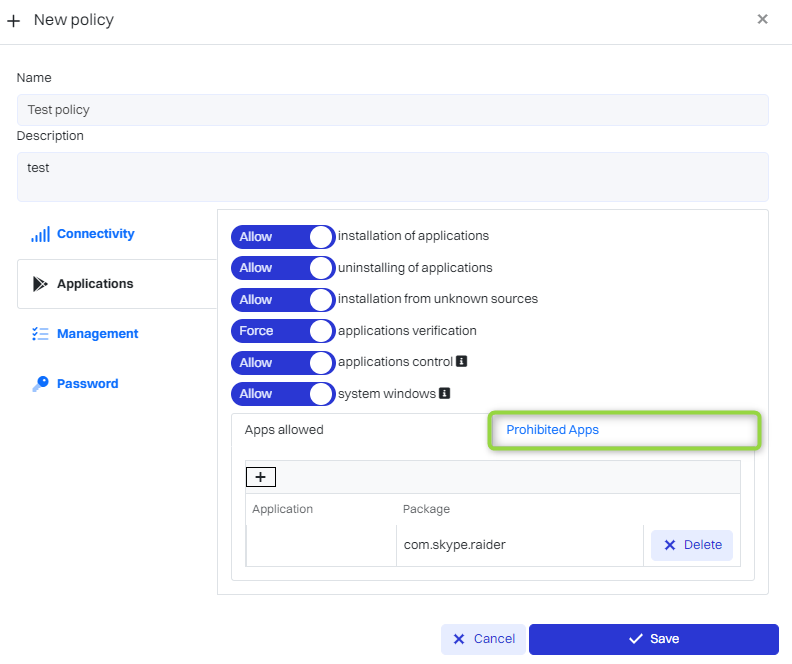
To add specific prohibited apps, follow the same steps as in the diagram from adding a specific allowed app only in this case in the “Prohibited Apps” tab. After adding a prohibited app, it will appear the same way in the list under the “Prohibited Apps” tab.
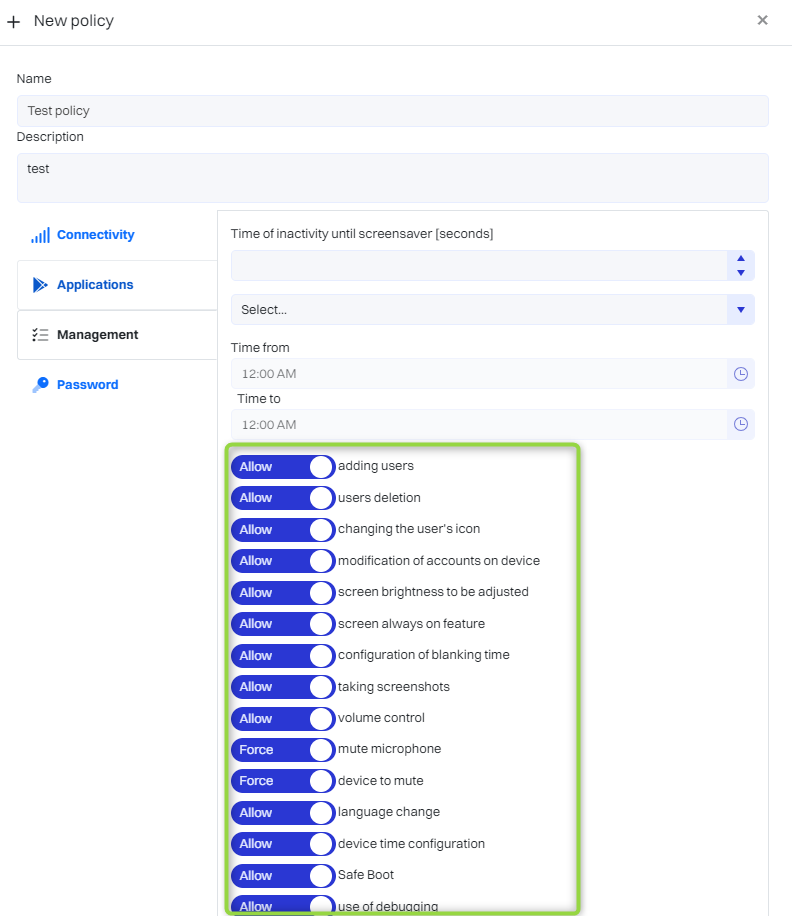
Management tab
In this tab, management can manage settings related to the device's idle time before the screen goes blank, as well as manage updates, with options to choose from: “Update immediately when the update is available, without user interaction.”, “Delay the update for up to 30 days, then install with user interaction.” “Update within a time window without user interaction.” When selecting “Update in a time window without user interaction.” you can select the time window in the “Time from”, “Time to” fields.
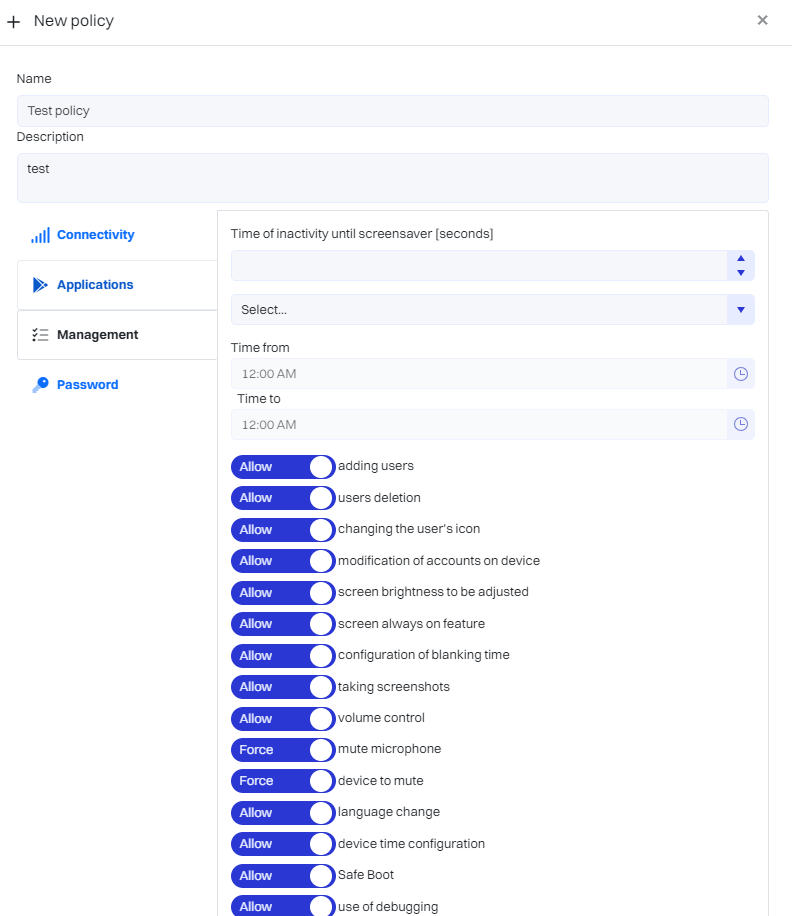
In addition, the management tab includes options:
-
Adding and deleting users
-
Changing the user icon
-
Modifying accounts on the device
-
Adjusting the brightness of the screen
-
Always-on screen settings
-
Configuring screen blanking time
-
Taking screenshots
-
Volume adjustment
-
Muting the microphone
-
Mute the device
-
Changing the language
-
Device time configuration
-
Safe Boot settings
-
Using debugging
-
Reset to factory settings
-
Printing
-
Using external memory
-
Changing the wallpaper
-
Using the camera
-
Unifying passwords
Each of these options has a “Allow” or “Force” button that allows you to enable or disable the feature for managed mobile devices.
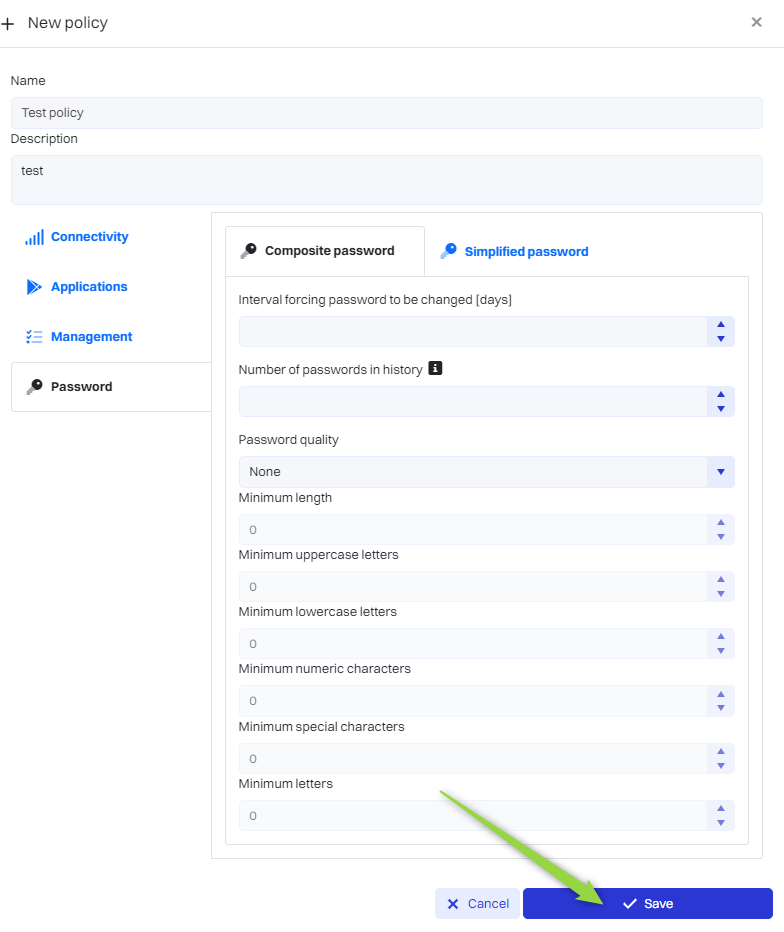
Passwords tab
In the “Passwords” tab, it is possible to set password policies for mobile devices. It is divided into “Compound Password” and “Simplified Password” tab. The “Complex Password” tab refers to the requirements for creating a strong password in which there are options:
-
Force password change with interval [days]: Allows you to specify the frequency of required password changes by users.
-
Number of passwords in history: Defines how many recently used passwords are remembered to avoid reuse.
-
Password Quality: Allows you to select security criteria for passwords, such as whether they should be alphanumeric.
-
Minimum length: Indicates the minimum number of characters a password must contain.
-
Minimum number of uppercase letters, lowercase letters, numeric characters and special characters: Specifies the minimum requirements for password components.
-
Minimum number of letters: Indicates the minimum total number of letters required in a password.
Compound password applies to android devices lower than 13 or any devices in Device Owner mode
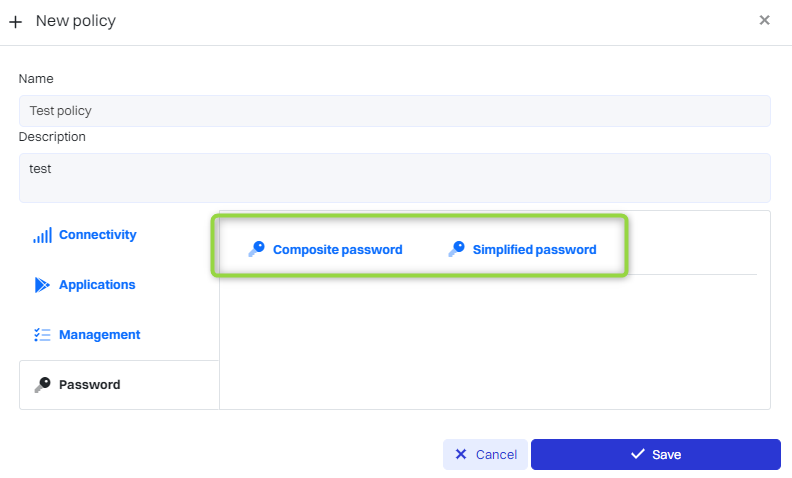
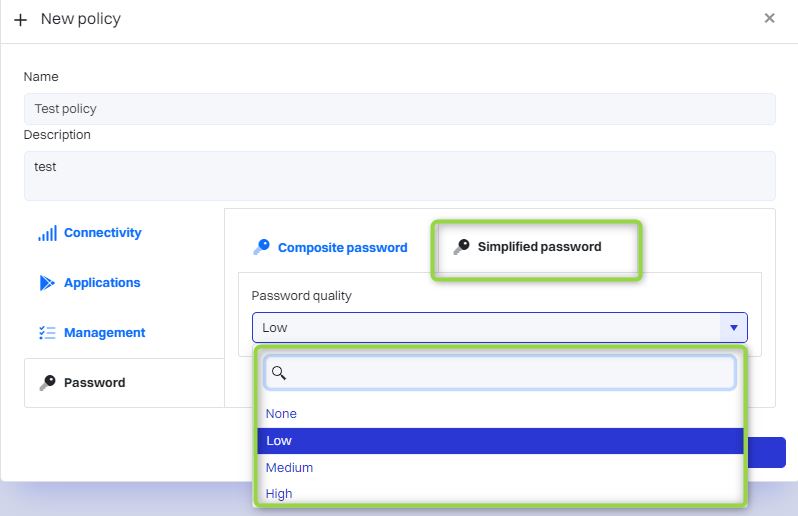
The “Simplified Password” tab indicates less stringent requirements. In the “Password quality” section, you can select the complexity of the required password. The available options are:
-
None
-
Low complexity
-
Medium complexity
-
High complexity
Simplified password applies to devices in Standard and Work Profile mode with Android higher than 13
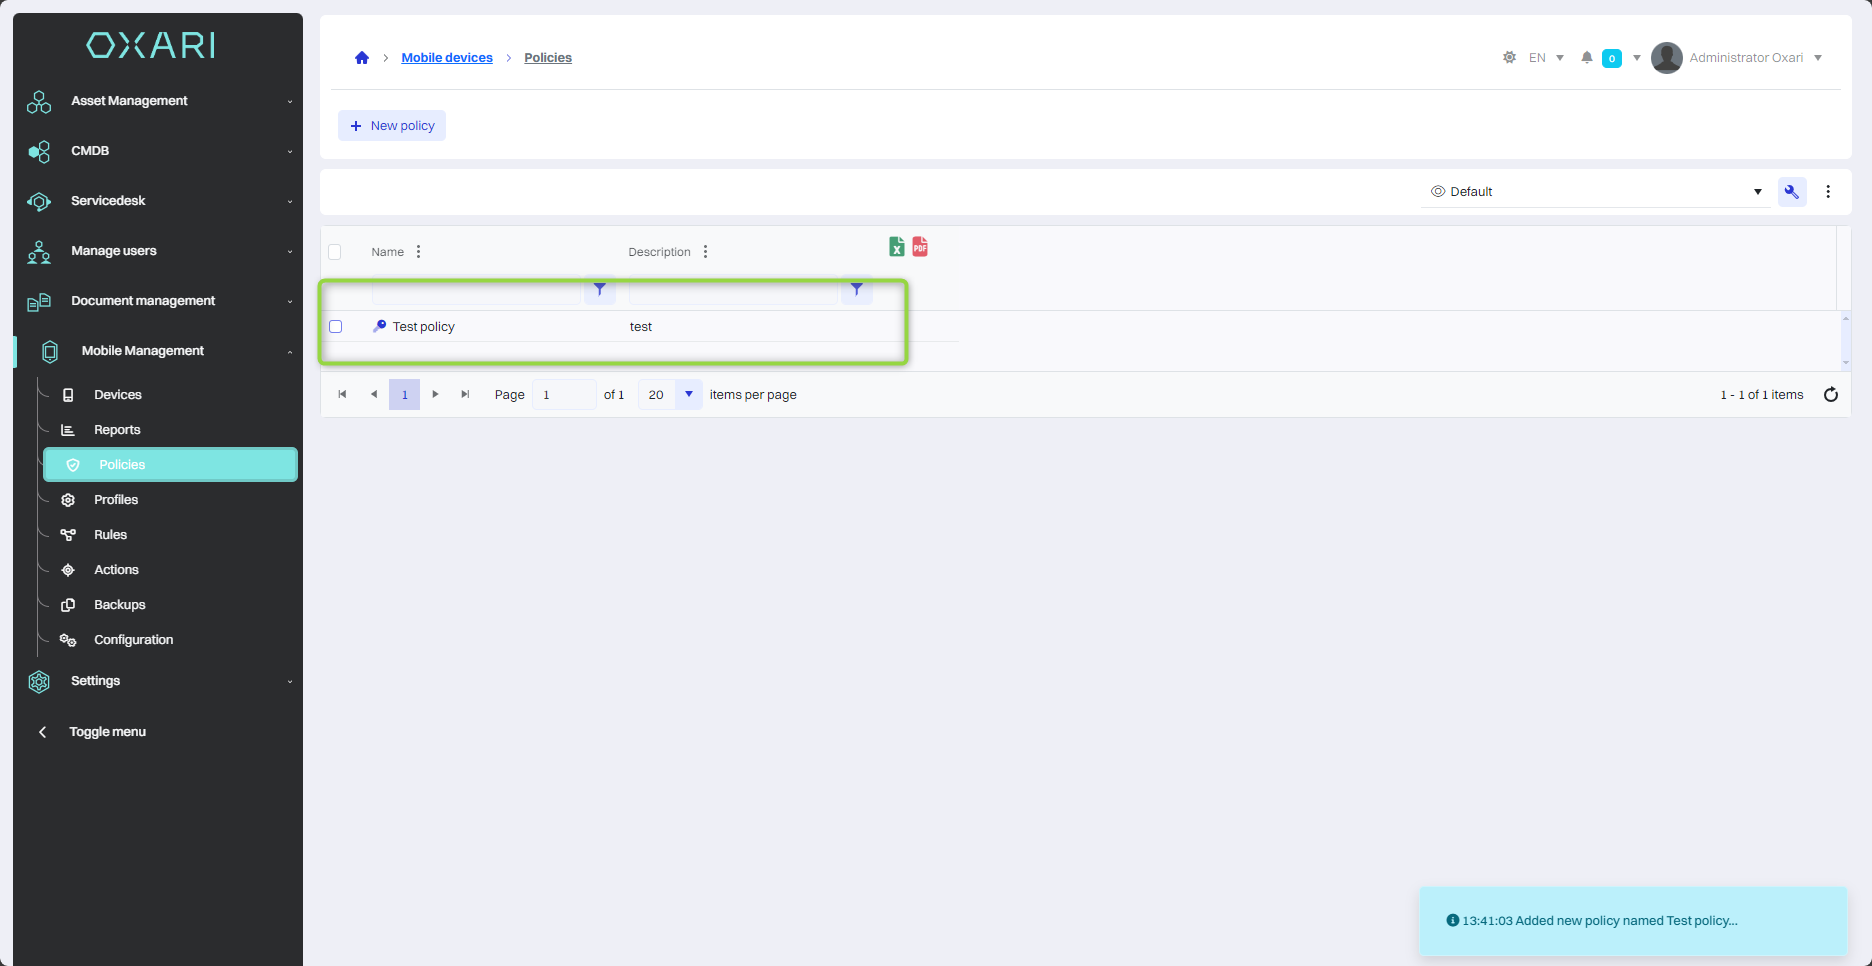
Save the policy
After configuring the policy, click the “Save” button.
The policy will be added to the list.
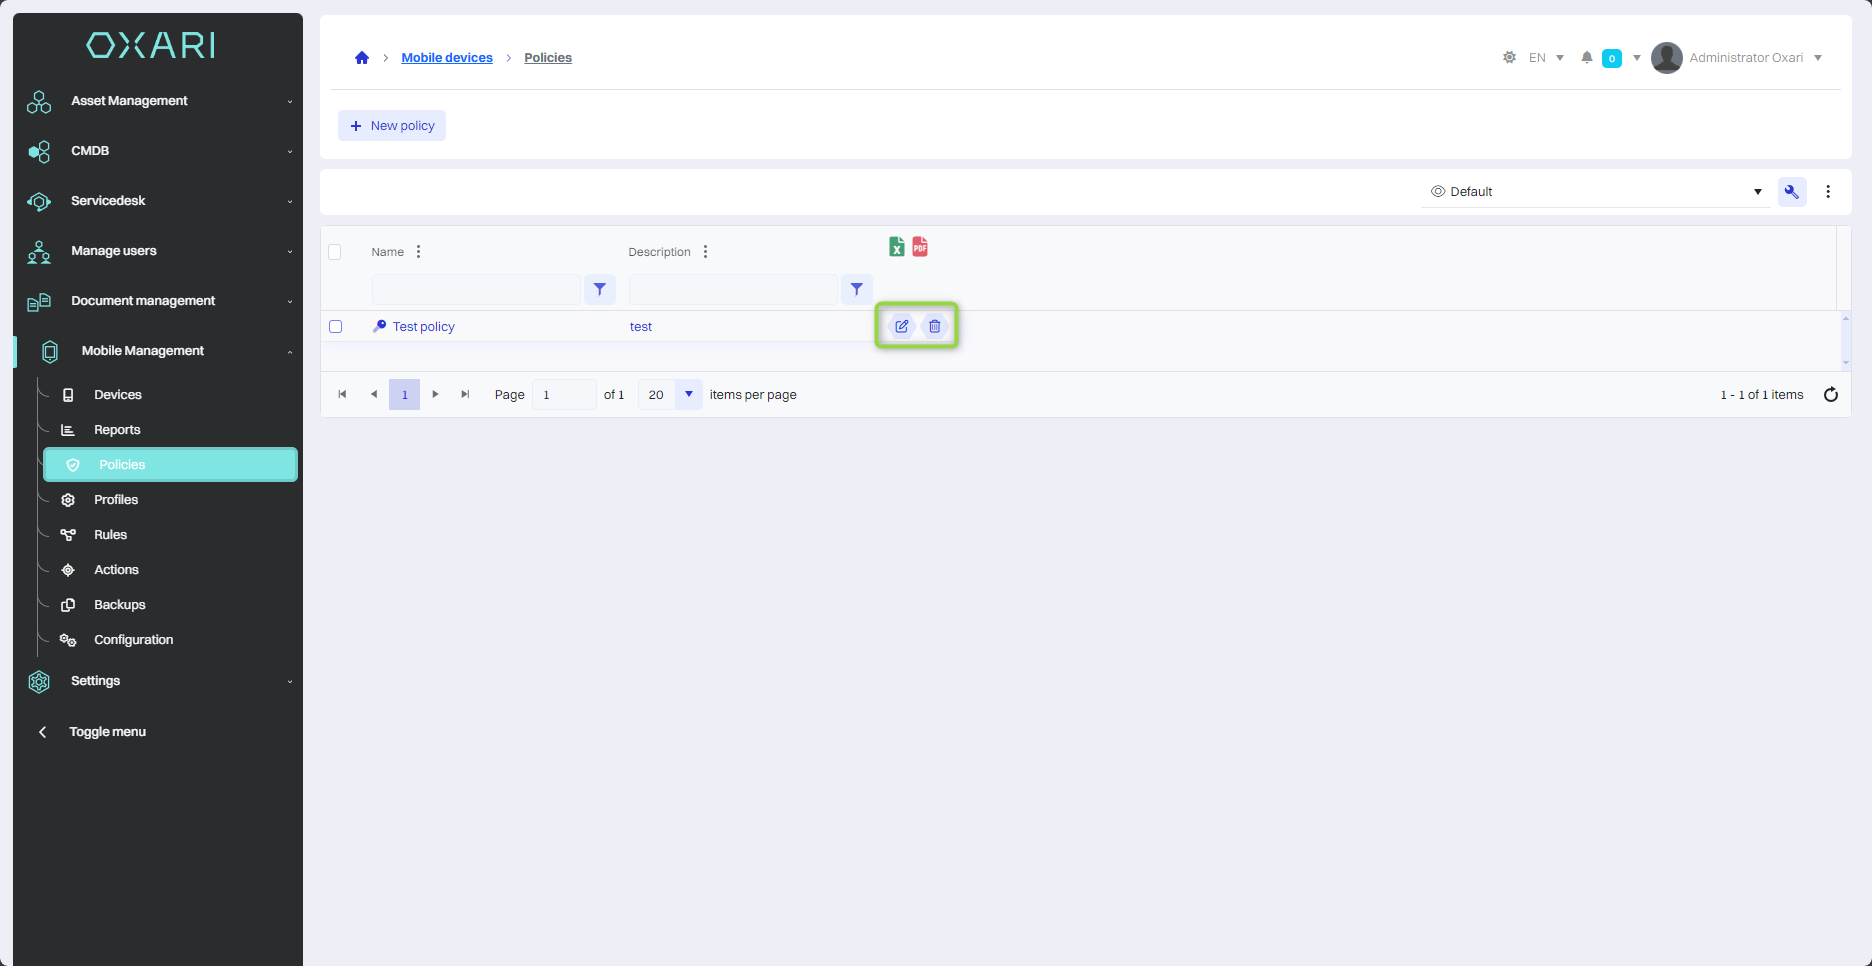
Edit/Delete
Policies can be edited or deleted using the following buttons.
Assigning a policy to a device
You can assign a created policy to a device under Mobile Management > Devices in two ways.
The first way to assign a policy to a device
Go to Mobile Management > Devices and then select the device in question from the list.
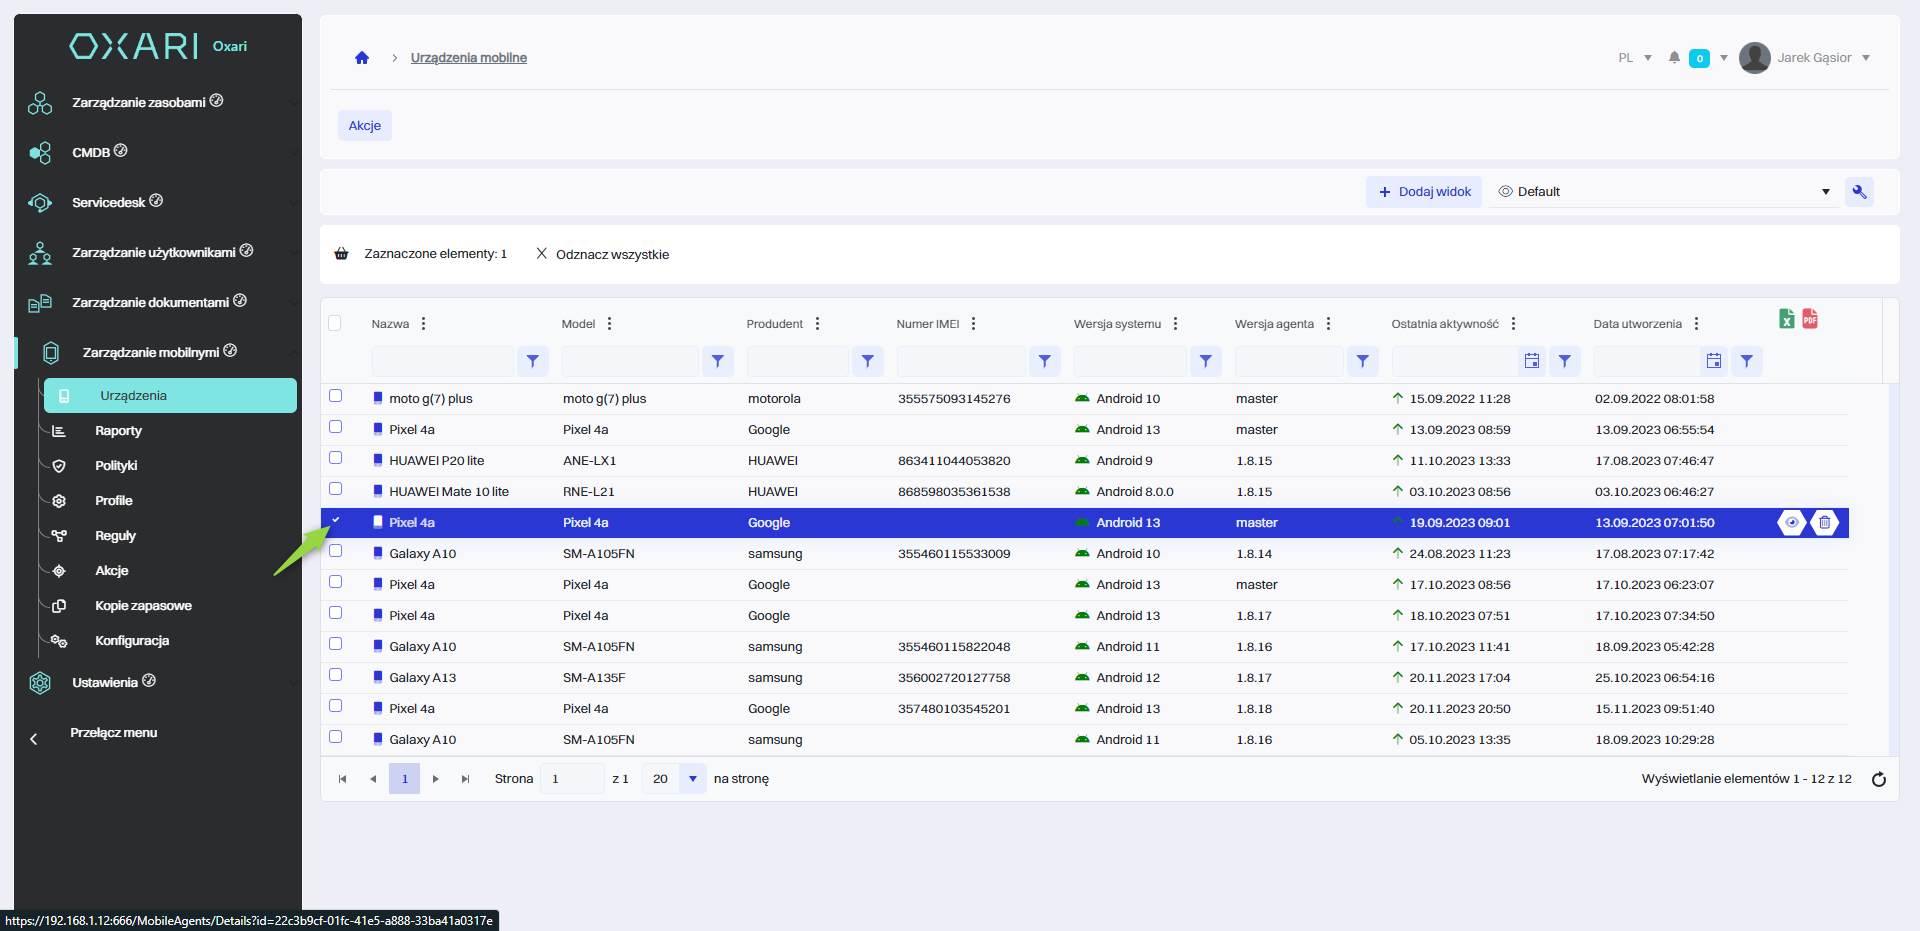
Then click the “Actions” button and select the “Assign Policy” option.
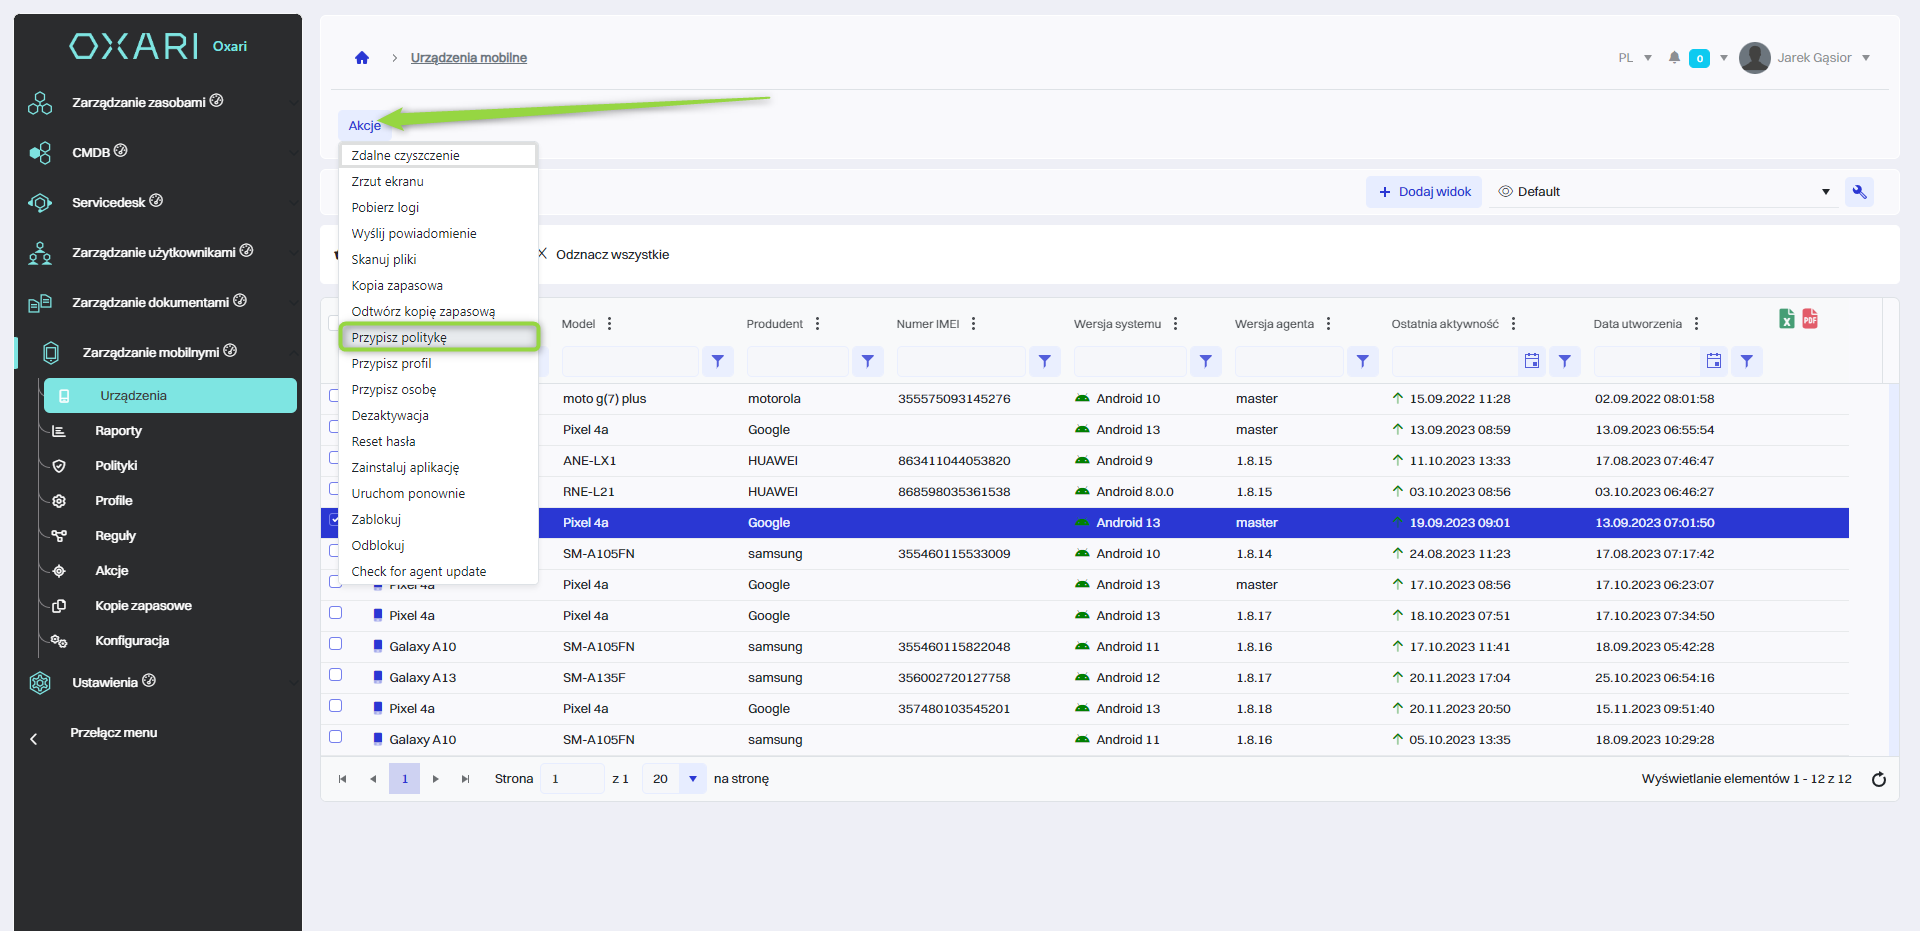
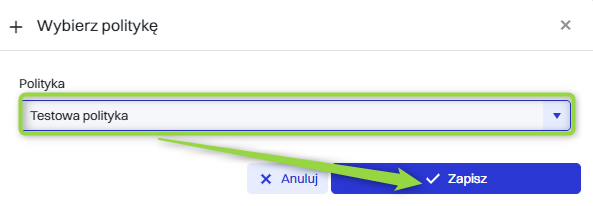
Finally, in the “Select Policy” window in the “Policy” field, select the desired policy from the list and click the “Save” button.
Dana policy was added to the device.
The second way to assign a policy to a device
Go to Mobile Management > Devices and then click the “Details” button next to the device in question.
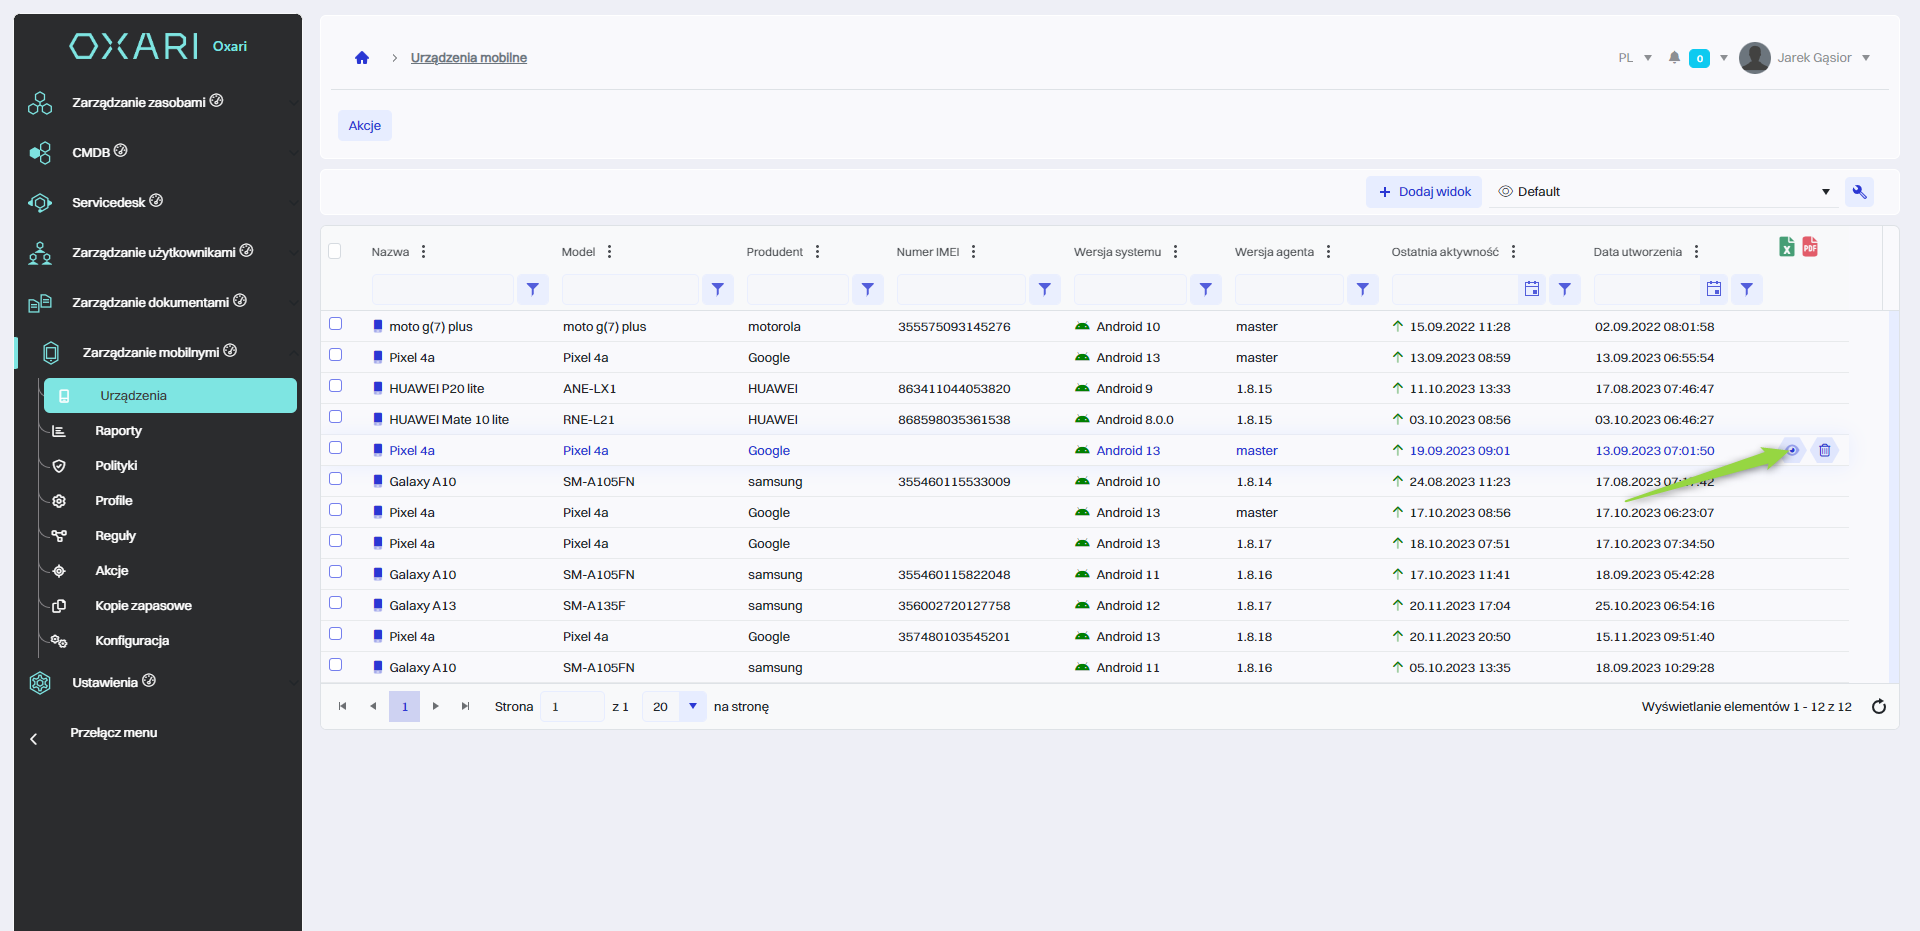
Then, in the detailed section of the device, click the “Assign Policy” button.
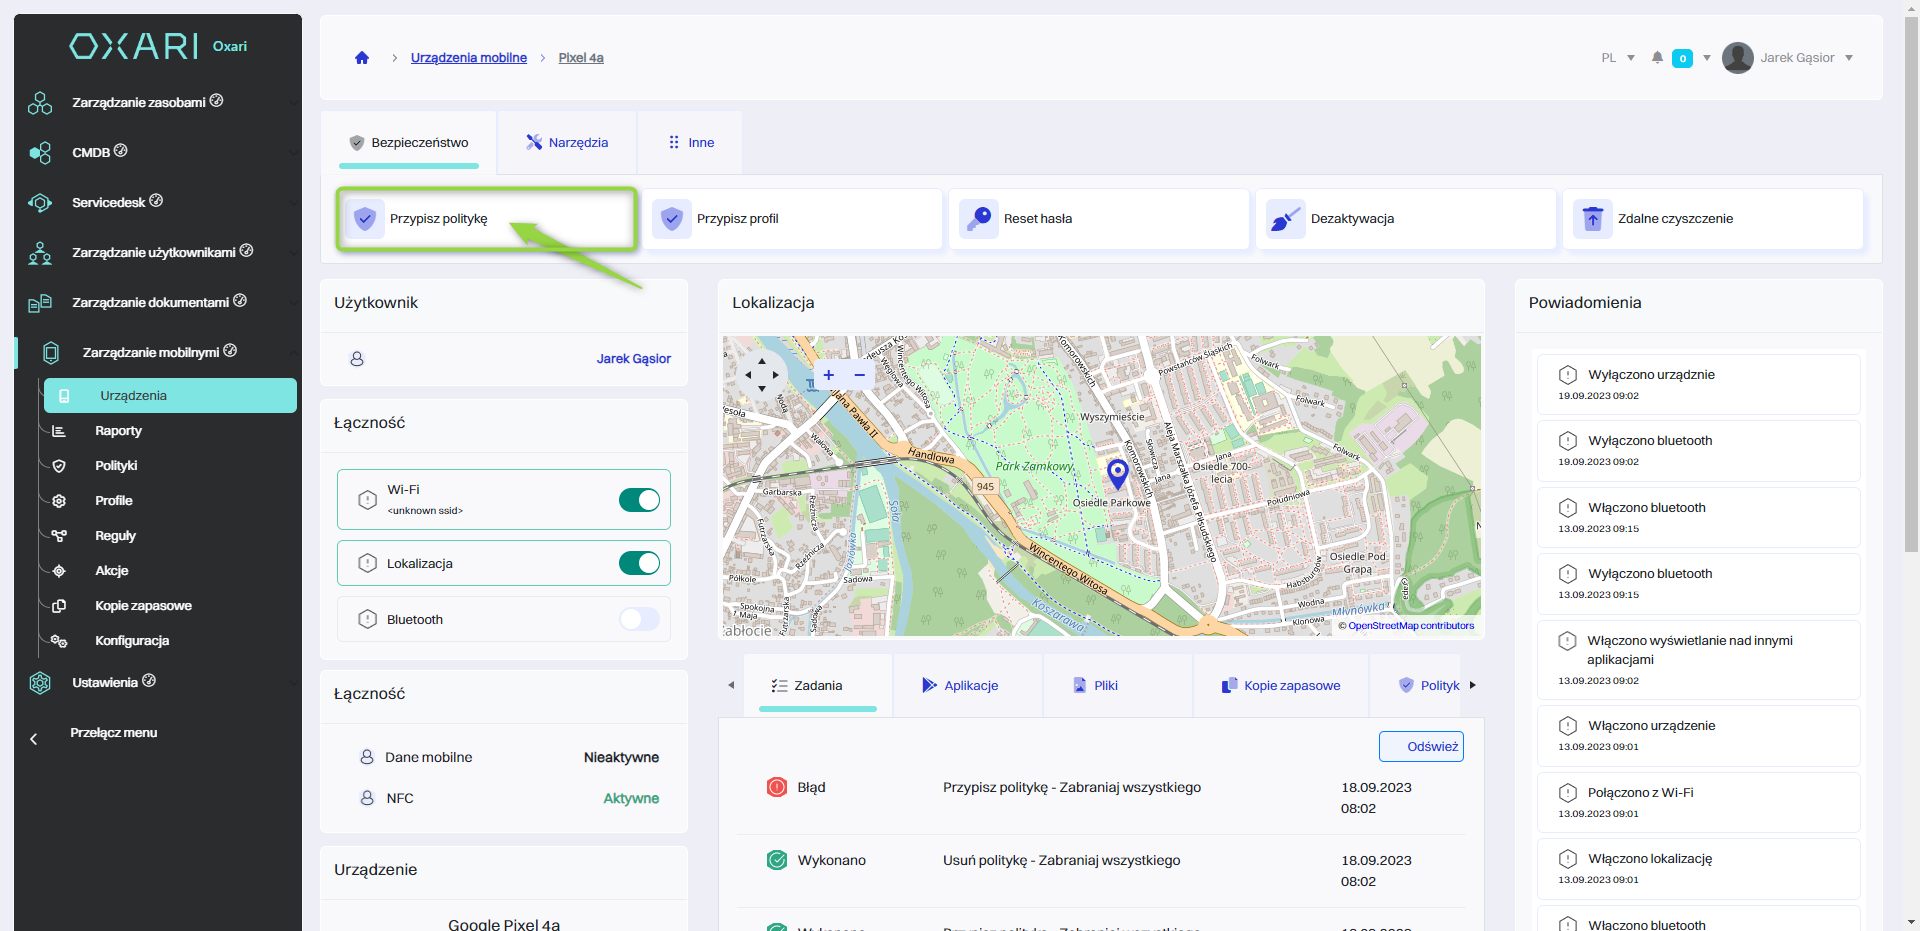
Finally, in the “Select Policy” window in the “Policy” field, select the desired policy from the list and click the “Save” button.
The policy has been added to the device: