The Mobile Management > Configuration section of OXARI's mobile management system allows you to centrally manage the settings of all devices on your network. The configuration section is divided into two parts.
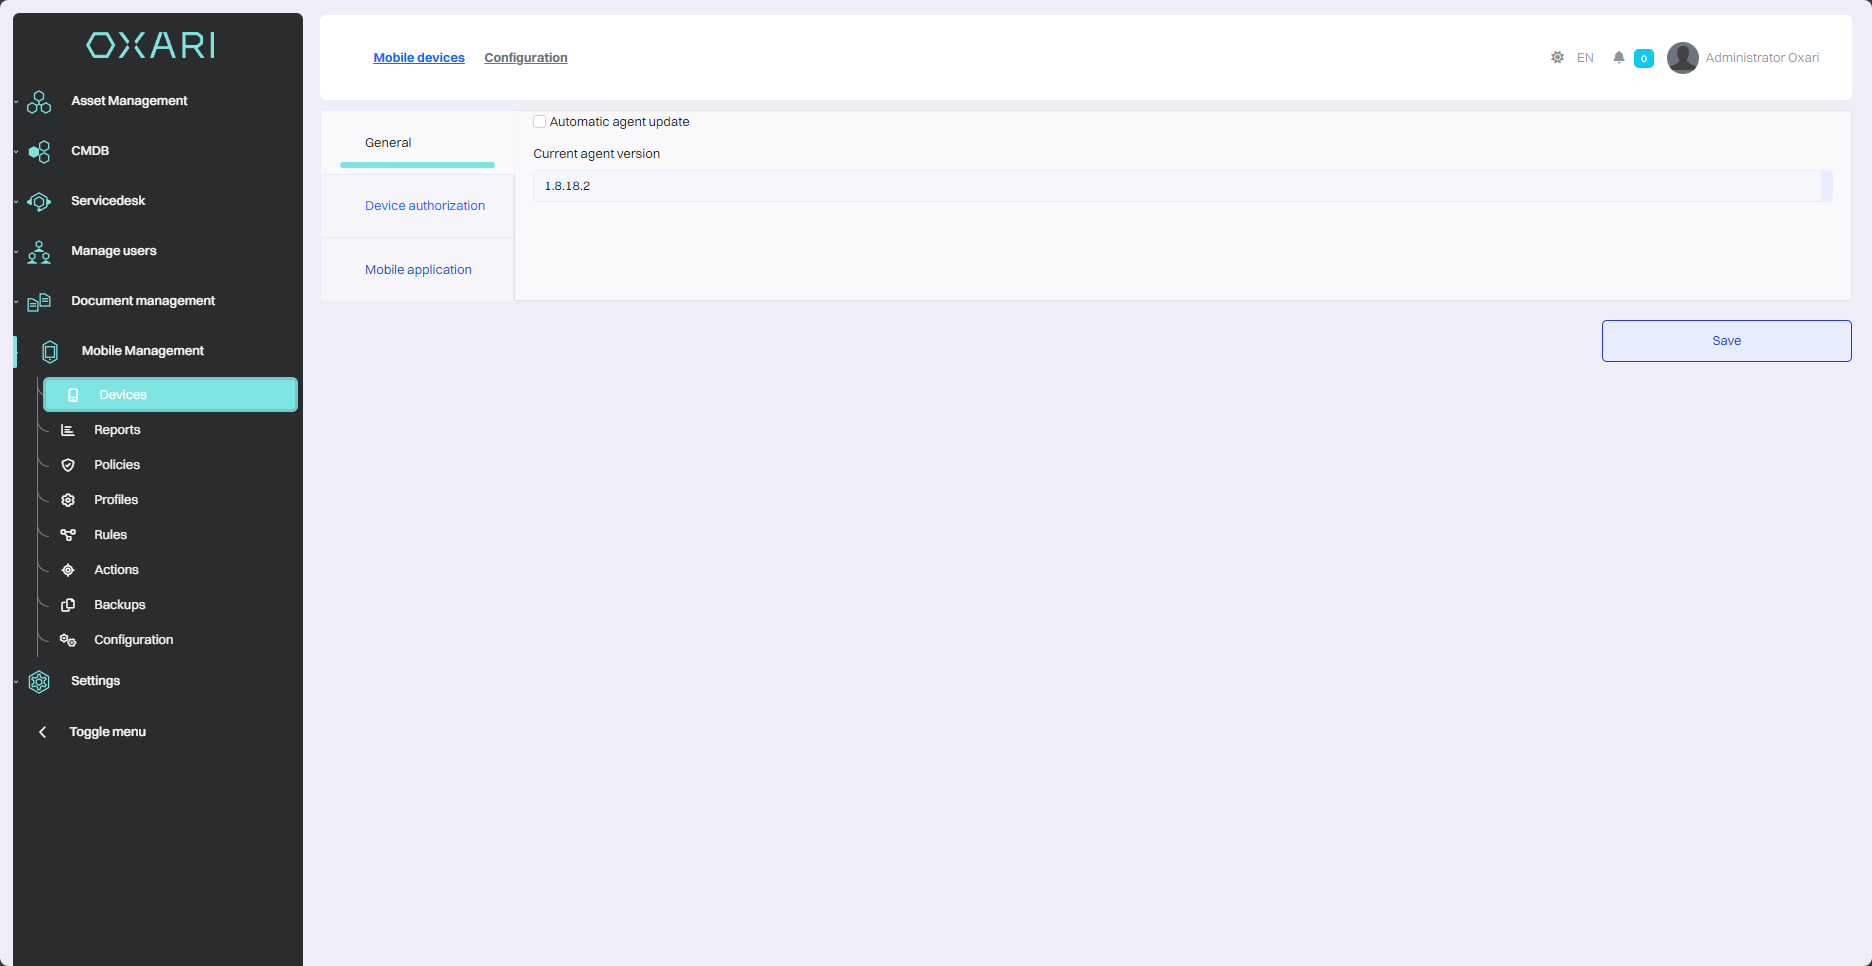
General tab
This tab allows you to set, among other things, policies for automatic agent software updates on devices, ensuring that all devices are running on current software versions. It also allows you to set the required version of the agent, which can be important for maintaining compatibility with corporate security and functionality standards.
Device authorization tab
In this tab, you can perform operations such as installing mobile agent applications. This makes it easier to manage devices in the organization by quickly distributing the software by scanning the QR code, which is convenient when distributing the software to a large number of devices.
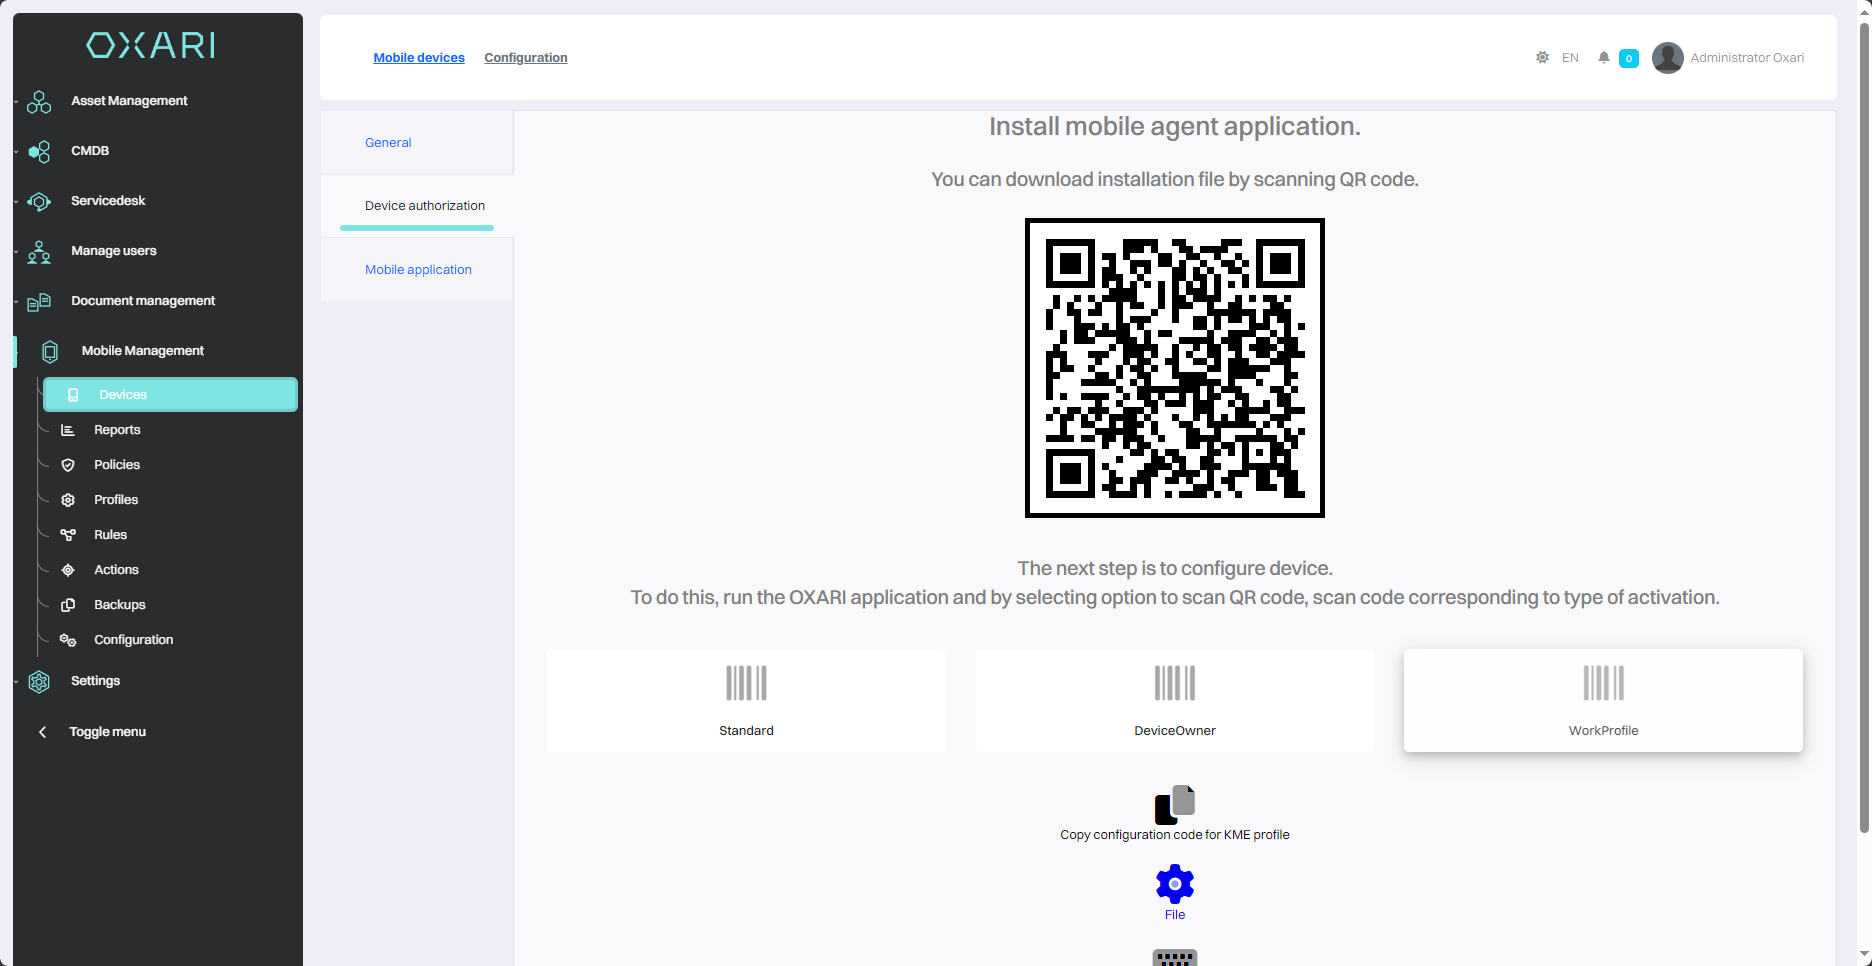
Installation of an application on a mobile device
There are three types of installation: Standard, Device Owner, Work Profile
The differences between the functionalities of each version are shown in the table below:
|
Function |
Standard |
Work Profile |
Device Owner |
|---|---|---|---|
|
Remote cleaning |
Yes |
Yes |
Yes |
|
Screenshot |
Yes |
No |
Yes |
|
Download logs |
Yes |
Yes |
Yes |
|
Send notification |
Yes |
Yes |
Yes |
|
Scan files |
Yes |
Yes |
Yes |
|
Backup |
Yes |
Yes |
Yes |
|
Restore backup |
Yes |
Yes |
Yes |
|
Deactivation |
Yes |
Yes |
Yes |
|
Assign policy |
Yes, but only the password |
Yes (11 functions) |
Yes (47 functions) |
|
Service space |
No |
Yes |
Yes |
|
Assign Profile |
Yes |
Yes |
Yes |
|
Password reset |
No |
No |
Yes |
|
Install the application |
No |
No |
Yes |
|
Uninstalling the application |
No |
No |
Yes |
The differences between the policies available for each version are shown in the table below:
|
Policy |
Standard |
Work Profile |
Device Owner |
|---|---|---|---|
|
Allow WiFi configuration |
No |
No |
Yes |
|
Allow change WiFi state |
No |
No |
Yes |
|
Allow mobile data configuration |
No |
No |
Yes |
|
Allow Bluetooth configuration |
No |
No |
Yes |
|
Allow Bluetooth usage |
No |
No |
Yes |
|
Allow Bluetooth sharing |
No |
Yes |
Yes |
|
Allow location configuration |
No |
No |
Yes |
|
Allow location sharing |
No |
No |
Yes |
|
Allow VPN configuration |
No |
No |
Yes |
|
Allow plane mode |
No |
No |
Yes |
|
Allow USB transfer |
No |
No |
Yes |
|
Allow Tethering configuration |
No |
No |
Yes |
|
Allow mobile networks configuration |
No |
No |
Yes |
|
Allow NFC transmission |
No |
No |
Yes |
|
Allow roaming data |
No |
No |
Yes |
|
Allow private DNS configuration |
No |
No |
Yes |
|
Allow outgoing calls |
No |
No |
Yes |
|
Allow SMS |
No |
No |
Yes |
|
Allow uninstall apps |
No |
Yes (inside profile) |
Yes |
|
Allow install apps |
No |
Yes (inside profile) |
Yes |
|
Allow install from unknown sources |
No |
No |
Yes |
|
Force app verification |
No |
Yes |
Yes |
|
Allow apps control |
No |
Yes (inside profile) |
Yes |
|
Allow system windows |
No |
No |
Yes |
|
Definie allowed apps |
No |
No |
Yes |
|
Define disallowed apps |
No |
No |
Yes |
|
Define idle time to screen off |
No |
No |
Yes |
|
Define Android system update policy |
No |
No |
Yes |
|
Allow add users |
No |
No |
Yes |
|
Allow remove users |
No |
No |
Yes |
|
Allow user icon change |
No |
No |
Yes |
|
Allow device accounts modification |
No |
Yes (inside profile) |
Yes |
|
Allow adjust screen brightness |
No |
No |
Yes |
|
Allow always on display |
No |
No |
Yes |
|
Allow idle time to screen off configuration |
No |
No |
Yes |
|
Allow screenshots |
No |
No |
Yes |
|
Allow adjust volume |
No |
No |
Yes |
|
Force microphone muted |
No |
No |
Yes |
|
Force device muted |
No |
No |
Yes |
|
Allow language change |
No |
No |
Yes |
|
Allow device time configuration |
No |
No |
Yes |
|
Allow Safe Boot |
No |
Yes |
Yes |
|
Allow debugging |
No |
No |
Yes |
|
Allow factory reset |
No |
No |
Yes |
|
Allow printing |
No |
Yes |
Yes |
|
Allow use of external storage |
No |
Yes |
Yes |
|
Allow wallpaper change |
No |
No |
Yes |
|
Allow camera |
No |
No |
Yes |
|
Allow unified passwords |
No |
Yes |
No |
|
Force password change by interval |
No |
No |
Yes |
|
Define password history length |
No |
No |
Yes |
|
Define password quality |
Yes |
Yes |
Yes |
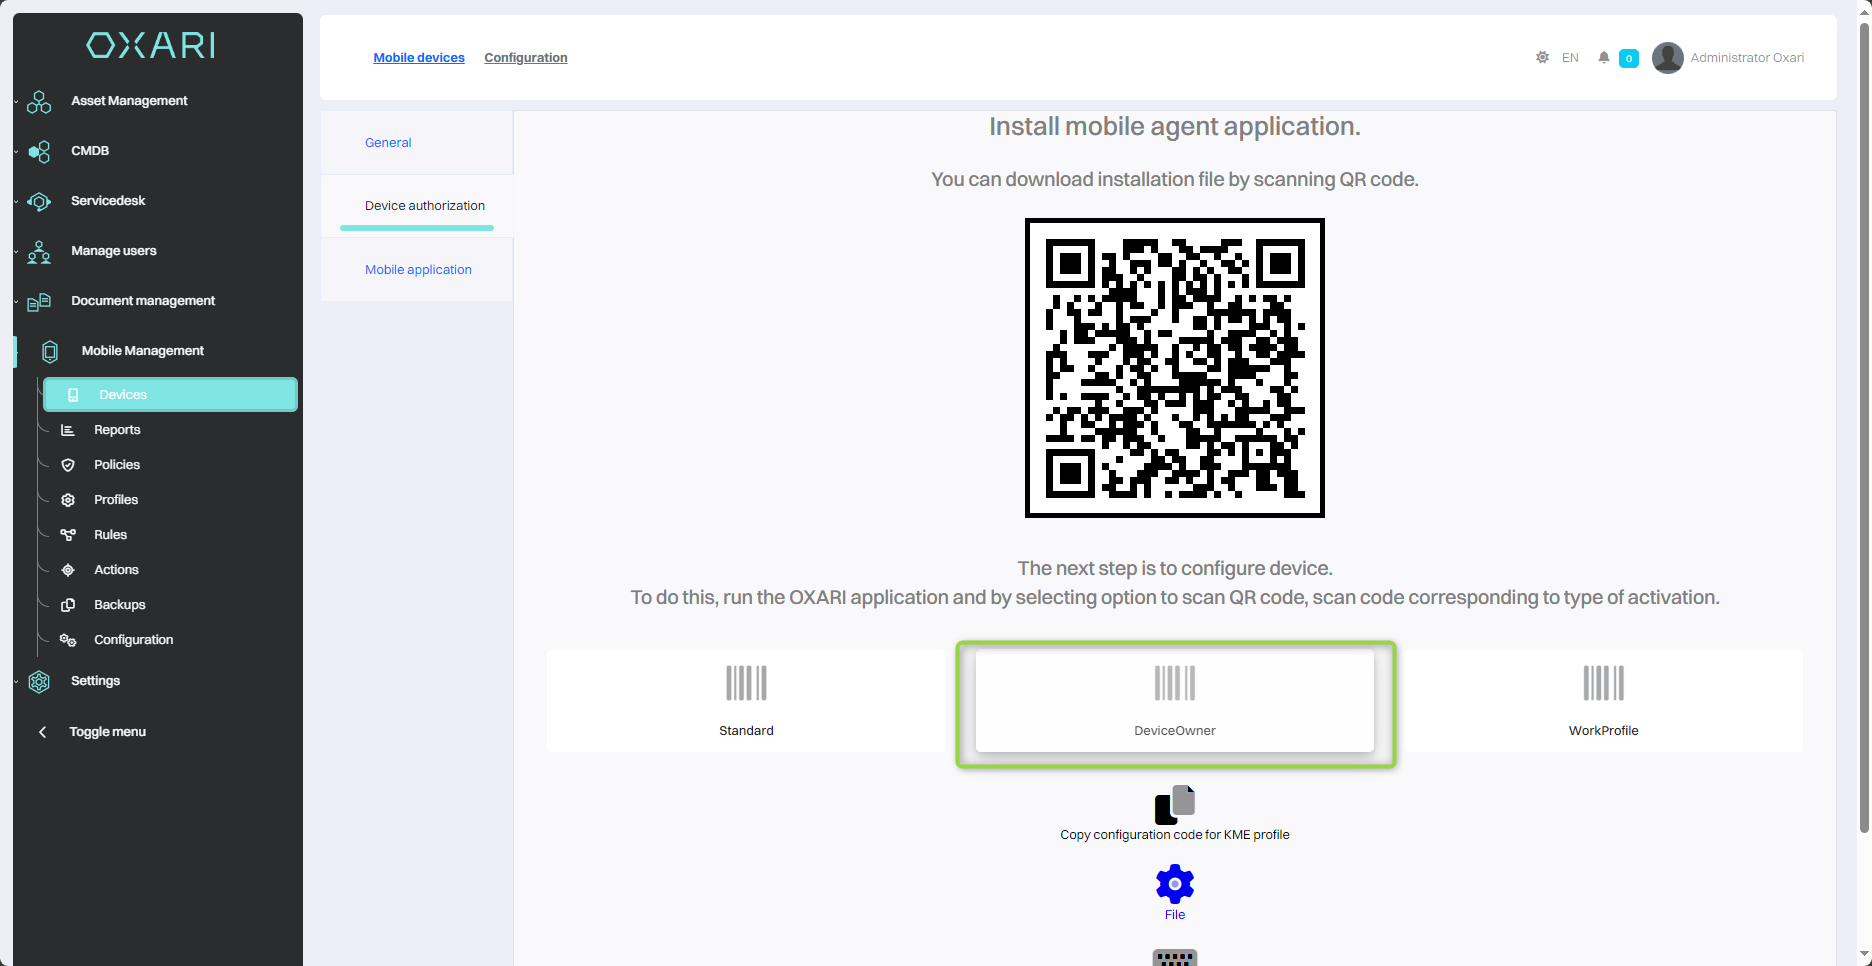
Installation of Device Owner
Installation of Device Owner is only possible after the first boot of the phone, or when restoring the phone to factory settings.
During the first startup, or when restoring the phone to factory settings, tap several times (about 7) on the startup screen (usually the language selection screen), which will launch the native QR code scanner.
Then follow the instructions. One of the screens will require you to log into a Wi-Fi network, and the next of the steps will show the QR code scanning application.
Depending on the model of the phone, these steps may appear in different order
When the QR code scanner appears in the OXARI console, click the Device Owner icon and scan the QR code displayed in the pop-up window.
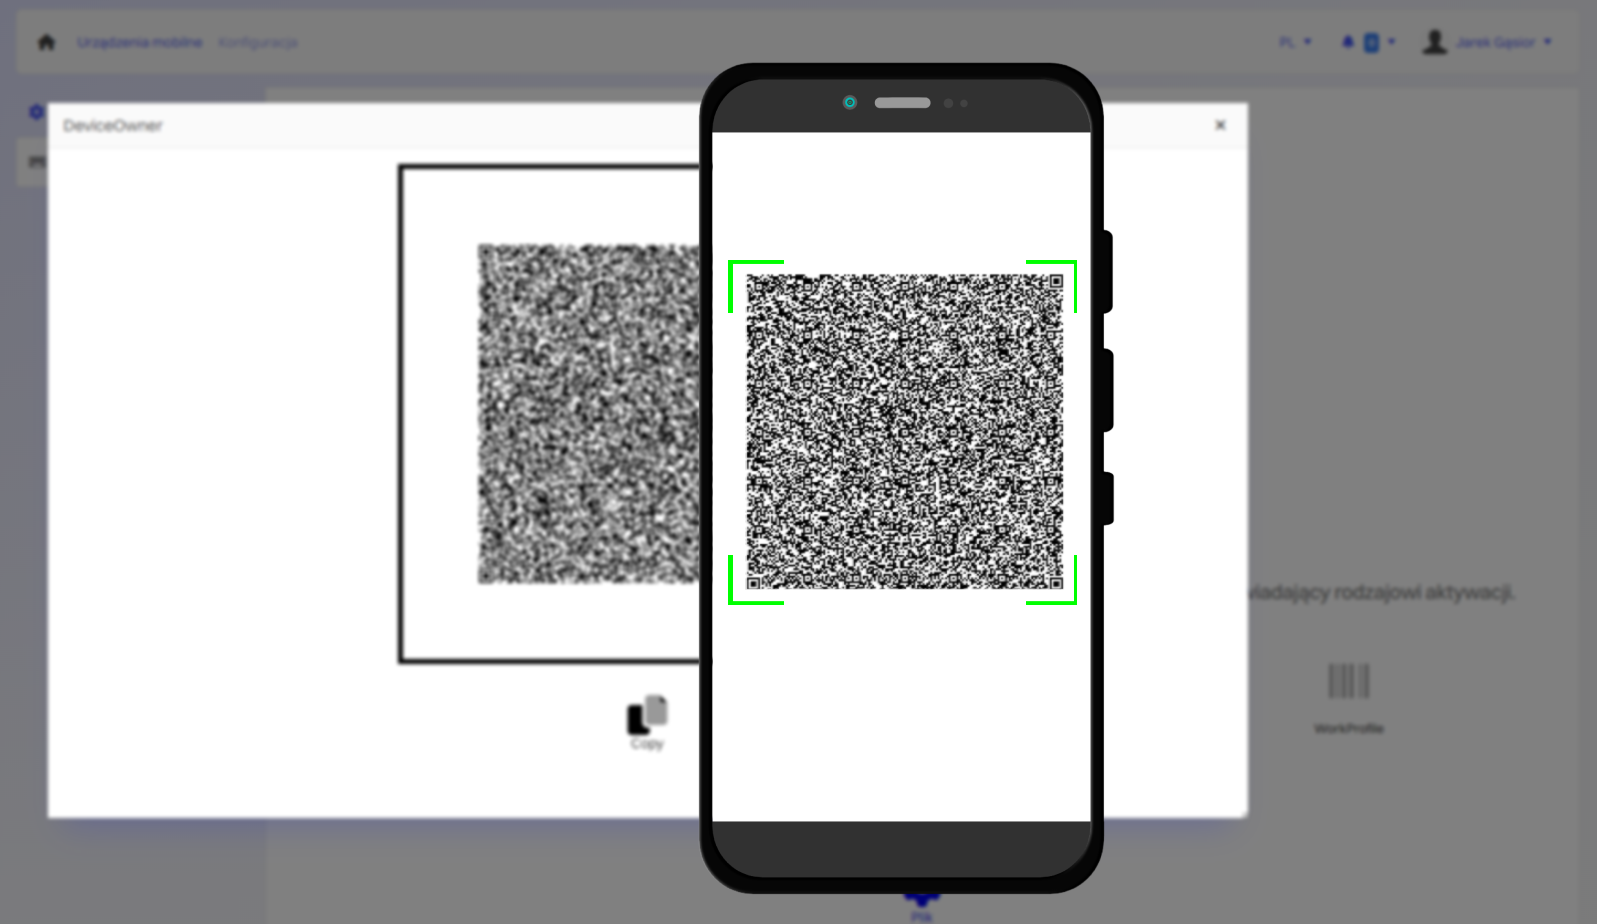
After that, again follow the instructions on the mobile device. Once the installation and authorization is complete, the app will automatically authorize the device.
In this type of installation, no authentication data is required. The whole process is automatic.
Standard and Work Profile installation
Standard installation can be done at any time without resetting the phone. You need to load the shit code with any QR code scanner to download the installation file. Then install the application on the mobile device.
Authorize Standard and Work Profile with QR code
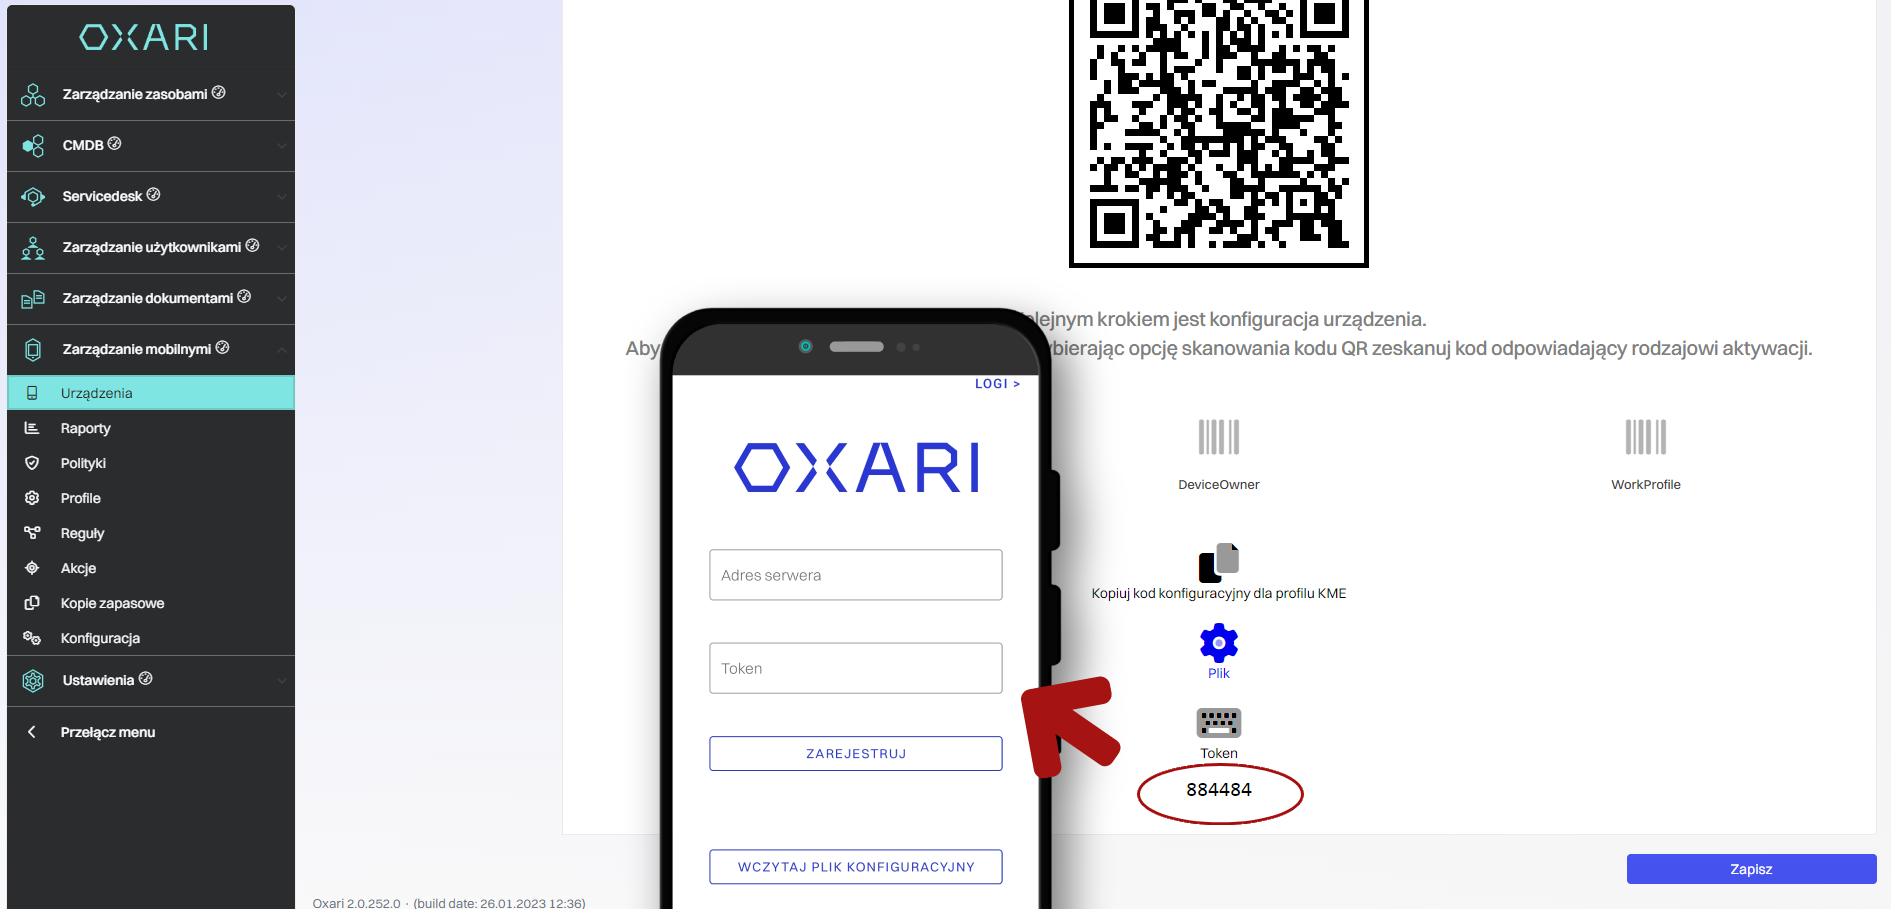
In the authorization window of the mobile application, select Scan QR code and then in the OXARI console click the Standard icon and scan the QR code. After this action, the device will be authorized.
Authorization of Satandard and Work Profile with Token
In the authorization window, enter the server address and the token generated in the OXARI console.
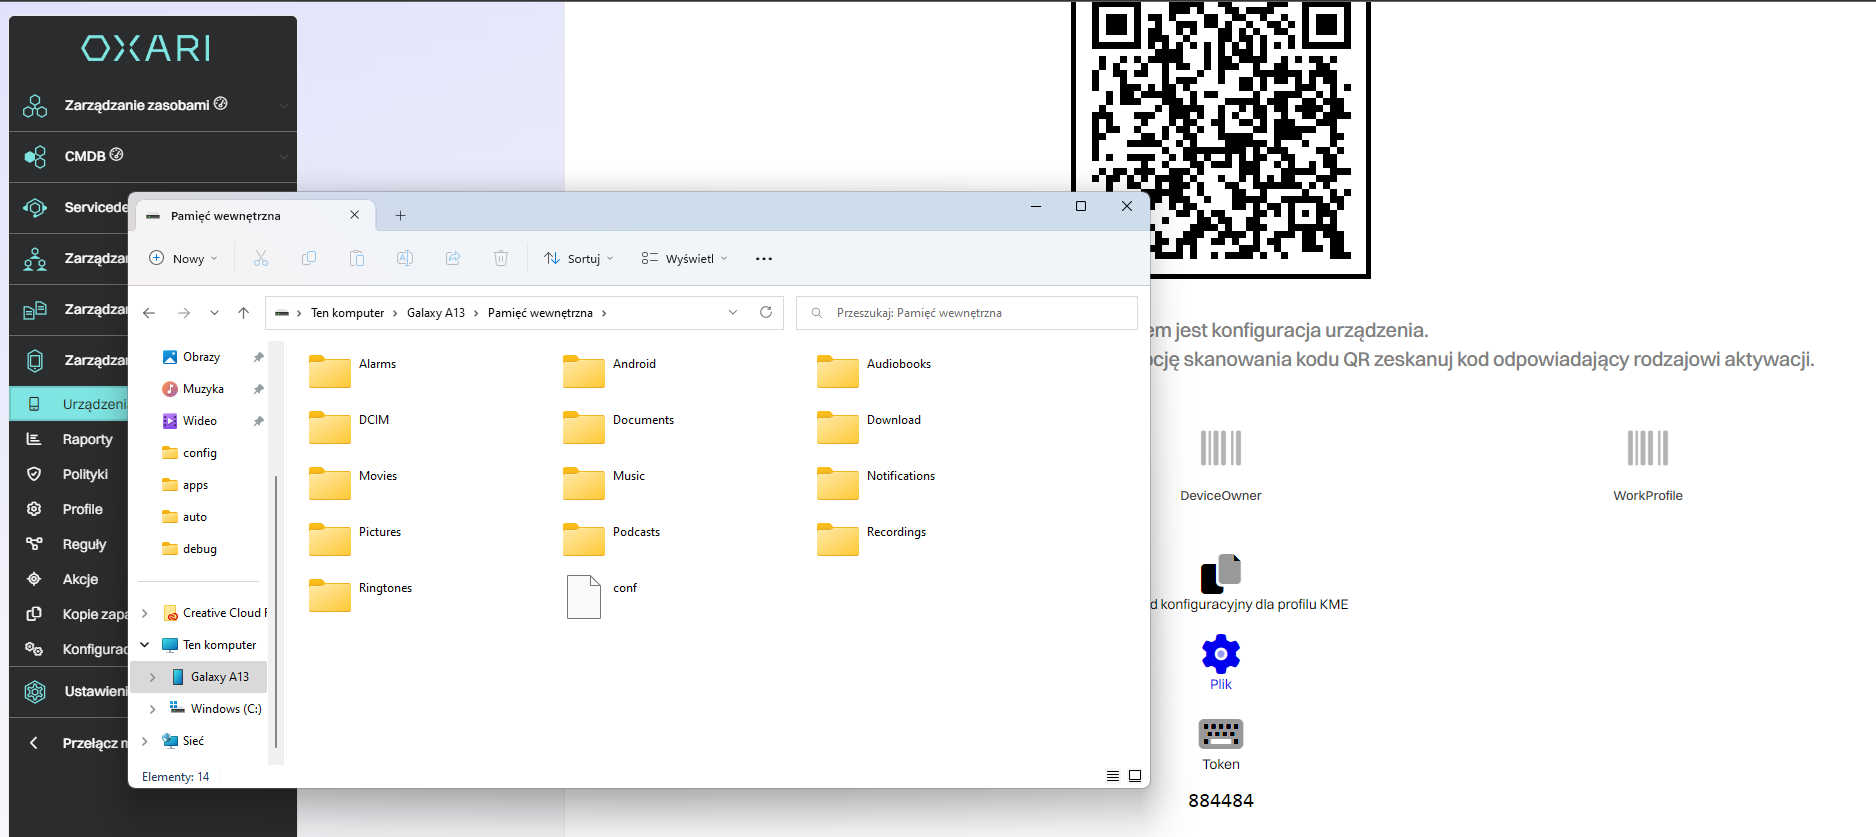
Authorization of Standard and Work Profile using a configuration file
For authorization, download the configuration file from the OXARI console and place it in the root directory of the mobile device, then press the Load Configuration File button in the mobile application.