OXARI's mailbox configuration, which enables email notifications for inbound and outbound mailboxes, is a process that ensures the integration of email functionality with various activities in the system.
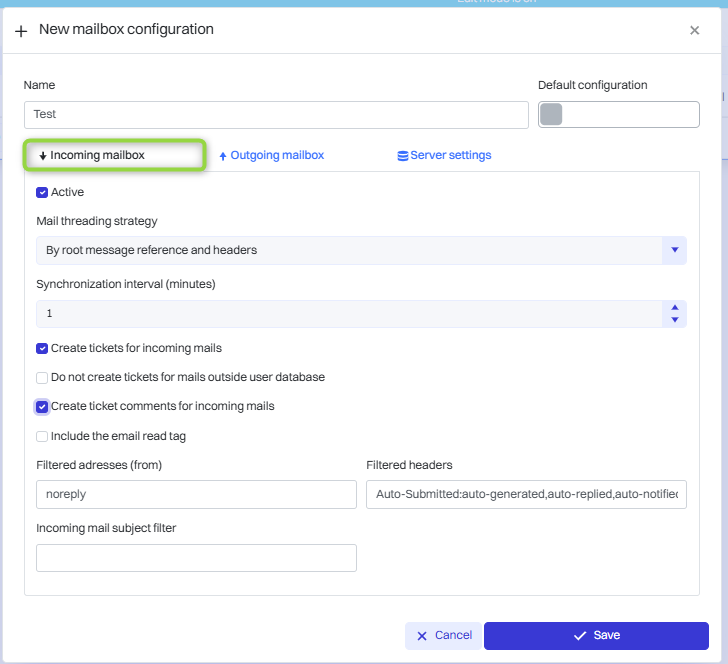
New email configuration (Incoming mailbox)
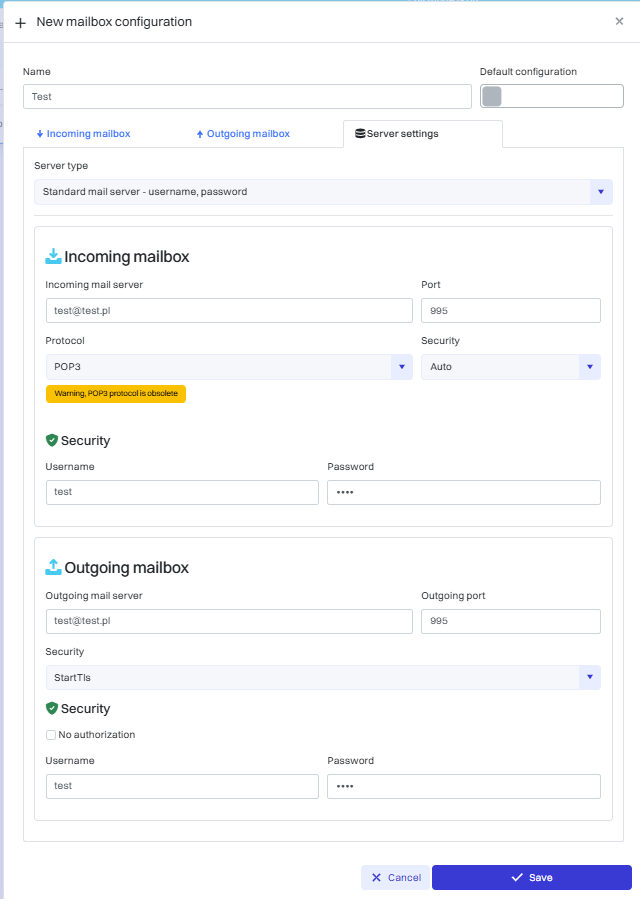
The configuration of this section allows OXARI to receive e-mails from external mail servers. You can specify the server address, port, protocol (such as IMAP or POP3) and credentials (username and password).
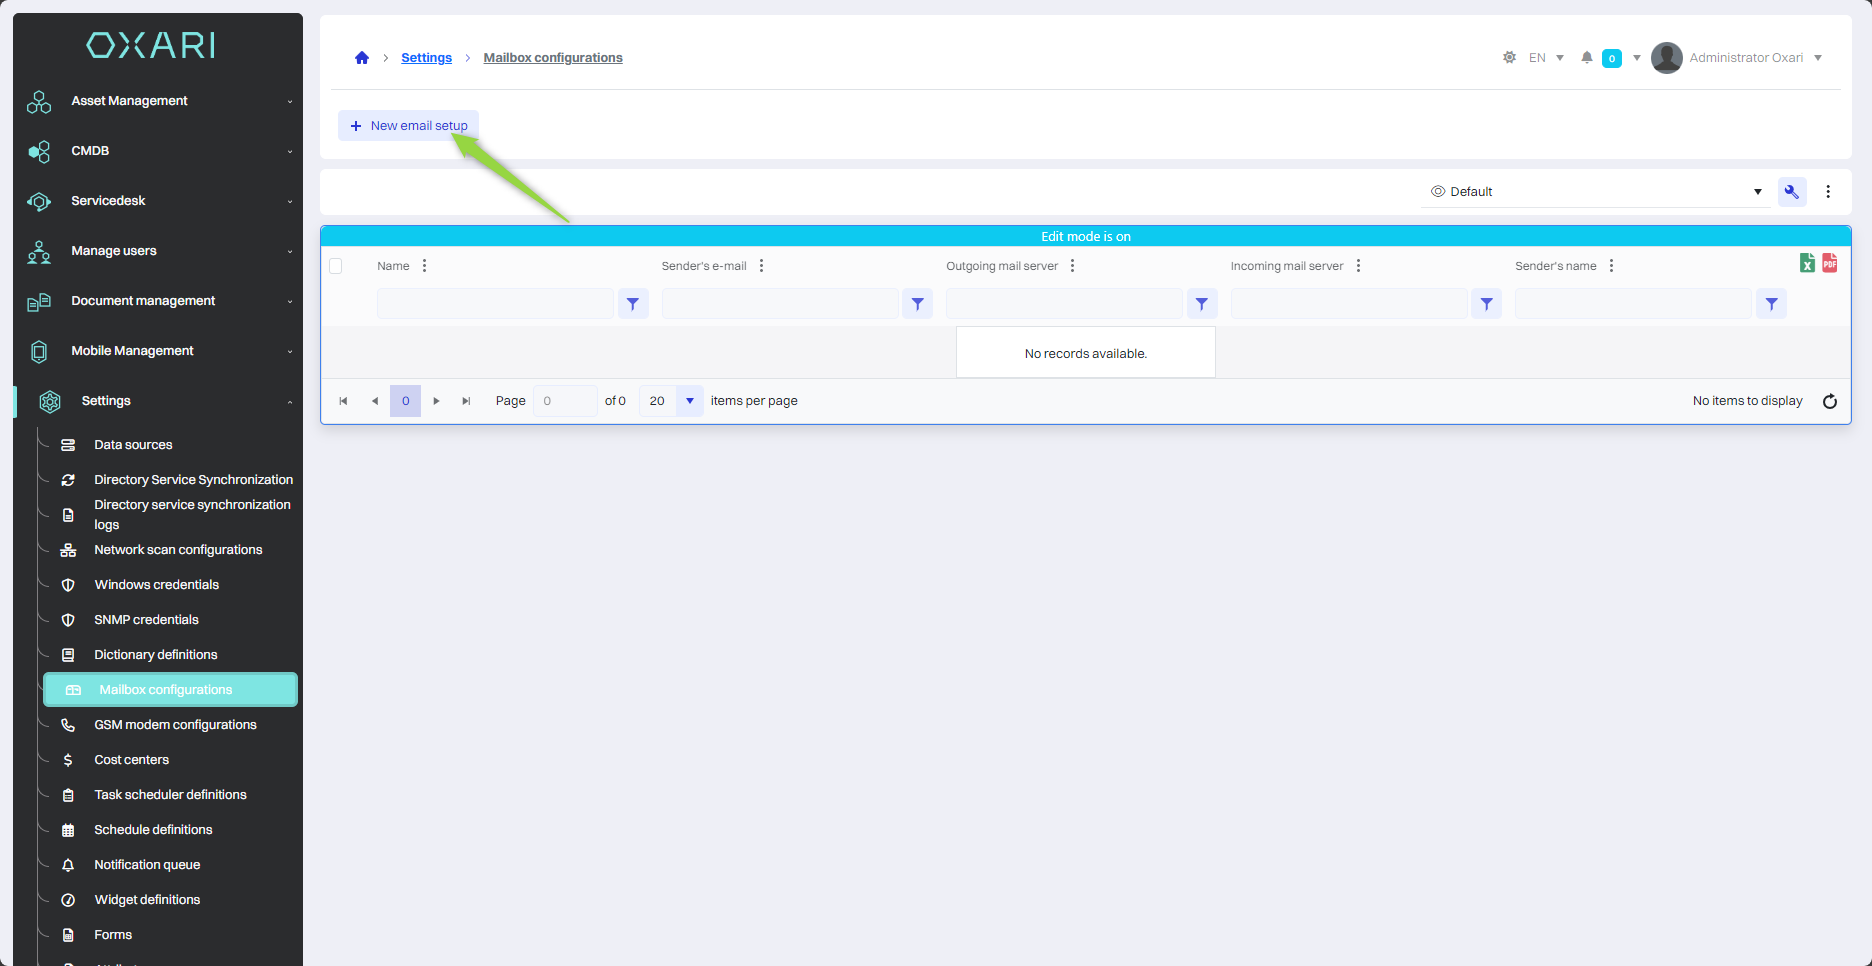
To add a new email configuration, navigate to the section in question and then click the “New Email Configuration” button.
Filling out
Next, in the “New email configuration” window, check the “Active” box, fill in the required fields, and then click the “Save” button.
|
1 |
Name - The name of the new email configuration. |
|
2 |
Default configuration - Ability to select whether to use this configuration as the default for the system. |
|
3 |
Authorization Type - Selection of the authentication method, in this case (Username, password). |
|
4 |
Incoming mail address - Set the address of the incoming mail server. |
|
5 |
Port - Set the port of the incoming mail server. |
|
6 |
Protocol - The protocol used for incoming mail (POP3/IMAP). |
|
7 |
Security - Set the type of communication encryption (Auto, None, SSLOnConnect, StartTlS, StartTlsWhenAvailable). |
|
8 |
User Name - Provide login information for the mailbox. |
|
9 |
Password - Provide the password for the mailbox. |
|
10 |
Message threading method - Determines how emails will be grouped into threads in the system. |
|
11 |
Synchronization interval - Sets at what interval the synchronization is to be performed |
|
12 |
Create notifications automatically for incoming emails - Allows you to automatically generate notifications in the system based on incoming emails. |
|
13 |
Don't create tickets for emails from outside the personal database - An option to block the creation of tickets for emails from senders who are not registered in the system. |
|
14 |
Create comments for incoming emails - An option that allows the system to automatically create comments in existing requests based on incoming emails. |
|
15 |
IncomingMailMarkAsReaded - This option, when enabled, marks incoming emails as read after the system has processed them. |
|
16 |
Filtered email addresses ('from' field) - Here you can specify specific email addresses from which incoming messages will be filtered, which can be used to block spam or specific senders. |
|
17 |
Filtered email headers: Allows you to filter emails based on specific message headers, which can be used for more advanced sorting and message management. |
|
18 |
Filtered email subjects: Allows you to filter messages based on their subjects, allowing you to reject or give special treatment to messages with specific subjects. |
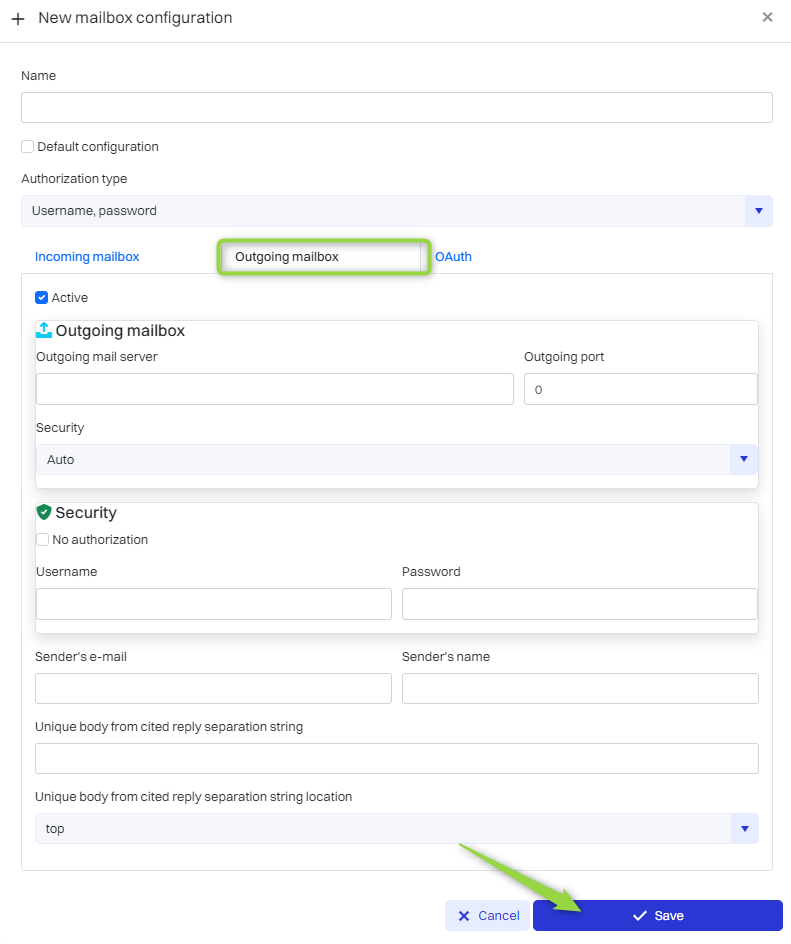
New email configuration (Outgoing mailbox)
OXARI's inbound mailbox configuration allows the application to receive e-mails from external mail servers. With this configuration, OXARI can effectively receive emails, which can then be used for various purposes within the system.
To add a new e-mail configuration, navigate to the section in question and then click the “New e-mail configuration” button.
Filling out
Next, in the “New email configuration” window, check the “Active” box, fill in the required fields, and then click the “Save” button.
|
1 |
Name - The name of the new email configuration. |
|
2 |
Default configuration - Ability to select whether to use this configuration as the default for the system. |
|
3 |
Authorization Type - Selection of the authentication method, in this case (Username, password). |
|
4 |
Outgoing Mail Address - SMTP server address used to send emails. |
|
5 |
Outgoing Mail Port: The port number used by the SMTP server. |
|
6 |
Security - Set the type of communication encryption (Auto, None, SSLOnConnect, StartTlS, StartTlsWhenAvailable). |
|
7 |
User Name and Password - Login data used for authorization on the outgoing mail server. |
|
8 |
Sender Email - The email address from which all messages will be sent. |
|
9 |
Sender's Signature - Text that will be included at the end of each email sent as a signature. |
|
10 |
Email separation string from quoted content - Specify a character or string of characters to be used to separate new email content from the quoted part (e.g., “---” or “>>”). |
|
11 |
Location of the email separation string from the quoted content: Selectable whether the separator string should be placed at the beginning or end of the email. |
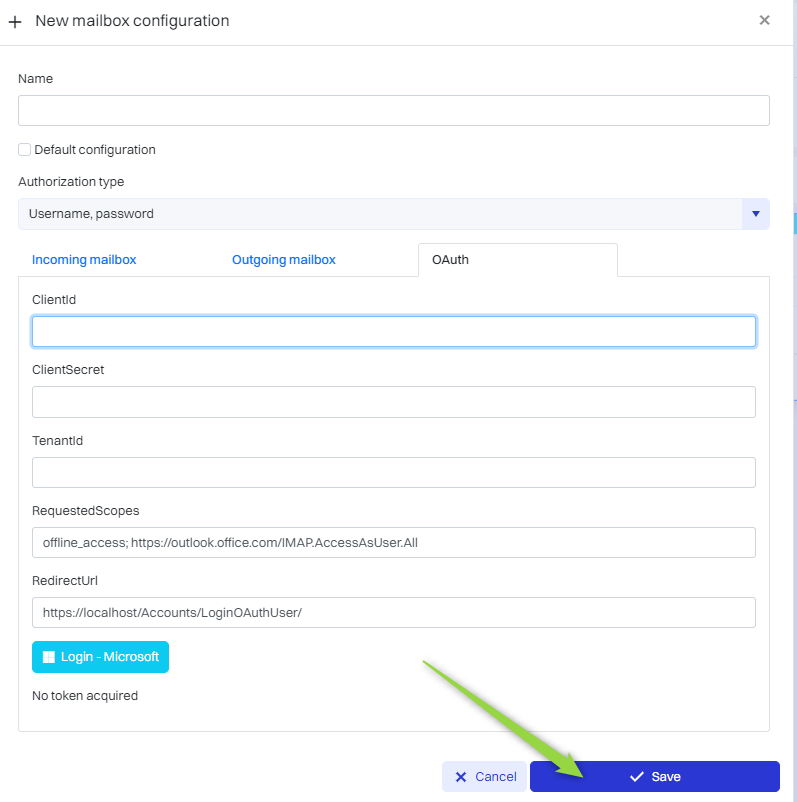
New email configuration (OAuth)
OAuth, is an authentication standard used to securely grant applications access to information on other servers without having to share credentials with the user. It allows applications to access a user's Outlook email account so they can, for example, read messages, send email, without having to share the account password.
To add a new email configuration, go to the section in question and then click the “New email configuration” button.
Filling out
Next, in the “New email configuration” window, fill in the required fields, and then click the “Save” button.
|
1 |
Name - The name of the new email configuration. |
|
2 |
Default configuration - Ability to select whether to use this configuration as the default for the system. |
|
3 |
Authorization Type - Selection of the authentication method, in this case (Microsoft Account). |
|
4 |
ClientId - A unique client identifier assigned to an application when it registers with the OAuth service. It is used to identify the application during the authorization process. |
|
5 |
ClientSecret - A secret key assigned to the application along with the ClientId. It is used to confirm the identity of the application during the token exchange process. |
|
6 |
TenantId - In the context of Microsoft services (Azure), TenantId identifies the specific lease or instance in Microsoft services where the application is used. |
|
7 |
RequestedScopes - Specify the scope of access the application is requesting. For example, it could be access to read email messages. |
|
8 |
RedirectUrl - The URL to which the OAuth service redirects after successful login and authorization. This is often the page in the application that receives the access token. |
|
9 |
Button (Microsoft Login) - User interface that initiates the process of logging in via OAuth to Microsoft services. |
|
10 |
Information No Token - A message that appears when the application does not have a current access token, indicating the need to perform a login process or refresh the token. |
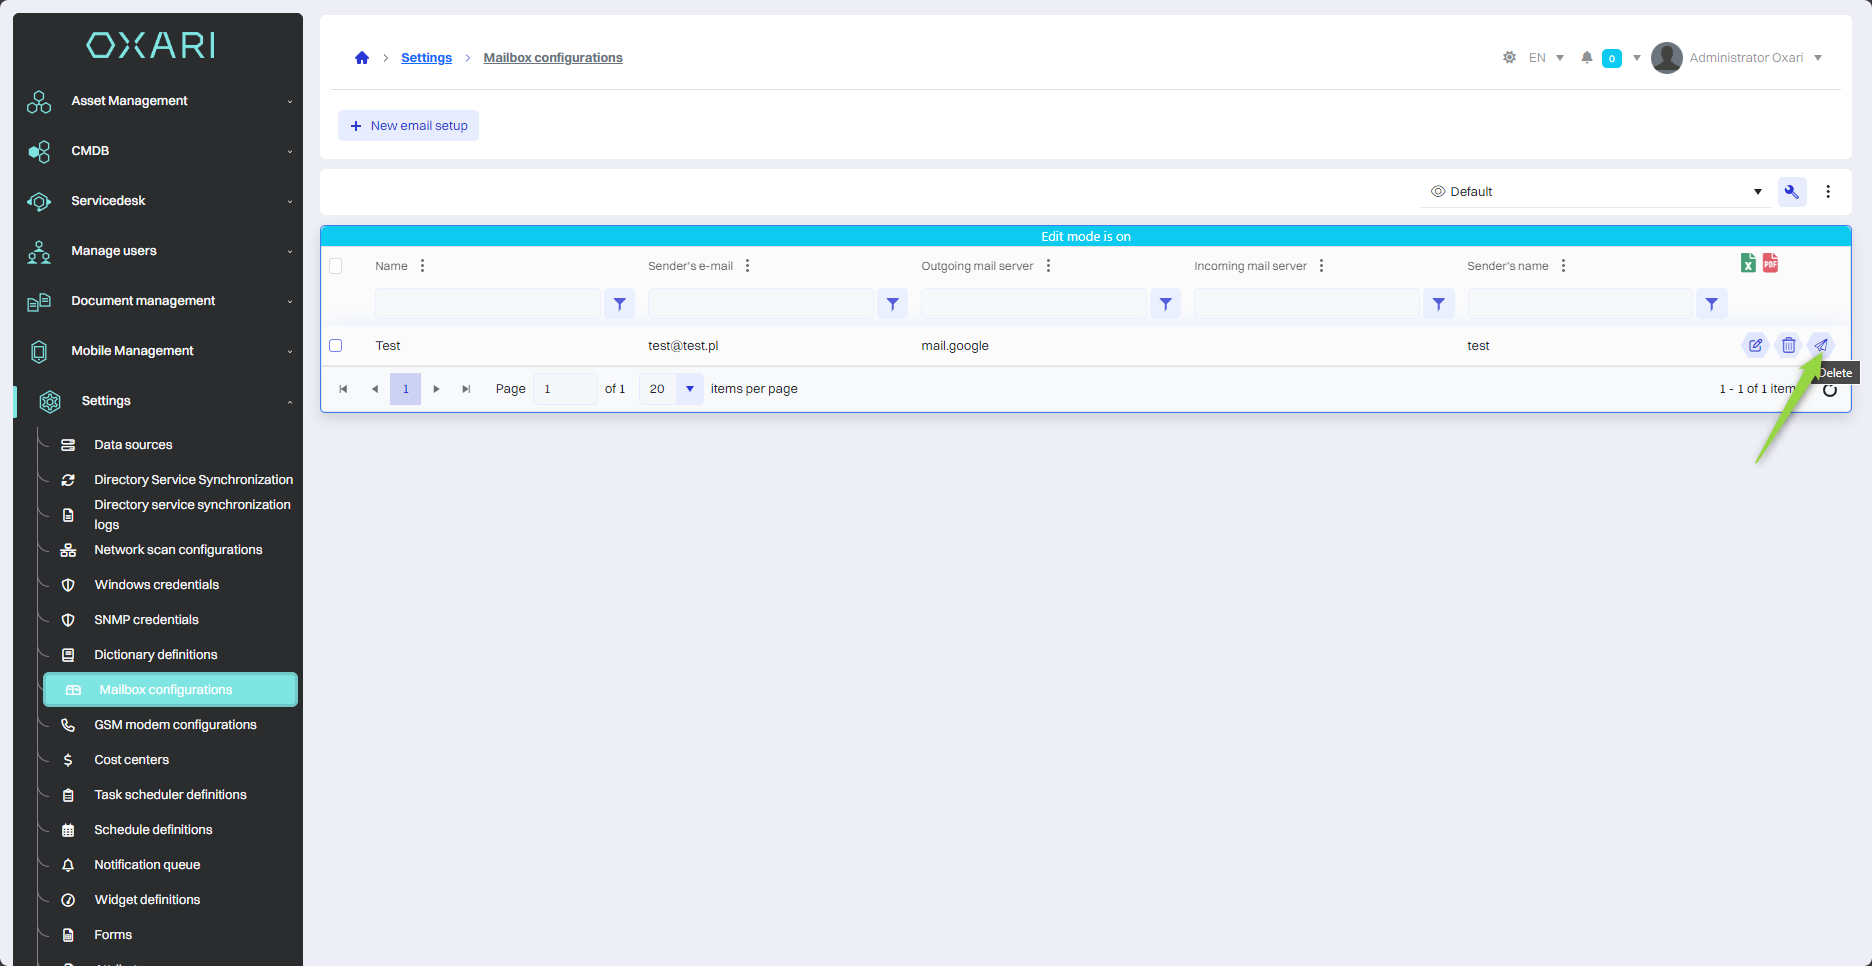
Edit/Remove
The network scan synchronization configuration can be edited or deleted using the following buttons.

Testing Email Configuration
The testing process is important to make sure that the OXARI system is properly configured to send and receive emails.
Testing can be started using the following button.
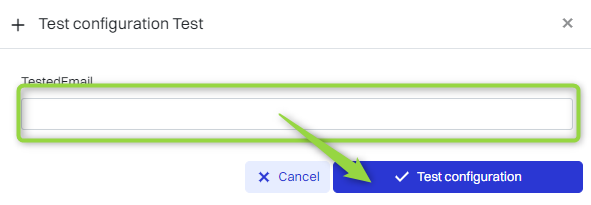
Starting the test
Next, enter the e-mail address that will be used to test the mail configuration. This email address serves as the target recipient of the test email. Finally, click the “Test Configuration” button.
Completing the test
To complete the test, check the inbox of the specified email address to make sure that the test message was successfully received. This confirms that the mail configuration is correct and working.