Configuration in OXARI allows you to customize the application to meet your organization's specific requirements. After making selections or changes to the settings, it is necessary to click the “Save” button to approve the changes.
Settings section - location
Below is a description of the various settings in the location section.
|
1 |
Languages available to the user - available are: Polish, English, German. |
|
2 |
Default application language - selectable: Polish, English, German. |
Settings section - file storage
In this section we can configure whether the system should store files and in what location.
To do this, set the slider to “Enabled” and specify the location of the files on disk and the path.
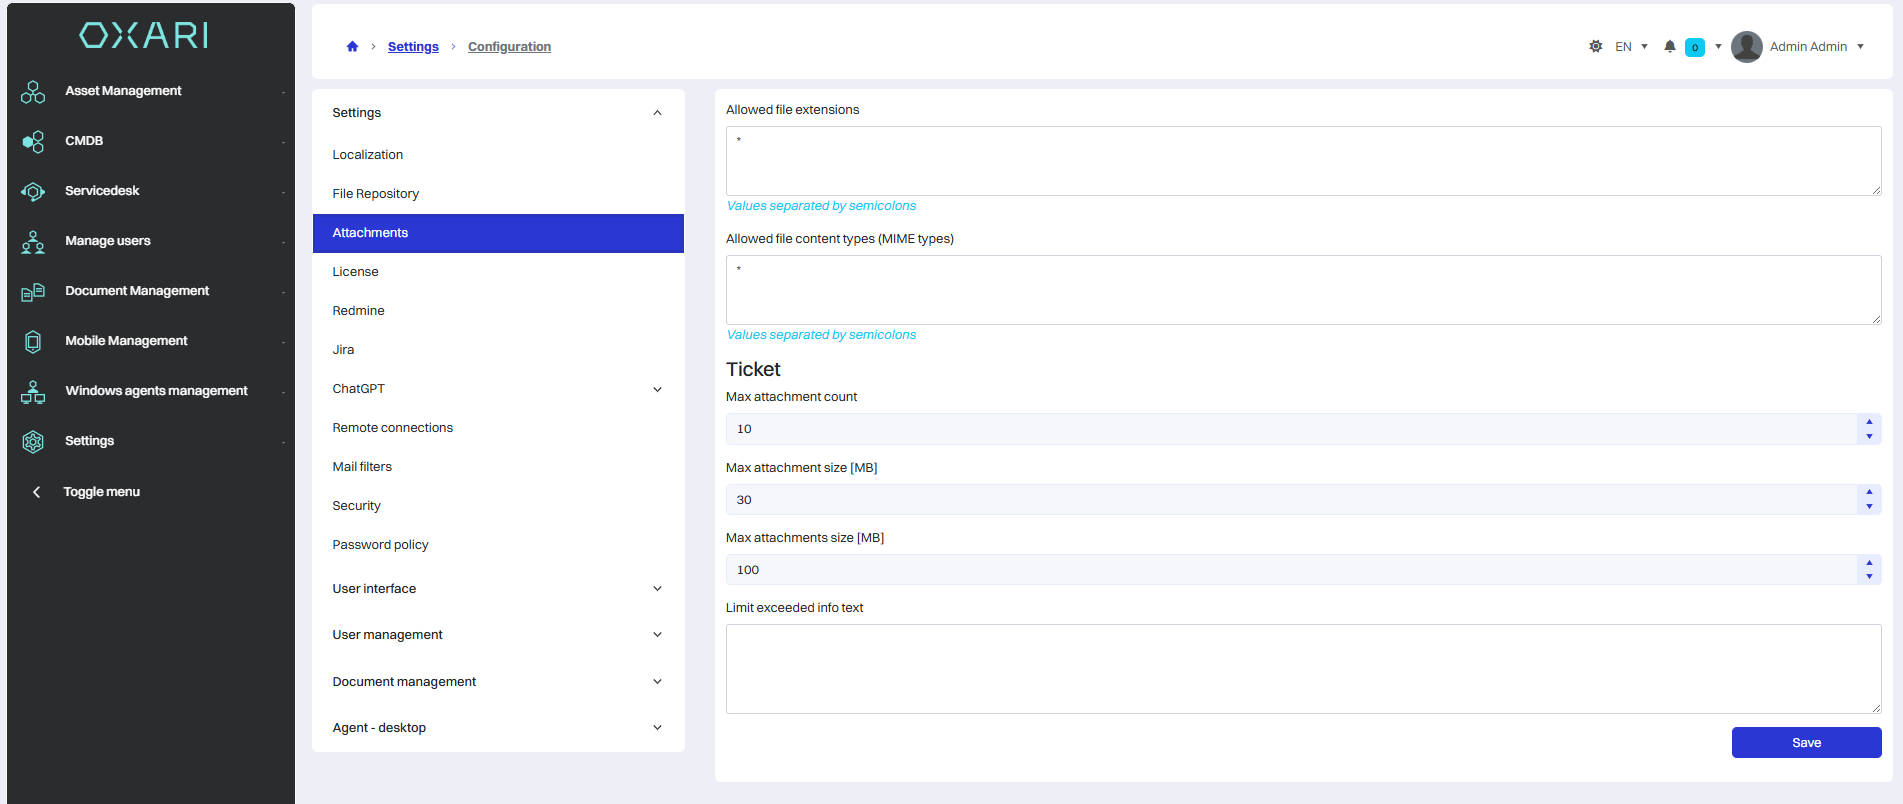
Settings section - attachments
Below is a description of the various settings in the attachments section.
|
1 |
Maximum number of attachments - This setting limits the number of attachments a user can attach to a single ticket or record. |
|
2 |
Maximum attachment size [MB] - Specifies the maximum size of a single attachment that a user can upload. |
|
3 |
Maximum size of all attachments [MB] - This setting defines the total maximum size of all attachments that a user can send within a single ticket. |
|
4 |
Informational text after exceeding the limit - Allows you to define the message that will be displayed to users when an attempt to send an attachment exceeds the established limits. |
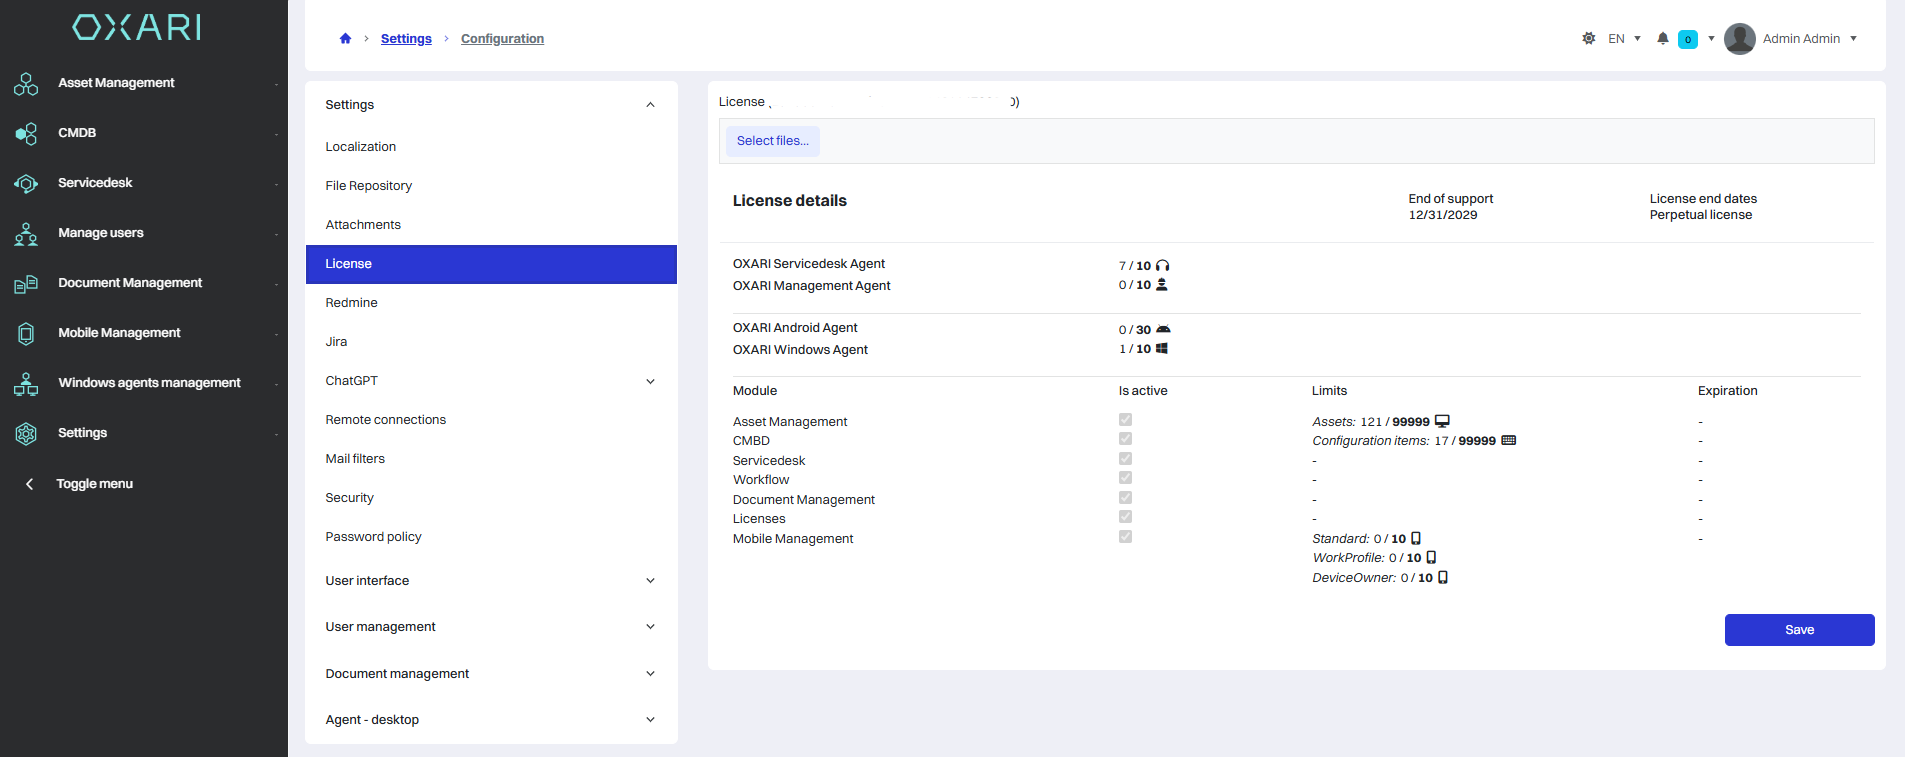
Settings section - license
This section allows administrators to manage licenses for various agents and system modules. The administrator must upload the appropriate license file using the “Select...” button. in the license field.
License Details - After uploading the license file, the “License Details” section displays information about various system agents, such as:
-
OXARI Servicedesk Agent
-
OXARI Management Agent
-
OXARI Android Agent
-
OXARI Windows Agent
For each agent, the current usage status and available limit is shown. For example, for OXARI Servicedesk Agent, there are 3 out of 999 possible instances available.
Modules: Shows which modules are active and how many of them are in use. Modules can include:
-
Resource management
-
CMDB
-
Servicedesk
-
Workflow
-
Document management
-
Mobile management
Limits and license expiration: Limits for specific functions are also shown, such as the number of resources and configuration items that can be managed under the license, as well as the license and support expiration dates for these modules.
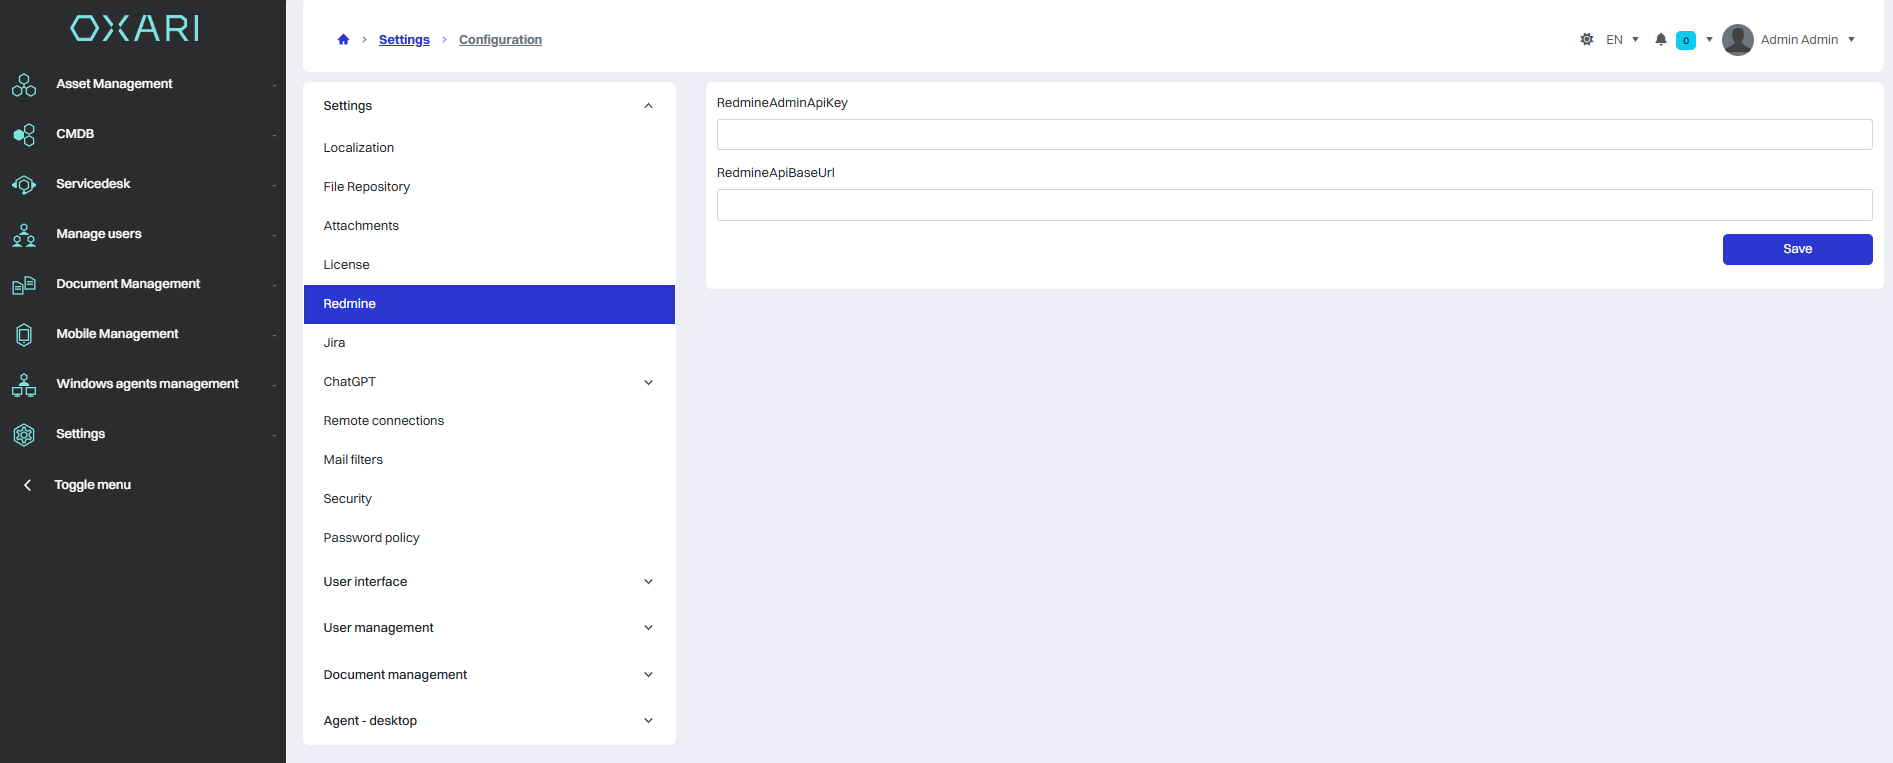
Settings section - redmine
This section allows you to integrate your OXARI system with Redmine, a popular project and bug tracking tool.
Below is a description of the various settings in the redmine section.
|
1 |
RedmineAdminApiKey - In this field, enter the Redmine administrator API key. This is a unique identifier that allows OXARI authorized access to Redmine functions. |
|
2 |
RedmineApiBaseUrl - This is where you enter the primary URL of the Redmine API. This is the web address that OXARI uses to communicate with the Redmine server, allowing it to perform operations and queries. |
Settings section - jira
This section allows you to integrate OXARI with Jira, which is a project management and bug tracking tool.
The following is a description of the various settings in the jira section.
|
1 |
Jira instance address - In this field, enter the URL to the JIRA instance with which OXARI is to integrate. |
|
2 |
Username - The username used to log in to JIRA is entered, which will be used by OXARI for authentication in the JIRA system. |
|
3 |
Api Key - An API key used to authorize connections between OXARI and JIRA. It is a security feature that allows secure connection and data exchange between the two applications. |

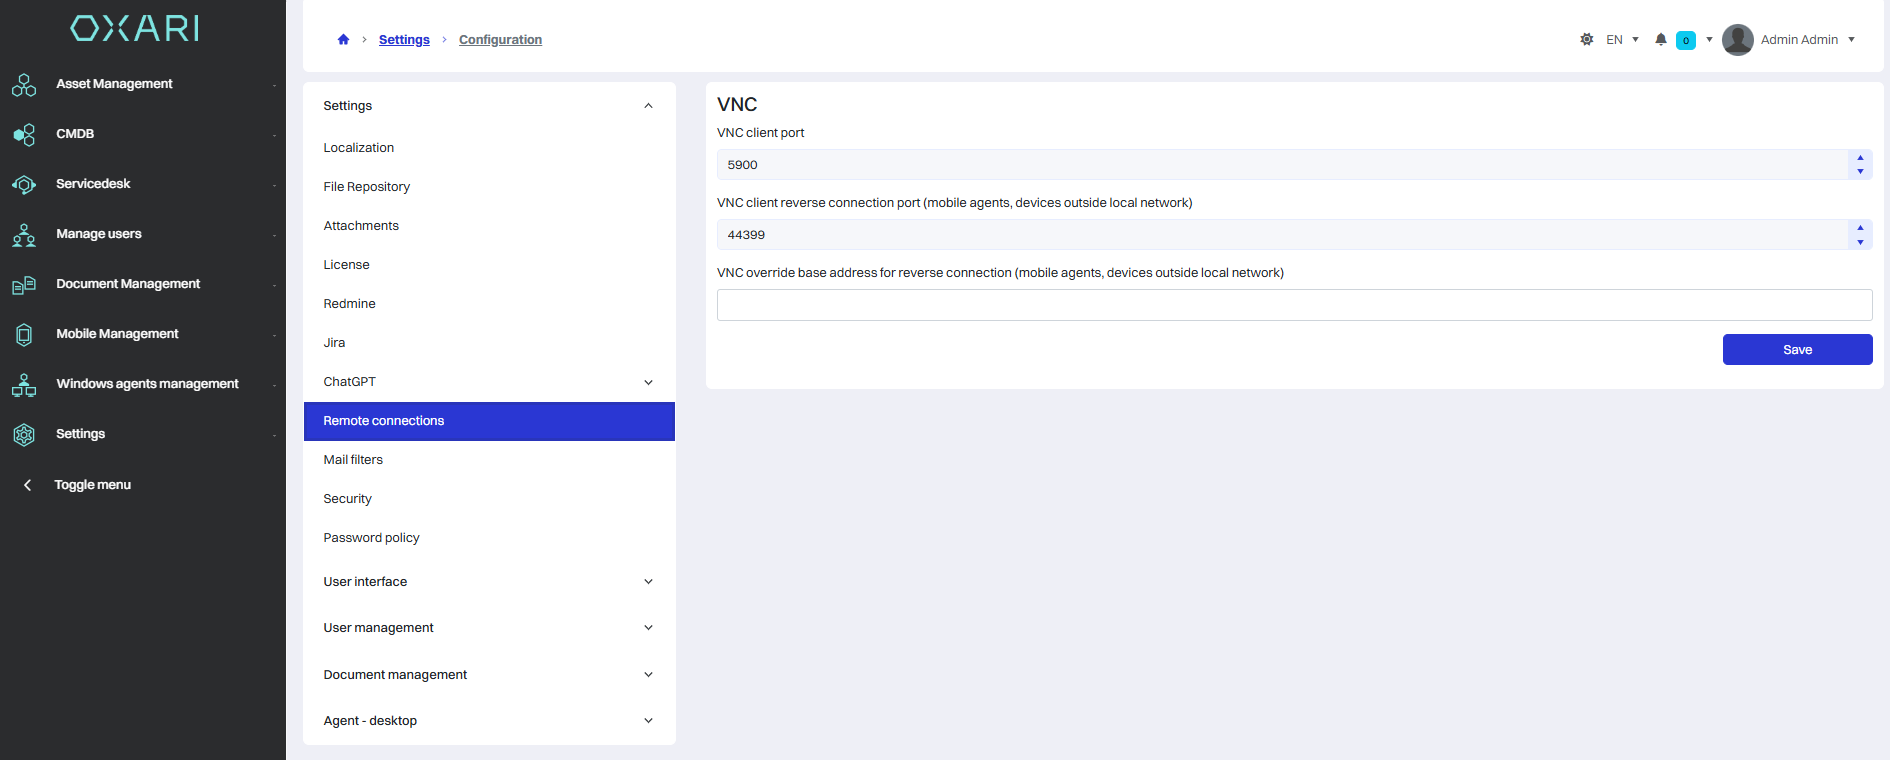
Settings section - remote connections
VNC in OXARI. VNC, or Virtual Network Computing, allows you to control your computer remotely. In this section, we can configure various aspects of VNC connections.
The following is a description of the various settings in the VNC section.
|
1 |
VNC - client port - Here you enter the port number that will be used by VNC clients to establish a connection. The standard port is 5900. |
|
2 |
VNC - client return port (mobile agents, devices outside the local network) - This field is for the port that will be used for callbacks from clients that are outside the local network, for example, by mobile agents. |
|
3 |
VNC - write the base address for the callback (mobile agents, devices outside the local network) - In this field you enter the base URL that will be used to initiate VNC callbacks. |
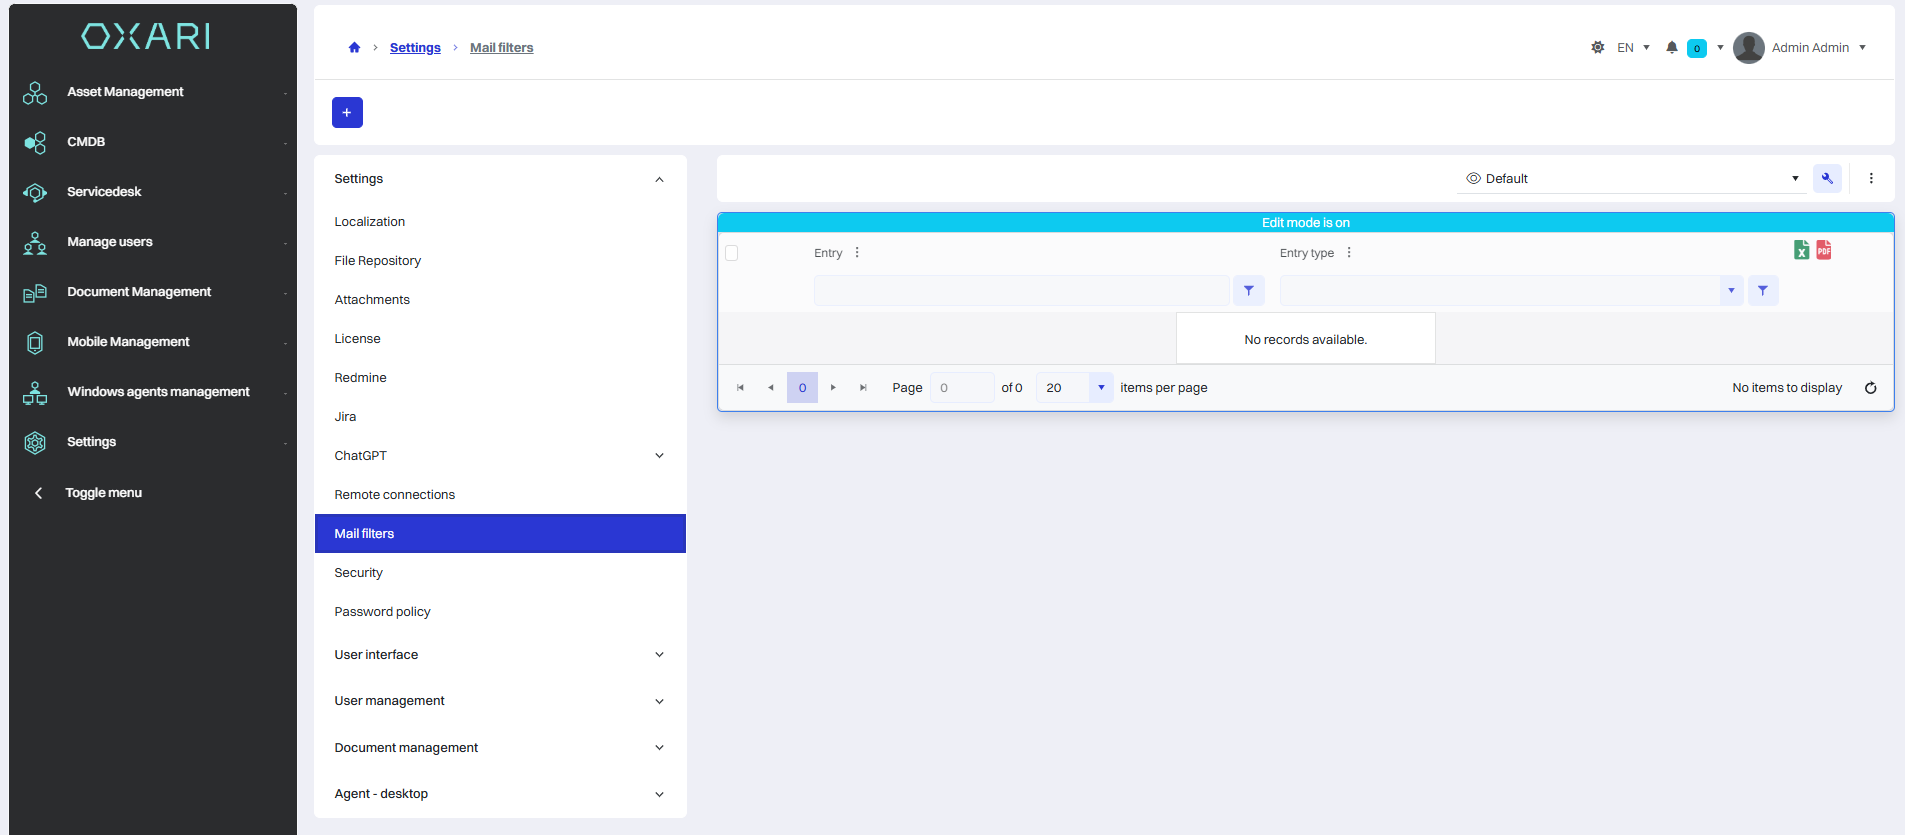
Settings section - email filter
This section allows system administrators to configure email filtering.
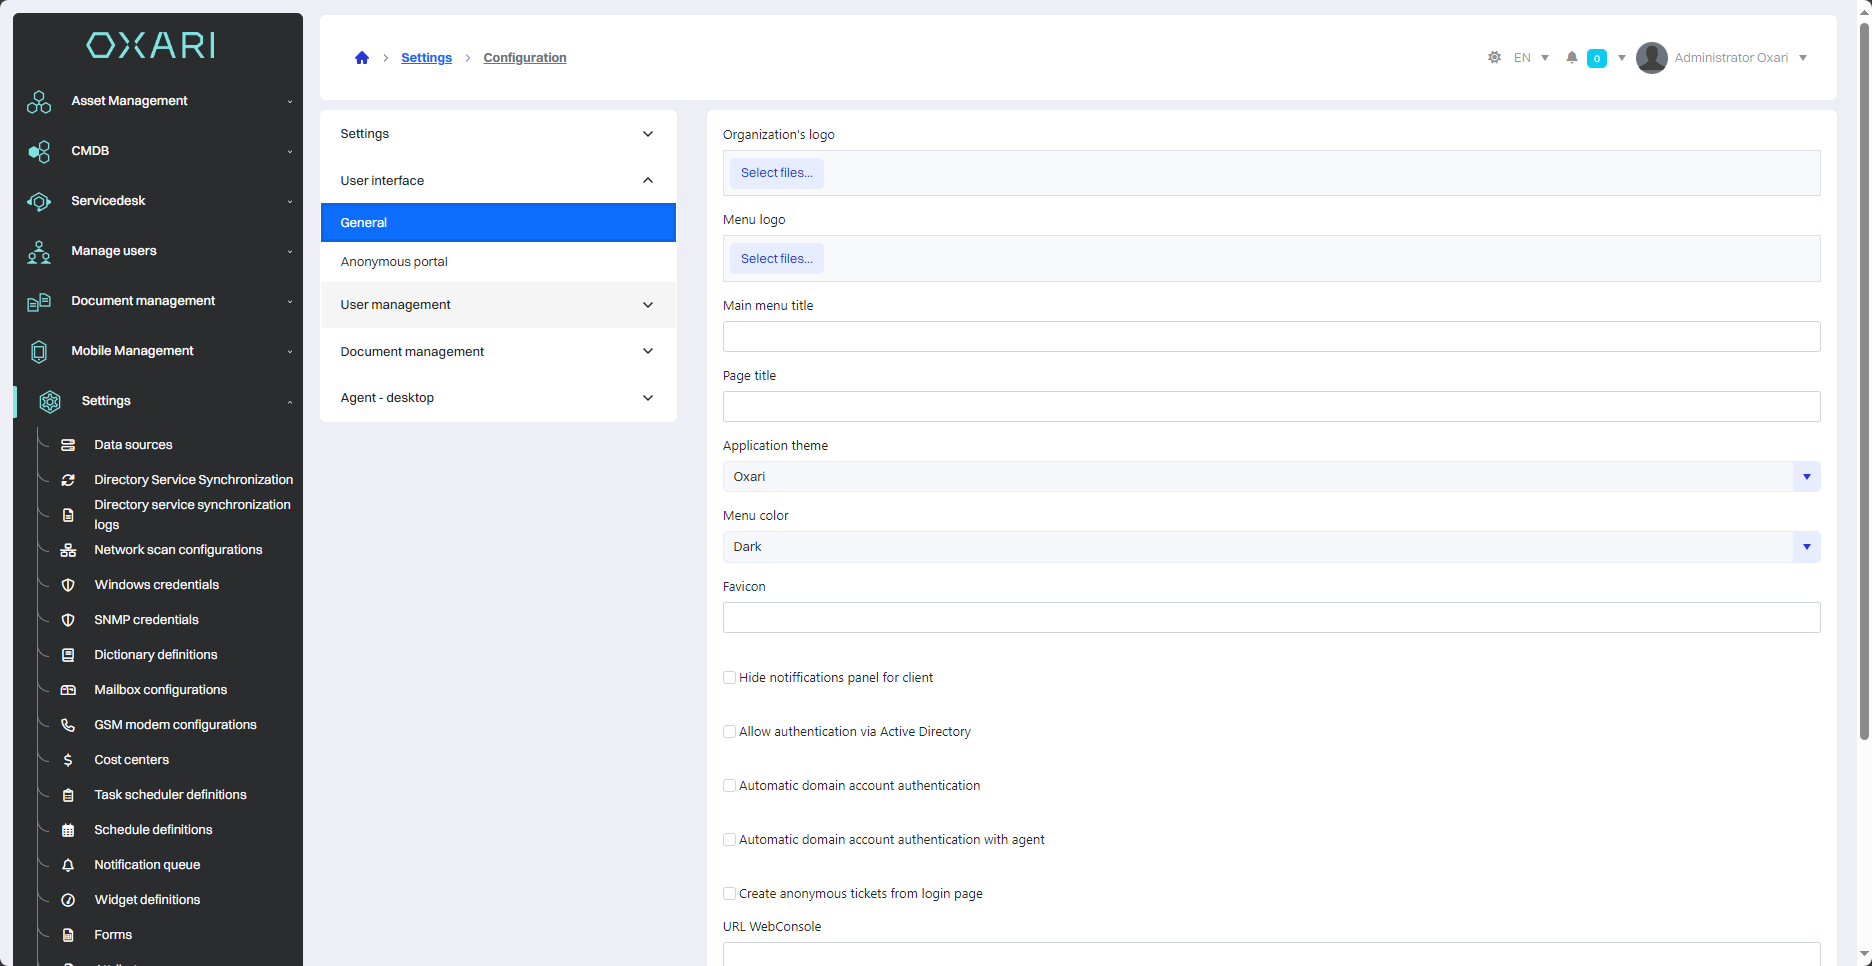
User interface section - general
Below is a description of the various settings in the general section.
|
1 |
Organization Logo - A place where you can upload and manage your company logo to be displayed in the application. |
|
2 |
Menu logo - Option to upload a logo to be displayed in the application menu. |
|
3 |
Menu title - A field for entering the title that will appear in the application's side menu. |
|
4 |
Tab title - Ability to specify the text displayed as the tab title in the browser. |
|
5 |
Application color style - Selects the color palette for the application, such as the default OXARI style. |
|
6 |
Main menu color - Set the background color for the application's main menu, such as dark. |
|
7 |
Favicon - Upload a site icon (favicon) that appears in the browser tab. |
|
8 |
Customer Notification Panel - Checkbox that allows you to enable or disable the customer notification panel. |
|
9 |
Authentication by Active Directory - An option to integrate the system with Active Directory services to manage user authentication. |
|
10 |
Automatic authentication of domain accounts - Ability to automatically log users in based on their domain accounts. |
|
11 |
Adding anonymous requests from the login screen - Checkbox that allows users who are not logged into the system to add requests. |
|
12 |
URL WebConsole, URL WebAPI and URL Helix API - Fields to specify URLs for the web console and API. |

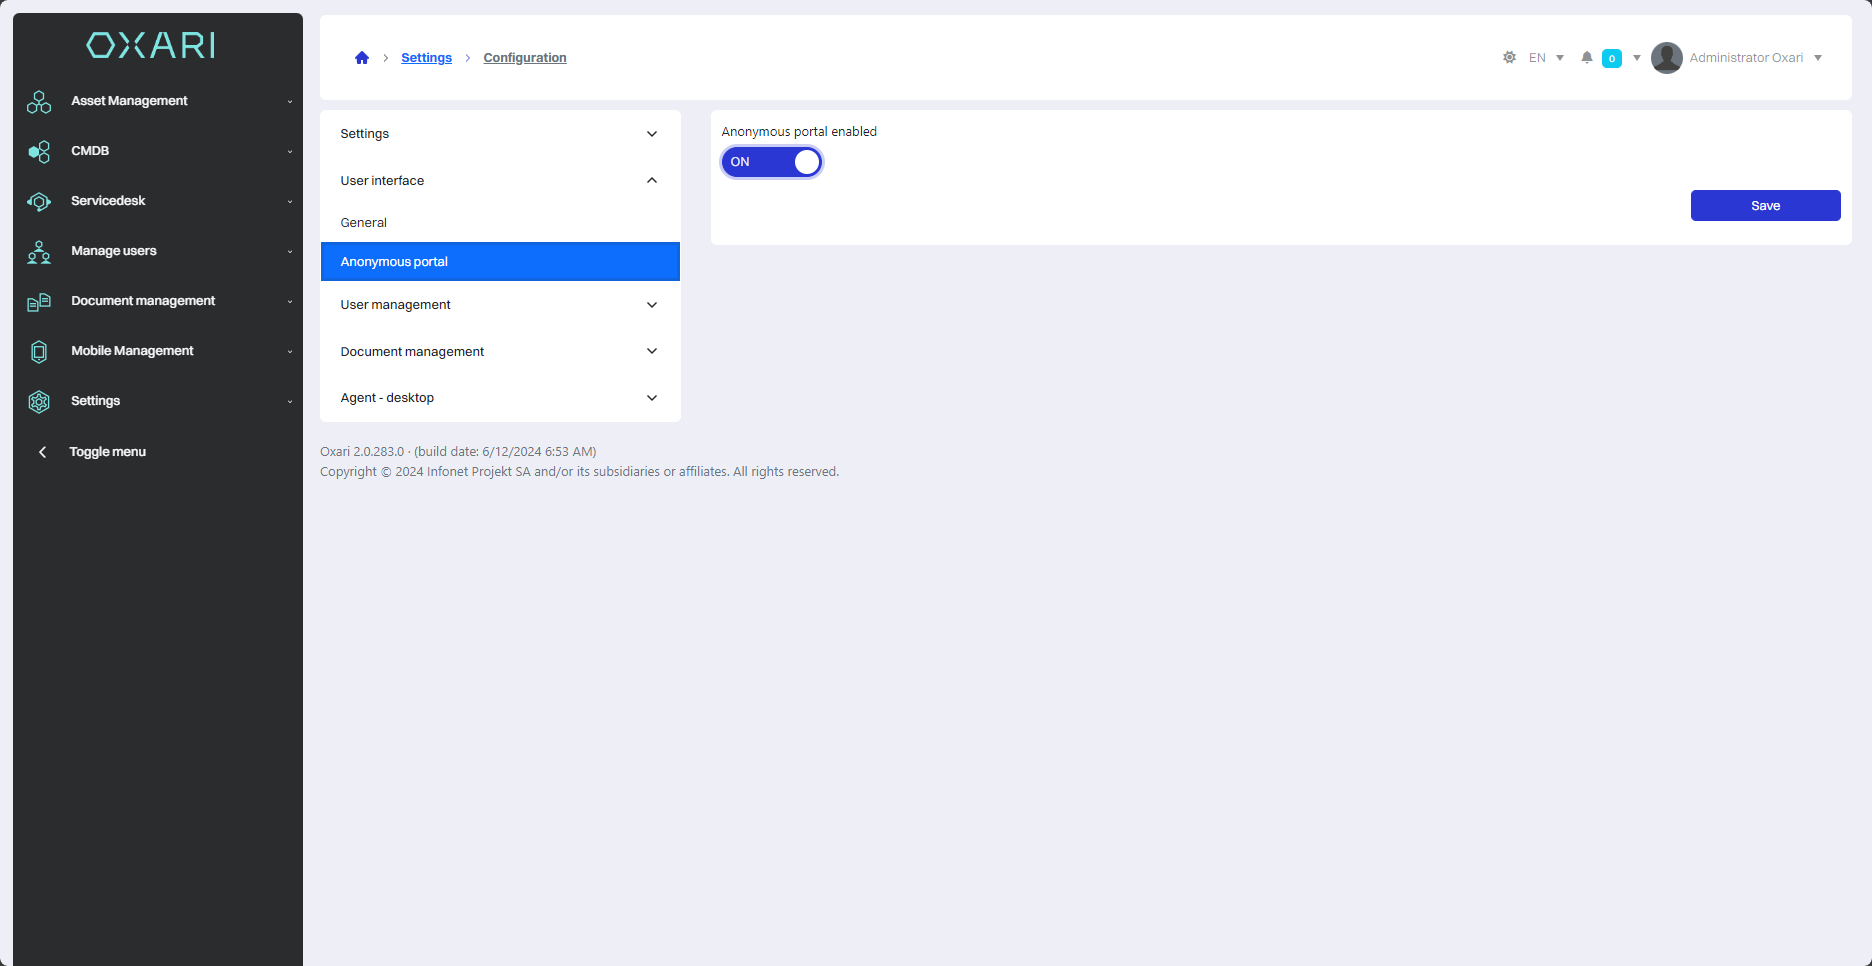
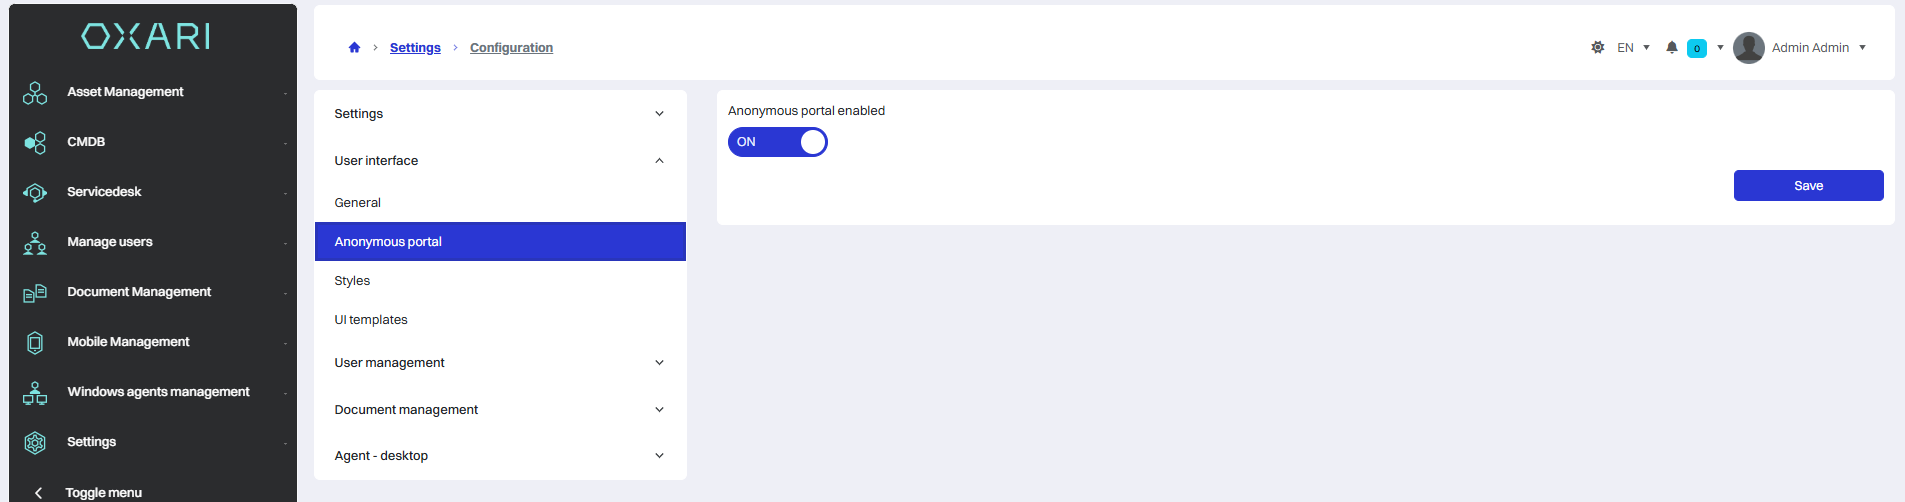
User interface section - anonymous portal
This section allows you to enable or disable access to the anonymous user portal. When the option is enabled (switch flipped to “ON”), users can access certain parts of the system without logging in, which can be useful for functions such as the bug report or request system, where user anonymity is desirable.
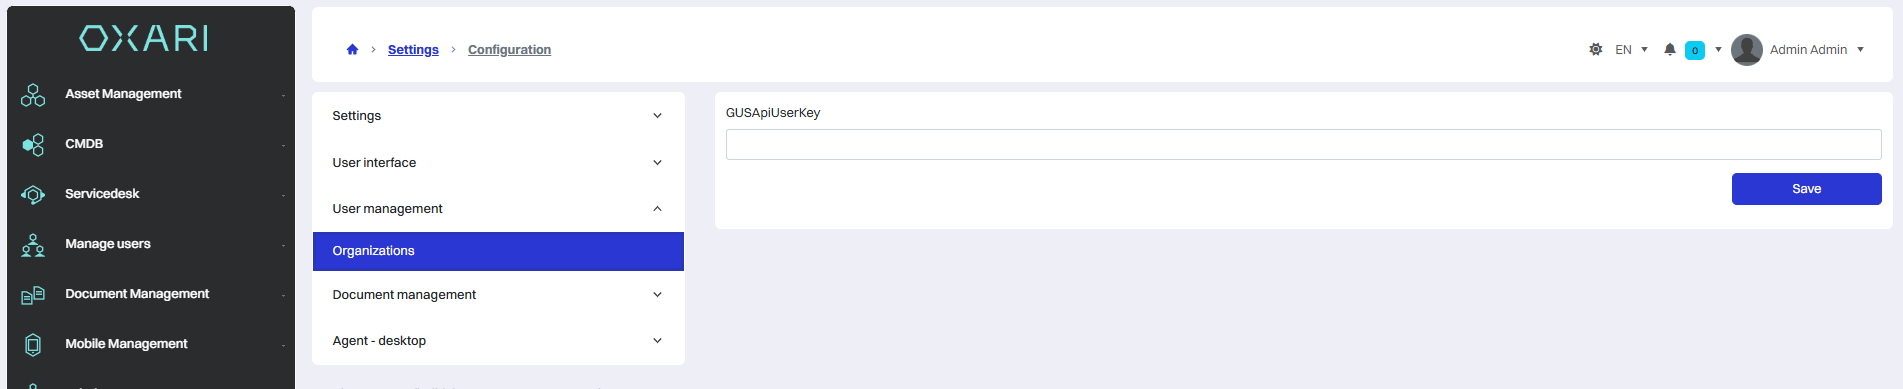
User management section - organizations
In this section, it is possible to add a GUS key, for automatic completion of contractor data in the User Management > Organizations tab.
You can get the key by contacting the Central Statistical Office. more information and instructions on the CSO API Portal website.
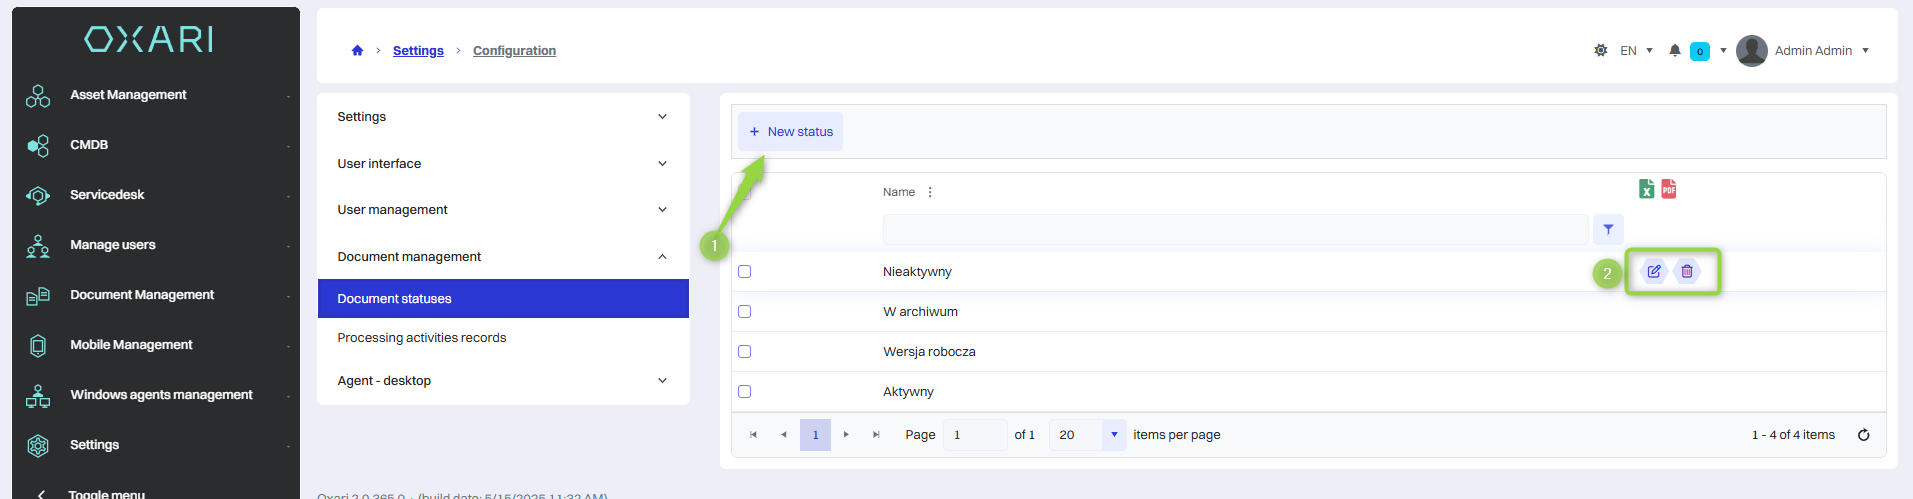
Document management section - document statuses
In this section we can add, edit and delete document statuses.
-
To add a new status, click the “New status” button. and then enter the name of the status, select the appropriate color and click the “Save” button.
-
Statuses can be edited or deleted using the following buttons.
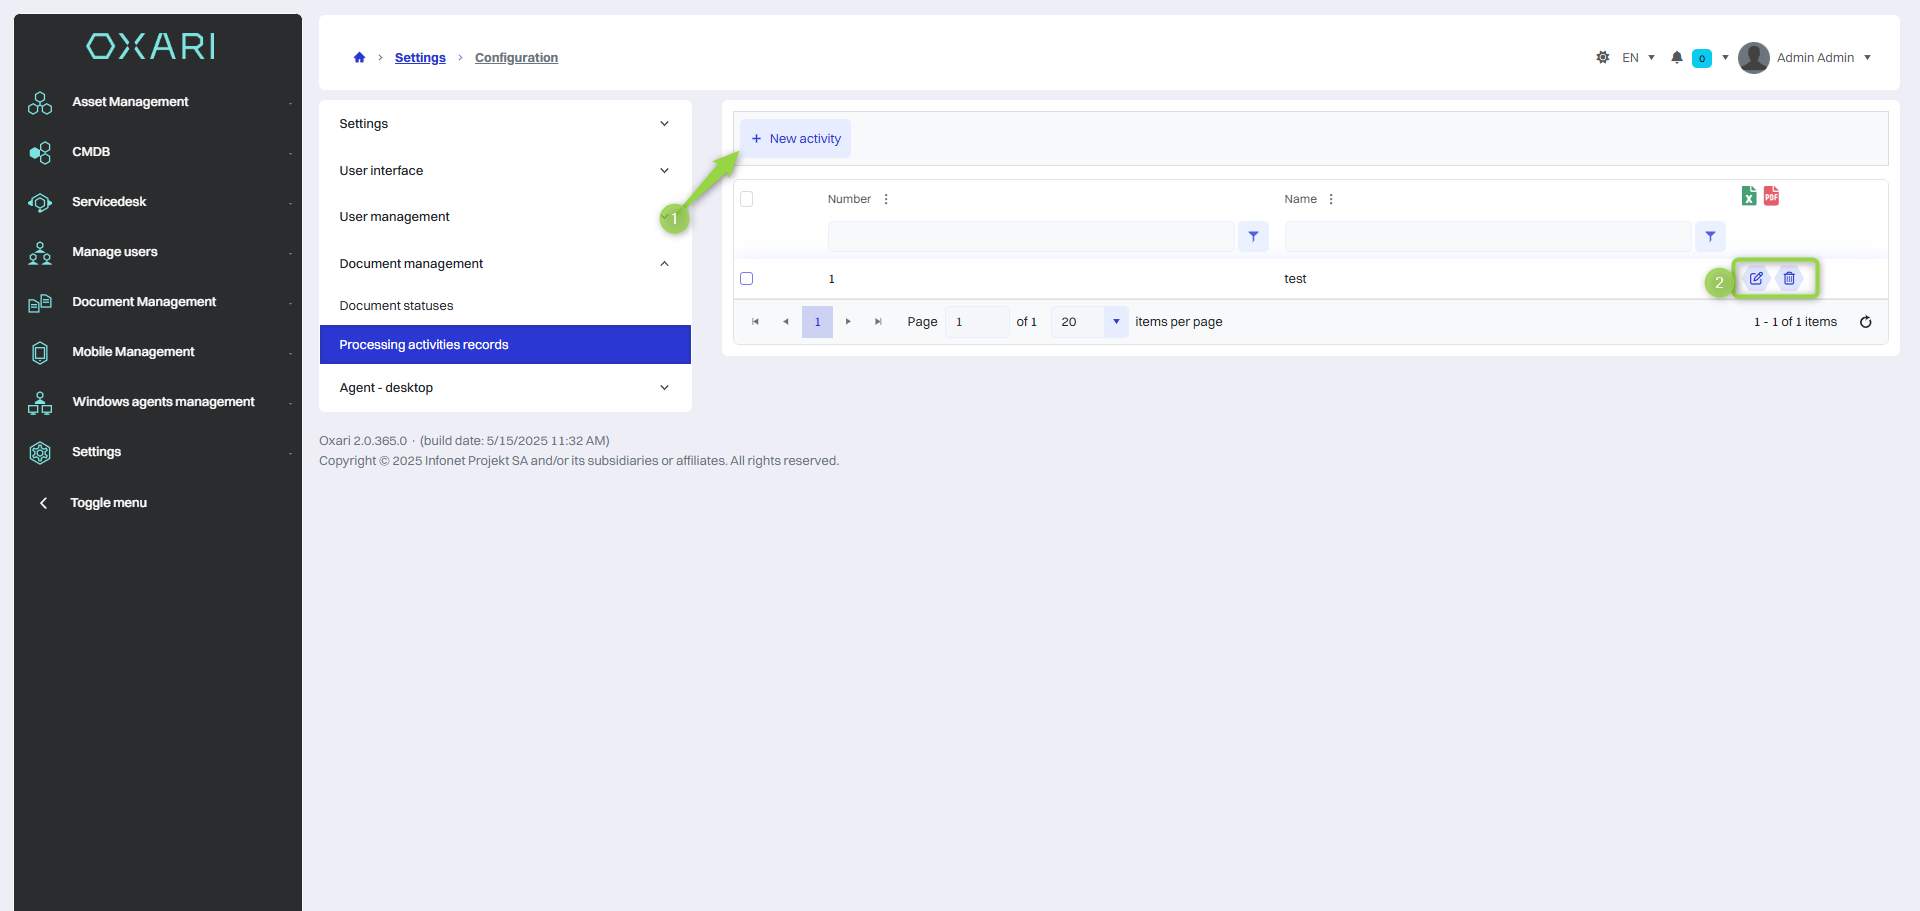
Document management section - register of processing activities
In this section, we can configure a form for documenting personal data processing activities in the OXARI system. This is a typical component of systems for information management and compliance with data protection regulations, such as RODO (General Data Protection Regulation).
-
To set up a form, click the “New Activity” button.
-
The created form can be edited or deleted using the following buttons.
In the form, you can enter information such as:
-
Number and name of the processing activity.
-
The name of the data set to which the processing applies.
-
The purpose of the data processing.
-
Categories of personal data processed.
-
The source of the data.
-
Information about the data controller and its contact information.
-
Categories of recipients of the data.
-
Legal basis of data processing.
-
The planned date of deletion of the data.
-
Name of the data processor and contact information.
-
Name of the system or software used for data processing.
-
General description of technical and organizational security measures.
-
Information on data transfer to a third country or international organization.
-
Required documentation related to data processing, such as DIPA (Documentation of Impact Privacy Assessment) or documentation of appropriate safeguards.
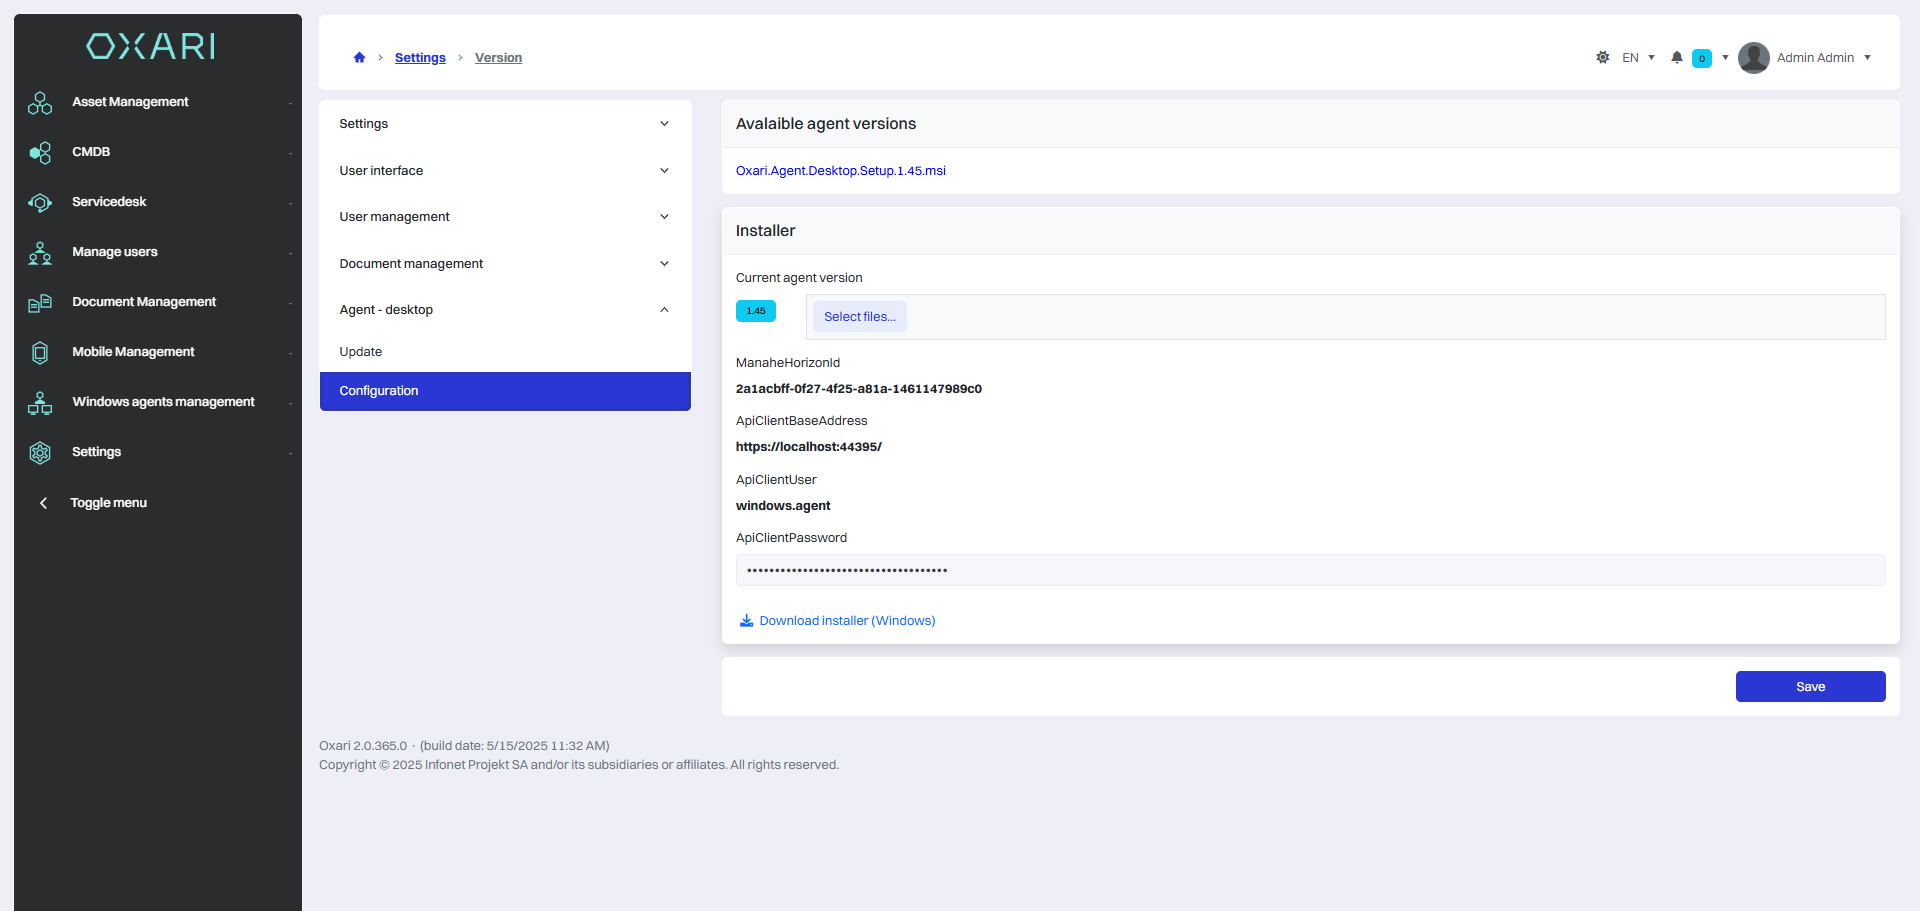
Desktop agent - Update section
This section relates to version management and agent installation on the OXARI system.
Below is a description of the various settings in the version section.
|
1 |
Available agent versions - A list of downloadable versions of the OXARI system agent. This displays the specific version of the installer (e.g. OXARI.Agent.Desktop.Setup.1.45.msi) that can be downloaded and installed on client computers. |
|
2 |
Installer - A section where you can select a specific version of the agent that is valid for system users. |
Agent desktop Configuration - section
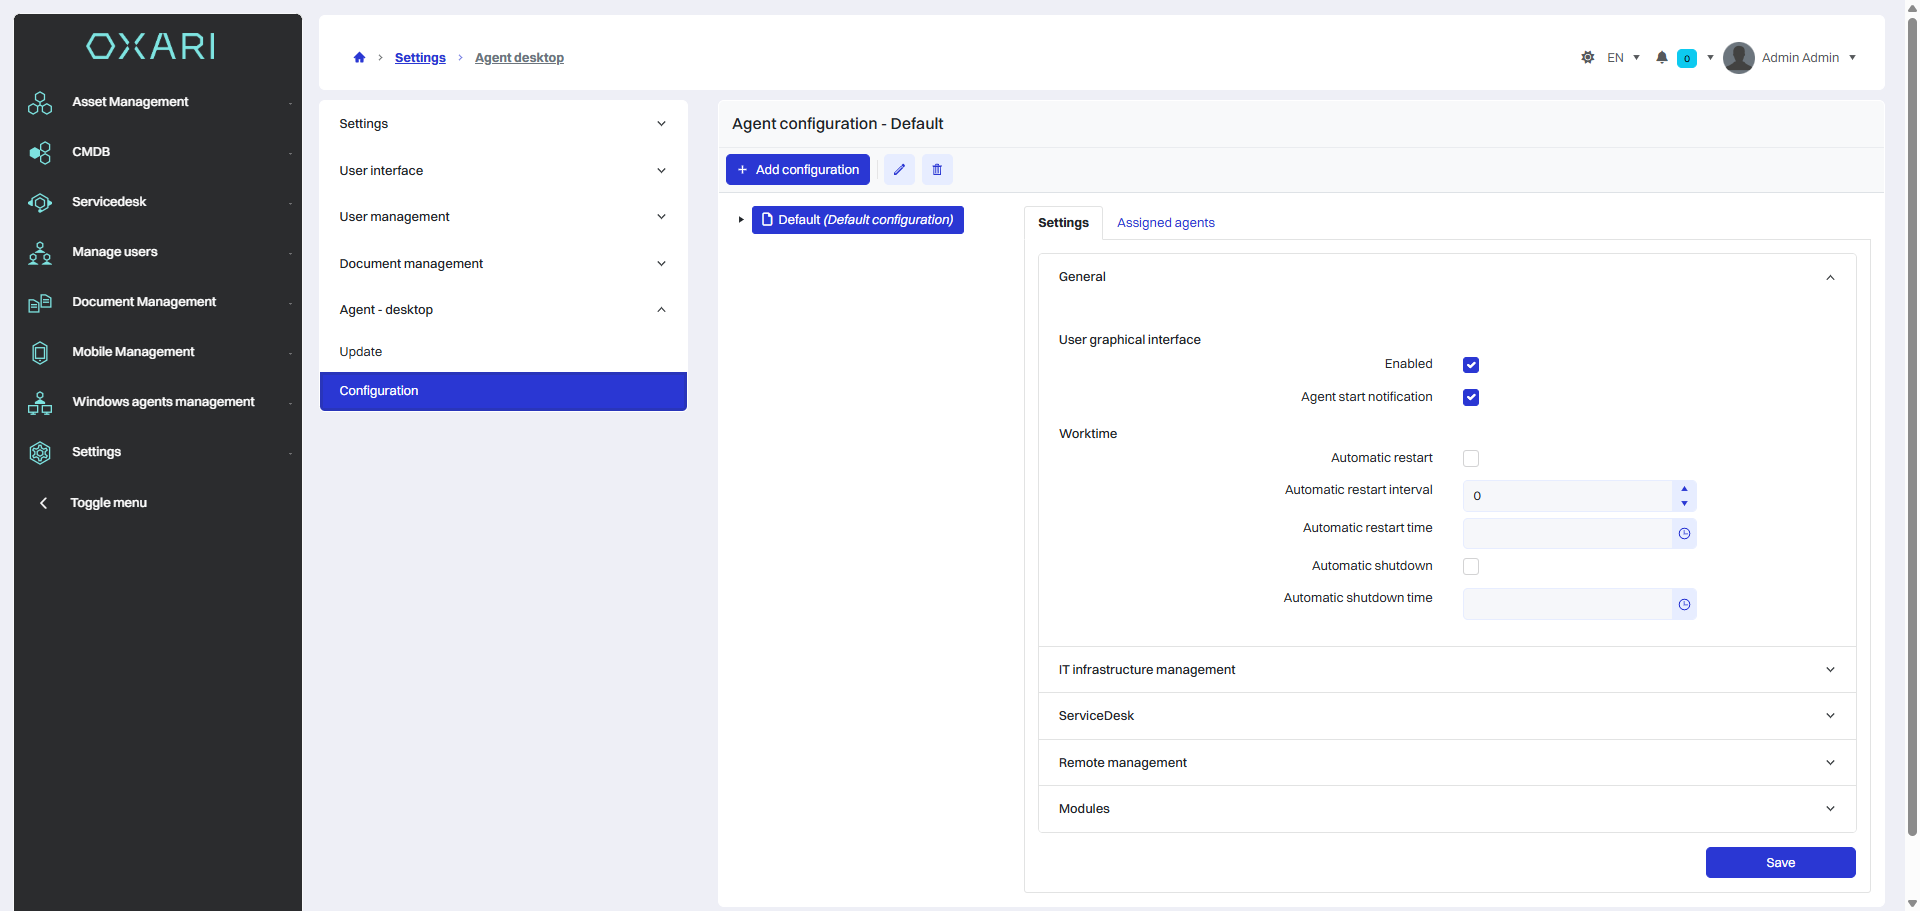
Below is a description of the various settings in the configuration section.
|
1 |
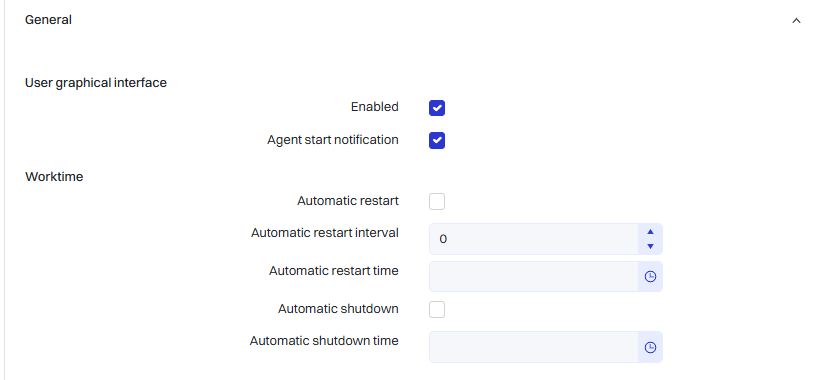
General Section
User interface -.
Run time -
|
|
2 |
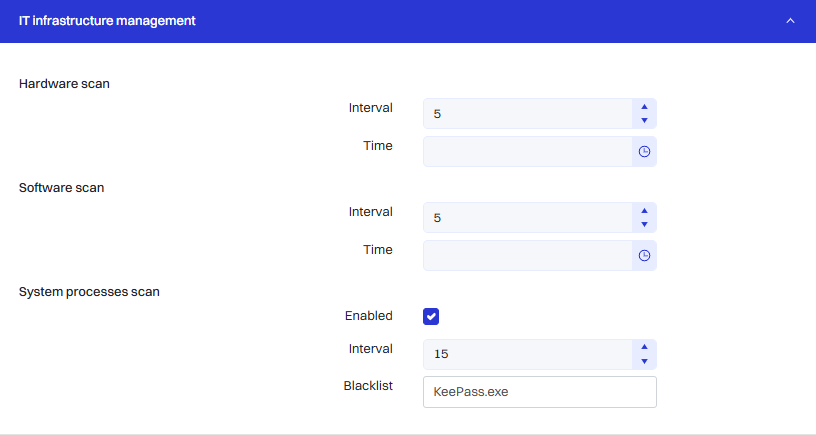
IT infrastructure management section
Hardware scan -
Software scan -
System process scan -
|
|
3 |
ServiceDesk section -
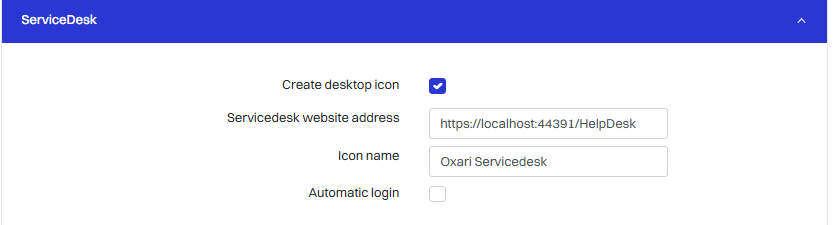
|
|
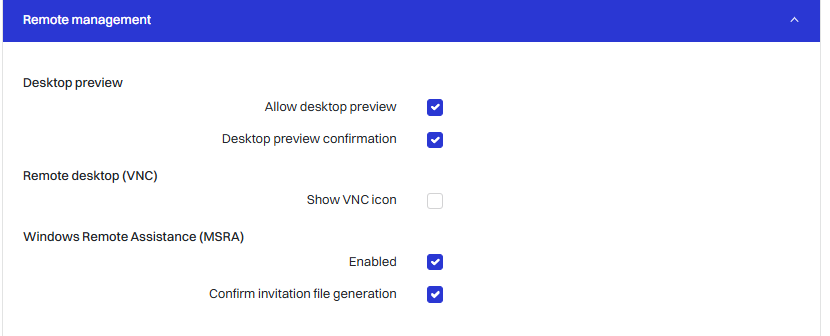
4 |
Remote management section
Desktop preview -
Remote Desktop (VNC) -
Windows Remote Assistance (MSRA) -
|
|
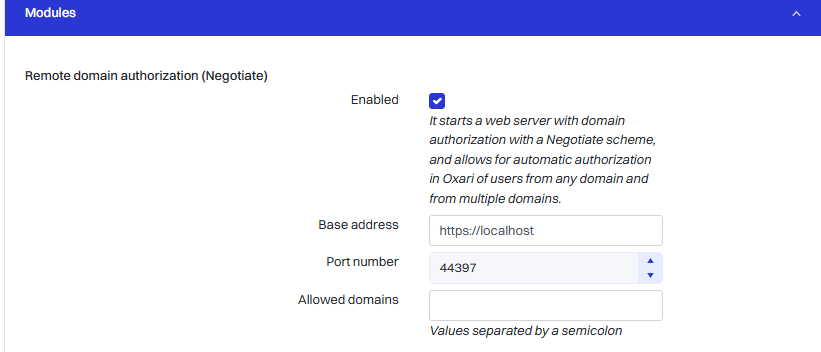
5 |
Modules section Remote Domain Authorization (Negotiate) -
|
SSL certificate configuration
For Windows
-
On the application server with OXARI, you need to replace the .pfx file in the locations:
C:\Program Files (x86)\OXARI\Web\API\_SupportFiles
and
C:\Program Files (x86)\OXARI\Web\Console\_SupportFiles
-
Then update the appsettings.json file in the locations:
C:\ProgramData\OXARI\Web.API
and
C:\ProgramData\OXARI\Web.Console
-
Set the password and certificate name in the appsettings.json file.
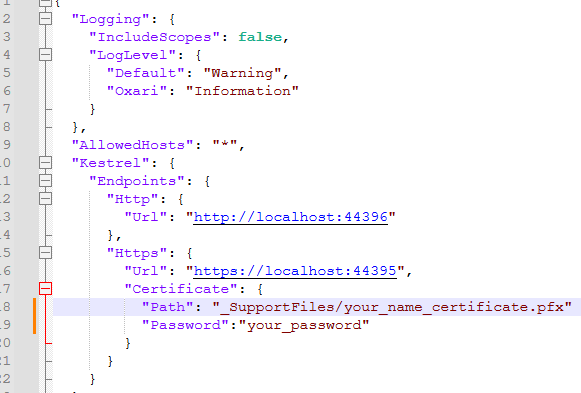
-
The final step is to restart OXARI services.
OXARI - SSO
-
On the OXARI side, go to Settings > Configuration > Settings > Authentication, and configure the desired login options there:
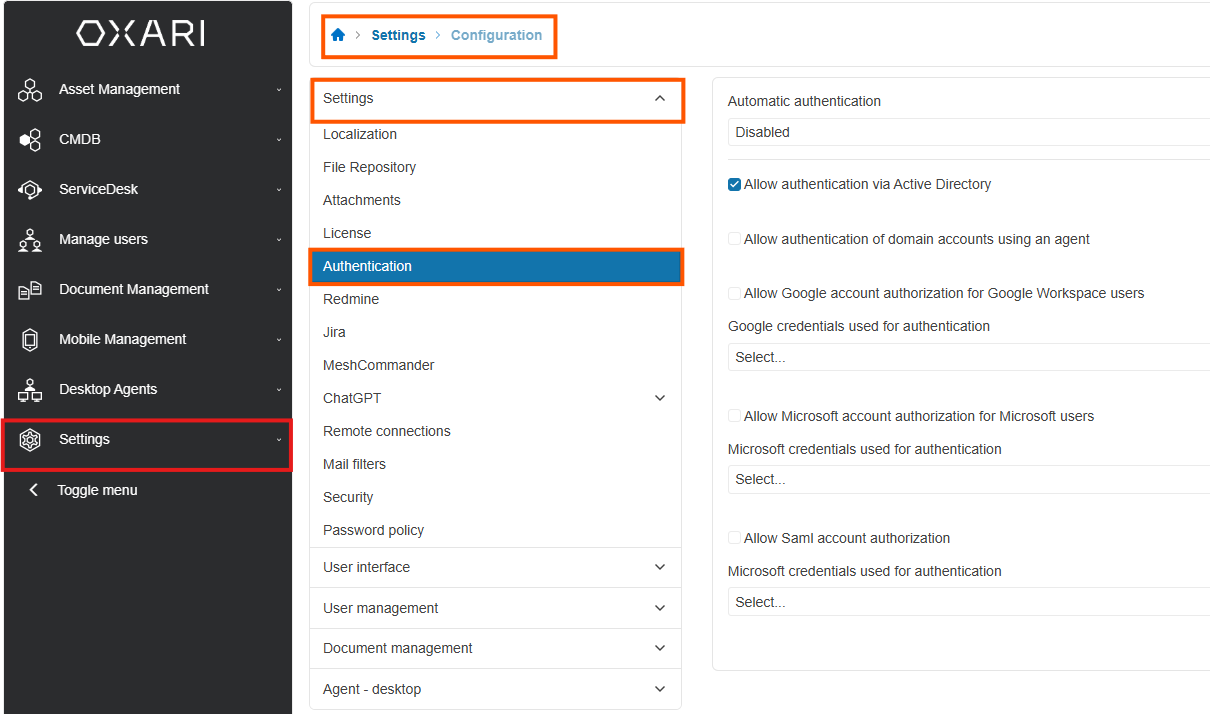
-
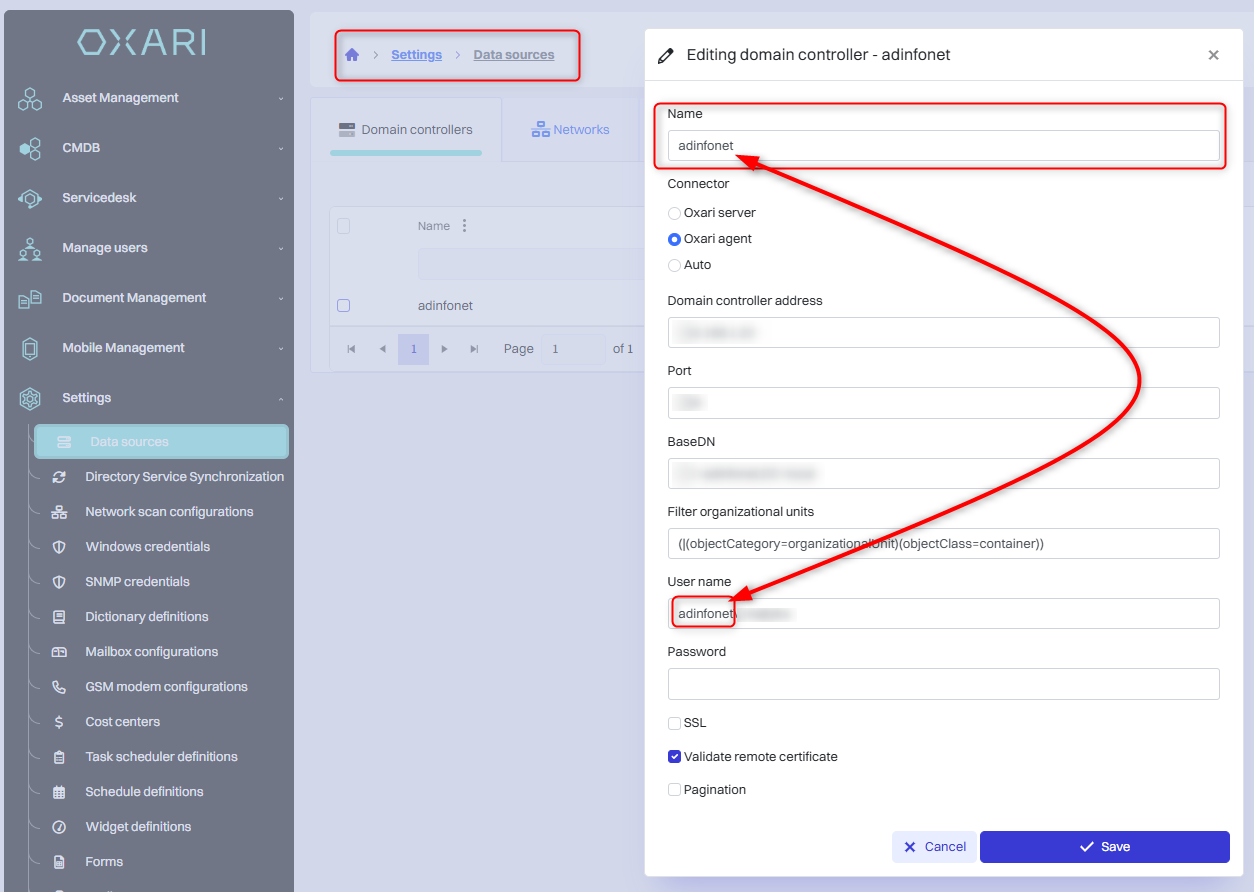
Next, make sure that on the OXARI side the domain controller name is the same as the domain suffix used in the organization:
-
SSO should be configured on browsers:
For Chrome and Edge, the site must be added to Trusted and allowed to Windows authentication in the Edge browser settings
Mozilla Firefox requires additional browser configuration to enable SSO login. In the open browser window, enter the following in the address bar:
about:config
Search for the preference:
network.negotiate-auth.trusted-uris
And add the hostname of the Oxari server or its IP address:

In the system Internet Options settings, enable automatic user authentication and add the application address to the Trusted Sites list to ensure proper functioning of Single Sign-On (SSO) login.
OXARI two-step authentication (2FA) instructions
Before enabling/disabling two-step authentication, it is best to restart OXARI services.
Enabling/disabling 2FA
The appsettings.json file ( for Web.API ) is to contain:
"AuthorizationOptions": {
…
 "Disable2FactorAuthenticationUsers": false
 }
Setting options:
true - disables 2FA,
false - turns 2FA on
Enabling two-step authentication for the client
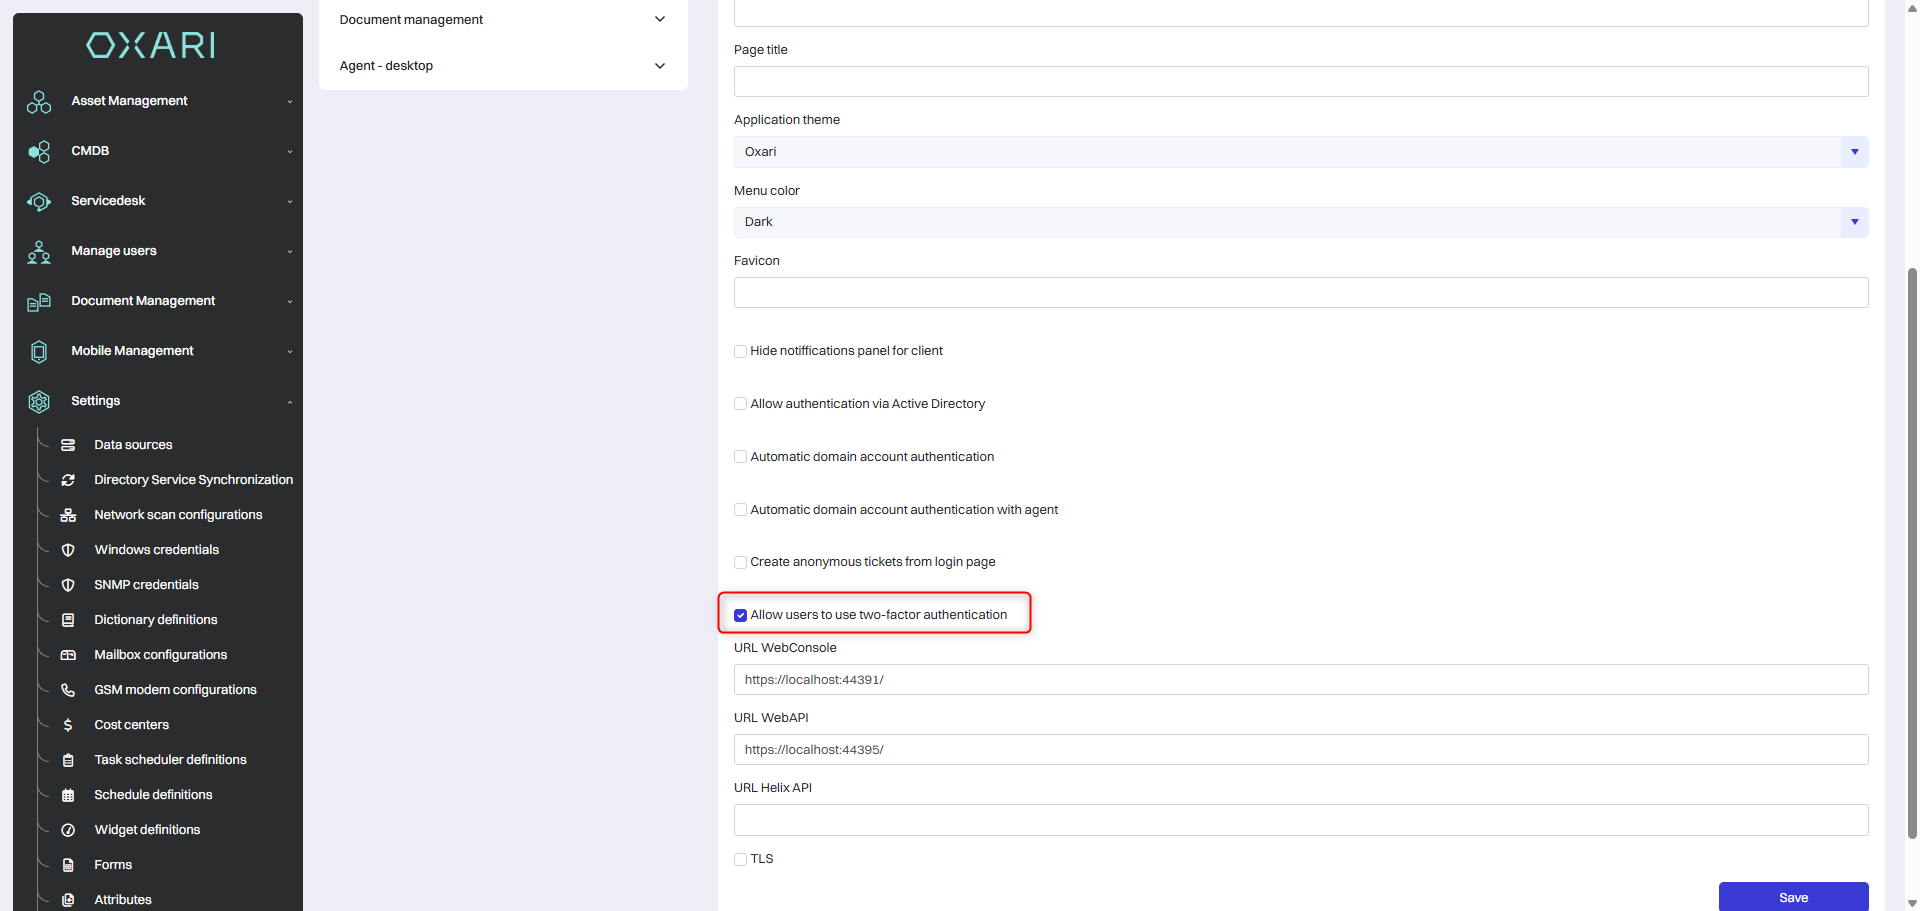
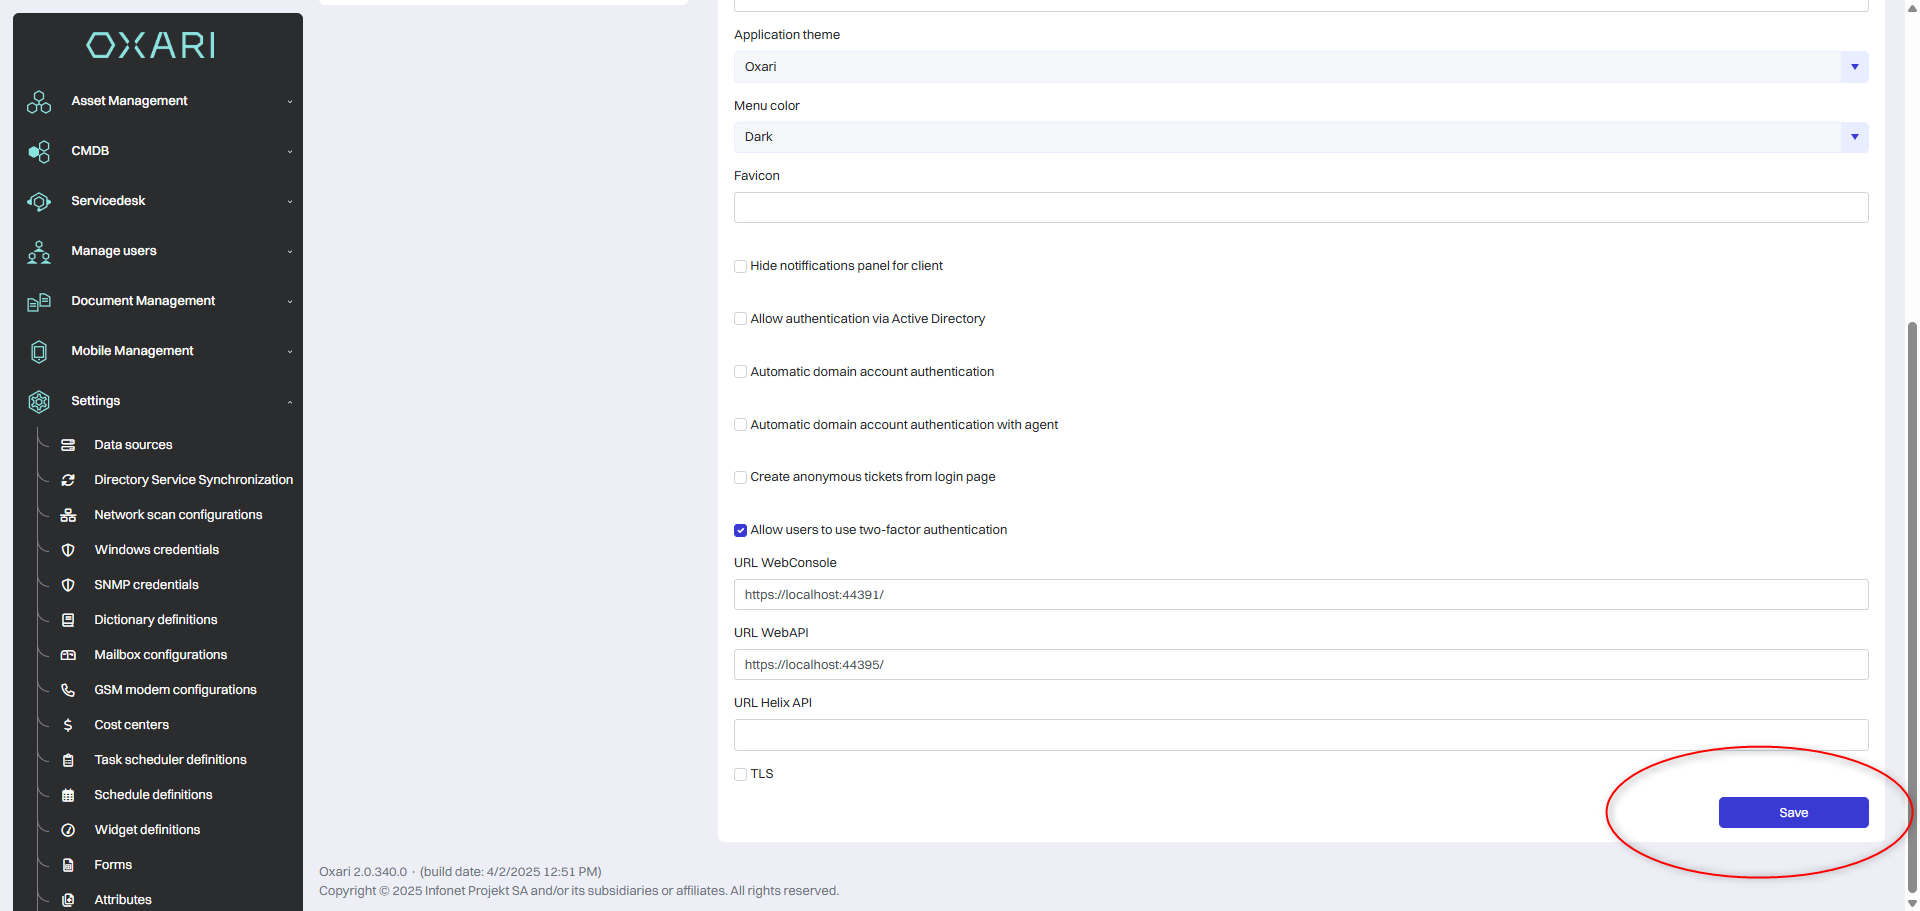
The administrator opens the menu “Settings” -> “Configuration.” He then activates the “Allow two-step authentication” option and presses “Save”.
Enabling two-step user authentication
You must log out and log back in to make the 2FA Settings option visible. After typing logout, open 2FA Settings, located in the upper right corner.
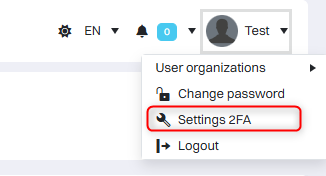
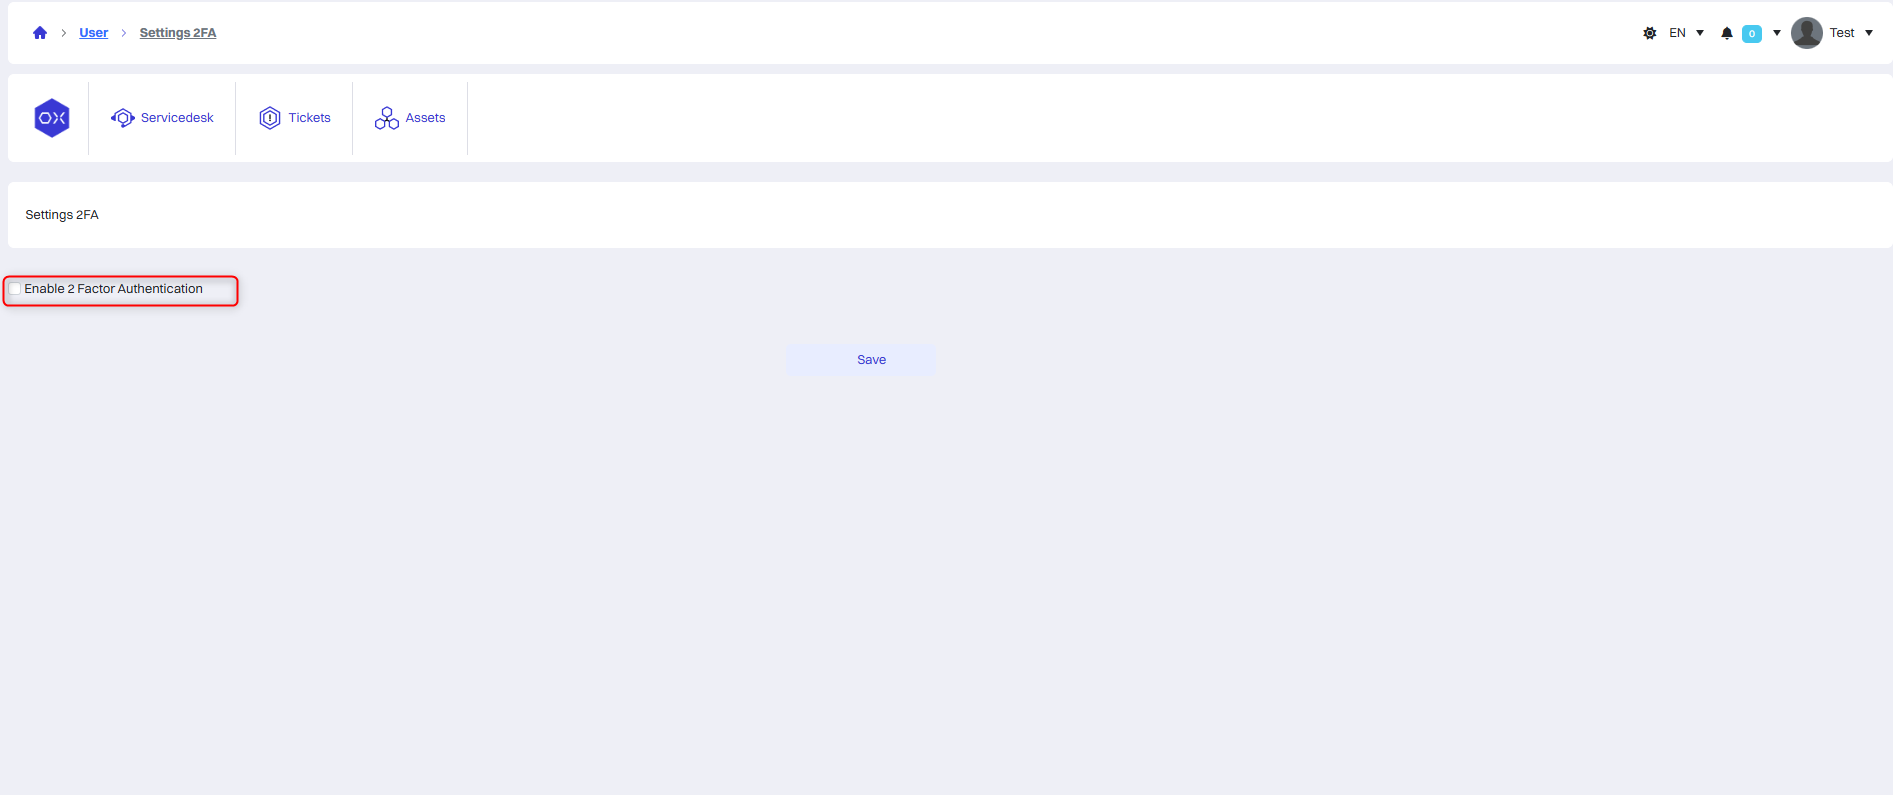
Enable “Enable two-step authentication”
When “Enable two-step authentication” is enabled, a QR code and key will appear.
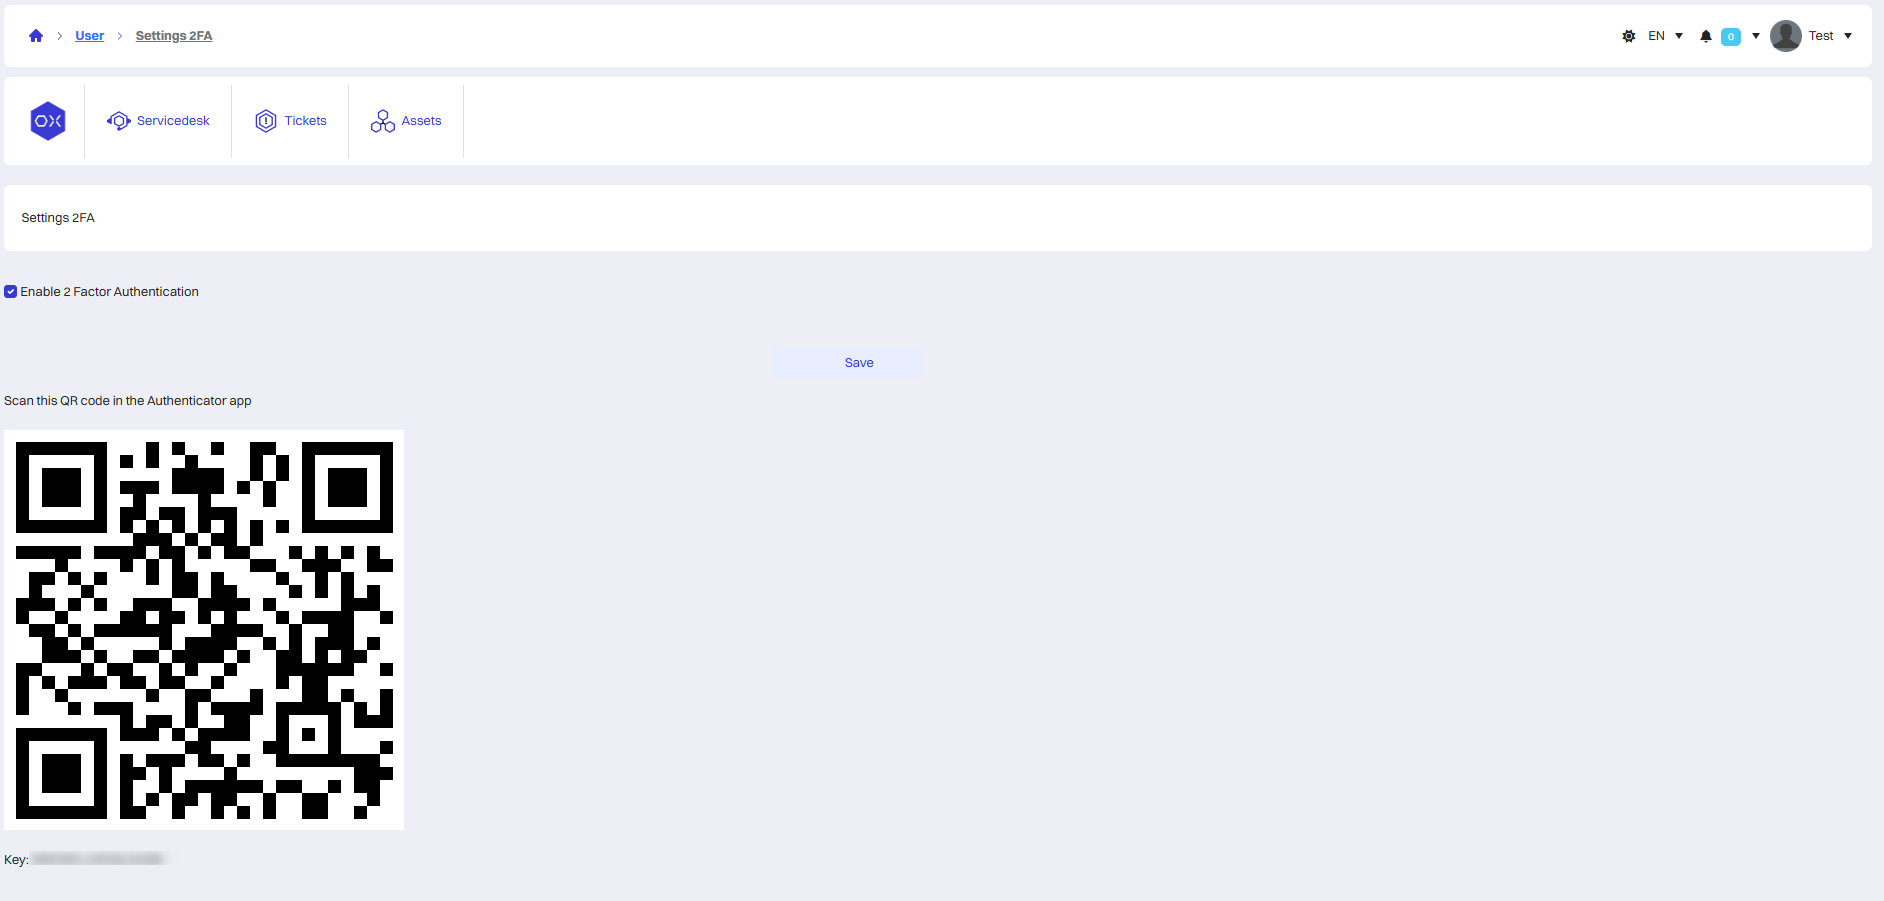
This QR code can be scanned with a smartphone using the 2FA app.
If your phone doesn't already have an app for generating 2FA codes, you can install it yourself or use the list of verified apps below.
Choose either Android or iOS. Several apps are available for each option.
To install the program on your phone, find it in the app store or scan the QR code containing a link to the selected app.

Launch the app on your phone, press “Scan QR Code”.
After adding the key, the Code will appear in the app and will change every 30 seconds.
Press “Save.”

If for some reason it is necessary to change the key, use the “Generate new code and save” button.

After changing the key, it is necessary to scan it or enter it in the application for two-step identity verification on the phone.
When changing the key, the new one will be automatically saved.
Activation of two-step authentication will change the form of login and password entry.

After entering your login and password, you will be required to enter an authorization code, which is displayed in the app on your phone.

Only after entering the code will OXARI allow the user to access the system. Each password is valid for 30 seconds and changes. Be sure to have time to enter the code during this time.
Situation in which the user has removed the key or code generation application for 2FA
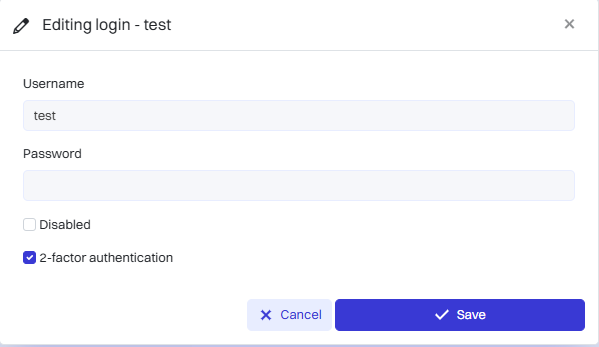
To disable two-step identity verification for a user, the administrator opens “User Management” - “User logins.”
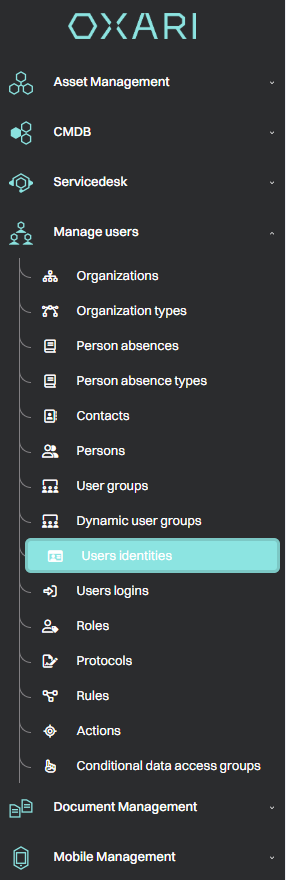
He finds the appropriate user in the list, launches the login editor, unchecks the “Two-step authentication” option, and then presses “Save.”
This will disable two-step identity verification for the user, who will be able to log into the system on his own and activate two-step identity verification while saving the key or generating it again.